This guide explains how to make HTTP GET requests using the HttpClient module in Angular. The Angular introduced the HttpClient Module in Angular 4.3. It is part of the package @angular/common/http. In this tutorial, let us build an HTTP GET example app, which sends the HTTP Get request to GitHub repository using the GitHub API.
Table of Contents
HTTP Get Example
Create a new Angular App.
1 2 3 | ng new httpGet |
Import HttpClientModule
To make HTTP Get request, we need to make use of the HttpClientModule, which is part of the package @angular/common/http. Open the app.module.ts and import it. Also, import the FormsModule
You must also include it in the the imports array as shown below.
1 2 3 4 5 6 7 8 9 10 11 12 13 14 15 16 17 18 19 20 21 22 23 24 25 | import { BrowserModule } from '@angular/platform-browser'; import { NgModule } from '@angular/core'; import { HttpClientModule } from '@angular/common/http'; import { FormsModule } from '@angular/forms' import { AppRoutingModule } from './app-routing.module'; import { AppComponent } from './app.component'; import { GitHubService } from './github.service'; @NgModule({ declarations: [ AppComponent ], imports: [ BrowserModule, AppRoutingModule, HttpClientModule, FormsModule ], providers: [GitHubService], bootstrap: [AppComponent] }) export class AppModule { } |
Model
Create repos.ts file and add the following code. This is a simplified model for the GitHub repository.
1 2 3 4 5 6 7 8 | export class repos { id: string; name: string; html_url: string; description: string; } |
HTTP GET Service
Let us create a service to handle the HTTP Request. Create a new file github.service.ts and copy the following code.
1 2 3 4 5 6 7 8 9 10 11 12 13 14 15 16 17 18 19 20 21 22 23 | import { Injectable } from '@angular/core'; import { HttpClient, HttpParams, HttpHeaders } from '@angular/common/http'; import { Observable, throwError } from 'rxjs'; import { map, catchError} from 'rxjs/operators'; import { repos } from './repos'; @Injectable() export class GitHubService { baseURL: string = "https://api.github.com/"; constructor(private http: HttpClient) { } getRepos(userName: string): Observable<any> { return this.http.get(this.baseURL + 'users/' + userName + '/repos') } } |
First, we import the required libraries. The HttpClient is the main service, which Performs the HTTP requests like GET, PUT, POST, etc. We need to inject this into our GitHubService. Also, import HttpParams which helps us to add Query Parameters in an HTTP Request. Import HTTP Headers using the HttpHeaders which allows us to add HTTP Headers to the request.
1 2 3 | import { HttpClient, HttpParams, HttpHeaders } from '@angular/common/http'; |
The HttpClient service makes use of RxJs observable, Hene we import Observable, throwError & RxJs Operators like map & catchError
1 2 3 4 | import { Observable, throwError } from 'rxjs'; import { map, catchError} from 'rxjs/operators'; |
The URL endpoint is hardcoded in our example, But you can make use of a config file to store the value and read it using the APP_INITIALIZER token
1 2 3 | baseURL: string = "https://api.github.com/"; |
We inject the HttpClient using the Dependency Injection
1 2 3 4 | constructor(private http: HttpClient) { } |
Finally, we use the get method of the httpclient to make an HTTP Get request to GitHub.
The https://api.github.com/users/<username>?repos endpoint returns the list of Repositories belonging to the user <userName>
1 2 3 4 5 6 | //Any Data Type getRepos(userName: string): Observable<any> { return this.http.get(this.baseURL + 'users/' + userName + '/repos') } |
Note that httpclient.getmethod returns the observable. Hence we need to subscribe to it to get the data.
Component
The following is the code from app.component.ts
1 2 3 4 5 6 7 8 9 10 11 12 13 14 15 16 17 18 19 20 21 22 23 24 25 26 27 28 29 30 31 32 33 34 35 36 37 38 39 40 41 | import { Component } from '@angular/core'; import { GitHubService } from './github.service'; import { repos } from './repos'; @Component({ selector: 'app-root', templateUrl: './app.component.html', }) export class AppComponent { userName: string = "tektutorialshub" repos: repos[]; loading: boolean = false; errorMessage; constructor(private githubService: GitHubService) { } public getRepos() { this.loading = true; this.errorMessage = ""; this.githubService.getRepos(this.userName) .subscribe( (response) => { //next() callback console.log('response received') this.repos = response; }, (error) => { //error() callback console.error('Request failed with error') this.errorMessage = error; this.loading = false; }, () => { //complete() callback console.error('Request completed') //This is actually not needed this.loading = false; }) } } |
We subscribe to the getRepos() method in our component class. Only when we subscribe to the observable, the HTTP GET request is sent to the back end server.
1 2 3 4 | this.githubService.getRepos(this.userName) .subscribe(); |
When we subscribe to any observable, we optionally pass the three callbacks. next(), error() & complete().
Next() callback is where we get the result of the observable. In this example the list of repositories for the given user.
1 2 3 4 5 6 | (response) => { //next() callback console.log('response received') this.repos = response; } |
The observable can also result in an error. It will invoke the error() callback and pass the error object. The observables stop after emitting the error signal.
1 2 3 4 5 6 7 | (error) => { //error() callback console.error('Request failed with error') this.errorMessage = error; this.loading = false; }, |
When the observable completes, it will call the complete() callback. There is no need for this call back as the subscription completes when the data is received.
1 2 3 4 5 6 | () => { //complete() callback console.log('Request completed') this.loading = false; }) |
Loading Indicator
We create a variable loading=true just before subscribing to the GETrequest. When the observable completes or an error occurs, we make it false. This helps us to show some kind of loading indicator to users, while we wait for the response.
Template
1 2 3 4 5 6 7 8 9 10 11 12 13 14 15 16 17 18 19 20 21 22 23 24 25 26 27 28 29 30 31 32 33 34 35 36 37 38 39 40 | <h1 class="heading"><strong>HTTP </strong>Demo</h1> <div class="form-group"> <label for="userName">GitHub User Name</label> <input type="text" class="form-control" name="userName" [(ngModel)]="userName"> </div> <div class="form-group"> <button type="button" (click)="getRepos()">Get Repos</button> </div> <div *ngIf="loading">loading...</div> <div *ngIf="errorMessage" class="alert alert-warning"> <strong>Warning!</strong> {{errorMessage | json}} </div> <table class='table'> <thead> <tr> <th>ID</th> <th>Name</th> <th>HTML Url</th> <th>description</th> </tr> </thead> <tbody> <tr *ngFor="let repo of repos;"> <td>{{repo.id}}</td> <td>{{repo.name}}</td> <td>{{repo.html_url}}</td> <td>{{repo.description}}</td> </tr> </tbody> </table> <pre>{{repos | json}}</pre> |
The template is very simple
We first ask for the userName. We use the two-way data binding to sync userName [(ngModel)]="userName" with the userName property in the component class.
1 2 3 4 5 6 | <div class="form-group"> <label for="userName">GitHub User Name</label> <input type="text" class="form-control" name="userName" [(ngModel)]="userName"> </div> |
getRepos() method subscribes to the HTTP get method.
1 2 3 4 5 | <div class="form-group"> <button type="button" (click)="getRepos()">Get Repos</button> </div> |
We show a loading message until the observable returns response or an error.
1 2 3 | <div *ngIf="loading">loading...</div> |
Show the error message.
1 2 3 4 5 | <div *ngIf="errorMessage" class="alert alert-warning"> <strong>Warning!</strong> {{errorMessage | json}} </div> |
The last line shows the response as it is received.
1 2 3 | <pre>{{repos | json}}</pre> |
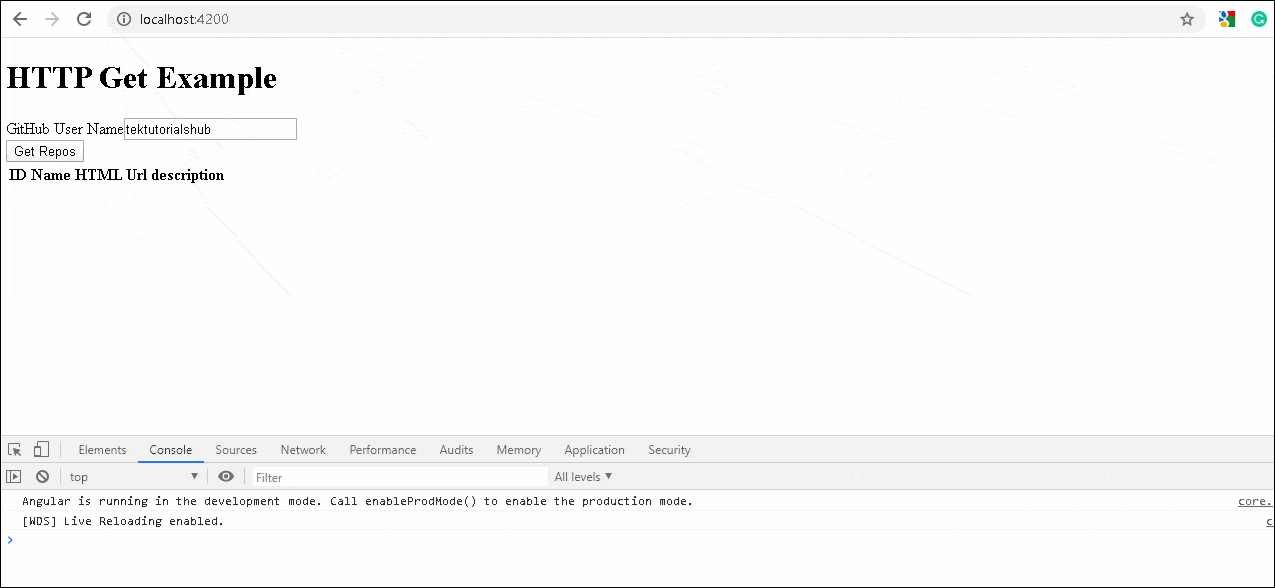
HTTP Get in Action
Now, run the app, you should able to make a successful GET Request.
Get Syntax
The above code is a very simple example of the HTTP get() method. The complete syntax of the get() method is as shown below. It has second argument options, where we can pass the HTTP headers, parameters, and other options to control how the get() method behaves.
1 2 3 4 5 6 7 8 9 10 11 | get(url: string, options: { headers?: HttpHeaders | { [header: string]: string | string[]; }; params?: HttpParams | { [param: string]: string | string[]; }; observe?: "body|events|response|"; responseType: "arraybuffer|json|blob|text"; reportProgress?: boolean; withCredentials?: boolean;} ): Observable<> |
headers :use this to send the HTTP Headers along with the requestparams:set query strings / URL parametersobserve:This option determines the return type.responseType:The value of responseType determines how the response is parsed.reportProgress:Whether this request should be made in a way that exposes progress events.withCredentials:Whether this request should be sent with outgoing credentials (cookies).
observe
The GET method returns one of the following
- Complete
response bodyof the responseevents.
By default, it returns the body as shown in our example app.
Complete Response
The following code will return the complete response and not just the body
1 2 3 4 5 | getReposRawResponse(userName: string): Observable<any> { return this.http.get(this.baseURL + 'users/' + userName + '/repos', { observe: 'response' }) } |
The complete response is as follows.
1 2 3 4 5 6 7 8 9 10 11 12 13 14 15 16 17 18 19 20 | { "headers": { "normalizedNames": {}, "lazyUpdate": null }, "status": 200, "statusText": "OK", "url": "https://api.github.com/users/tektutorialshub/repos", "ok": true, "type": 4, "body": [ { "id": 102269857, ****************** Removed for clarity ***** } ] } |
events
You can also listen to progress events by using the { observe: 'events', reportProgress: true }. You can read about observe the response
1 2 3 4 5 | getReposRawResponse(userName: string): Observable<any> { return this.http.get(this.baseURL + 'users/' + userName + '/repos', { observe: 'events', reportProgress: true }) } |
Response Type
The responseType determines how the response is parsed. it can be one of the arraybuffer, json blob or text. The default behavior is to parse the response as JSON.
Strongly typed response
Instead of any, we can also use a type as shown below
1 2 3 4 5 | getReposTypedResponse(userName: string): Observable<repos[]> { return this.http.get<repos[]>(this.baseURL + 'users/' + userName + '/repos') } |
String as Response Type
The API may return a simple text rather than a JSON. Use responsetype: 'text' to ensure that the response is parsed as a string.
1 2 3 4 5 | getReposTypedResponse(userName: string): Observable<repos[]> { return this.http.get<repos[]>(this.baseURL + 'users/' + userName + '/repos', { responsetype: 'text'}) } |
Catching Errors
The API might fail with an error. You can catch those errors using catchError. You either handle the error or throw it back to the component using the throw err
1 2 3 4 5 6 7 8 9 10 11 12 | getReposCatchError(userName: string): Observable<repos[]> { return this.http.get<repos[]>(this.baseURL + 'usersY/' + userName + '/repos') .pipe( catchError((err) => { console.error(err); throw err; } ) ) } |
Read more about error handling from Angular HTTP interceptor error handling
Transform the Response
You can make use of the map, filter RxJs Operators to manipulate or transform the response before sending it to the component.
1 2 3 4 5 6 7 8 9 10 11 12 13 14 15 16 17 | getReposMap(userName: string): Observable<repos[]> { return this.http.get<repos[]>(this.baseURL + 'users/' + userName + '/repos') .pipe( map((data) => { //You can perform some transformation here return data; }), catchError((err, caught) => { console.error(err); throw err; } ) ) } |
URL Parameters
The URL Parameters or Query strings can be added to the request easily using the HttpParams option. All you need to do is to create a new HttpParams class and add the parameters as shown below.
1 2 3 4 5 6 7 8 9 10 11 12 13 14 15 16 17 18 19 20 21 | //URL Parameter getReposUrlParameter(userName: string): Observable<repos[]> { const params = new HttpParams() .set('sort', "description") .set('page',"2"); return this.http.get<repos[]>(this.baseURL + 'users/' + userName + '/repos', { 'params': params }) .pipe( map((response) => { return response; }), catchError((err, caught) => { console.error(err); throw err; } ) ) } |
The above code sends the GET request to the URL https://api.github.com/users/tektutorialshub/repos?sort=description&page=2
The following code also works.
1 2 3 4 5 6 7 8 9 10 11 12 13 14 15 | getReposUrlParameter(userName: string): Observable<repos[]> { return this.http.get<repos[]>(this.baseURL + 'users/' + userName + '/repos?sort=description&page=2') .pipe( map((response) => { return response; }), catchError((err, caught) => { console.error(err); throw err; } ) ) } |
HTTP Headers
You can also add HTTP Headers using the HttpHeaders option as shown below. You can make use of the Http Interceptor to set the common headers.
1 2 3 4 5 6 7 8 9 10 11 12 13 14 15 16 17 18 19 20 21 22 23 24 25 | //HTTP Headers getReposHeaders(userName: string): Observable<repos[]> { const params = new HttpParams() .set('sort', "description") .set('page',"2"); const headers = new HttpHeaders() .set('Content-Type', 'application/json') return this.http.get<repos[]>(this.baseURL + 'users/' + userName + '/repos', { 'params': params, 'headers': headers }) .pipe( map((response) => { return response; }), catchError((err, caught) => { console.error(err); throw err; } ) ) } |
You can send cookies with every request using the withCredentials=true as shown below. You can make use of the Http Interceptor to set the withCredentials=true for all requests.
1 2 3 4 5 6 7 8 9 10 11 12 13 14 15 16 17 18 19 20 21 22 23 24 25 | //With Credentials getReposWithCookies(userName: string): Observable<repos[]> { const params = new HttpParams() .set('sort', "description") .set('page',"2"); const headers = new HttpHeaders() .set('Content-Type', 'application/json') return this.http.get<repos[]>(this.baseURL + 'users/' + userName + '/repos', { 'params': params, 'headers': headers, withCredentials: true }) .pipe( map((response) => { return response; }), catchError((err, caught) => { console.error(err); throw err; } ) ) } |
Summary
This guide explains how to make use of HTTP get in Angular using an example app. In the next tutorial, we will look at the HTTP post method.


Great explanation … thanks
Great job , thank you so much fram France.
I’m facing issues in downloading files as Zip using angular 13.
It downloads as zip but looks like zip file gets corrupted.
But the zip file has size. Any help is much appreciated.
explained well in every part of angular
This tutorial is nothing but excellent. Thanks for the good work!
For those who have not gone through the introduction to HttpModule your application might throw an error because the missing providers [] declaration in either the component or the ngModule class
Great use case. Well working example. This saved me. Thanks a lot.
Great use case example. Thks
very well explained