Black Friday Exclusive: $2 for 2 Months + 50% Off Any Plan
Black Friday: 50% Off
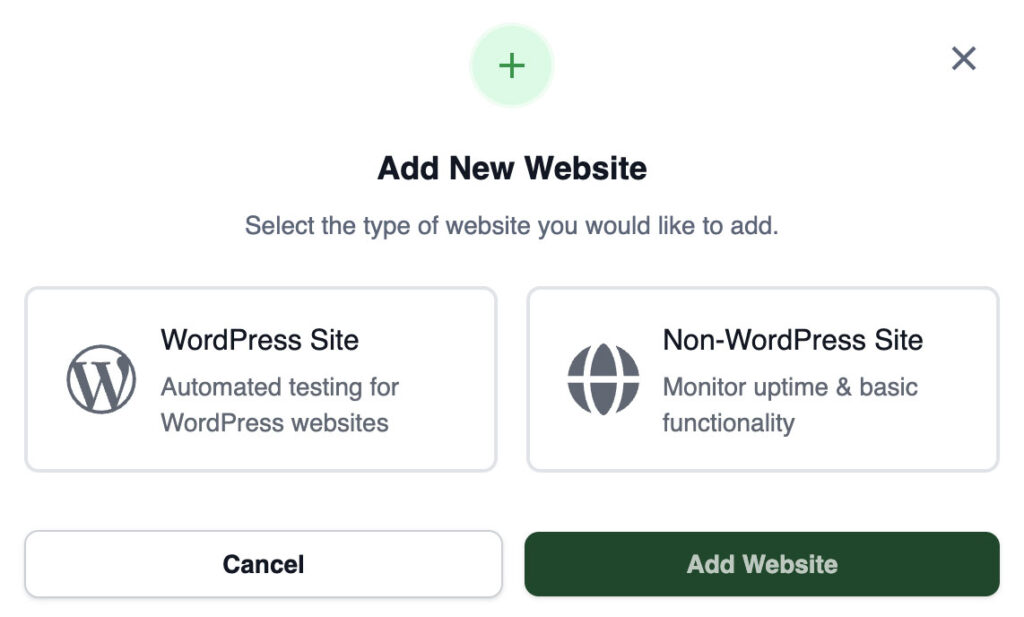
Adding a Website to CheckView
- From your main CheckView dashboard, click Add Website to begin connecting your site.
- After entering your URL, select whether your site is a WordPress site or a non-WordPress site.
- If it’s a WordPress site: you’ll connect using the free CheckView plugin.
- If it’s a non-WordPress site: CheckView will take you straight to the test step editor, where you can manually build test flows that work across many platforms, including SaaS apps, landing pages, and other CMSs.
- Enter your site’s full URL. Type in the complete public frontend URL of your website, including https://.
- For WordPress sites:
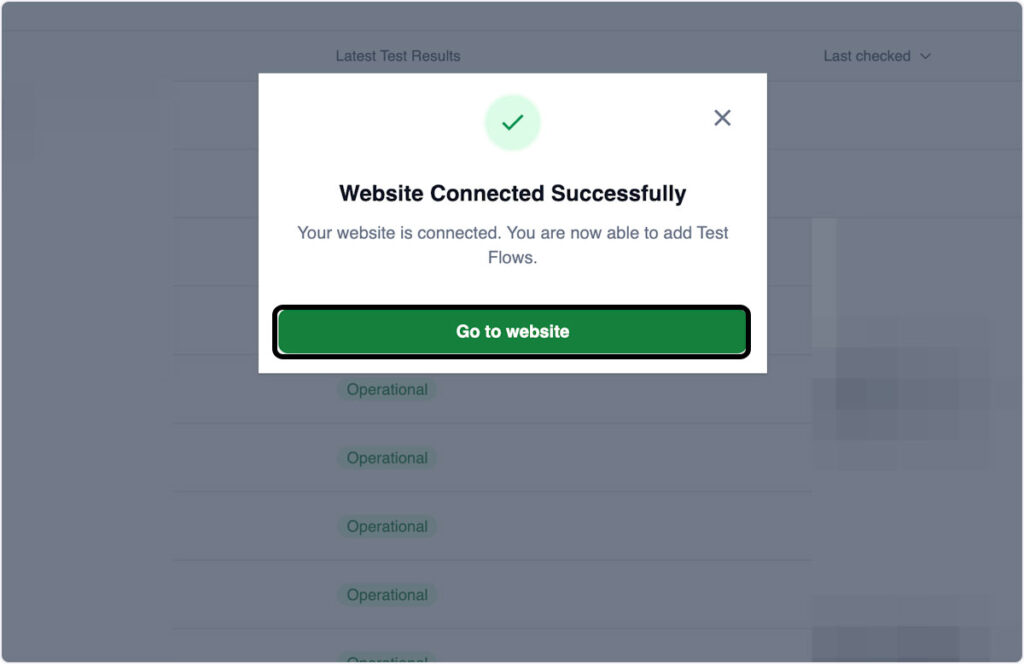
- If you’ve already installed and activated the free CheckView plugin, you should see a message saying “Website Connected Successfully.”
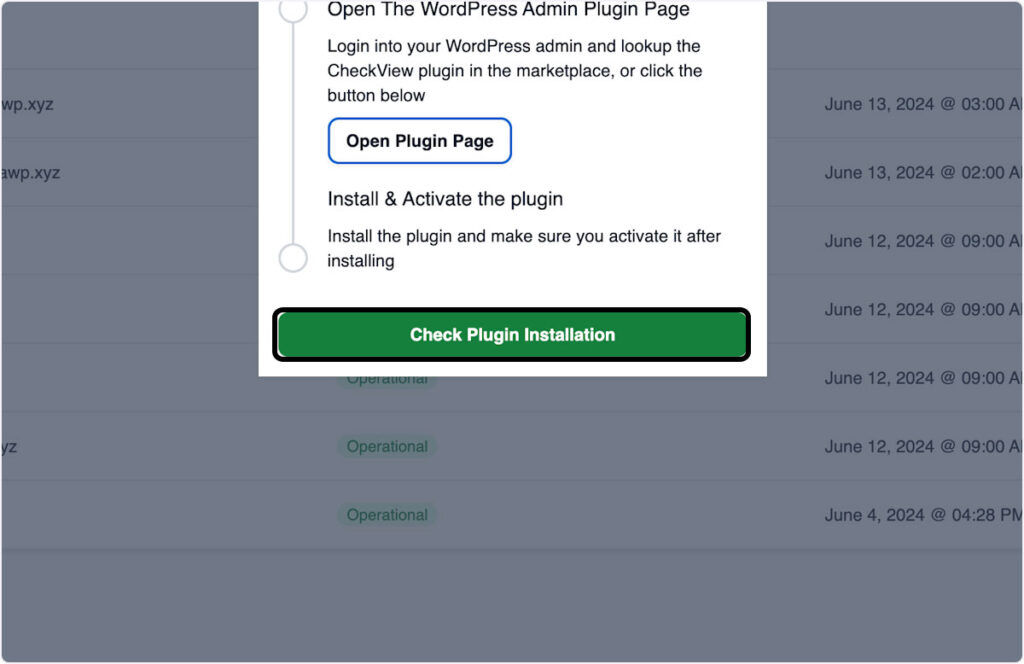
- If you haven’t installed it yet, click Open Plugin Page. This will open your WordPress admin’s “Add Plugins” screen.
- Log in to your WordPress admin (if prompted), then click Install Now followed by Activate.
- Once the plugin is active, return to CheckView and click Check Plugin Installation.
- You should now see “Website Connected Successfully.”
- For non-WordPress sites:
- You’ll be taken directly to the Test Step Editor, where you can begin creating and customizing your automated test flow.
- These flows work with most websites and SaaS platform, no plugin required.
- You’re all set! Your site is now connected to CheckView. You can start creating automated tests to ensure your forms, checkouts, and user flows are always working as expected.