Sunshine Jeans

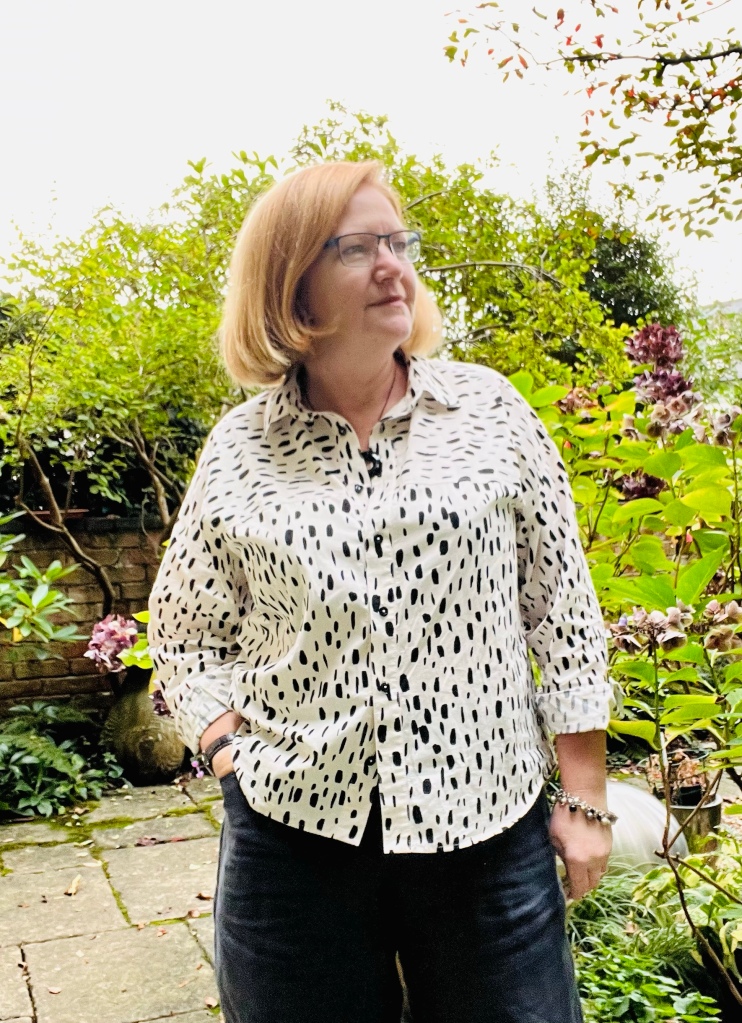
This was a post I should have published last year, and I’ve just found it languishing in my drafts! I’ve had plenty of use of these jeans and even made a pair in linen for the summer.

I have realised that I’m definitely won over by trousers with a barrel leg shape. The Kew, Bob and Teddy pants patterns from Style Arc are obviously not enough barrel leg goodness for my pattern collection, I had to buy the Sunshine Jeans from I Am Patterns too! I’ve since bought another couple of trouser patterns, but I won’t get into that in this post! I’d been a bit of a lurker regarding the Sunshine Jeans, but this year a couple of Instagram posts brought my attention back to the slouchy leg version of this pattern and I decided to give it a try.

Image

I traced sizes 48-52 in various places and decided to follow the Top Down Centre Out fitting philosophy. I watched Stacey from The Crooked Hem video tutorials on using this method with jeans with a yoke, and it all worked out rather well! The legs are the 48, hip to waist are roughly 50, with a little more width in the front than the back. I also added a little in crotch depth at front and took some out in the back. This all stops the slight sway to the front I always get. I think I might narrow the legs a bit more, compare to the photos on the I AM Patterns website, these look a little baggy, that’s not to say I don’t like it!

Image

Fabric for this pair is black denim that I bought a couple of years ago from Barbican Fabrics in Plymouth. It really is the most fabulous black, and I hope it stays that way! I washed it with a tin of coke when I first got it and ironed while still slightly damp. There are no creases now even after two or three wears, so I think that’s a success.

Image

I used a scrap of cotton poplin for the pocket bags and decided to go with a contrast topstitching using Gutermann’s Denim thread in a dark grey. My machine will loterate the Denim threat where it will otherwise thow a complete fit if I try to use topstitching thread. I have a denim twin needle, so I cheat horribly when it comes to stitching two rows of topstitiching, my little twin needle friend is called upon and I have lovely parallel rows of stitches.

Image

Talking of decoration, I couldn’t let this pair of jeans go out into the world without a small sign of protest to take iwth them where ever they and I go. in 2022 when Ukrain was invaded, I made a pair of Terra Pants and embroidered the back pockets with sunflowers. This time I’ve hand embroidered a slice of Palestinian watermelon on my pocket. It’s a small, visible act, and it just might get someone thinking.

Image

The instructions are really good, I didn’t make any comments or note any pattern markings that didn’t line up or were missing. The pockets are a good size, not too deep, but plenty of space for your phone without it falling out! I actually haven’t got anything negative to say about this pattern, I’m tempted to make the straight leg version later in the year, but for now have cut out another pair in linen! I’m intrigued to see just how differently they hang and fit in the softer fabric.

Image

So, I have worn these four times during Me Made May – basically as soon as they’re dry and ironed, I find a need to wear them. I love a good black trouser staple in my wardrobe and I hope these will be on call all year round.

Odell Top

I think I have a shiny new favourite top pattern – the Odell by Notches Patterns, and the bonus is that it’s free! I had seen it on Instagram a while ago and fell in love with the sleeve, of course! I just love the possibilities to use up different colurs of the same fabric, using a print cut in different directions, and just basically having fun with that sleeve.

Image

Odell Top

Notches patterns

I traced the sizes 18-22, not sure whether I could get away with the smaller size and do a FBA, or just do one fo the bigger ones. I decided to start with toiling the smaller one without the FBA just to see where it was going. I was pleasantly surprised to see that the smaller one was just fine, plenty of ease. But I did need to adjust the dart, it was just too wide and pointy. I lengthened it first, about 2.5cm longer, which looks much better, and I rotated some of it out into a new temporary waist dart. It was temporary because I ignored making a dart and took half of it out in the side seam. So the blouse is less straight and a bit fuller in the front, but I’m happy with it. I also found it too long for me, so it’s been shortened by 8cm! And no – I didn’t mistakenly cut the dress length…

Image

Last year, when Mum came to visit, she brought me two 2m length of black and white Shweshwe. I thought it would be the perfect fabric for this top, the shweshwe had good body. I only just had enough to get all the important pieces out, but I had to cut the facings from plain black lawn in the end! The curved, teardrop shapes of the sleeve pieces mean this top is a little more fabric hungry than you’d expect. If I hadn’t shortened the top, I wouldn’t have got it on at all! This is because shweshwe is only 90cm wide, so a “normal” width fabric wouldn’t have the same issues.

Image

Image

Construction is pretty easy, just keep an eye on which sleeve pieces are which! Each raglan balloon sleeve consists of six pieces! I assembled the sleeves before adding them to the bodice, unpinning each piece one at a time as needed. My overlocker was acting up so I just zigzagged all the seams, shweshwe is too stiff to use French seams. I think I’ll leave the facing off next time and just bias bind the neck. I like the lower back neckline, could be cute in the summer. It’s nice worn with a layer underneath, but I can’t wait to wear it in the warm weather!

Image

Image

Now, on to the practical stuff. I’ve worn this top once so far, which means one wash and one opportunity to iron it… The fabric irons beautifully, and like all shweshwe will soften each time its washed. My problem, if it’s a problem, is ironing the sleeves!! Some areas of the sleeves are ok to iron on the flat, but I found myself reaching for the tailor’s ham in order to iron the lower edges where the pattern pieces are more rounded to give that balloon shape. I will probably not rush to make this pattern from linen!

Image

But I will make another, I really love that sleeve, and for now, the faff with ironing it is worth it!

So it’s January Again

Well that went quickly, didn’t it? I suppose it helps when I’m not posting regularly, and last year was a bit “messy” with everything going on! I really am still sewing, albeit not as much, but I am not finding it easy, or fun, to take photos. However – as it is January, it’s as good a place as any to try to start again and post again. I do miss reading blogs, my reader isn’t anywhere near as full as it used to be.

So, being January, it’s time for Sew japanese in January, Jungle January and a whole host of other sewing challenges to kick start your Sewjo after the Christmas crush. Sew Japanese in January is hosted by Blogless Anna on Instagram, and it’s a great way to use Japanese patterns and or fabrics. The fabric I chose is viscose, soft and drapy, off white with a pale blue print that almost resembles layers of palm leaves over each other.

Image

After last year’s over shopping and under sewing achievements, I have decided to shop from my collection of patterns and fabrics as much as possible this year. I got the fabric last year from Stitch Fabrics at the Sewing show at the NEC. I’m not banning myself from buying anything, because I know my level of willpower! But I really need to get the levels of fabric in the sewing cupboard under control.

Image

I have to confess that I’ve been a bit lazy with my contribution for Sew Japanese this year, I’m not making anything outrageous or using a new pattern. I simply reached for my favourite blouse from Asuka Hamada’s book, Sweet Clothes, and whipped up a beautiful top with big sleeves that I know I will love to wear all year long! Tick for using an existing pattern and fabric from the cupboard!

Image

I’ve made no adjustments to the pattern since last January when I made this gorgeous blue windowpane version. The insides are all pretty with French seams throughout and the viscose behaved itself while I applied the self bias to the neck edge. Initially I thought I’d be wearing this with a contrasting, dark pair of trousers/jeans, but I popped it on with the off-white corduroy Betty Pants I made last January and I really like the pale look!

Image

Further plans for a Japanese January are afoot. I had a length of vintage Japanese cotton fabric given to me in ’22, and I’d love to make a yukata with it. I bought a Folkwear Kimono pattern from Higgs and Higgs last summer, but I’m also intrigued by Emilia’s posts on Kimono making. The printed pattern is not the same as the layout they describe, so I’m on the fence a bit. I only have one bolt of the fabric and I need to do it justice and make it correctly! I guess you’ll have to come back and watch this space to see what I actually do – if anything….

Jumping on the Wide Leg Trousers Trend

Finally, the rest of the fashion world has realised what I knew years ago – wide leg trousers/pants are simply fabulous! Daughter No 2 has been wanting a pair of those fabulously floppy, soft, wide legged trousers for a while now, and we’ve gone through loads of pattern options, but none were quite right. I thought I’d cracked it with the Landers, but no, not quite.

Image
Protea pants in cotton twill

This summer I bought the Protea Pants pattern from Paradise Patterns as part of their fundraiser for the Hawaiian fire disaster. I’d fancied it for myself for a while, but not all photos on Instagram were ticking the boxes, so there was some doubt. Anyway, I offered this pattern to Ms Fussy Pants, and she graciously allowed me to toile it for her. She has a lovely piece of worsted wool suiting in navy that is begging to become a pair of wide legged trousers.

Image
Image
In Seam pockets

I toiled the pleat-free version, having traced both the size 2 and 4, but for the toile went for the size 4 without adjustments, and the 32″ leg length. Her measurements put her in the 4 for waist and 2 for hips, which is completely opposite to how patterns usually work for her. I usually have to grade out for the hips. So I was a bit wary. However – they fit perfectly! I was gobsmacked – I’ve never had a pattern fit her straight out of the envelope. All I did differently was to turn up just 3cm of the 4-5cm hem. The pants just skim above the floor when she’s wearing her converses.

Image
Image

So – at this point I’m happy, I can cut the wool and get started. Except the words I was dreading, but had expected, drifted across the sewing room. “Muuum – can you make these wearable…..?” Accompanied with the usual puppy dog eyes. I bloody knew it! But I’d sewn with white thread. She wasn’t bothered, so I kept going, doing all the visible stitching with the white too! Of course this means I had to pull the seams apart at various sections in order to neaten the seams, insert the pockets and retro-fit the zip and belt loops.

Image
Image

The pants actually look fantastic, and she’s worn them already! Good news is that they were comfy all day, didn’t drop in the waist and the pockets are a decent size for her phone and other paraphanalia. And she definitely wants those wool trousers now! So I suppose that’s this week’s job.

Image

The instructions are good, but I ignored most of them, especially the zip installation. I have my own method that works just fine and is nice and quick and neat. I stuck the fly facing piece to the front at the relevant point in order to eliminate that extra seam and faff too, just cut off what you don’t need afterwards with the overlocker.

Of course, I haven’t traced them in my size at all yet…

Better Late Than Never

Waaaay back in May of this year, a week break in Cornwall resulted in the inevitable trip to Truro Fabrics – with the obvious result. Daughter No 2 was with me and bought three pieces for herself. One piece was a 1cm black and white gingham cotton that she wanted to make a skirt from, a tiered, gathered skirt like the ones she’s been seeing on Instagram. I knew we could make a pattern easily enough, and that it would also be easy enough for her to make on her own, with limited time.

About two months later I finally made enough of a pattern for the fitted top section of the skirt to enable a toile for fitting and adjusting purposes. Notes were made. Last weekend Daughter No 2 came to visit for 5 days. Take a flying guess at what was on the top on her list of things to do while she was home…! We made a new pattern from the notes made in July, toiled and made new notes, adjusted the pattern and decided on the proportions for the tiered, gathered parts of the skirt. We had to work with the piece we had, no more was available to purchase.

Image

Image

Daughter No 2 made the fitted part of the skirt, and inserted the invisible zip, while I measured and cut the long rectangles for the rest. The first tier was to be a finished length of 28cm, and we’d use the full width of the fabric. We also decided on narrow, 1cm seams to get the most out. The second tier was to be 35cm deep, one and a half times the width of the fabric. I was thinking to just cut the width twice, but she didn’t want it that gathered. We were able to hide the join quite well in the pattern of the gingham.

Image

All in all, she did a fabulous job on this skirt, and maybe she’ll make another next summer! I have saved the pattern pieces and the sizes of the rectangles needed for the tiers. I’m sorry I hadn’t got myself organised sooner as she’d have loved wearing this skirt this summer, but it’s done and now it’s an autumn skirt instead! I love it with the tights and Docs.

Image

Olya the Seventh – I Think

When a pattern is perfect, it is only right to make it again and again, right? I’ve made so many versions of my favourite Burda trousers, a certain Burda jacket and some of the Style Arc pants – and this shirt. I have other patterns. But I do love this one! Mr Not-Compulsive thinks I need to branch out, try other shirts too, but I’m still all starry eyed over the Olya.

Image

So here she is, I think this is the seventh one I’ve made now. I love the print of the fabric, it’s also a nice weight, so perfect for winter wearing. Some of the others are a little thin – necessitating a jumper if they’re to be worn when it’s chilly, and boy, are we going down that route fast now!! It’s hard to believe that just a month ago we were in the middle of a mini heatwave! (Please note, I started writing this post at the beginning of October!)

Image

Image

Image

So here we are now, a month down the line and definitely in cooler temperatures. I love this shirt, it looks great with jeans and my rust coloured winter trousers, so I know it’ll be worn loads over the winter. But hubby is right – I do need to branch out. I’ve been working my way through a number of FibreMood magazines that I’ve bought, tracing out the interesting looking blouses, so hopefully I’ll find the time to toile some of those and make them up in some of the gorgeous fabrics I have in my stash!

Work in Progress Wednesday 2/23

Oh I have been remiss – this is only the second peek into my sewing process I’ve done this year! It has been a weird one, to be hoonest, so we’ll just move on, shall we? Today I’m making another Olya shirt. Another?? Well, yes. I love this pattern! Its simultaneously casual and smart, all depends on how you wear it. The fabric is viscose, but no one of those thin, floaty viscoses. This one has more body and weight, less floaty drape than you’d expect from viscose, so I think it’ll be perfect for cooler weather wearing. And yes, I think we can now safely say that it is moving properly into cooler weather!

This is one of the pieces I dug out of the stash after my last post, so maybe I am also acutally making pogress with “planned” Autumn sewing!! I bought it from Rainbow Fabric at their stand at the Festival of Quilts in August, knowing that it would be a shirt, but not sure at the time whether it would be an Olya or The Assembly Line’s Oversized Shirt. That one I’ve yet to toile. But I know the Olya pretty well now and I’m after a bit off quick sewing gratification!

So let’s get started, shall we? The instructions have you starting with the placket, but I usually get the back made up first, makes me feel like I’m already getting somewhere. Then it’s the placket, because you can’t do anything else until that’s sorted. I make a slight change to the placket, sewing it from the outside instead of the inside, as per the instructions. This is because I like the clean lines of a machine stitch and fold, rather than pressing a fold and topstitching. The look overall of the placket remains the same, I just prefer my finish.

With the pleats folded, ironed, and pinned in place and the placket done, the front yoke and sleeve piece can be attached to the main front piece. This is when it all starts to look like you’re getting somewhere! Now the side seams join the fronts to back and you have a rather large, unwieldy bit of fabric! I like that the instructions guide you to finish the seams as you go, with this unusual pattern, it’s good to keep track of that as you can’t always go back and tidy something up later.

Image

Sewing the shoulders is always fun on this shirt, but follow the instructions to the letter and it’s very do-able. I pin the shoulder seams to the corner, then the sleeve into the armhole from the yoke joining seam to the end, leaving the section from the shoulder corner unpinned so I can rotate the fabric after snipping the corner. I find this easier than trying to get it all in place before snipping, or the converse, having all that flapping about when I’m trying to sew!

Image

Sewing the sleeve seam is then a piece of cake, a quick press of the seam and topstitching finishes it all off nicely. This is when I quickly staystitch the neck, sometimes I remember and do it when the pieces are still seperate, but now is as good a time as any! The front bands go on now, after I’ve taken time out to interface them and all the other pieces that need interfacing. I know it should be done at the bgining, but I’m usually too keen on getting started, so I wait until I have to do it.

Image

Image

This is as far as I got today, other things to do! I’ll finish the front band, sewing it on the inside by hand before topstitching from the outside. Again, it’s just a finish I prefer. Then collar, cuffs and hem. I think I have suitable buttons in the stash, otherwise it looks like I may have to pay a visit to the charity shop to see if they have anything useful.

Image

All these bits are ready to be sewn tomorrow, so hopefully I’ll get it all done by lunchtime, then it’s off to do other things.

How Many More Times

Another pair of linen trousers has been added to the summer wardrobe. Back in January I made a pair of Burda trousers using some crisp cotton chino fabric and said at the time that I’d love to make a linen pair – well, I’ve made them! Pants 106 from February 2020 with the interesting seam detail on the front legs and the barrel shape has proved to be a pattern I like very much.

Image

Image
Seam details on the front leg

The linen is from Higgs and Higgs, chartreuse in colour and with some weight and body, it’s not a light linen, so it’s going to be perfect to wear as the weather cools down (not this week, with its 30 deg C offerings!) I think I jinxed the weather with my last post about cool September and thinking of warmer layers! This week, all I’ve wanted is a swimming pool and a lot of shade!

Image

Back to the pattern – I made it with the same adjustments as the last time, but took it in at the waist in the side seams by 1cm each side. The waistband fits better now, so it was the right choice. As the fabric is a little thick and doesn’t have a smooth texture, I decided to cut the inner waistband pieces from a left over piece of Liberty lawn. The colours go together really well and it feels lovely against my skin.

Image
Liberty lawn to line the waistband

Image

There might possibly be another pair in the works for the winter – I have some lovely pieces of wool.

Geometric Zadie

I love the Zadie jumpsuit, it’s so easy to make, and so fabulous to wear! This one almost wasn’t a jumpsuit at all, the fabric was initially destined to be trousers, with possibly making a jacket from the rest of it. But I was hit on the head with a bolt of inspirational lightning. I realised I’d be wearing only blue or off white tops with this fabric if it were trousers – and as a jacket, I’d be wanting plain tops under it, so…. It made perfect sense to make an all-in-one, in effect, a jumpsuit. And we all know the best jumpsuit around is Zadie!

Image

I made a decision to cut the bodice with the pattern running 90 degrees to that on the trouser section – something I now maybe think I shouldn’t have done. It’s fine, and I still love it, but maybe it was not the 100% best decision. No matter, it’s done! Let’s talk fabric. It’s cotton satin with a little bit of stretch across the width, off-white with a dull navy blue print. I bought it from Stitch Fabrics at their stall at the NEC in March, 3m of it!!! There is a bit left for something else, but it was cheap because it had a print fault in it, so cutting needs to be done carefully. I was aware of the fault when I bought it.

Image

Image

I cut the size 16 with FBA adjustment and other alterations that I’d made when I first made the Zadie back in 2019 and went for the short sleeves and cropped trouser length. It’s summer after all, even if the British weather hasn’t had the memo. As always, it’s a super comfortable item of clothing to wear and the cotton has been lovely and cool. Its just got a luxurious feeling to it that makes it feel a milion bucks.

Image

Image

I love it, not much more to say, really!!

Seasonal Changes

Image

September – that time of change, Spring day in the southern hemisphere where it’s celebrated with fresh flowers and the advent of summer school uniform; dreaded in the north as the harbinger of long nights, dull, damp weather. But there’s good in it too, right? Speaking from the north now, September brings crisp mornings, the chance to add a little layer or two, and the innate desire to wrap up. Time spent in the anticipation of a good rifle through the stash to see what new goodies we can make for Autumn and Winter. Not to mention the dreaded Christmas word and vague ideas that we might just manage some handmade Christmas gifts inbetween making gorgeous clothes.

I’m still firmly in the “it can’t be the end of summer yet” camp. Our British weather has been its usual unpredictable self and left us wondering what happened to our summer. I still have piles of linen waiting to be transformed into summer trousers, jersey for tee-shirts and some lightweight cotton for shirts. You could say I should just make them anyway, but given that last year’s summer things didn’t fit this year, I’m not keen on that angle.

So it’s time to re-evaluate the piles on the cutting table and pack away what I won’t be able to make and wear with the changing weather. It’s time to dig out the suiting, the wool and heavier weight jersey – and lovely denim. Maybe turn those summer tees into longer sleeved tops. Planning and preparation – getting lost in the stash for a few happy hours.

Image

For those of you who like a little flutter in a sale, and happen to also have a penchant for vintage patterns, I have a 20% discount running in my Etsy pattern shop for this month. Feel free to help me make more space in my pattern cupboard to fit the extra fabric stash!

See you on the other side, I might actually have some ideas by then!

Theunpickstitchpapers

Finding joy in sewing a useful, beautiful and thoughtful wardrobe

My Sanctuary Garden

My little piece of heaven on earth

Making and Books

I like making, and I like books.

The Insouciant Stitcher

Creativity beats Insanity

Fabric Engineering

Creating a well-fitting wardrobe, piece by piece

Yet Another Unfinished Project

Crafting better mental health by sewing myself happy. Slow fashion, conscious consuming and an effort to live a more ethical life.

A Tailored View

The thinking behind a project

Poundcake

a lot of cake and a little frosting

Sew Everything Blog

Always sewing. Sewing Everything. Sharing the Sewing with Everyone

Your Stitches May Vary

sewing, making, and mental health.

The Easy Blues

craft, diy, natural dyeing

Creating in the Gap

Forever sewing

Love, Lucie

Where hands and minds are rarely still

U&Mii

Adventures of a plus size renegade seamstress

allsewpetite

Create beautiful bags with confidence!

tales of the sewing city

slow sewing, creativity, and a fabric obsession

Mainelymenswear

Be your own luxury brand !

Buttons and Trims

Sewing - Learning - Making

Designed By Danita

"Seams" like I've been sewing forever!

the curious kiwi

Happily immersed in sewing nerdyness…

KJ Sews

Sewing and more

nelnanandnora

Faith, family and creativity

Sew My Style

Forever sewing

Offsquare

A refashion and sewing blog

Tailored by Kate

My sewing record

The Notions Tin

Forever sewing

Girls in the Garden

Forever sewing

The Savvy Sartorialist

Fashion, Lifestyle & Travel by Trish O'Sullivan

Needleswift

Sewing lessons in Lindfield, West Sussex

Just another blog

Permanently sleep deprived. Trying to make a lot of stuff.

jess sews clothes

blogging my homemade wardrobe

nomadiccharacter

Forever sewing

The German Edge

Forever sewing