Search the Community
Showing results for tags 'launchbox'.
-
 Just thought I would give people a little tutorial here on how to use "mklink" to create a Symbolic Link for the Launchbox Cache. Some people say it improves performance (I certainly noticed it) and some say they don't notice much of a difference, I guess it depends on your set up. This method worked for me very well when I moved the Cache to my SSD, I found that I could now use images set to there highest quality without any impact on performance and the images look great on a 4k TV. So here is what worked for me: 1. First download and install LINK SHELL EXTENSION found here http://schinagl.priv.at/nt/hardlinkshellext/linkshellextension.html (be sure to install the dependency's first)You should now have the option when you right click on a file to "Pick Link Source". 2. On your SSD where you want your CACHE to be located create a folder called "CACHE" (I find that creating a Folder named something like "Launchbox Cache" and then placing the new Cache folder inside it works best). 3. Go to your Launchbox folder and find the original CACHE folder in the IMAGES folder and copy everything in the CACHE folder to your new CACHE folder on your SSD. (this may take a while, alternatively you could just delete everything in the original cache folder if you wish but you will have to repopulate it later after the folder is linked, not a big deal really I just leave launchbox in "attract mode" so the Cache gets filled up). 4. Once you have copied everything (or deleted everything) from the original CACHE folder also delete the actual ORIGINAL CACHE folder itself as well (this part is important). 5. now go to your SSD and right click your new CACHE folder (or the folder it's in) you created earlier and select "Pick Link Source" 6. now go to your IMAGES folder in launchbox right click it and select "Drop as Junction" This will automatically create a new CACHE folder (where you deleted the original) INSIDE the IMAGES folder with a little chain icon attached to it indicating that it is now linked to your SSD CACHE folder! That's it simple but took me a while to get my head around so I just thought I would post this. A way to test if this is working correctly is to do the same with your platform videos folder, if after following the instructions above your videos display properly, everything is working fine! or of course you could just watch the space left on your SSD as the cache fills up.
- 46 replies
-
- 13
-

-

-

-

-
 Hi there- I'm running into an error I can't seem to resolve. For a little context, I'm on Windows 10 running LaunchBox 13.24 and I've got my ROMs sitting on an external HD in their own folders (e.g. R:\Arcade\Sega Genesis\roms) outside of the LaunchBox directory (which is on the same external HD, R:\Arcade\LaunchBox), and have imported all of my ROMs in the same way using Tools>Import>ROM Files>Single Platform. Arcade ROMs are running on MAME, and console ROMs are running on RetroArch. Here's my problem: I click the "More Options" (3 dots) menu below a ROM (for example in the Super Nintendo Entertainment System platform), then click "Configure", and I receive an "An error occurred while trying to launch the game: Object reference not set to an instance of an object." error. I've tried Tools>Download>Force Update Games Database Metadata to no avail. I can play the ROMs just fine, so this isn't a critical error, just something I stumbled upon and found strange considering everything else works as expected, as far as I can tell. Something else I don't understand is that for certain platforms, e.g. Sega Genesis, clicking the 3 dots menu on a ROM only gives the option to "Delete" and doesn't have the "Configure" option at all. TIA to anyone who can shed any light on this.
-
BezelLauncher View File What is it? Use this plugin to display bezels for emulators that don't natively support them. What does it do? It displays a bezel and resizes the emulator window to fit within the bezels transparent area. What's required to make this plugin work? LaunchBox v13.3 (or newer), the plugin file, bezel images and some minor setup. No more. No less. (See Setting up) Do I need to provide my own bezel images? Yes. (See Setting up for where to place them) Will it work with game specific bezels? Yes. Will this work with all emulators? Yes, with exception. RetroArch and MAME emulators will not show in the list of emulators and cannot be used with this plugin. The emulators that have been tested so far all work. Some adjustments may be necessary. (see Emulator Settings) Will this work with storefront games or Windows games? No. Can I use my existing RocketLauncher bezel configuration files?You can use the existing platform.png and platform.ini files from RL. These existing files should be located under: /RocketLauncher/Media/Bezels/platform_name/_default/something.ini (and something.png) (See Setting up [step #3]) What are the .ini files for? The .ini (configuration) files tell the plugin how to resize and move the emulator window to fit within the bezel. (See .ini (configuration) Files for more info and Testing for creating and saving them) Can this plugin add shaders as well? No. Yes. See Using Shaders (new v2.1.0) Disclaimer This works on my test PC. I didn’t test it on my cab because I didn’t want to change my emulator settings to not use fullscreen (see Emulator Settings). Outside of RetroArch and MAME, I don’t use bezels, so didn’t want to mess-up-a-good-thing. There are no guarantees, express or implied… blah blah blah blah blah blah blah. There is no risk. This plugin makes no changes to LaunchBox or your emulators. If you decide this isn’t for you, simply undo any fullscreen changes you made and (with LB/BB not running) delete the BezelLauncher folder. Special Thanks Special thanks to @MadK9 for the idea, direction and help with testing! Without him, I would have never contemplated starting this project. Also a big thanks to @Sbaby for testing un-tested emulators with the plugin. Installing With LaunchBox/BigBox not running... Download the plugin .zip file "Unblock" the file Right-click the file, select Properties, check the box "Unblock", click OK. Or better yet, just use 7-zip to open the file Copy the contents (a folder called "BezelLauncher") into your \LaunchBox\Plugins\ folder Start LaunchBox Setting up Start BezelLauncher Setup from the LaunchBox Tools menu, then click Close This will create the \Plugins\BezelLauncher\Bezels\platform_name\ subfolders Copy your bezel images into their respective platform_name subfolders See Bezel Images for more information (optional) If you have existing RL platform_name.ini files, copy those alongside the image files See .ini (configuration) Files for more information Restart BezelLauncher Setup Select a platform Choose an emulator you wish to use for that platform. Check Disabled to enable it Click Test Adjust (Move/resize) the orange frame to fit within the view area of the bezel (See Testing) Click Shaders to enable, adjust and change shader (see Using Shaders) (new v2.1.0) Click Save [to save the .ini file] Click Save on the main setup screen to add the emulator to the list of Enabled platform emulators Repeat for other platforms and emulators you wish to add You must click "Save" for each emulator you've enabled, separately. Maintenance After adding/removing platforms or emulators Run BezelLauncher Setup Click Refresh Continue with Setting up, step #5 Testing To configure the placement of the emulator window within the bezel (Requires an existing bezel image): Run BezelLauncher Setup Select a platform and an emulator Enable it (if it's not already) Click Test Move and resize the frame Click [and hold] the left or right side of the frame to move it around Click [and hold] the bottom right corner to resize Use the on-screen buttons to fine-tune the adjustments The on-screen display will show information about the emulator window. (You can click and drag the OSD to move it around as needed) x, y = upper left monitor-coordinates of the emulator window w, h = width and height of the emulator window x, y = lower right monitor-coordinates of the emulator window If any of the values are red, they are off the screen The OUTSIDE edge of the frame is the emulator window extents After adjusting, click Save. This will overwrite any existing configuration file. Using Shaders (new v2.1.0) First you need some shaders. Place the .png images in the /Bezels/Shaders/ folder (Scanline.png 'shader' is included) Start BezelLauncher Setup Select your platform and emulator and click Test Click Shaders Check the box to turn shader on Use the slider to adjust the shader Adjust the opacity down to lighten the shader Use the drop-down box to select a different shader Click Save to save your settings Parameters Depending on the emulator and the bezel, you may need to check 1 or more of the following parameters: (h) hideStuff Check this if you see the desktop behind bezel while the game is loading. This adds a black background during the startup process. (s) startupSleeper “Hide stuff” for a little longer during startup (3 seconds) (l) longerSleep Same as above (4 seconds) (g) hideGameStartup Check this if LB Game Startup screen is showing behind the bezel at game startup When selecting a platform, if the plugin detects an emulator that has been tested, “suggested” parameters will be shown. Your mileage may vary. Emulator Settings For the plugin to move/resize the emulators’ window, you will need to disable fullscreen in the emulator(s). This may be as easy as removing "-f" or "-fullscreen" from the Default Command-line Parameters (depending on the emulator). Beyond that, of the emulators I've tested, the only one that needs to have its Default Command-line Parameters altered is SuperModel. You will need to manually set the resolution. Start BezelLauncher Setup Select your Super Model 3 platform and Enable it Click Test and after adjusting the frame to where you want it, make note of the W(idth) and H(eight) #'s shown in the OSD. Save and Close. (Be sure to click Save on the main Setup screen to save Enabled as well.) Edit your SuperModel emulator (in LaunchBox) and set the Default Command-line Parameters to "-res=W,H" (no quotes, no spaces and replacing W & H with the #'s noted above) Example: -res=1420,1076 Bezel Images When you run BezelLauncher Setup for the 1st time, the plugin creates subfolders for each of your eligible platforms. They are created in: \LaunchBox\Plugins\BezelLauncher\Bezels\[platform_name]\ The platform image file needs to be in the [platform_name] folder and must be named the exact same as the platform. \BezelLauncher\Bezels\Sony PSP\Sony PSP.png Game-specific bezel files Game-specific bezel folders (or files) can be named after the games ROM filename or the games Title. Using the games Title: If the Title has 'invalid file name characters', those characters will need to be replaced with _ (underscore). The exact same way LaunchBox does with its image files (but without the -01 suffix). Example: Title = Disney-Pixar's Toy Story 2: Buzz Lightyear to the Rescue! Bezel = Disney-Pixar_s Toy Story 2_ Buzz Lightyear to the Rescue!.png NOTE: Additional Apps game Titles are (i.e.) "Play USA Version...". So the bezel would be "Play USA Version....png". Same rules apply with 'invalid file name characters'. Invalid characters are: < (less than) > (greater than) : (colon) " (double quote) / (forward slash) \ (backslash) | (vertical bar or pipe) ? (question mark) * (asterisk) ' (single quote) Not technically invalid (post-DOS), but consistent with LaunchBox character replacement Storing game-specific bezels: Option 1: Place your game bezel images directly inside their respective \[platform_name]\ folder. Game-specific image files must be named the exact same as the games ROM file or the games Title (accounting for invalid characters). example: \BezelLauncher\Bezels\Sony PSP\After Burner - Black Falcon (USA) (En,Fr,Es,It,Nl) (PSP) (PSN).png Option 2: Place your game-specific bezel image folders under the \[platform_name]\ folder. The subfolder must be named the exact same as the games ROM file or Title (barring invalid characters). The .png and .ini files in the subfolder can be any filename. example: \BezelLauncher\Bezels\Sony PSP\After Burner - Black Falcon (USA) (En,Fr,Es,It,Nl) (PSP) (PSN)\thisIsAnyFileName.png See Launching different game versions for information about bezel requirements for games that are combined as Additional Apps. ScummVM Setting up ScummVM for use with this plugin: In LaunchBox, Edit games using ScummVM. In the ScummVM section, have both checkboxes un-checked. (Fullscreen and Aspect Correction). This cannot be done using the Bulk Edit Wizard, so will need to be done on a per-game basis. One-at-a-time. If it's not displaying correctly with just the above, try the (optional) following: Navigate to /LaunchBox/Third Party/SummVM/ and start ScummVM.exe. On the Graphics tab, set Graphics Mode to opengl. Leave the other 2 as default and the check box's un-checked. Click OK and Exit. ScummVM Bezel Files: To use bezels with games using LB's integrated ScummVM, you will need to set them up manually. It will not appear in BezelLauncher Setup. Navigate to the plugins Bezels subfolder and add your platform folder. i.e. \LaunchBox\Plugins\BezelLauncher\Bezels\ScummVM\ Add your platform default png and ini files to this folder. i.e. ScummVM.png ScummVM.ini Game specific bezels for ScummVM must be named the same as the Game Data Folder. i.e. D:\LaunchBox\Games\ScummVM\King's Quest 1 - Quest for the Crown\[game files] use: "King's Quest 1 - Quest for the Crown.png" DOSBox The integrated version of DOSBox is NOT supported by this plugin. I couldn’t get it to cooperate 100% of the time. So going with plan “B”. To use DOSBox with this plugin, you will need to install and set up DOSBox-X. Setting up DOSBox for use with this plugin: Note: BezelLauncher Setup will NOT show your DOSBox platform ('MS-DOS') as an available platform. So don't bother looking for it. Download DOSBox-X DOSBox-X releases can be found here: https://github.com/joncampbell123/dosbox-x/releases Download the vsbuild-win64 version. (direct link for the download file) Create a new folder under \LaunchBox\ThirdParty\ and name it DOSBox-X Extract the contents of the downloads "\bin\x64\Release\" folder into the new folder Be sure to unblock the zip file before extracting (unless you’re using 7-Zip) Configuring DOSBox-X In Windows Explorer, navigate to \LaunchBox\ThirdParty\DOSBox-X\. Make a copy of dosbox-x.conf. Rename the copy to [something like] "BL-dosbox-x.conf" Right-click the new 'BL-dosbox-x.conf' file and select edit (Notepad++ works great for this. But any text editor (Notepad) will work) Look for the following keys and change their Values as shown: (starting on approximately line 78) fullresolution = 1400x1080 windowresolution = 1400x1080 windowposition = 260,0 output = ttf showmenu = false "1400x1080" (2 locations) is the dimension of the transparent area of your bezel. Adjust as necessary. From your MS-DOS.ini file, use [Right X]-[Left X] for the 1st value (1400) and [Right Y]-[Left Y] for the 2nd (1080) "260,0" is the upper-left coordinate of the transparent area. Use the Left-X value for the 1st number and Left-Y for the 2nd. Save the changes and close the editor. Configure games to use DOSBox-X The following assumes your MS-DOS platform games are already setup to use the integrated version of DOSBox. In LaunchBox, select all your DOSBox games and press Ctrl+E to start the Bulk Edit Wizard. (Select 1 game in the MS-DOS platform, then press Ctrl+A to select all) On the 2nd screen select the Field Custom DOSBox Version EXE Path for Value, Browse to and select dosbox-x.exe Click Next, Next Click “Yes, I would like to make more changes” select the Field DOSBox Configuration File for Value, Browse to and select the new file you created (BL-dosbox-x.conf) Click Next. Next (again). Click "No, I would not like to make more changes" MS-DOS Bezel Files: This assumes your DOSBox platform is called "MS-DOS". In the Bezels subfolder under the plugin folder, create a new folder called 'MS-DOS'. In \LaunchBox\Plugins\BezelLauncher\Bezels\MS-DOS\, add your bezel files (MS-DOS.png and MS-DOS.ini). Game specific bezels for DOSBox need to be named the same as the Game Data Folder i.e. D:\LaunchBox\Games\MS-DOS\Cosmos Cosmic Adventure\COSMO1.EXE use "Cosmos Cosmic Adventure.png" .ini (configuration) Files The .ini files contain the monitors' coordinates for placing the emulator window. The Upper Left x,y coordinate and the Lower Right x,y coordinate Example: Upper Left X Coordinate=240 Upper Left Y Coordinate=100 Lower Right X Coordinate=1680 Lower Right Y Coordinate=1080 The platform ini file must be named the exact same as the platform. If copied from RocketLauncher, you may need to rename it (removing any under_scores). i.e. \BezelLauncher\Bezels\Sony PSP\Sony PSP.ini For game-specific ini files, if they are located in a subfolder below /[platform_name]/ (see Bezel Images, Option 2, above), they can have any filename. If they are inside the /[platform_name]/ folder (Option 1), then they must be named the exact same as the games ROM file or Title. If a game-specific .ini file doesn’t exist, the plugin will use the games platform.ini file. Launching different game versions Also known as Additional Apps, when right-clicking a game and selecting Play Version, the Additional App is not required to have its own bezel files. If the Additional App doesn't have its own bezel, the plugin will look for the Default Games' bezel. If neither of those exist, it will use the platforms’ bezel. This eliminates the need to have a separate set of bezel files for each version of the game. Useful since they most likely all use the same image. This only works for games that are Additional Apps. Plugin Folder Structure As always, any thoughts, views, opinions, [constructive] criticism, comments and suggestions are welcome. Submitter JoeViking245 Submitted 12/02/2023 Category Third-party Apps and Plugins
-
 These custom console themed overlays were edited and assembled by me to play your retro console games with a unique nostalgic bezel on Retroarch. Please enjoy and have fun. Please give me credit and the others involved if you use it on your Youtube channel. Thanks. The Mega Bezel Reflection Shader is by Hyperspacemadness Some of the original artwork came from ReignStumble Credit is given to RetroKenesis for the bezel frames Here's a Tutorial on how to add them to Retroarch. Older versions...
- 179 replies
-
- 13
-
-
-
-
- video
- orionsangel
- (and 14 more)
-
Version 2.2.0
1,259 downloads
What is it? Use this plugin to display bezels for emulators that don't natively support them. What does it do? It displays a bezel and resizes the emulator window to fit within the bezels transparent area. What's required to make this plugin work? LaunchBox v13.3 (or newer), the plugin file, bezel images and some minor setup. No more. No less. (See Setting up) Do I need to provide my own bezel images? Yes. (See Setting up for where to place them) Will it work with game specific bezels? Yes. Will this work with all emulators? Yes, with exception. RetroArch and MAME emulators will not show in the list of emulators and cannot be used with this plugin. The emulators that have been tested so far all work. Some adjustments may be necessary. (see Emulator Settings) Will this work with storefront games or Windows games? No. Can I use my existing RocketLauncher bezel configuration files?You can use the existing platform.png and platform.ini files from RL. These existing files should be located under: /RocketLauncher/Media/Bezels/platform_name/_default/something.ini (and something.png) (See Setting up [step #3]) What are the .ini files for? The .ini (configuration) files tell the plugin how to resize and move the emulator window to fit within the bezel. (See .ini (configuration) Files for more info and Testing for creating and saving them) Can this plugin add shaders as well? No. Yes. See Using Shaders (new v2.1.0) Disclaimer This works on my test PC. I didn’t test it on my cab because I didn’t want to change my emulator settings to not use fullscreen (see Emulator Settings). Outside of RetroArch and MAME, I don’t use bezels, so didn’t want to mess-up-a-good-thing. There are no guarantees, express or implied… blah blah blah blah blah blah blah. There is no risk. This plugin makes no changes to LaunchBox or your emulators. If you decide this isn’t for you, simply undo any fullscreen changes you made and (with LB/BB not running) delete the BezelLauncher folder. Special Thanks Special thanks to @MadK9 for the idea, direction and help with testing! Without him, I would have never contemplated starting this project. Also a big thanks to @Sbaby for testing un-tested emulators with the plugin. Installing With LaunchBox/BigBox not running... Download the plugin .zip file "Unblock" the file Right-click the file, select Properties, check the box "Unblock", click OK. Or better yet, just use 7-zip to open the file Copy the contents (a folder called "BezelLauncher") into your \LaunchBox\Plugins\ folder Start LaunchBox Setting up Start BezelLauncher Setup from the LaunchBox Tools menu, then click Close This will create the \Plugins\BezelLauncher\Bezels\platform_name\ subfolders Copy your bezel images into their respective platform_name subfolders See Bezel Images for more information (optional) If you have existing RL platform_name.ini files, copy those alongside the image files See .ini (configuration) Files for more information Restart BezelLauncher Setup Select a platform Choose an emulator you wish to use for that platform. Check Disabled to enable it Click Test Adjust (Move/resize) the orange frame to fit within the view area of the bezel (See Testing) Click Shaders to enable, adjust and change shader (see Using Shaders) (new v2.1.0) Click Save [to save the .ini file] Click Save on the main setup screen to add the emulator to the list of Enabled platform emulators Repeat for other platforms and emulators you wish to add You must click "Save" for each emulator you've enabled, separately. Maintenance After adding/removing platforms or emulators Run BezelLauncher Setup Click Refresh Continue with Setting up, step #5 Testing To configure the placement of the emulator window within the bezel (Requires an existing bezel image): Run BezelLauncher Setup Select a platform and an emulator Enable it (if it's not already) Click Test Move and resize the frame Click [and hold] the left or right side of the frame to move it around Click [and hold] the bottom right corner to resize Use the on-screen buttons to fine-tune the adjustments The on-screen display will show information about the emulator window. (You can click and drag the OSD to move it around as needed) x, y = upper left monitor-coordinates of the emulator window w, h = width and height of the emulator window x, y = lower right monitor-coordinates of the emulator window If any of the values are red, they are off the screen The OUTSIDE edge of the frame is the emulator window extents After adjusting, click Save. This will overwrite any existing configuration file. Using Shaders (new v2.1.0) First you need some shaders. Place the .png images in the /Bezels/Shaders/ folder (Scanline.png 'shader' is included) Start BezelLauncher Setup Select your platform and emulator and click Test Click Shaders Check the box to turn shader on Use the slider to adjust the shader Adjust the opacity down to lighten the shader Use the drop-down box to select a different shader Click Save to save your settings Parameters Depending on the emulator and the bezel, you may need to check 1 or more of the following parameters: (h) hideStuff Check this if you see the desktop behind bezel while the game is loading. This adds a black background during the startup process. (s) startupSleeper “Hide stuff” for a little longer during startup (3 seconds) (l) longerSleep Same as above (4 seconds) (g) hideGameStartup Check this if LB Game Startup screen is showing behind the bezel at game startup When selecting a platform, if the plugin detects an emulator that has been tested, “suggested” parameters will be shown. Your mileage may vary. Emulator Settings For the plugin to move/resize the emulators’ window, you will need to disable fullscreen in the emulator(s). This may be as easy as removing "-f" or "-fullscreen" from the Default Command-line Parameters (depending on the emulator). Beyond that, of the emulators I've tested, the only one that needs to have its Default Command-line Parameters altered is SuperModel. You will need to manually set the resolution. Start BezelLauncher Setup Select your Super Model 3 platform and Enable it Click Test and after adjusting the frame to where you want it, make note of the W(idth) and H(eight) #'s shown in the OSD. Save and Close. (Be sure to click Save on the main Setup screen to save Enabled as well.) Edit your SuperModel emulator (in LaunchBox) and set the Default Command-line Parameters to "-res=W,H" (no quotes, no spaces and replacing W & H with the #'s noted above) Example: -res=1420,1076 Bezel Images When you run BezelLauncher Setup for the 1st time, the plugin creates subfolders for each of your eligible platforms. They are created in: \LaunchBox\Plugins\BezelLauncher\Bezels\[platform_name]\ The platform image file needs to be in the [platform_name] folder and must be named the exact same as the platform. \BezelLauncher\Bezels\Sony PSP\Sony PSP.png Game-specific bezel files Game-specific bezel folders (or files) can be named after the games ROM filename or the games Title. Using the games Title: If the Title has 'invalid file name characters', those characters will need to be replaced with _ (underscore). The exact same way LaunchBox does with its image files (but without the -01 suffix). Example: Title = Disney-Pixar's Toy Story 2: Buzz Lightyear to the Rescue! Bezel = Disney-Pixar_s Toy Story 2_ Buzz Lightyear to the Rescue!.png NOTE: Additional Apps game Titles are (i.e.) "Play USA Version...". So the bezel would be "Play USA Version....png". Same rules apply with 'invalid file name characters'. Invalid characters are: < (less than) > (greater than) : (colon) " (double quote) / (forward slash) \ (backslash) | (vertical bar or pipe) ? (question mark) * (asterisk) ' (single quote) Not technically invalid (post-DOS), but consistent with LaunchBox character replacement Storing game-specific bezels: Option 1: Place your game bezel images directly inside their respective \[platform_name]\ folder. Game-specific image files must be named the exact same as the games ROM file or the games Title (accounting for invalid characters). example: \BezelLauncher\Bezels\Sony PSP\After Burner - Black Falcon (USA) (En,Fr,Es,It,Nl) (PSP) (PSN).png Option 2: Place your game-specific bezel image folders under the \[platform_name]\ folder. The subfolder must be named the exact same as the games ROM file or Title (barring invalid characters). The .png and .ini files in the subfolder can be any filename. example: \BezelLauncher\Bezels\Sony PSP\After Burner - Black Falcon (USA) (En,Fr,Es,It,Nl) (PSP) (PSN)\thisIsAnyFileName.png See Launching different game versions for information about bezel requirements for games that are combined as Additional Apps. ScummVM Setting up ScummVM for use with this plugin: In LaunchBox, Edit games using ScummVM. In the ScummVM section, have both checkboxes un-checked. (Fullscreen and Aspect Correction). This cannot be done using the Bulk Edit Wizard, so will need to be done on a per-game basis. One-at-a-time. If it's not displaying correctly with just the above, try the (optional) following: Navigate to /LaunchBox/Third Party/SummVM/ and start ScummVM.exe. On the Graphics tab, set Graphics Mode to opengl. Leave the other 2 as default and the check box's un-checked. Click OK and Exit. ScummVM Bezel Files: To use bezels with games using LB's integrated ScummVM, you will need to set them up manually. It will not appear in BezelLauncher Setup. Navigate to the plugins Bezels subfolder and add your platform folder. i.e. \LaunchBox\Plugins\BezelLauncher\Bezels\ScummVM\ Add your platform default png and ini files to this folder. i.e. ScummVM.png ScummVM.ini Game specific bezels for ScummVM must be named the same as the Game Data Folder. i.e. D:\LaunchBox\Games\ScummVM\King's Quest 1 - Quest for the Crown\[game files] use: "King's Quest 1 - Quest for the Crown.png" DOSBox The integrated version of DOSBox is NOT supported by this plugin. I couldn’t get it to cooperate 100% of the time. So going with plan “B”. To use DOSBox with this plugin, you will need to install and set up DOSBox-X. Setting up DOSBox for use with this plugin: Note: BezelLauncher Setup will NOT show your DOSBox platform ('MS-DOS') as an available platform. So don't bother looking for it. Download DOSBox-X DOSBox-X releases can be found here: https://github.com/joncampbell123/dosbox-x/releases Download the vsbuild-win64 version. (direct link for the download file) Create a new folder under \LaunchBox\ThirdParty\ and name it DOSBox-X Extract the contents of the downloads "\bin\x64\Release\" folder into the new folder Be sure to unblock the zip file before extracting (unless you’re using 7-Zip) Configuring DOSBox-X In Windows Explorer, navigate to \LaunchBox\ThirdParty\DOSBox-X\. Make a copy of dosbox-x.conf. Rename the copy to [something like] "BL-dosbox-x.conf" Right-click the new 'BL-dosbox-x.conf' file and select edit (Notepad++ works great for this. But any text editor (Notepad) will work) Look for the following keys and change their Values as shown: (starting on approximately line 78) fullresolution = 1400x1080 windowresolution = 1400x1080 windowposition = 260,0 output = ttf showmenu = false "1400x1080" (2 locations) is the dimension of the transparent area of your bezel. Adjust as necessary. From your MS-DOS.ini file, use [Right X]-[Left X] for the 1st value (1400) and [Right Y]-[Left Y] for the 2nd (1080) "260,0" is the upper-left coordinate of the transparent area. Use the Left-X value for the 1st number and Left-Y for the 2nd. Save the changes and close the editor. Configure games to use DOSBox-X The following assumes your MS-DOS platform games are already setup to use the integrated version of DOSBox. In LaunchBox, select all your DOSBox games and press Ctrl+E to start the Bulk Edit Wizard. (Select 1 game in the MS-DOS platform, then press Ctrl+A to select all) On the 2nd screen select the Field Custom DOSBox Version EXE Path for Value, Browse to and select dosbox-x.exe Click Next, Next Click “Yes, I would like to make more changes” select the Field DOSBox Configuration File for Value, Browse to and select the new file you created (BL-dosbox-x.conf) Click Next. Next (again). Click "No, I would not like to make more changes" MS-DOS Bezel Files: This assumes your DOSBox platform is called "MS-DOS". In the Bezels subfolder under the plugin folder, create a new folder called 'MS-DOS'. In \LaunchBox\Plugins\BezelLauncher\Bezels\MS-DOS\, add your bezel files (MS-DOS.png and MS-DOS.ini). Game specific bezels for DOSBox need to be named the same as the Game Data Folder i.e. D:\LaunchBox\Games\MS-DOS\Cosmos Cosmic Adventure\COSMO1.EXE use "Cosmos Cosmic Adventure.png" .ini (configuration) Files The .ini files contain the monitors' coordinates for placing the emulator window. The Upper Left x,y coordinate and the Lower Right x,y coordinate Example: Upper Left X Coordinate=240 Upper Left Y Coordinate=100 Lower Right X Coordinate=1680 Lower Right Y Coordinate=1080 The platform ini file must be named the exact same as the platform. If copied from RocketLauncher, you may need to rename it (removing any under_scores). i.e. \BezelLauncher\Bezels\Sony PSP\Sony PSP.ini For game-specific ini files, if they are located in a subfolder below /[platform_name]/ (see Bezel Images, Option 2, above), they can have any filename. If they are inside the /[platform_name]/ folder (Option 1), then they must be named the exact same as the games ROM file or Title. If a game-specific .ini file doesn’t exist, the plugin will use the games platform.ini file. Launching different game versions Also known as Additional Apps, when right-clicking a game and selecting Play Version, the Additional App is not required to have its own bezel files. If the Additional App doesn't have its own bezel, the plugin will look for the Default Games' bezel. If neither of those exist, it will use the platforms’ bezel. This eliminates the need to have a separate set of bezel files for each version of the game. Useful since they most likely all use the same image. This only works for games that are Additional Apps. Plugin Folder Structure As always, any thoughts, views, opinions, [constructive] criticism, comments and suggestions are welcome. -

Version 1.0.0
1,831 downloads
While I am not the original creator of the LaunchBox / BigBox logos, I have the best versions available in this collection. After roughly 30 hours, I have redrawn and perfected the recognizable cube shape and have multiple variants for multiple use cases. All previously used versions are available here, as well as new versions that are slightly different. All my drawings use perspective correct line work making these the best versions of these logos. They come in three sizes Small (1920x1080 max), Large (3840x2160 max) and SVG which is a vector file type. A lot of the BigBox logos can’t be properly saved in SVG format so I included vector PDFs for all logos as well. The LaunchBox logo had some uneven shapes which I corrected. In addition, I noticed the entire LaunchBox logo is not a perfect cube. Its sides are actually rectangles. I never noticed this until now. Once I saw it, I created a separate perspective correct version. I created a further revised version as well, with thicker lines, consistent line widths and punchier colors. The same standard goes for the BigBox logos. The thicker LB logo also has a glass BigBox variant which took a solid amount of work to get right. I really tried to make the glass thick enough to not be too busy and easily visible large or small. I went back and forth on every shade of every gradient until I felt it looked pretty good against dark and light backgrounds. The only versions that are official are the original taller designs. I wanted to improve them as much as I could while still keeping all of the artist’s intent. Feel free to use these how you’d like. I’ll always appreciate credit. If you like what you see here, please also check out my extensive platform logo collection:- 7 comments
- 1 review
-
- 30
-
-
-
-
-
- launchbox logo
- bigbox logo
- (and 9 more)
-
I was able to download and play some Wii U games that already had the wuv file. But when it came to the RPx files in the code folder, I did exactly what was instructed to do with the Folders on tutorial videos, but it simply would not load any of them. Can someone help?
-
Hello Everyone, I have been searching for the best way to view my old gaming magazines for a while now and thought I would share what I found. I love them as much as I love the games, and felt they looked pale in comparison to everything else I have done with launchbox. This isn't a post about how I found the BEST possible way to do this, I'm actually hoping that somebody might come along and make it better as I don't know everything about pdf and the viewers. This will likely be something I keep adding to as I go on with this, i can tell it will take me some time to finish it but I really enjoy doing it...as they say, time you enjoy wasting isn't time wasted. I started my journey few years back and got alot of information from the forums here about how to add them and get the covers and such, it was very helpful. I just....hate the pdf viewers, all of them. I use them for strategy guides but for my magazine or comic stuff it just takes away all the immersion. Launchbox has come a long way since then, and we now have 3d boxes that can be edited to look like a magazine! Suddenly I started to see what I always wanted out of my magazine pdf collection, if I could just find a better way to read them. After months of trial and error, reading and testing, I think I found my winner. There are apps that convert PDF files into flipable interactive exe's, none are free (that I'm aware of) but man does it make a difference. You can flip them with the mouse, keyboard, etc. You can literally grab the page and wiggle it around with the mouse! These combined with LB have blown me away, im not far into converting them all but I plan to document my journey here so others can get the most out of their old mag collections. PLACES TO FIND MAGAZINES CONVERTING PDF TO FLIPBOOK LAUNCHBOX 3D MODEL SETTINGS & GETTING COVER/BACK ART ADDING EXTRAS TO YOUR MAGAZINES (DEMO/VHS/ETC) AS ADDITIONAL APP USEFUL TOOLS (POSTED BY USERS) MAGAZINE MEDIA UPLOADED BY OTHER LB USERS MAGAZINE MEDIA FOR LAUNCHBOX I will add my media for the magazines I have in my collection here if anybody needs them. You will need to rename your magazines to match the names in the zips if you want to copy/paste these, can also add them manually. I will admit I didn't get very creative with the fanart, just a way to distinguish the magazines for my "most recent" and "most played" buttons. I added Front Covers, Back Covers, and Fanart into each zip. Also included platform icon, clear logo, and spline. I created a download section for all the media I've pulled so far, it can be found in the link below. Custom Clear logos in any of the sets are made by Baggio Magazine Platform Media: Magazine Platform Icon.zip Magazine Edge Spline.zip Magazine Platform Media.zip
-
I'm unable to login to the LaunchBox Games Database on Windows Server 2019 Standard 64-bit (10.0, Build 17763) either through LaunchBox 13.23 or through a web browser (Firefox, 142.0.1 (64-bit). When I try to register with my email, it tells me I already have an account associated with my email address. I haven't forgotten my password; I use a password manager.
-

portable setup External SSD 100% Portability for Launchbox, Help!
Deemeister36 posted a topic in Noobs
I was wondering if it is possible to make my (F:) external 4TB SSD 100% portable? I notice that some Emulators/PC games rely on C:/Documents and C:/Appdata/Roaming, even though I choose my external, when installing. I hear that if you create a .txt called "portable" inside the emulator folders, that it should do the trick? Please let me know if you need some pictures or if you need to know specifically, which emulator/pc game. Thanks! Dee -
Ps5 Theme for Big box View File Best theme for gaming on big box Submitter ANASS RAKID Submitted 12/20/2021 Category Big Box Custom Themes
-
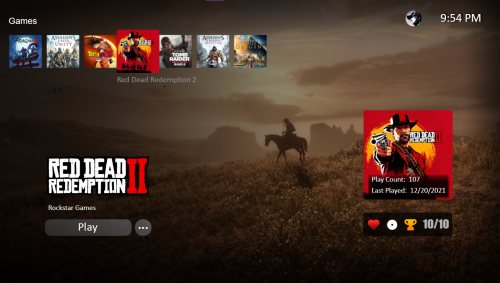
Version 1.0.0
1,292 downloads
Best theme for gaming on big box -
I keep running into an error whenever I try to remove an image for a game or a playlist directly in LaunchBox. I’ve already tried reinstalling LaunchBox, but the issue persists. I confirmed I don’t have another instance of LaunchBox running. This problem didn’t exist before—I used to be able to remove images without any issues. I think it may have started after a previous crash when images were in the middle of downloading during a game import (though I don’t remember exactly what the crash was). I’ve noticed the error seems to happen specifically when I’m trying to remove an image that is currently being displayed in the editor (e.g., the logo of the game I’m editing or the fanart of the playlist I’m editing). Error Message: Could not delete file "C:\Games\Launchbox\Images\Playlists\Darksiders\Fanart\Darksiders.png": The process cannot access the file 'C:\Games\Launchbox\Images\Playlists\Darksiders\Fanart\Darksiders.png' because it is being used by another process. Has anyone else run into this? Any suggestions on how to fix it would be greatly appreciated.
-
Could someone do a NEW YouTube tutorial for installing Launchbox, and then RetroArch (and other gaming installs) on a Nvidia ShieldTV please? I ask because right now the tutorials I’ve search are different from the interface I’m using forcing me into an impasse because I don’t know how to install RetroArch because the steps on the tutorials are different from what actually see and therefore what I can actually do.
-
Hi, I currently have a standalone installation of MAME running and I have no issues. I have set it up to my liking with CRT filter etc. and I am looking at using this installation with LB. I guess I could just point LB at MAME and its ROMS but I would like to have a smaller amount of games for this setup with LB and also have MAME within LB for when I eventually set up an arcade. My question is, If I choose to run the installer, install MAME within LB and then copy over the top my MAME setup, will this work? Then I would have the settings I want, and edit the ROM selection to my taste. Does a copy/paste job work? Can I run two separate installations of MAME at once? I feel this is a simple answer but I would like to know before I start. MAME was tricky to setup on my first occasion and I do not want to run into more issues. Thanks, Peter
-

Version 2.1.0
265 downloads
Visual Pinball X VideoSnap Creator (Playfield Recorder) Use this plugin to create videosnaps of the Visual Pinball X tables on your PC/Cab. This will record any VPX table at any orientation and from any monitor. Why record your own? There already exists a lot of video snaps of most every Visual Pinball Table. You can even find vertically oriented (portrait) ones for your pincab. The issue is they may not be recordings of the actual version of the table you use. Or you simply can’t find one for a particular Original. Or you just don’t like the one(s) you found. Features: This will automatically ‘find’ your table’s playfield view so there’s no need to set up which monitor to look at or set any scale, resolution or aspect ratio. Your VPX default monitor settings will be displayed for your reference. (new v2.0) Record the backglass at the same time as the playfield. (optional) (new v2.0) Record the DMD (3rd screen) at the same time as the playfield. (optional) (new v2.0) Record the tables gameplay sounds along with the playfield video. (optional) (new v2.1) Add the tables Clear Logo to the end of the video. (optional) Included is an AutoHotkey script that the plugin uses to quickly bypass the VPinMAME window when loading a table. (Should reduce loading time by approximately 4 seconds per table) (This also works well if added to your Running AutoHotkey Script tab for your VPX emulator ) Record durations can be set between 5 seconds and 3 minutes. If your playfield is in portrait mode, the saved output video can be rotated for proper viewing. (Options are 0º (default), 90º, 180º, -90º) You can set the video to record at 60 FPS (Depreciated v2.1) All video will be recorded at 30 FPS Videos are automatically saved to the default folder (/Plugins/VPXVideoCreator/CreatedVideos/) or you can change it to be placed directly into your /LaunchBox/Videos/Visual Pinball/ folder. Installing: Download and unblock the zip file. (right click the file, select properties and check the Unblock check box and click OK) Copy the VPXVideoCreator folder (from inside the zip) into your /LaunchBox/Plugins/ folder. If updating to 2.0, overwrite the existing file. Quick Start: Start LaunchBox (always a good place to start) Right click one of the tables in your Visual Pinball platform and select Create VPX video. Set how long you want your final recording to be. Click Capture Video. The default save location is in the plugins’ subfolder, “CreatedVideos”. Setting up to record audio: (new v2.0) (optional) You will need to register “audio_sniffer-x64.dll”** (included with the plugin) with Windows. Basically what this does is makes all your audio output accessible in one place. Think of it as a Frontend for all your audio output devices. This “frontend” will be labeled “virtual-audio-capturer”. 2 ways to register/unregister audio_sniffer are: The easy way: Run the included batch file (located in the plugins AudioSniffer subfolder). You need to run this as administrator. The batch file can also be used to unregister it. Follow the prompts. Old school: Open the command prompt [as administrator] in the “AudioSniffer” subfolder. To Register: type in then press enter: regsvr32 audio_sniffer-x64.dll.1 To Unregister: type in then press enter: regsvr32 /u audio_sniffer-x64.dll.1 **NOTE: The file is named "audio_sniffer-x64.dll.1" (with a “.1” at the end). Otherwise LaunchBox will try to load it as a plugin, which will cause errors. Source code for audio_sniffer can be found here: https://github.com/rdp/virtual-audio-capture-grabber-device Using the plugin: Set Delay: This is the delay time between clicking Capture Video and the video actually starting to record. Set to bypass (in the recording) the VPX editor loading the table. Default is 12 seconds. Options are from 5 to 30 seconds. Record Duration: Set to how long you want your video snaps to be. Default is 30 seconds. Options are from 5 to 180 seconds (3 minutes). Video Rotation: If you play on a rotated monitor (or TV), you will want to set this to the direction your monitor/TV is rotated. Default is 0º. Options are 0º, 90º, 180º and -90º. Include Audio: (new v2.0) Check this box to include the tables playfield sounds with the recording (needs to be configured). Record Backglass: (new v2.0) Check this box to record the Backglass at the same time as recording the Playfield. This will be saved to a separate file that is saved in the “/VPXVideoCreator/CreatedVideos/Backglass/” folder. The backglass is typically on a 2nd monitor, but (if setup) will get recorded separately no matter which monitor it’s on (single or otherwise). The file will be saved as [the-games_Title]_BG.mp4 Record DMD: (new v2.0) Check this box to record the Dot Matrix Display (DMD) at the same time as recording the Playfield. This will be saved to a separate file that is saved in the “/VPXVideoCreator/CreatedVideos/Backglass/” folder alongside the backglass video. The DMD is typically on a 3nd monitor, but (if setup) will get recorded separately no matter which monitor it’s on (single or otherwise). The file will be saved as [the-games_Title]_DMD.mp4 Add Clear Logo to the end of the video: (new v2.1) Check this box to add the tables Clear Logo (if one exists) to the end of the video. The logo will fade in as the video fades out during the last 2 seconds of the recording. This feature is automatically disabled if no Clear Logo for that table exists. 60 FPS Option removed (v2.1) Experimental. Check this box to record at 60 frames per second. Default is 30 FPS (un-checked). Depending on your video card (and probably some other factors too), this may or may not even be worthwhile. Change Save Location: The default save location is in /LaunchBox/Plugins/VPXVideoCreator/CreatedVideos/. The video filename will be saved as the ‘games’ Title in LaunchBox with .mp4 file extension. You can save them anywhere you want. Reset to Default: This will reset the Save Location, Delay, Duration and Rotation to their default values. Save Settings: This will save the Save Location, Delay, Duration and Rotation values you set and will load these next time you run the plugin. Save settings before video capture This is checked by default and will save any changes made when you click Capture Video and before launching VPX. Capture Video: This will launch the table you selected to open the plugin with. At the same time, the AutoHotkey script “vpxBypassPinMAME.ahk” will start. This runs in the background and waits for the VPinMAME popup window to appear and then ‘hits the spacebar’ to make it go away (sooner). The script will exit after it see the popup, or 15 seconds. Whichever comes first. After the amount of Delay time has passed, recording will begin and will continue for the set Duration. When done, VPX closes and the video gets converted. The video is saved to “_tempVideo.mkv” (in the CreatedVideos subfolder) and then gets converted to an mp4 file. After conversion, _tempVideo.mkv will be deleted. Keep temp video when done: By default, “_tempVideo.mkv” will be deleted after the video has been converted. If you want to see what the video looks like before converting, check this box. After your video is complete, go to the CreatedVideos folder to view it. Note: this file gets overwritten each time you click Create Video if you have the checkbox checked. View Saved Video Click this to view the converted video. This is the video file shown in Saved Video Location. VPX Playfield This shows the default playfield monitor settings you have setup for your Visual Pinball installation. These get read from your Registry settings: HKEY_CURRENT_USER\SOFTWARE\Visual Pinball\VP10\Player\Display The Monitor # listed may not be the same as what your Windows Display Settings says. So if it’s “wrong”, ignore it. The Image Scale (W and H) shown will be correct. If the VPX display settings cannot be retrieved from the registry, monitor #1’s information will be displayed with an asterisk (*) after the monitor number. (Monitor #: 1*) Some notes: When you click Capture Video, probably don’t click anything else until recording is complete. However once the table is loaded, feel free to drop in a coin, hit start and play until ‘your time is up’. Just don’t click on another window. Backglass and DMD recordings only work with B2S Backglass Server (which is what most of them are). PinUPPlayer windows are not supported. Designed for LaunchBox v11.3 and higher. Special Thanks! Special thanks to gtxjoe’s PBX Recorder on VPForums and Carny_Priest’s post on GameEx Forum for paving the way to figuring out an excellent approach to creating your own Visual Pinball table videosnaps. Huge thanks to @sundogak for convincing me (though it didn't take much once I saw it in action) and showing me how to add video fade and attaching Clear Logos to the videos. Also for all the testing done and invaluable insight! Future releases and enhancements: If there’s enough interest in this plugin (as in, it’s actually useful and would get used), I will look at adding: Option to record the table’s audio in with the video. (added v2.0) Ability to select multiple tables for ‘bulk recording’. Record backglass videos??? (added v2.0) Any REASONABLE request. As always, any and all feedback is welcome! -
If I update to a new version of MAME, will I have to go in and redo all my Bigbox/Launchbox playlists? I would assume I would, but crazier things happen.
-
So I noticed that im running out of space. And I see that IMAGES and MUSIC and VIDEO is now nearly 1/5 of my 500gb drive space. As well as my roms. Maybe you have experience with this and cam make suggestions. But I am still adding new roms and plan on adding the BB jukebox and music files. This is a dedicated pc win 10 LAUNCHBOX system with only launchbox and related software. I have 2 drives. 500gb ssd for software system and most roms 2TB hd for backup and lazerdisc games. Trying to keep roms on the faster drive but that is becoming increasingly difficult. Also not sure how much spare space I should have. Can someone suggest what should be where and if there is anything i dont need or how they would do it differently to optimise space and efficency ? Thanks ?
-
Hello, I have downloaded exoDOS and it is located on a separate internal drive (G drive) to where my already existing LB is located (C drive). I have: Downloaded exoDOS 6.04 Run Setup eXoDOS.bat (on G drive) Copied all of the data, manuals, music, images and videos folders from G-drive to my LB location Downloaded Link Shell Extension Created folders in my LB directory called eXoDOS\eXo\eXoDOS Right clicked on the 7,666 games in is G:\eXoDOS\eXo\eXoDOS Right clicked in the folders in step five and selected 'drop as symbolic link' After all of this, when I attempt to launch a MS-DOS games on LB it says 'The ROM file you've specified does not exist.' The reason why I am wanting to leave everything in G drive is because I don't want to add over half a terabyte more to my C drive. Would anyone please be so kind as to tell me what I have done incorrectly? Thank you in advance. EDIT: I saw in a post on Reddit someone said you have to move Parents.xml and Platforms.html from eXoDOS's Data folder into Launchbox's Data folder, so I did that and I still get the 'The ROM file you've specified does not exist' message.
-
.thumb.png.632d19a4f33f16491745f891e0ea495b.png)
Version 2.1.0
145 downloads
This is a sample pack from a full set of 142 glossy box arts for SNK Neo Geo AES. Please feel free to make a donation at our crowd-funding page if you would like us to upload the full set! -
Is there a way to always keep the "sub platforms" expanded? After closing and opening Launchbox the "sub platforms" collapse. I am using the "Default Plus" theme along with "Platform Category" selected in the top left corner.
-

© RCX Media
-

© RCX Media
-
© RCX Media
-

© RCX Media


.thumb.png.c9faf450e4d2b690a819048b18173f61.png)