 Skip to Navigation


Whether you run a simple website or a large WooCommerce store, you’ll need reliable email-sending functionality. And when it comes to sending emails, WordPress has multiple limitations.
In this tutorial, we’ll teach you how to set up WordPress SMTP settings properly, so the transactional emails sent from your website get delivered successfully.
Before we proceed, make sure to create and set up an email account for your WordPress website, as a valid sender address will be required for proper authentication and compliance.
Why do you need to set up SMTP in WordPress?
WordPress uses the PHP mail function to send emails, which isn’t the best option for several reasons.
First, the capabilities of the default email configuration are pretty limited – you can’t easily build HTML templates, embed images, or add attachments.
Second, PHP mail() lacks proper email headers. That’s why some web hosts deactivate WordPress mail settings. As a result, email delivery gets impeded, and such emails land in spam folders, lowering the domain reputation.
To improve email deliverability, it is recommended to send emails using a Simple Mail Transfer Protocol (SMTP). Unlike the PHP mail() function, the SMTP server requires a header authentication and supports security mechanisms such as SSL and TLS.
Some WordPress hosts may have an SMTP server already pre-configured for each website – but this is more of a rare exception than a trend among hosting providers. To ensure reliable email delivery from your website, it’s often recommended to work with a specialized web design company that understands the intricacies of email configuration.
For that reason, you have to set up SMTP manually. You have two main options for this:
- Use the PHPMailer library;
- Create an SMTP connection with the help of a WordPress plugin.
Setting up WordPress SMTP with PHPMailer
To send email programmatically from WordPress using SMTP, you’ll need the PHPMailer library and some coding.
The first step is to install the composer according to these instructions. In the root directory of your WordPress installation, create a composer.json file. Add the following code to the composer.json file to require the PHPMailer library:
"phpmailer/phpmailer": "6.9.1"Then, the following script will configure PHPMailer settings to use SMTP server to send HTML emails with attachments from localhost.
<?php
//Import PHPMailer classes into the global namespace
//These must be at the top of your script, not inside a function
use PHPMailer\PHPMailer\PHPMailer;
use PHPMailer\PHPMailer\SMTP;
use PHPMailer\PHPMailer\Exception;

//Load Composer's autoloader
require 'vendor/autoload.php';

//Create an instance; passing `true` enables exceptions
$mail = new PHPMailer(true);

try {
    //Server settings
    $mail->SMTPDebug = SMTP::DEBUG_SERVER;                      //Enable verbose debug output
    $mail->isSMTP();                                            //Send using SMTP
    $mail->Host       = 'YOUR_Mailtrap_Host';                   //Set the SMTP server to send through
    $mail->SMTPAuth   = true;                                   //Enable SMTP authentication
    $mail->Username   = 'api';                                 //SMTP username
    $mail->Password   = 'YOUR_Mailtrap_Password';              //SMTP password
    $mail->SMTPSecure = PHPMailer::ENCRYPTION_STARTTLS;         //Enable implicit TLS encryption
    $mail->Port       = 587;                                    //TCP port to connect to; use 587 because Mailtrap has `SMTPSecure = PHPMailer::ENCRYPTION_STARTTLS`

    //Recipients
    $mail->setFrom('from@example.com', 'Mailer');
    $mail->addAddress('joe@example.net', 'Joe User');     //Add a recipient
    $mail->addAddress('ellen@example.com');               //Name is optional
    $mail->addReplyTo('info@example.com', 'Information');
    $mail->addCC('cc@example.com');
    $mail->addBCC('bcc@example.com');

    //Attachments
    $mail->addAttachment('/var/tmp/file.tar.gz');         //Add attachments
    $mail->addAttachment('/tmp/image.jpg', 'new.jpg');    //Optional name

    //Content
    $mail->isHTML(true);                                  //Set email format to HTML
    $mail->Subject = 'Here is the subject';
    $mail->Body    = 'This is the HTML message body <b>in bold!</b>';
    $mail->AltBody = 'This is the body in plain text for non-HTML mail clients';

    $mail->send();
    echo 'Message has been sent';
} catch (Exception $e) {
    echo "Message could not be sent. Mailer Error: {$mail->ErrorInfo}";
}
How to set up WordPress SMTP email settings with Post SMTP plugin
If you don’t want to configure PHPMailer manually, but still want consistent email sending in WordPress, using an SMTP plugin is the best way to go. And as one of the most flexible options at your disposal, you have Post SMTP – a plugin that reroutes all outgoing emails through an authenticated email delivery service instead of relying on the default PHP mail function.
To make that workflow effective, along with the plugin, you’ll also need a sending infrastructure that can handle deliverability and monitoring on the provider side.
Mailtrap offers both a RESTful API and SMTP with fast delivery, high inboxing rates, and 24/7 tech support. Teams that use this sending tool can count on reliable email delivery as well as actionable analytics to track performance across major mailbox providers such as Office 365, Outlook, Gmail, and Google Workspace.
On top of the provider-level insights, Mailtrap also offers email logs for accessing extended sending history, including message content, HTML and CSS rendering, spam score, and delivery status.
So, how do you connect the Post SMTP plugin with Mailtrap?
Well, as Post SMTP provides native support for Mailtrap’s email sending tool, configuring the connection between the two consists of a very quick setup.
As the first step, you have to log in to your Mailtrap dashboard, open the Sending Domains section, and add the domain you’ll use as the sender.
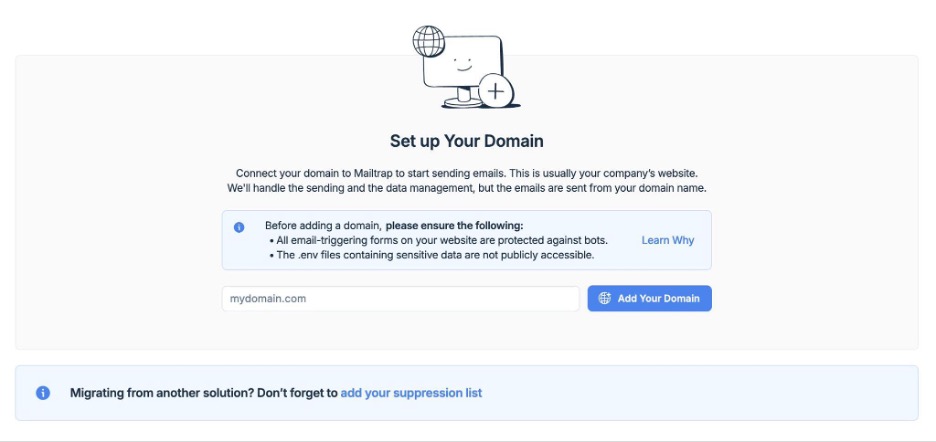
This will prompt Mailtrap to generate a set of DNS records that you need to copy into your domain provider’s settings to enable authentication and tell receiving servers that Mailtrap is allowed to send emails on behalf of your domain.
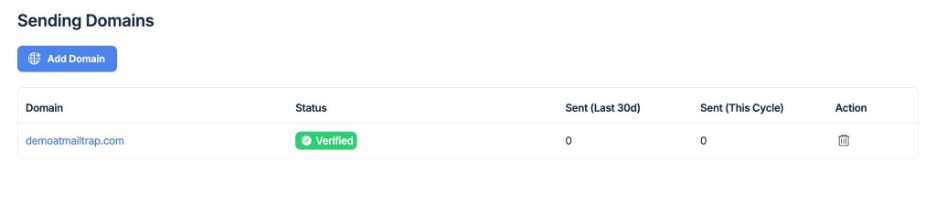
Mailtrap will check these records automatically, but if needed, you can also force a new check.
Once this process is done, the domain status will switch from Missing to Verified.
Note: At this point, you’ll also be asked to complete a short business or personal details form. This step is required for compliance and must be done before you can start sending emails.
With the domain verified, the next step is to create an API token that Post SMTP will use to authenticate with Mailtrap.
So, in the Mailtrap dashboard, head to Settings → API Tokens, add a new token, and assign the appropriate permissions.
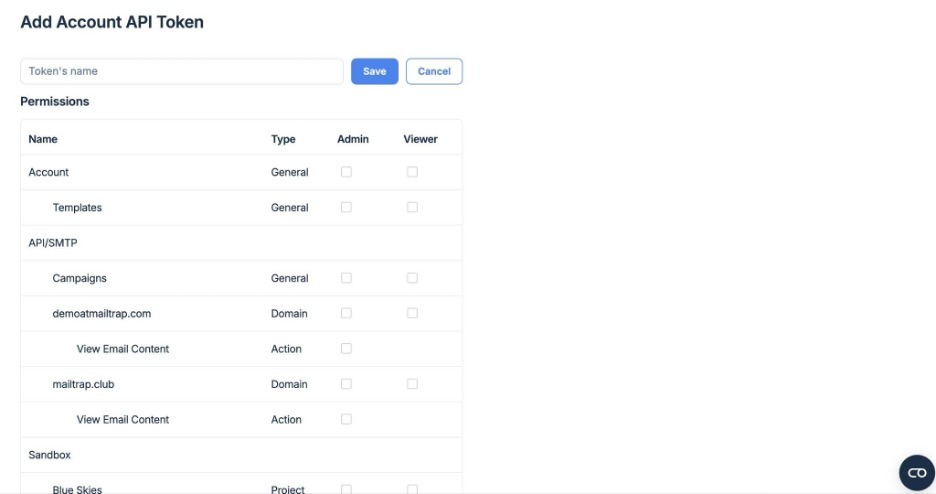
Then, simply click Save, and copy the token to somewhere secure, as you’ll need it in a moment when configuring the plugin.
Once that’s done, switch back to your WordPress dashboard and open Post SMTP.
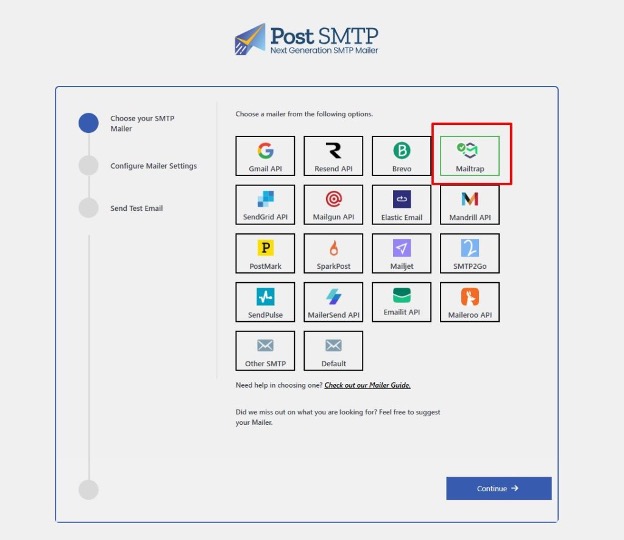
At this point, you will be greeted by a setup wizard that will guide you through the plugin configuration.
So, start the wizard and, when asked to choose a mailer, select the Mailtrap integration.
From there, you’ll be prompted to enter a few basic details:
- The From Email, which should belong to the domain you verified in Mailtrap
- The From Name, which recipients will see in their inbox
- And your Mailtrap API token, used to authenticate the connection
After you’ve entered all the details, save the settings and continue.
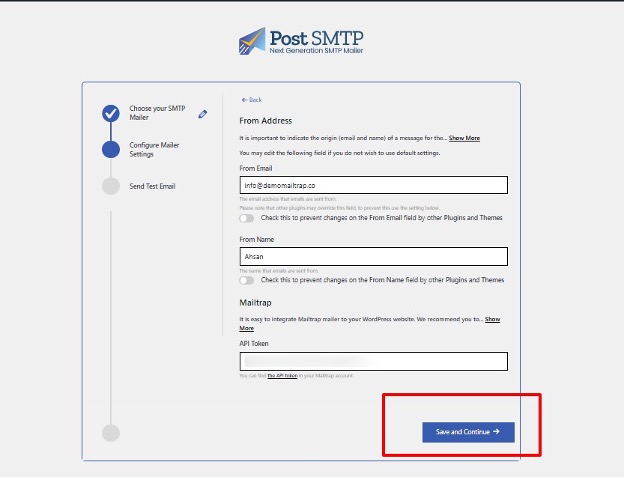
Note: If you’re using other plugins or themes that modify sender details, it’s a good idea to enable the option that prevents them from overriding the From Email and From Name. This keeps your sender identity consistent and helps avoid spoofing-related issues.
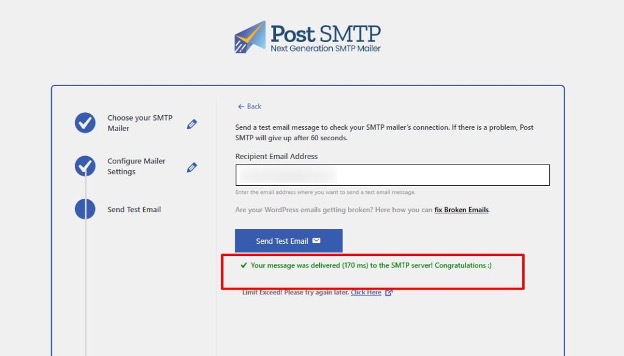
Finally, to see if everything is configured correctly, send an email directly from the Post SMTP interface by entering a recipient address and triggering a test.
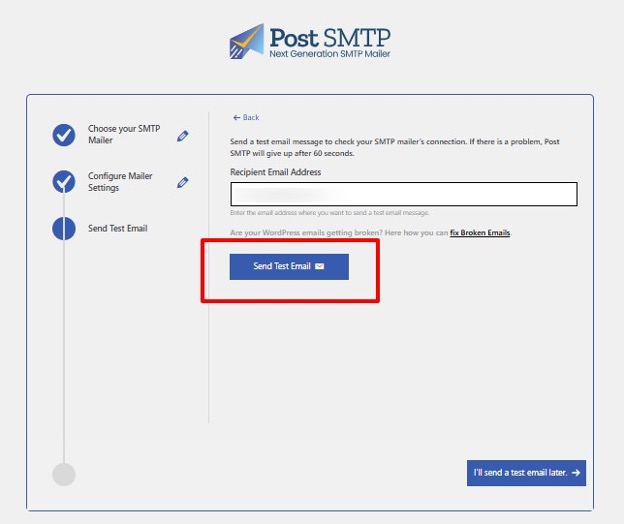
If everything works as intended, you should see a success message, and the email will arrive in the recipient’s inbox shortly after.
To exit the wizard, simply click the Finish button.
How to set up WordPress SMTP email settings with WP Mail SMTP plugin
WP Mail SMTP by WPForms is another option for configuring SMTP in WordPress if you prefer using a plugin instead of setting up PHPMailer manually.
The plugin comes in both free and paid versions and lets you either connect your own SMTP provider or use one of the supported email services.
To establish a connection between WP Mail SMTP and your WordPress website, there are three routes you can take:
- White glove setup offered by the plugin’s Elite version;
- Integration using a third-party SMTP server;
- Integration using a third-party API.
White Glove Setup
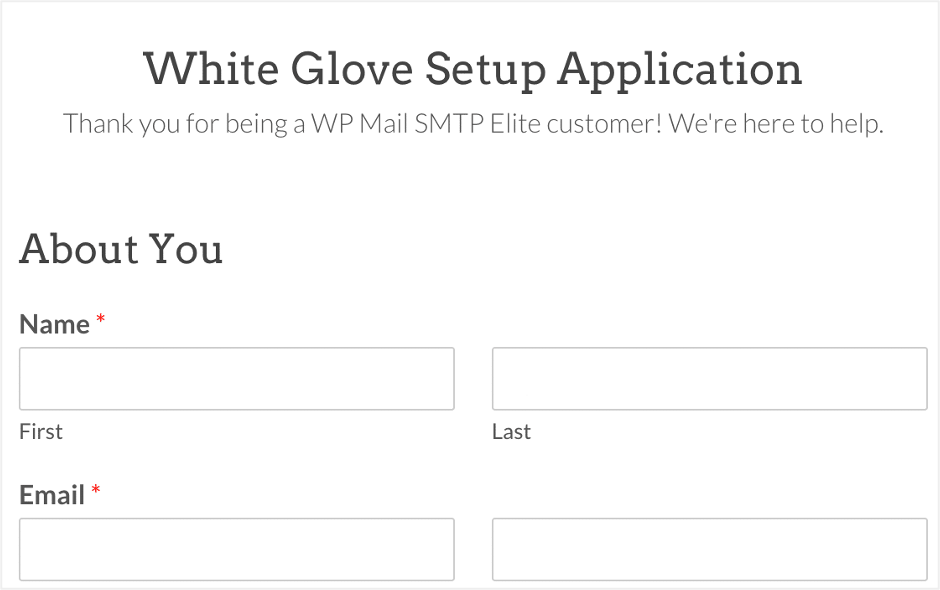
WP Mail SMTP offers White Glove Setup service to their Elite users. You’ll choose the preferred mailer, From Name and From Address, and give them the credentials of your site. They will configure the plugin settings for you, test the setup, and contact you when everything’s ready.
To request White Glove Setup, log into your WP Mail SMTP account and find the ‘Downloads’ tab. There, you’ll find ‘Apply for White Glove Set Up’ under your Elite license details.
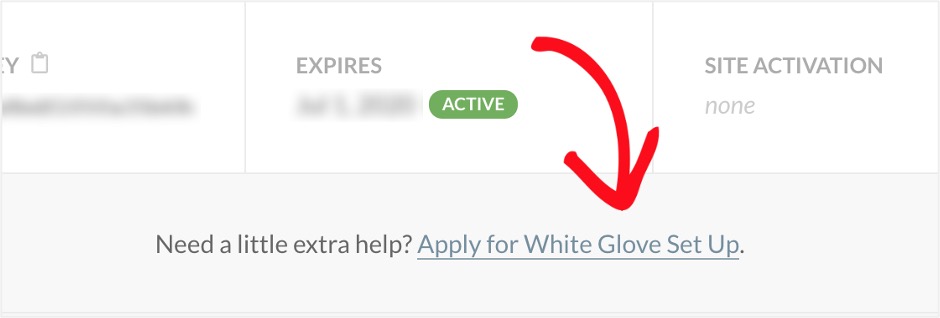
A form will pop up to gather the necessary information, such as your website credentials, preferred mailer, DNS access for your hosting provider, etc.
More information on White Glove Setup is available here.
Integrating WP Mail SMTP with Mailtrap
Though the previous option sounds simple, it has its limitations. It only allows you to choose between recommended mailers: SendLayer, Sendinblue, and SMTP.com. This means that if you want to set up a custom SMTP server or integrate a third-party email provider, you’ll have to go through the manual setup process.
In this section, we’ll focus on integrating WP Mail SMTP with the SMTP server offered by Mailtrap.
Note: As WP Mail SMTP doesn’t have a native integration with Mailtrap, you’ll need to configure Mailtrap as a custom SMTP mailer within the plugin by following a multi-step setup process.
So, first, create an account and verify your domain (step-by-step instructions are available here).
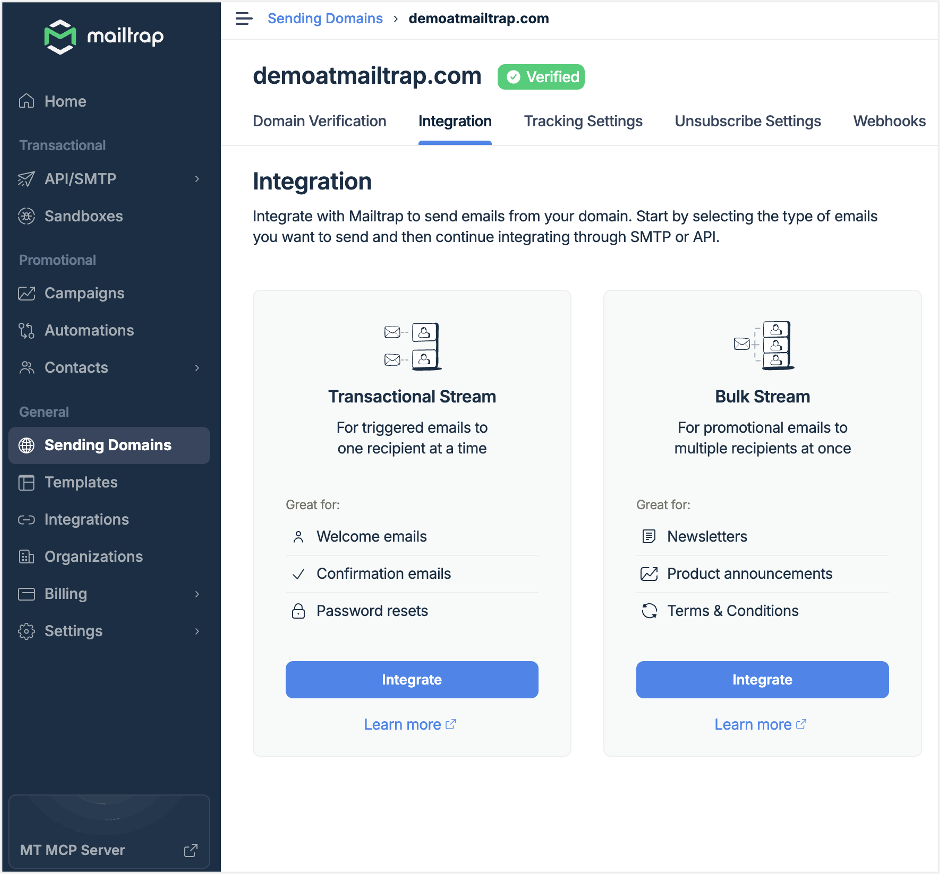
Once your domain is verified, navigate to the Sending Domains section, select the verified domain, and open the Integration tab.
There, select the Transactional Stream or the Bulk Stream depending on the type of emails you’d like to send.
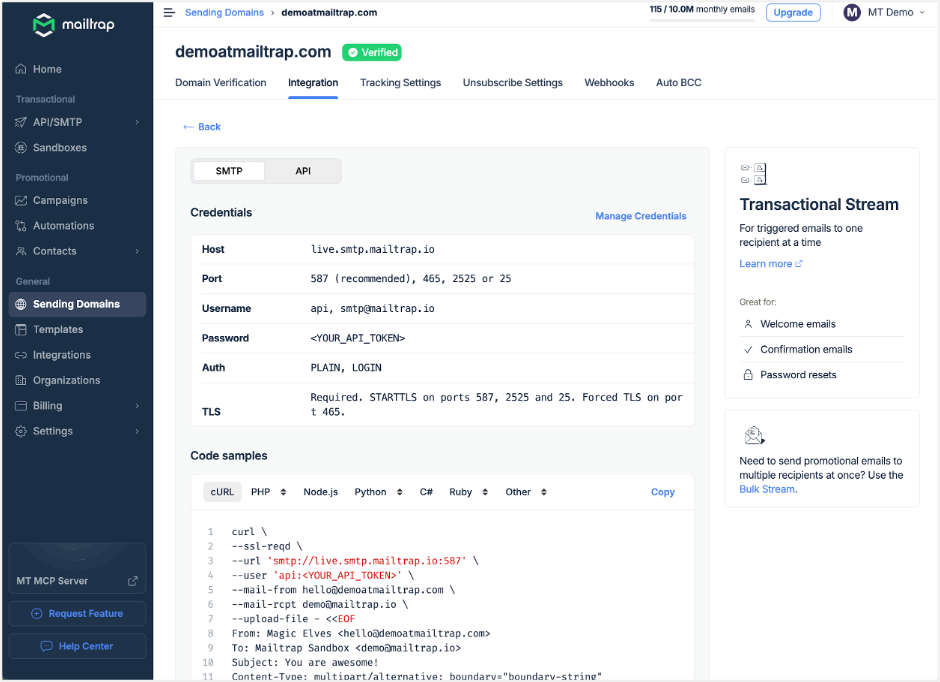
On the next page, find the corresponding credentials and copy them.
Now return to your WordPress dashboard and open the Plugins section.
There, click on Add New and type WP Mail SMTP in the search box.
After finding the plugin, install and activate it, and then head directly to the settings page.

Under the General tab, there will be a section labeled License, which allows you to connect your paid account, be it Pro, Elite, or another tier. Here, paste the license key and then click Connect. If you’re using a free version, feel free to skip this step.
Next, you have to indicate the From Name and From Email – the name you want to be displayed on your emails, and the email address your emails will be sent from. This address should belong to the domain you verified during the first step.
Note: Depending on the provider, this step may be grayed out. If so, integrate the mailer below and come back to this step later.
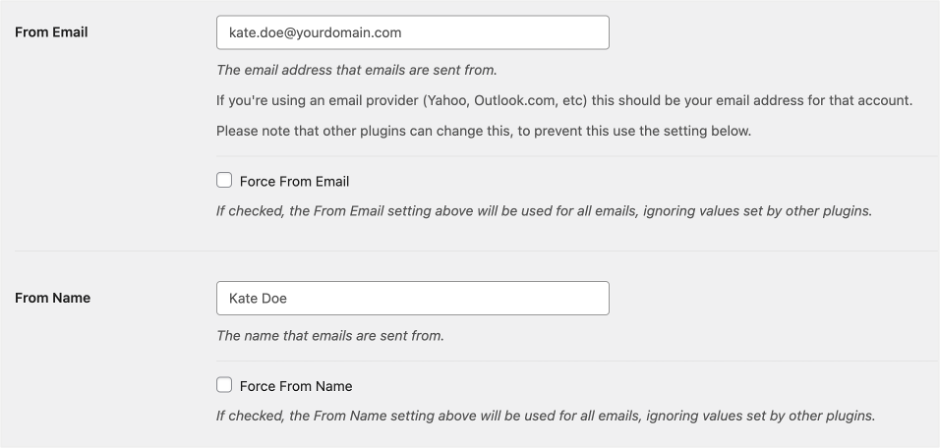
During this step, you can also configure the return path so it matches the from address. This way, bounced emails can be returned to the sender’s email address. If you don’t want your From Email to be the same as the return path, keep the box unchecked.
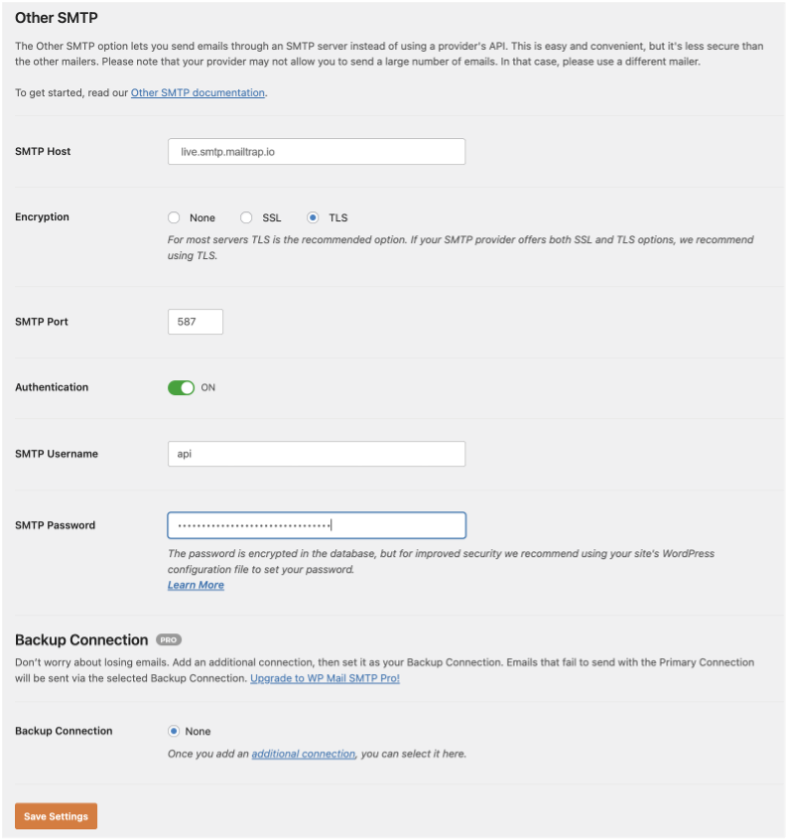
Next, scroll down and choose ‘Other SMTP’ as your mailer.
Here, you’ll need the credentials copied from your Mailtrap account, including:
- SMTP Host: live.smtp.mailtrap.io (transactional) or bulk.smtp.mailtrap.io (bulk marketing emails)
- Encryption: None, SSL, or TLS (we recommend choosing either SSL or TLS for security reasons)
- SMTP Port: 465 (for SSL) and 587 (for TLS – Recommended)
- SMTP Authentication: On or off (always toggle On)
- SMTP Username: api
- SMTP Password: SMTP password you copied from your account (for extra security measures, you can store your password in the wp-config.php file. Refer to these instructions for more info on wp-config.php).
To complete your mailer configuration, click ‘Save Settings’.
Lastly, to make sure everything is set up correctly, navigate to the Email Test tab, toggle HTML on or off, enter the desired email address, and press ‘Send Email’.
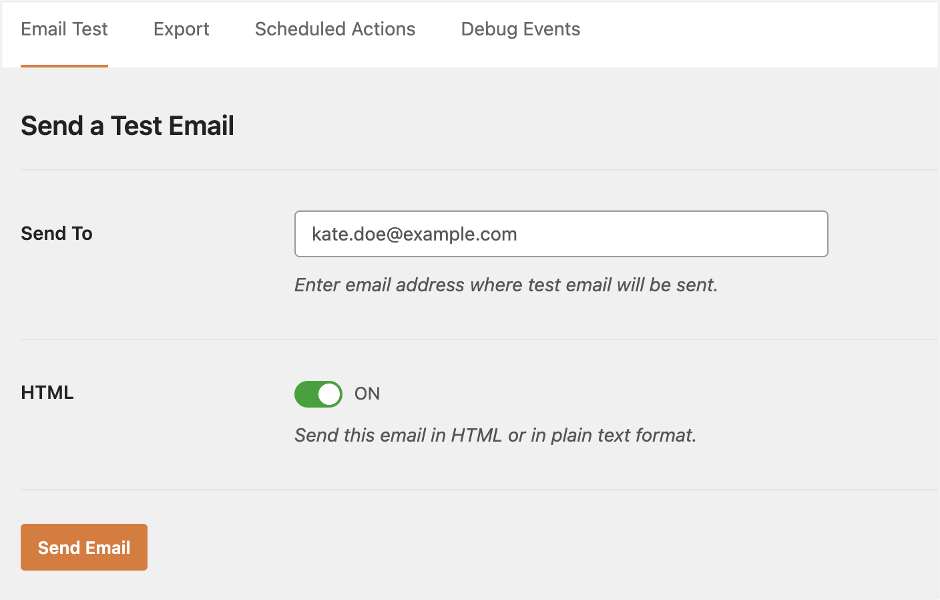
If the test email successfully reaches the recipient’s inbox, WP Mail SMTP is now properly configured to send email from your WordPress site via Mailtrap.
More WordPress SMTP plugins to consider
We’ve picked out three popular plugins that work properly according to users’ reviews and are regularly updated and tested.
But before choosing one, check the following details:
- Number of active installations;
- Compatibility/tests with the latest WordPress version;
- Frequency of maintenance and updates;
- Reviews.
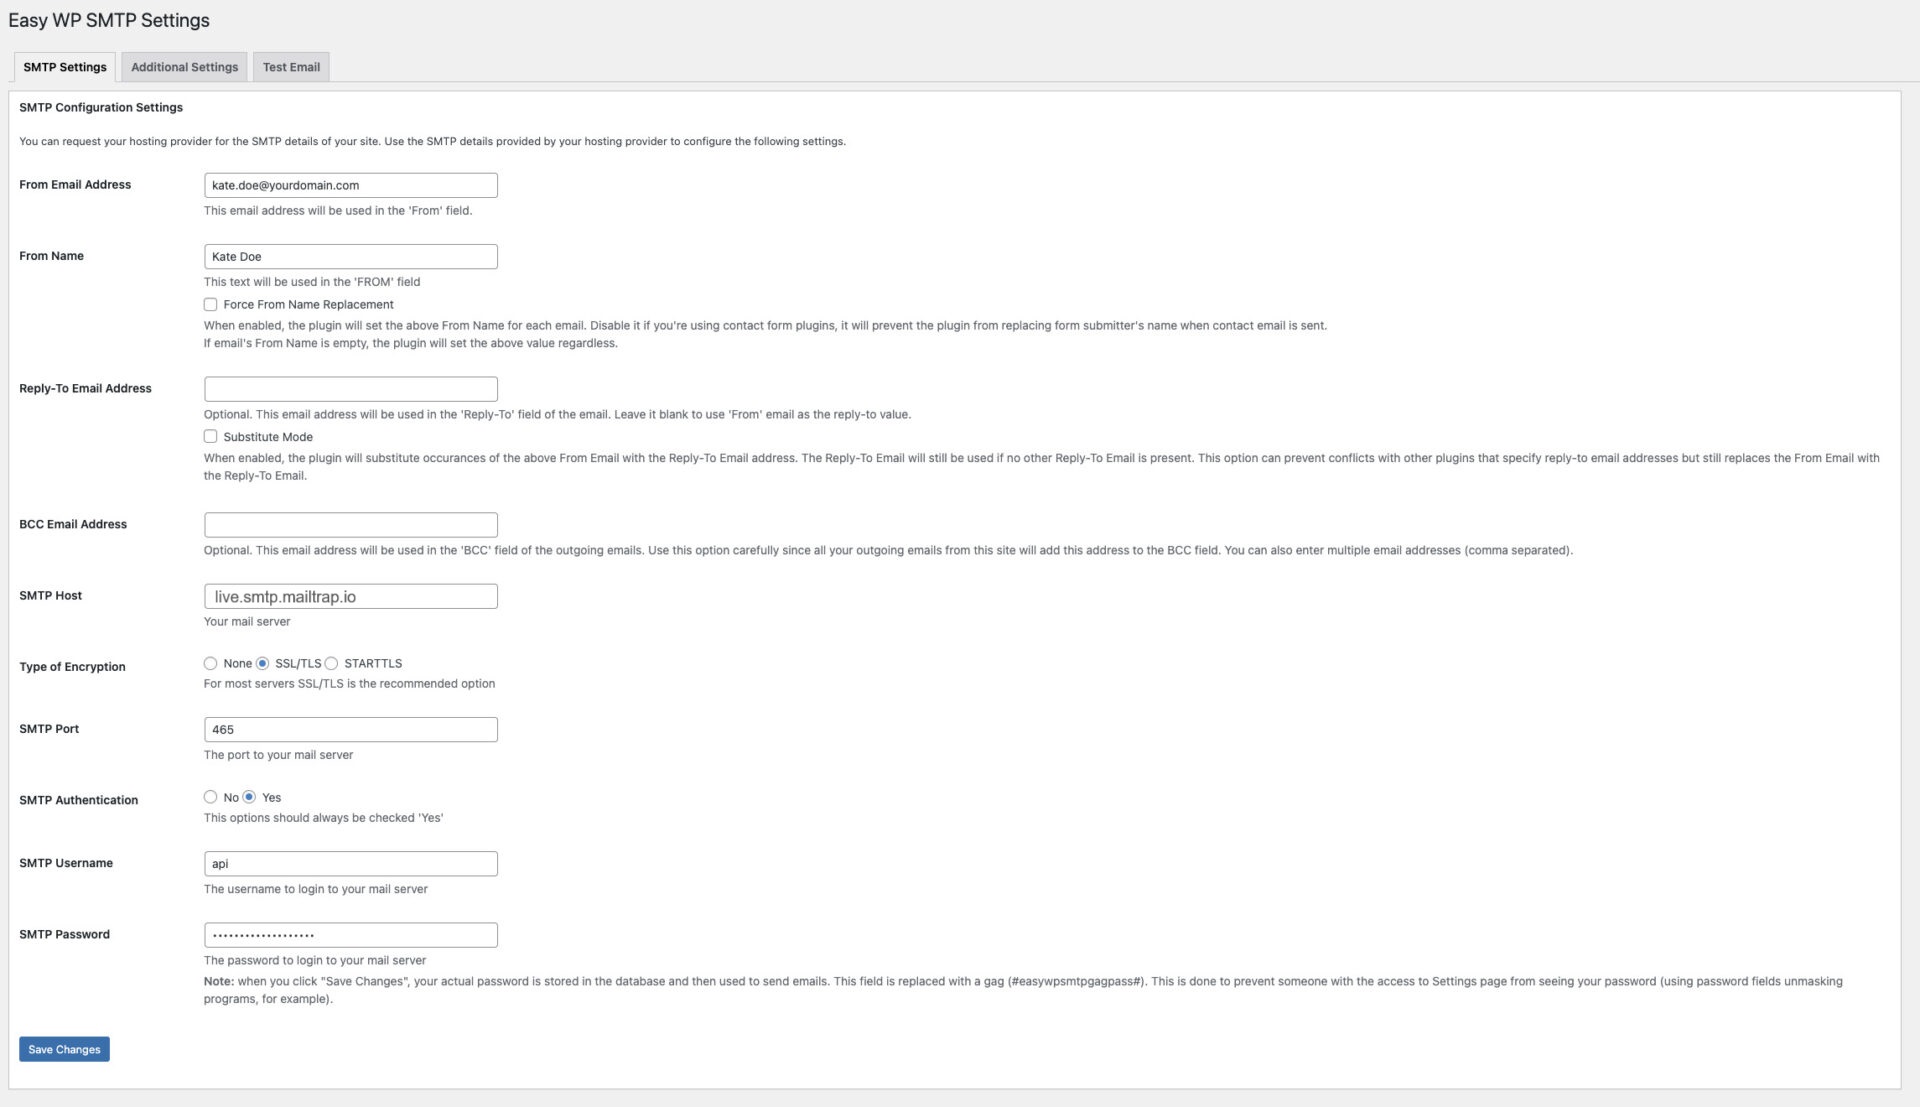
Easy WP SMTP
Easy WP SMTP is a simple plugin to configure SMTP for WordPress. It uses the PHPMailer library. Its capabilities include:
- Integration with Gmail, Yahoo, and Hotmail SMTP, as well as SMTP relay services
- Debugging and logging
- Custom email headers
- Export and import of SMTP settings with an add-on.
Tweaking Easy WP SMTP settings is fairly easy as it’s similar to WP Mail SMTP.
Icegram Express
Icegram Express (formerly called Email Subscribers & Newsletters) isn’t just an SMTP plugin – it’s an email marketing tool. It automates the sending of newsletters and managing subscribers from your WordPress website. The plugin enables you to set your mailer or use other SMTP plugins if they are already configured.
The main capabilities include:
- HTML editor
- Broadcast sending
- Email scheduling
- Subscription box
- Sent emails report
- Support for localization and internationalization
- User access control
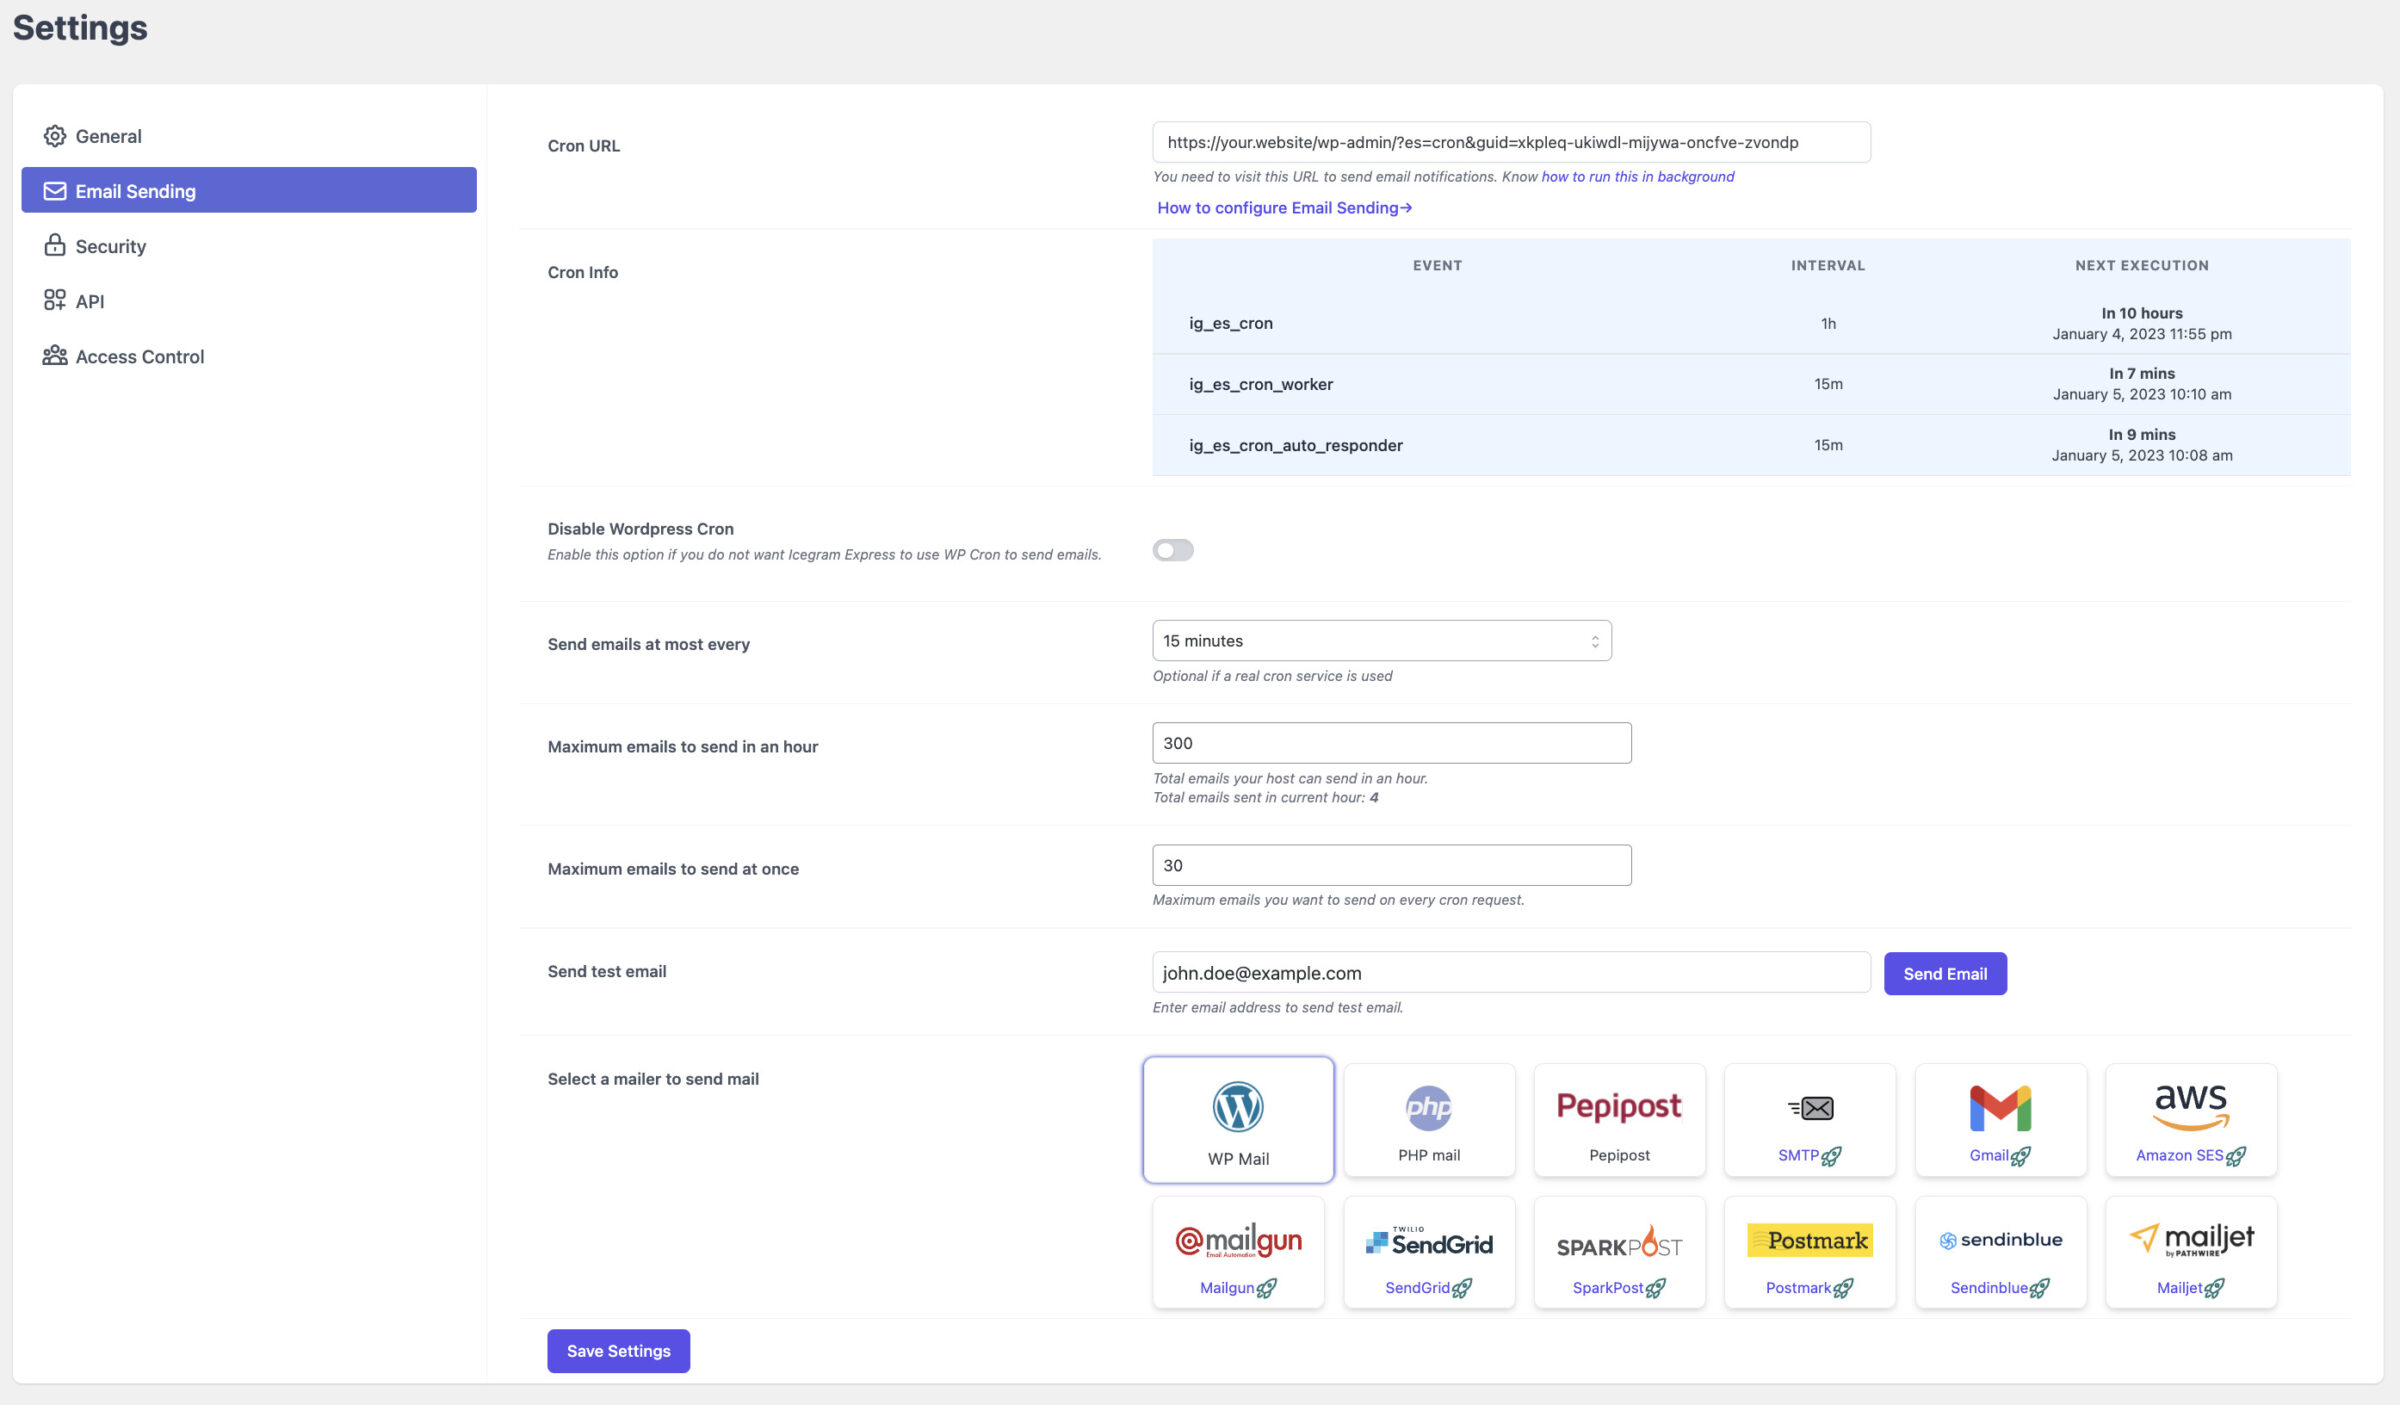
Note: Custom SMTP and other mailers are only available with a paid subscription.
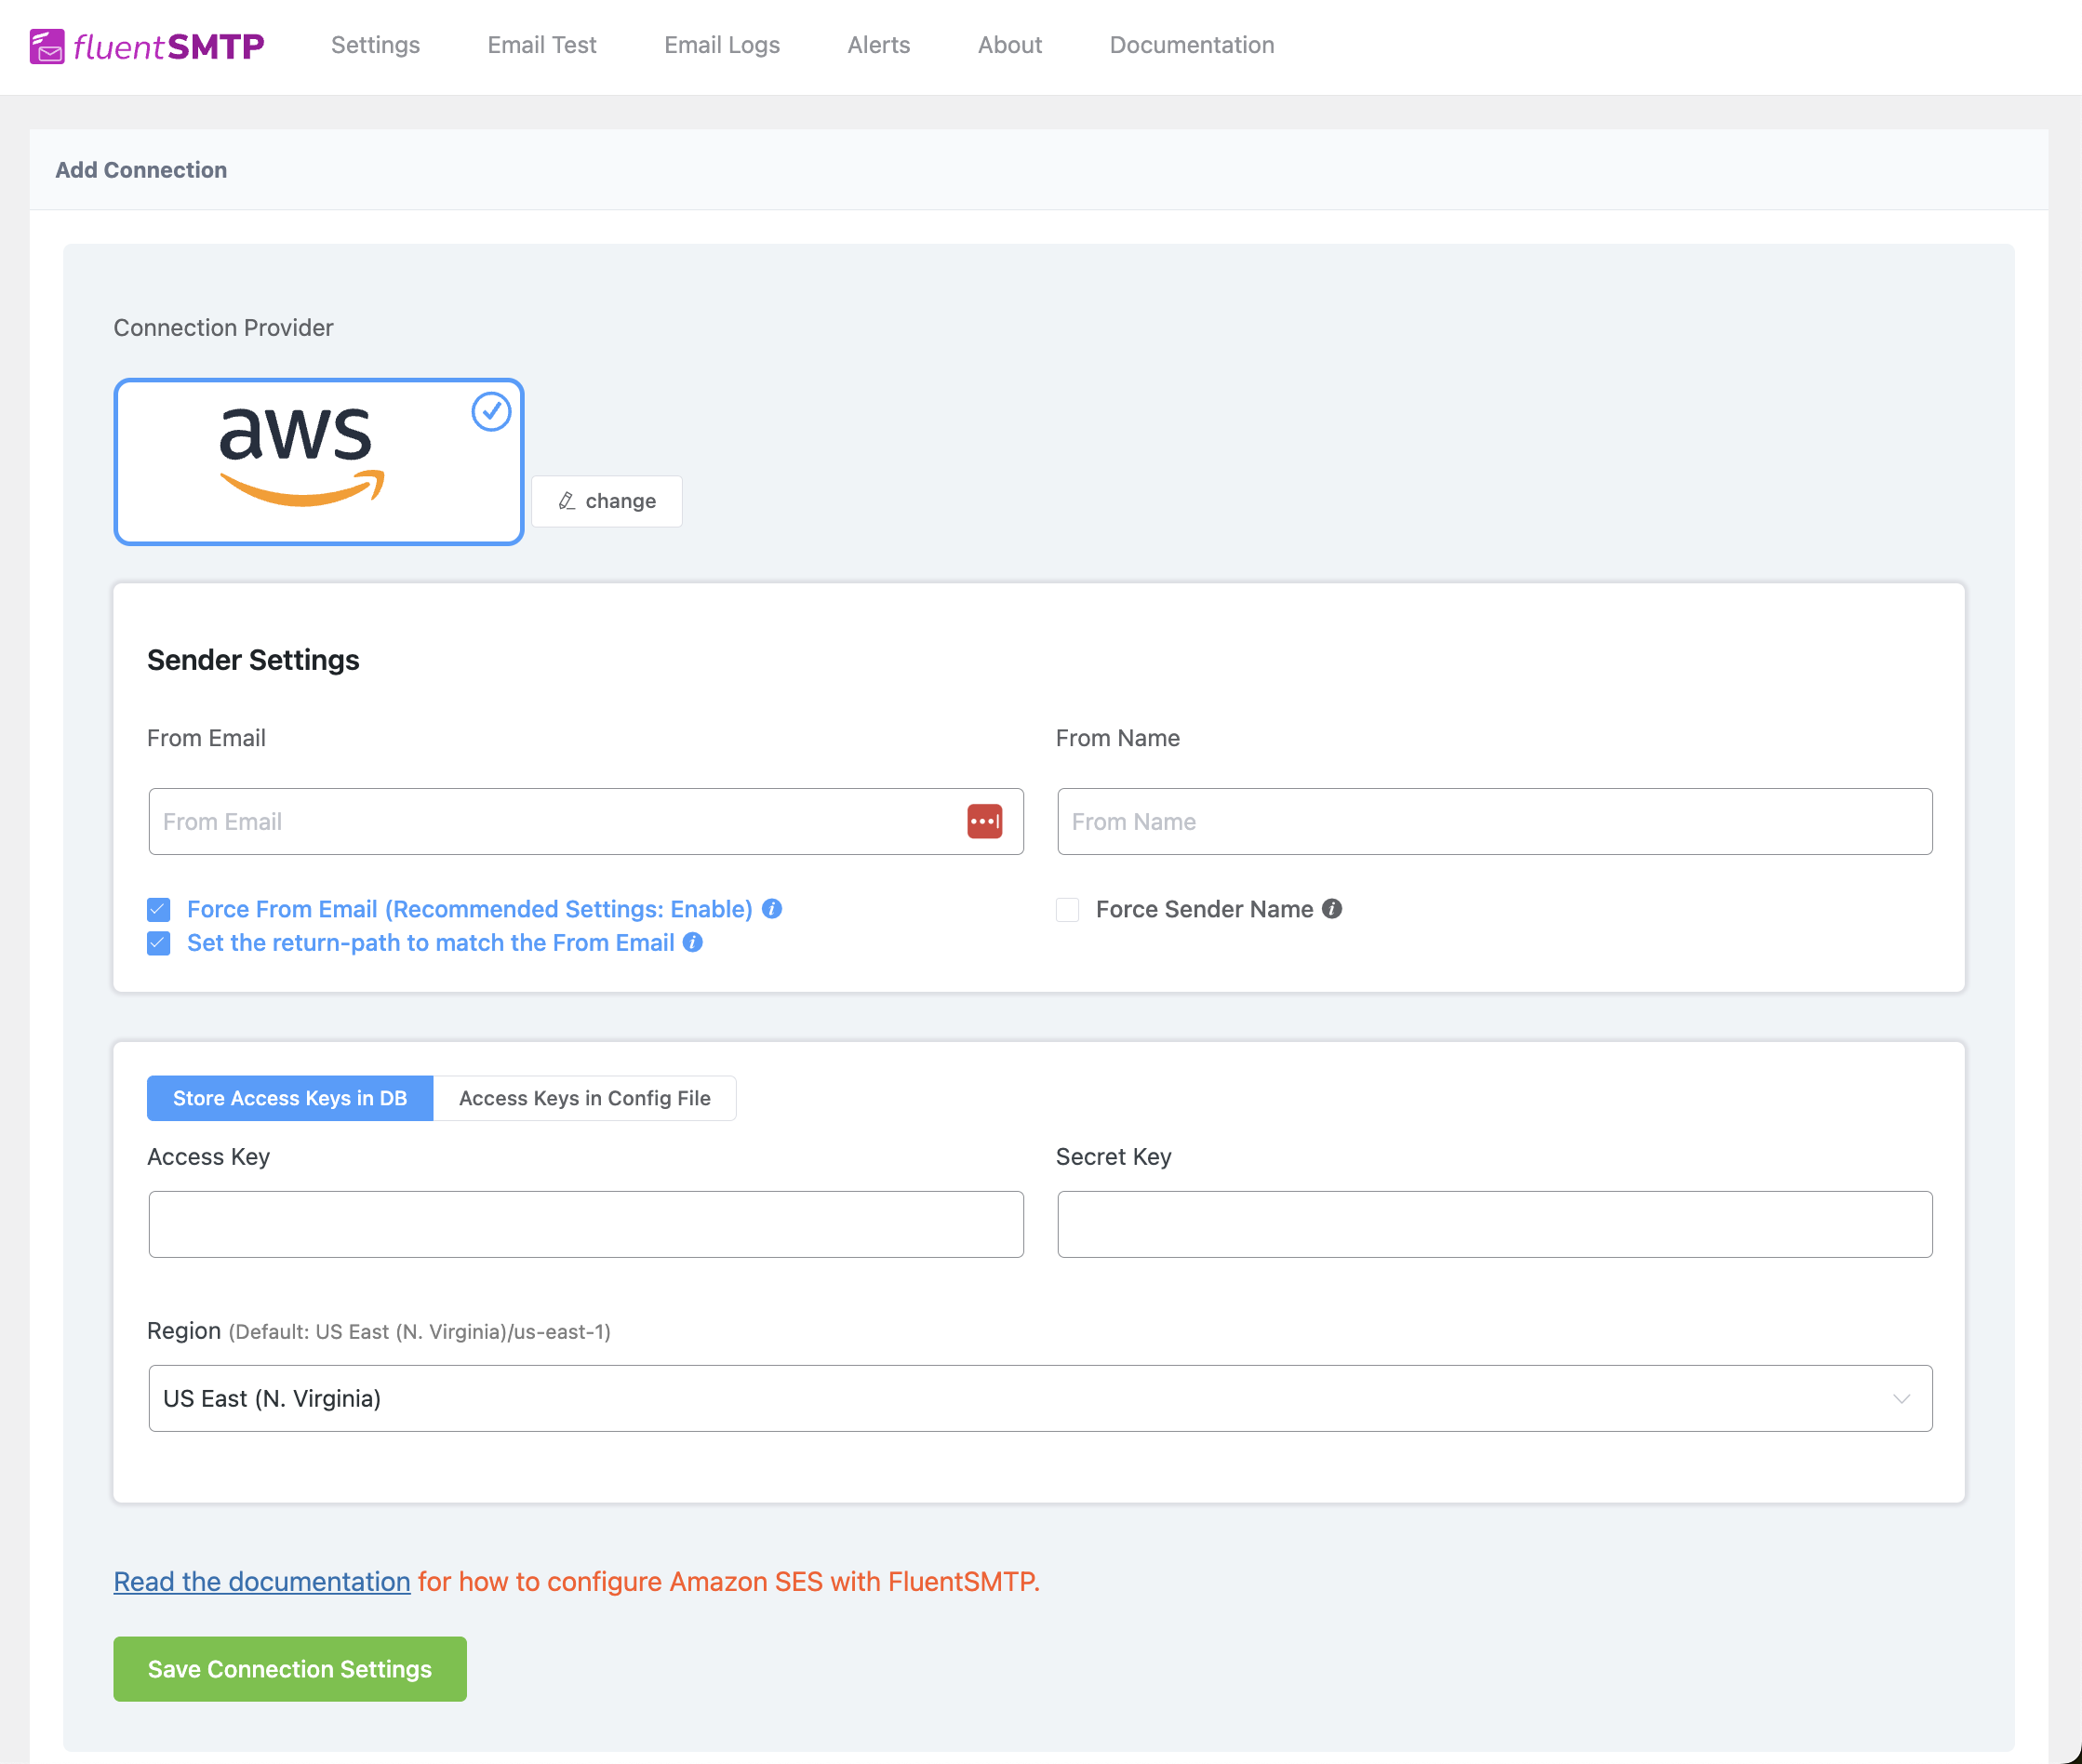
FluentSMTP
FluentSMTP offers the most advanced SMTP features despite being a free plugin. The plugin boasts email logging as well as some of the smartest features for free. Its wide range of features includes:
- Support for multiple connections and secondary SMTP
- Integration with Gmail, Outlook, Amazon SES, Mailgun, SendGrid, Brevo, Sparkpost, Netcore, Postmark & Elastic Email
- Email logging
- Weekly email summary notification
- Real-time email failure notification via Telegram, Discord & Slack
Configuring FluentSMTP also doesn’t take much effort. With its built-in setup wizard, you can fix your WordPress email delivery within 2 minutes!
FAQ
What is the difference between setting up SMTP in WordPress with a plugin vs PHPMailer?
The difference is mainly about control versus convenience.
Using PHPMailer gives you full control over configuration in code, but it requires more technical effort and ongoing maintenance.
An SMTP plugin simplifies the process by handling configuration through the WordPress interface and adding features like testing and logging.
Is using PHPMailer directly faster or more reliable than using an SMTP plugin?
Neither option is inherently faster.
Once an email is sent, delivery speed and reliability depend on the email provider, not on whether you used PHPMailer or a plugin.
Can I use WordPress SMTP settings to send emails from a different domain than my website domain?
Yes, but only if that domain is properly authenticated.
Without SPF and DKIM records for the sending domain, emails may be treated as spoofed and end up in spam or get rejected.
Do I need DNS records like SPF and DKIM if I’m sending WordPress emails through SMTP?
Yes. SMTP handles delivery, but SPF and DKIM handle trust. They tell receiving servers that your emails are legitimate and haven’t been altered. Without them, deliverability will suffer, even if SMTP is set up correctly.


Comments
3 replies