Friday, December 17, 2021

Altenew NEW Year-End Celebration Collection Release Blog Hop + Giveaway ($300 in total prizes)

Image

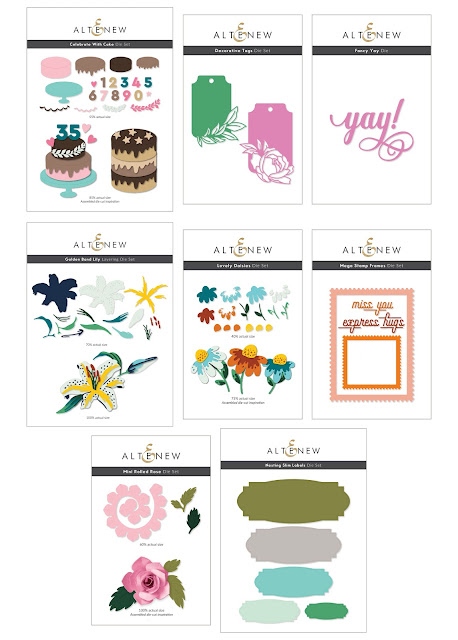
Hello Friends! I'm always a fan of a good stand-alone die, and love that Altenew has special releases featuring just stand-alone dies. This is one of those releases, and I'm happy to spotlight the giant cake, and the 3D rose dies, among others!

Image
December 2021 Stand Alone Dies

You may have come from the blog of Nathalie DeSousa, but if not feel free to start at the beginning with the Altenew Blog.

Image

At first I was thinking wedding cake for this Celebrate with Cake Die Set, but weddings (hopefully) only happen once ... anniversaries are every year! Wedding or 50th golden anniversary, a white cake looks fantastic as a focal image for your card!

Image
Celebrate with Cake Die Set

Image


I have a tip if you're going all white for the cake. Use an embossing folder with fine details and scrolls, like this Ornamental Feature 3D Embossing Folder (yikes, there's only one left!) to add detail to the sides. It's the perfect way to get the feel of cakes decorated with white icing, and a fondant layer on top!

Since this is a tall slimline card, and because I wanted more of the embossed/icing side of the cake to show, I raised the icing layer higher than it's meant to be. 

Two more things to note: 1) each layer is decorated with vines that come with the set, and a tiny stenciled flower and leaf from an older floral set, and 2) check out that gold foil cake plate with the black base!

Image

The Fancy Yay Die is fun and festive! I love the giant scrolly tail on the "y" so you have somewhere to layer a secondary sentiment ("happy anniversary").

Finally, I layered two of the Nested Slim Labels Dies for something different under the cake and sentiments.

Image

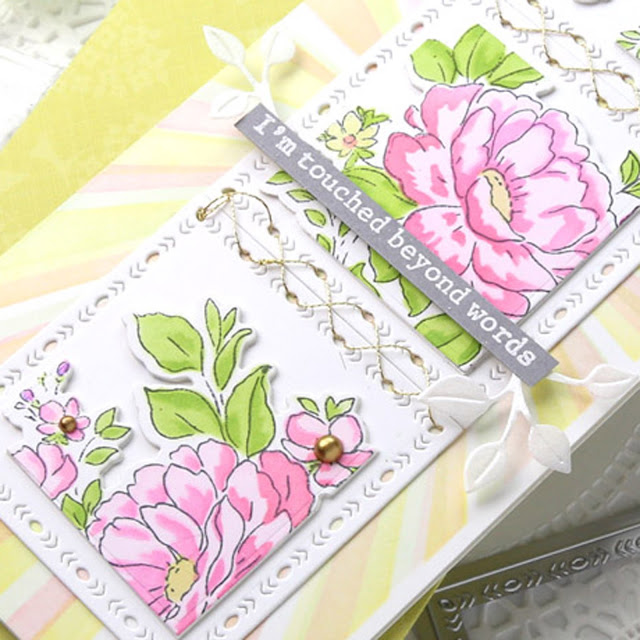
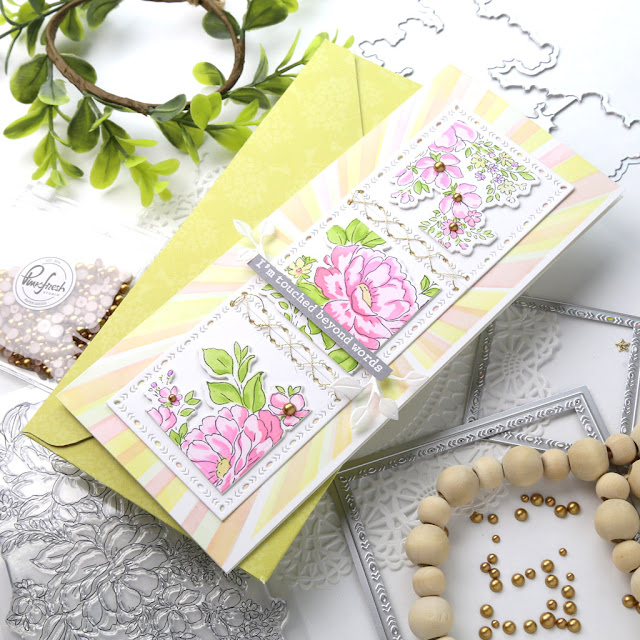
I wasn't sure how this
Mini Rolled Rose Die Set was going to turn out, but boy am I glad I tried it! Gorgeous!!

Image

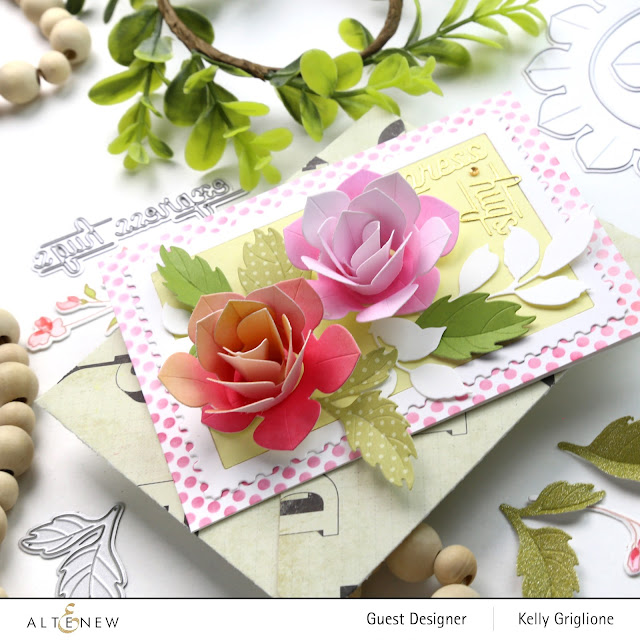
Of course it's not going to fit in a standard envelope, but if you're giving the card in person (yay that we can do that now!!) what a great way for it to stand out. Literally!

I blended ink on paper in a gradient fashion, keeping in mind how big the die is. Then after cutting, you just grab the end with a tweezers or your hand, twirl around itself, and hot glue on the bottom. Couldn't be easier!

Image
And bonus, the serrated green leaves come with this set too!

Image

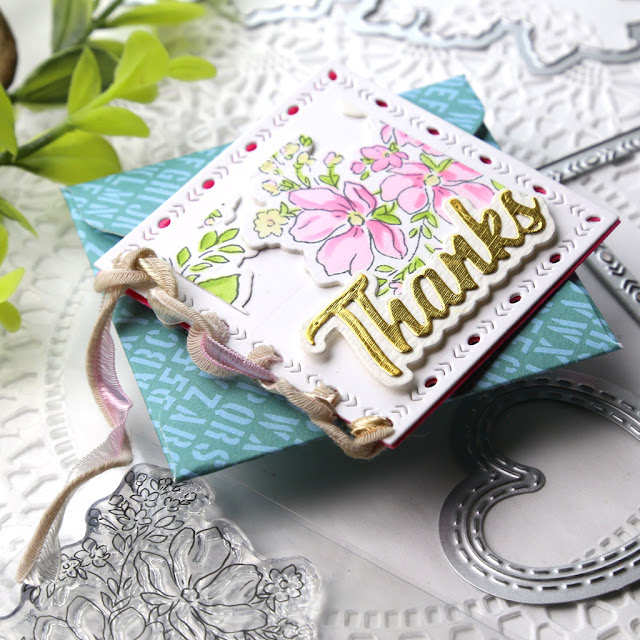
The panel the flowers are on is the new
Mega Stamp Frames Die Set. If you look at the bottom, the edge resembles a postage stamp edge. Perfect way to frame anything, really.
Another bonus, the die cut words also come with this set.

Image

Free Gift

Image

Giveaway Prizes

$300 in total prizes! To celebrate this release, Altenew is giving away a $50 gift certificate to 2 lucky winners and a $25 gift certificate to 8 winners! Please leave a comment on the Altenew Card Blog and/or each designer’s blog post by 12/23/2021 for a chance to win. Altenew will draw 10 random winners from the comments left on each stop of this blog hop and announce the winners on the Altenew Winners Page on 12/25/2021.

I am now pleased to send you to Norine Borys who has several classy and charming cards to share with you!

Thanks so much for stopping by!
- Kelly


Supplies used (affiliate links, thanks for your support!)

Image
Celebrate with Cake Die Set

Image
Fancy Yay Die

Image
Mega Stamp Frames Die Set

Image
Mini Rolled Rose Die Set

Image
Nested Slim Labels Die Set

Monday, December 13, 2021

Pinkfresh Studio December 2021 Stamp, Die, Stencil, and Hot Foil Release

 Image

Hello and welcome to the Pinkfresh December new release! There's a fun mix of florals, unique images, thoughtful sentiments, essential dies, and new bling!

You may have come from the lovely Keia, but if not feel free to start at the beginning with the Pinkfresh Blog

Let's start with the florals, thoughtful sentiments and essential dies ...

 Image

This adorable mini slim features a panel cut with Blanket Stitch Slimline and Mini Slimline Rectangle Dies to give it that wonderful texture around the entire edge.

Image

The florals are from the Citrus Bloom Stamp family of products (die and stencils are also offered, thank goodness). The other day I was looking thru my cards and realized I like to stick with lighter colors, so I mentally made a note to push myself to use some of the neglected darker colors now and then. The dark Stargazer navy/purple surprisingly turned out to be a perfect grounding element for the stem and base of the flowers. 

The nice thing about the Citrus Bloom Stamp is that it features citrus fruit in addition to the flowers, which allows you to introduce different color palettes like the yellow/green for the lemons and limes.  

Image

If you're looking for a good set of unique and meaningful sentiments, I think you're going to like the Always Uplifting stamp set. Aside from artfully arranging the text and font, the content of the phrases is quite engaging. 

One tip in using these and other sentiments with a mix of typeface and script font is to stamp the fonts in different colors. In this case, the typeface font is stamped in black, and the script is embossed in gold. I don't cut the stamp apart to do this, just carefully ink up each section.

Image

Here's a unique focal point image, a house (from the Built on Dreams Stamp)! The outline is simply rendered, but the inside of the house is filled with beautifully scrolling flowers and vines. And thanks to the Built on Dreams Layering Stencil they are easy to color! 

Image

I added some hand-cut clouds that I used as a mask and stenciled over, and then included another set of sentiments from
Always Uplifting on the top and bottom of the card. Love how easy they are to integrate with your existing sentiments, like this "thank you."

Image

Did you notice the new bling on both cards? That would be the Metallic Pearls: Sparkling Champagne! They have a darker base than the gold, and give off several different colors in the reflections. It's good to step outside my gold comfort zone now and then!

GIVEAWAYS:

We will be giving away the full release on the Pinkfresh blog & YouTube channel!! We will also be giving away a total of TEN $25  gift cards, so comment along the hop for more chances to win. The winners will be posted on December 21, 2021 on the GIVEAWAY PAGE, so check back and claim any prize within 2 weeks. GOOD LUCK!!


I'm now pleased to send you to none other than Laura Bassen where you'll be wowed with beautiful projects! 

You are invited to the Inlinkz link party!

Click here to enter

Thanks so much for stopping by!
-Kelly


Supplies Used (affiliate links, thanks so much for your support!)

Image
Citrus Bloom Stamp

Image
Citrus Bloom Die

Image
Citrus Bloom Layering Stencils

Image
Always Uplifting stamp set

Image
Built on Dreams Stamp

Image
Built on Dreams Die

Image
Built on Dreams Layering Stencil

Image
Blanket Stitch Slimline and Mini Slimline Rectangle Dies

Image
Metallic Pearls: Sparkling Champagne


Monday, November 22, 2021

Pinkfresh Studio November 2021 Essentials Release

Image

Hello Friends! I'm always super excited to ink up a gorgeous new floral set from Pinkfresh Studio, but no flowers this release ... just a crazy amount of essentials that you'll want to use on every single card you make!

You may have come from Keia's delightful blog, but if not feel free to join at the beginning with Pinkfresh Studio.

Image
Essentials: Folk Edge Squares Die Set

My projects today feature mostly the Folk Edge Squares Die Set. This set comes with three sizes of folk edge squares, and three proportionally smaller sizes of straight edge squares (for cutting frames, or layering panels on top).

What's special about the fancy Folk Edge? Not only does it look adorable, but it has stitches and holes ... that you can USE! Let's take a look!

Image

Wouldn't you know, the smallest Folk Edge square is the PERFECT size to fill a slimline card when you line three of them up? I was so excited to find that out.


Image

This type of layout is perfect if you're a little intimidated about filling up the bigger slimline format. I just stamped/cut/colored the Lush Peonies Stamp Set, and used the proportionally smaller square die to cut three different sections from that one Lush Peonie. Then adhered each of the three peonie squares to a Folk Edge square. Super easy!

Image

Let's take a moment to admire those edges!! Yes, yes, yes! They add so much to your project without being distracting in the least. Here's what I was getting at with using the holes in the Folk Edge ... I used some gold thread to "sew" each panel together. It's not functionally necessary, of course, since they're adhered to the card, but I love the look of something just a bit different.

Image

You might have also noticed the
Metallic Pearls Matte Gold that I added to the centers of some of the peonies. I'm definitely more of a matte vs. full-on shiny person, so these really speak to me. They come in silver and bronze as well. I can see turning to these often when I want to add something, but can't figure out what ROYGBIV color to use.

Image

I initially made four of the small squares since I was able to get that many cuts from the peonies, but since I just used 3 squares on the previous card, I had one peonie square left over. It was too cute to leave in the leftovers bin though. Since I still had the sewing idea in my head, I decided to sew another square behind it ... 

Image

... and turn it into the cutest mini card! Eeep! I chose a contrasting color for the inside square, and added two little hearts from the
Essentials: Shaker Heart Die Set.

Image

Of course I had to make tiny envelope for this cutie. Sometimes small can make a big impact.

Image
There's a blanket stitch along the spine of the card with some thin ribbon. Between the ribbon, and the popped up peonies, and the popped up sentiment, AND the Folk Edge, this little number has a lot of things going for it!
 
If you know me, you know sometimes I just like to keep going with a concept : )

Image

So the last project I sewed a bunch of squares together. These use papers and embellishments from the Holiday Magic line of products (6x6 paper pad, epoxy dots, and all manner of ephemera).

But why would I sew squares together like a tetris puzzle piece?!

 Image

To make a Christmas block, of course! I sewed the four sides together, and then a top and a bottom, all collapsible for mailing and storage.

Image

Here's what the other side looks like.

Image
On the lid I sewed a loose bead and button so there's something for you to grab onto when opening, and also to keep the paper down nice and straight (although with the super heavy quality of the Pinkfresh cardstock, you don't really have to worry about this).

Image

The bits of ephemera are popped up on foam tape. 

Image

So, now what do we do with this Cube of Christmas Cheer? Well, if you'd like to actually use it as a box for putting something special inside you can certainly sew the base all around to each edge. I'm keeping mine just sewn on one side so I can flatten it later, so my box will be more decorative than functional. Actually, I should have taken a photo of the box opened. Since these papers are double sided, it's neat to see the inside of the box as well!

I do have one  more project with the
Essentials: Folk Edge Squares Die Set, so stop back tomorrow on my Instagram where we're doing one more hop with another set of inspo and prizes!

Image

GIVEAWAYS:

We will be giving away the full release on the Pinkfresh blog & YouTube channel!! What a prize for someone, can you imagine?!!

-We will also be giving away a total of TEN $25  gift cards, so comment along the hop for more chances to win. The winners will be posted on November 30, 2021 on the GIVEAWAY PAGE, so check back and claim any prize within 2 weeks. GOOD LUCK!!

I'm now pleased to send you to none other than Laura Bassen for some pretty darn amazing inspiration!

You are invited to the Inlinkz link party!

Click here to enter


Thanks so much for stopping by!
Kelly


Supplies Used (Affiliate links, thanks so much for your support!)

Image
Lush Peonies Stamp Set


Image
Essentials: Folk Edge Squares Die Set
Image
Essentials: Shaker Heart Die Set

Image
Metallic Pearls Matte Gold