 |
| "UURRRAAAH!!" |
Another game, another 1805 batrep!
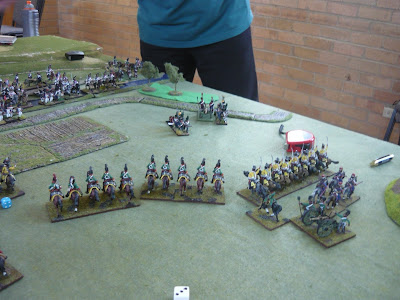
This time I was commanding the 1st Column, which will be my command during the re-fight in January. My able companions were Quinny, commanding the Russian Guard, and Darren who commanded part of the 5th (Cavalry) Column. Before the game we rolled to see who would take over-all command, and as I rolled the highest, that honour fell to me. The plan was for Quinny to aggressively move forward against Bill (who is taking Bernadotte's role, IIRC), while Darren tried to contain Garry on the right flank. I would use the greater weight of infantry against Andrew B. in the centre, pushing against the junction of the French commands. Initially I had planned to push in between Bill and Andrew's commands, but the opportunity seemed greater on the other flank. That indecision was probably my downfall, as my reserves weren't in the right place when my big push came (Note to self: if you change your plan, make sure you can pull it off!).
Anyway, things went swimmingly until I bumped up against the vineyard; 2 disorders and quarter speed if marching perpendicular to the rows. Rather than slog through them to emerge on the other side disordered and then try to tackle the river, I sent a brigade either side with the 3rd to act as a reserve to support an attack in either direction. I initially thought that attacking the left would be most promising, but found that there was really insufficient room once Darren's Guard Cossacks were in the picture. There was plenty of room on the other flank, but also plenty of opposition, including a battery of what turned out to be 8lb artillery which punished my every forward movement.
My own big guns were too slow to play a big part in the game. I had planned to set them up on the point of land jutting out to the front of my position, but found that the units I really wanted to target were in dead ground once the guns were unlimbered! Once it became clear that Andrew was playing a defensive game, I realised that my feint to the right was the best chance I had and that the original plan had to change. The left flank was squeezed between cossacks and the vineyard, while the area between the vineyard and the building to the right was wide open.
The Kiev Grenadiers led the attack on my right flank in l'ordre mixte as Andrew had plenty of small cavalry units lurking. By making my intentions obvious Garry then diverted a fair proportion of his command to threaten my approach, which meant they weren't available for his push against Darren.
When the push came, the Kiev Grenadiers disposed of their opponents in a couple of brutal firefights, but with the 8lb artillery still within close range and plenty of cavalry and infantry support, that was the high-tide of my advance. Even after my hussars successfully charged across the river into the artillery's supporting infantry, I still didn't have any reserves up close enough to exploit my successes. And because I had neglected to push at least one battalion into the vineyard, Andrew's counter attack included cutting through the corners of the vines to attack the flanks of my two main approaches.
Luckily Quinny's attack had been a lot more successful as his cavalry tore a gaping hole in Bill's defences which his infantry readily exploited. Of course, he had moved them to a position where they were actually able to support his success!
 |
| Kiev Grenadiers |
 |
| 12lb artillery! |
 |
| Cossacks |
 |
| and more Cossacks! |
 |
| Useless Jaegers |
 |
| Quinny's Guard Division on the left.. |
 |
| ...with its accompanying cavalry. |
 |
| Bill's French facing Quinny's Russian Guard... |
 |
| ...with his reserve ready to back up the front line. |
 |
| Большой сыр - The big cheese! |
 |
| The centre advances |
 |
| Kiev Grenadiers spread out to the right, |
 |
| Quinny's Guard attack develops on the left flank |
 |
| Andrew's French wait on the other side of the river, while his skirmishers occupy the vineyard. |
 |
| The French 8ib battery and supporting unit. |
 |
| My hussars take casualties as they mask the advance of my big guns |
 |
| Darren's Guard Cossacks on the left. |
 |
| The Kiev Grenadiers and the Moscow Fusiliers advance, while the hussars take cover from the French artillery behind the rise in the ground. |
 |
| Over on the right, Darren's cavalry holds the flank against Garry's French |
 |
| Hussars and Dragoons supporting the horse gun battery |
 |
| On my left flank the cossacks squeeze out the infantry. I was hoping that the Guard Cossacks would charge, but they were faced by numerous small cavalry detachments which would have counter-attacked any successful sortie across the river. |
 |
| My advance from the French point of view. |
 |
| The gap isn't quite wide enough for the whole regiment to fit abreast with their accompanying battalion guns! |
 |
| Andrew's dragoons to the Russians: 'Ger aweh, or Ah shall taunt yer anothair tahm'! |
 |
| The infantry screen my big guns while they unlimber. |
 |
| The Kiev Grenadiers form an anchored line on the BUA. |
 |
| Andrew doesn't move across the river, so it's time to continue. The battalion in the BUA exits, while the rest of the regiment conforms to the forward movement. |
 |
| Finally unlimbered, the 12lb battery looks for targets with the infantry and cavalry in support |
 |
| BOOOM!!! |
 |
| To advance through the vineyard or not? |
 |
| Darren's Guard Cossacks advance after urging by the C-in-C (ie, me!). but still no action on that flank. |
 |
| My guns are too far back to hit Andrew's closest units which are in dead ground! |
 |
| Darrens protects his flanks as Garry cheekily advances infantry in closed column in support of a small horse gun battery. |
 |
| The Kiev Grenadiers advance and trade fire across the stream. To the right, Garry assumes a flanking position. |
 |
| Darren's dragoons offer a counter threat, while I angle the Moscow Fusiliers in support, effectively leaving the Kiev Grenadiers to their own devices. |
 |
| Garry closes in on the flank... |
 |
| ...while the rest of his forces advance through the cultivated land against Darren |
 |
| My big guns belatedly move forward with support. Note the hussars out in front sheltering behind the fall of the terrain. |
 |
| The logjam behind the vineyard; should have just pushed through. |
 |
| Quinny's cavalry blitz crashes into Bill's infantry |
 |
| Quinny follows up with the infantry. |
 |
| Back in my sector, the much-reduced Kiev grenadiers firefight with their French counterparts. |
 |
| My hussars unleash a charge across the river at the line supporting the artillery on the other side of the artillery. Luckily I rolled high enough to cross the river and shrug off the casualties from defensive fire! |
 |
| However the charge resulted in a draw, which saw us both retire. |
 |
Still, with the unit charged by the hussars in bad morale, the infantry facing the Kiev grenadiers broke and ran!
Huzzah! |
 |
The high-water mark!
Note the general facing backwards; he was severely wounded in the previous firefight. |
 |
| My guns finally reached a position to do some good, but it was too late, really. |
 |
| The supporting column of the Kiev regiment had had enough of close range French artillery fire and broke! |
 |
| The other battalion of Kiev grenadiers then copped flank fire from Garry, and retreated... |
 |
| ...before Andrew counter-attacked with his reserve... |
 |
| ...following through into the Russian supporting line!! |
 |
| Wrong way, Roger! |


