Welsh Odyssey Part 2

Apologies is the delay in getting Part 2 posted.

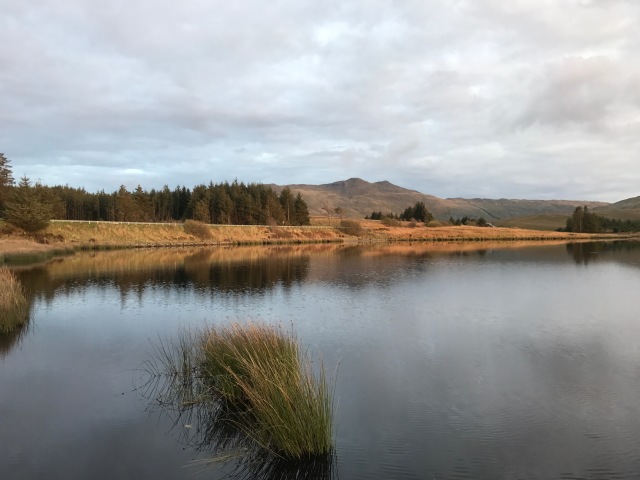
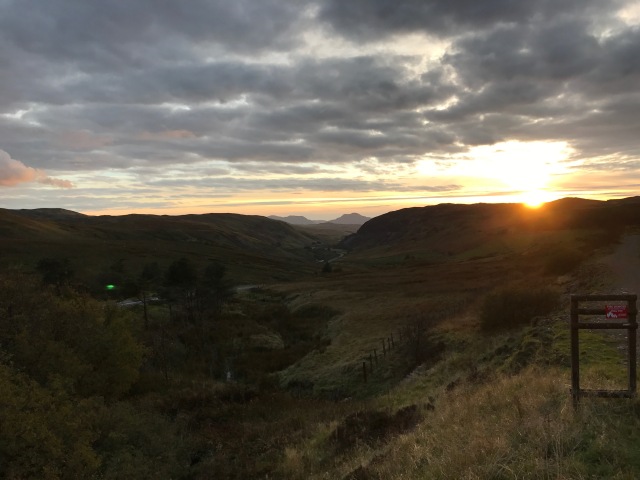
I was rather pleased with the evening photos I had taken from Friday night, but they were nothing compared to what I was to see on Saturday morning. I left my B&B at 7.30am and took the short drive up to Cwm Prysor. Nature really knows how to do it!

img_3501

The morning mist across Llyn Tryweryn was particularly atmospheric.

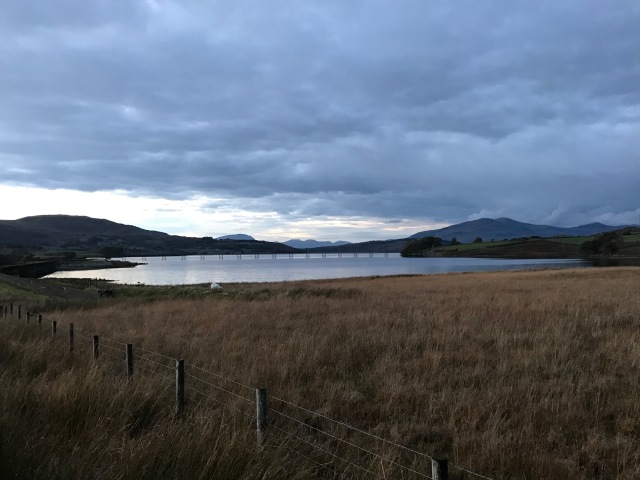
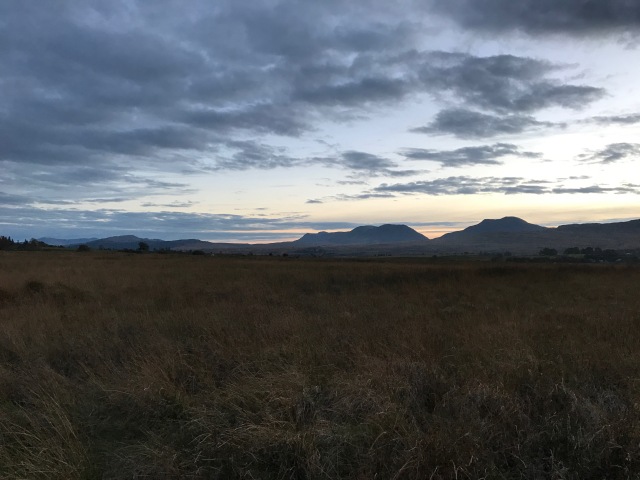
I then headed back down to Trawsfynydd to take some photos at Llyn Trawsfynydd and as dawn broke across the Rhinogs.

img_3535

img_3536-1

Back at the B&B I had a good hearty Welsh Breakfast, and headed off to Porthmadog. The original plan was to do the Welsh Highland. However I had decided to cut the weekend short due to my Dad’s health, and felt the WHR was going to be a touch too long at a 6 hour round trip, so I decided to travel on the Ffestiniog.

14681721_10154072804882984_7938291185782113682_n

IMG_3544.jpg

As we set out from Porthmadog, I really couldn’t believe how lucky I had been with the weather. The view across the Cob sums this up well!

img_3552

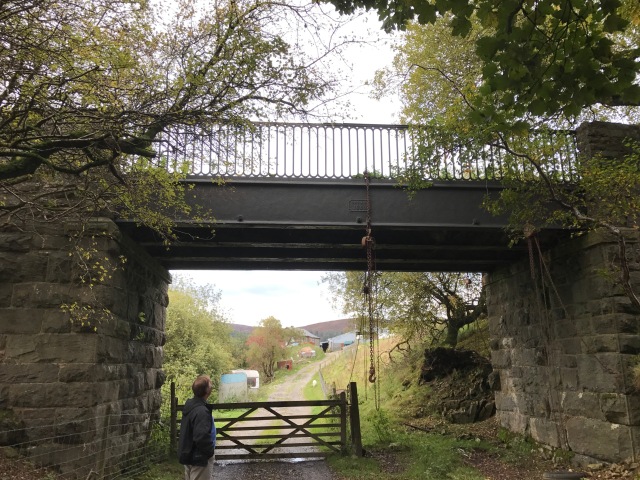
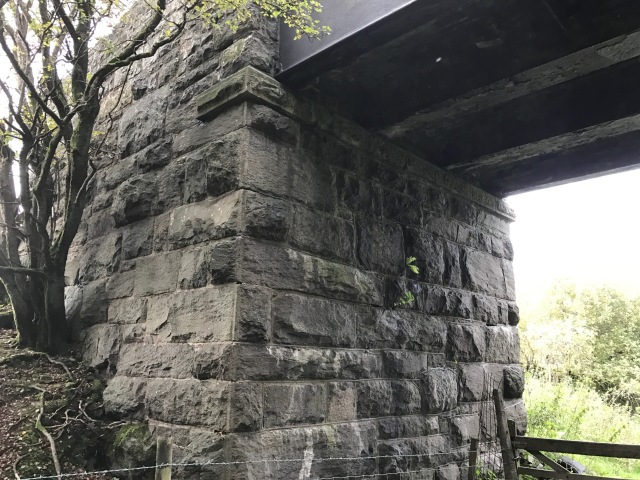
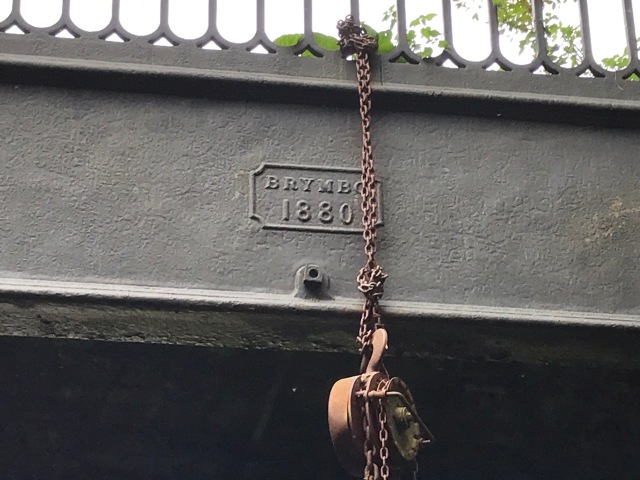
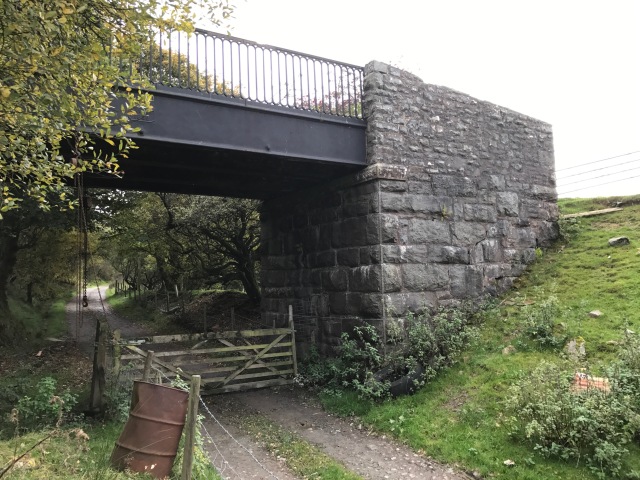
After a truly spectacular journey, I decided to head home, via Cwm Prysor to get some close up shots of the remaining crossing gate and dry stone walls….. there were no trains today….

img_3572

img_3573

IMG_3561.jpg

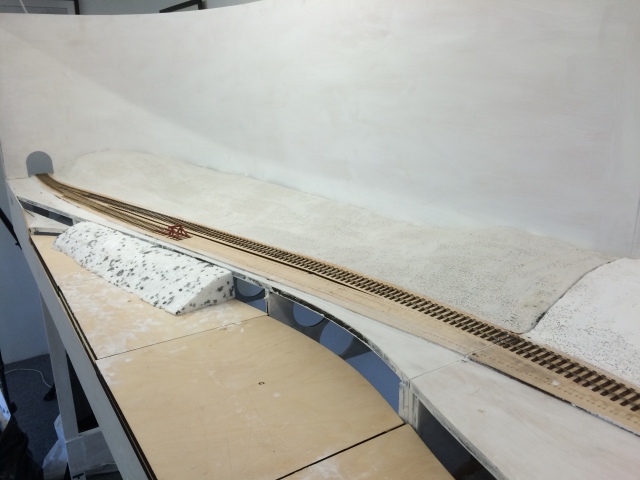
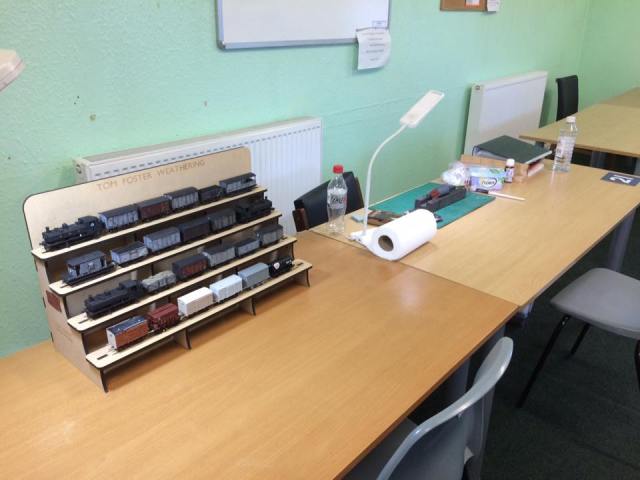
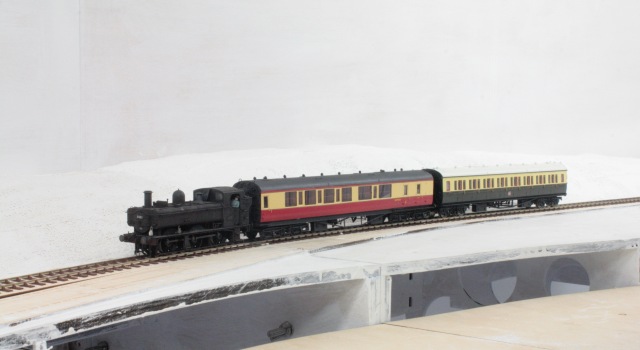
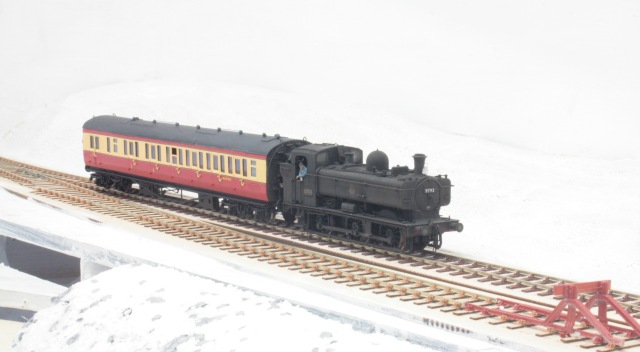
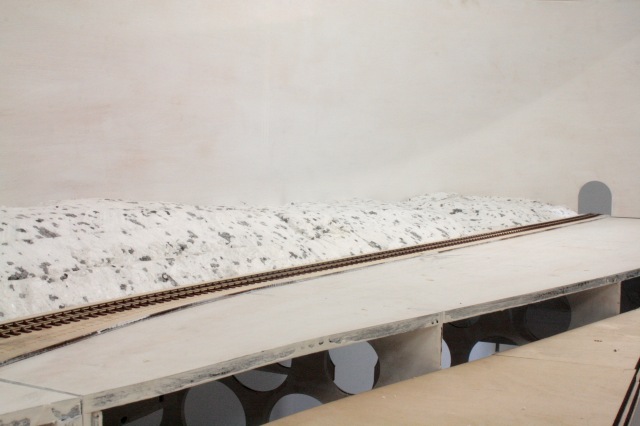
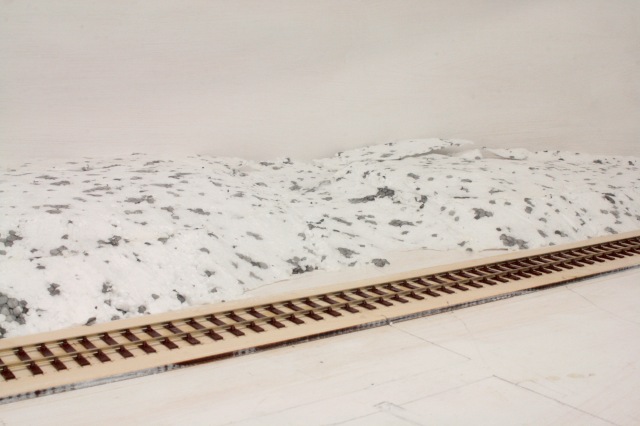
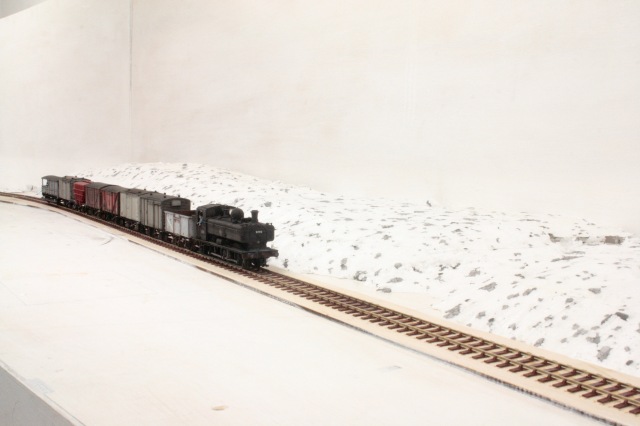
Although only a short trip, it’s left me feeling inspired to crack on with the layout. Things are coming together and I think it’s fair to say, with the landscaping to the front of the layout nearly formed, I’ll be starting the scenic work in the new year.

IMG_3587.jpg

My focus now is to have the layout finished by the Summer, as Railway Modeller are hopefully coming up to take photos for an article I’m writing.

Happy Days! 🙂

Welsh Odyssey Part 1

As I type, I am now settled into my rather cosy B&B for the night at Trawsfynydd. Today has been rather enjoyable, meeting up with my friends John Roberts (former signalman on the Bala-Blaenau branch and Ruabon – Barmouth lines), Martin Williams (author of the super Ruabon to Barmouth Line Book) and Derek Lowe (another author of several books including the Cambrian Main Line and ‘Return to Pwllheli’).

After a good natter about all things regarding this lonely branch line over the mountains, Derek and I headed up to Capel Celyn and Arenig. The former Quarry Station has been completely levelled with little sign of the former Granite Quarry (other than a couple of buttresses).

Capel Celyn was my primary interest, as there is a surviving farm bridge that crosses the trackbed. This is very much what I want to base the Cwm Prysor bridge on, that forms the Blaenau scenic break. After some exploring, we found the said bridge which is really in superb condition for it’s age.

img_3451

img_3454

img_3464

img_3462

After saying farewell to John, Derek and Martin I bought some Fish and Chips at Bala, and ate them at Cwm Prysor. To say it was a beautiful evening would be an understatement.

img_3476

img_3480

Finally, as the sun set….I had time to take some quick snaps of Trawsfynydd Lake and the Rhinogs…..roll on tomorrows furthering Welsh Odyssey!

IMG_3493.jpg

Goodnight! 🙂

img_3496

Cwm Prysor developments….

Since the last update, with the layout now wired, things have continued to move in a positive direction. 🙂

The track has been painted, initially with a coat of Grey Primer and then secondly with a coat of Halfords ‘Camouflage Brown’, as recommended by Jim Smith-Wright. The results of which are very pleasing and have just the right look for a basic coat. Plus it blends the SMP and  timber sleepers together quite nicely. I’ve now painted the entire landscape to the rear of the track, just to give a good earth texture before scenic work begins.

img_3370

img_3369

I have also been doing some ‘Ballasting Experiments’ which have proven interesting. I initially tried the method of adding PVA first, then lots of ballast before hoovering the excess up. The results were not great, with the ballast sticking and bulging out between the sleepers. I therefore went back to the conventional method of diluted PVA sprayed before hand with water with a drop of washing up liquid. The results were far better as can be seen below. I have been trialling two ballast types, Woodland Scenics ‘blended gray’ Medium and Fine. I already have one I prefer, but I’d be interested in your thoughts.

img_3386


I was originally going to begin ballasting the layout next, but I have decided it’s going to be best to start landscaping the front of the layout….that way the modrock stage is done, without effecting the ballast work.

Next weekend I head up to North Wales again, this time to stay for a few days as a sort of mini break, which will involve be taking in the delights of the Welsh Highland and Ffestiniog Railways. What I am looking forward to though, is meeting up with some friends, one of which being the ex signalman from Bala I have mentioned before. We are going to have a bit of a sight seeing tour with a look around Capel Celyn, Arenig…..oh and possibly this place for some reason! 😉

IMG_8415.jpg

In other news, I have just finished writing another article for Railway Modeller on ‘Goods Traffic for Cwm Prysor’ It has been an enjoyable experience once again to be writing for the Modeller and hopefully will be published the beginning of next year. Tony Wright has kindly taken some lovely studio photographs of my stock which should look very nice in print.

That’s all for now! 🙂

Tom


Cwm Prysor – Fully Wired!

Good Morning all!
Very brief update. The layout is now fully operational!

I’m extremely pleased I’ve managed to do it (wiring was something I didn’t think I’d be able to do) and with some advice from Ken Gibbons and Andy Jones, the process wasn’t as difficult as I thought. Below is a quick video I made last night, just to show locos and stock moving over the new area. The point is operated with a DPDT switch, which switches the polarity, and manually switches the point.


Just the fiddle yards to go, and we can start thinking about scenic work! 🙂

Point work finished!

I don’t think I ever thought I’d be able to manage it, but Cwm Prysor’s point work is completed.

img_3675

img_3674

I’m very pleased with the results and the appearance. The soldering of the tiebar to the switch blades was interesting, but they now work well. The point operation will be manual, using Ken Gibbon’s method with a DPDT switch (I became acquainted with the system when I was operating Ken’s layout at ExpoEM North). Overall though, I have rather enjoyed building point work and this will certainly be the method I use in future, no matter how good RTP track work becomes.

Next stage will be wiring them and operating them, and hopefully……we should have an operational layout (the main layout was wired last week).

We can then move on to ballasting and scening work!! We are getting there!

The Finishing Touches

With a great deal of time off during the Summer, I’ve thrown myself in to more goods stock for Cwm Prysor. The LMS vans I built several months ago, are now in Bauxite and two of them are now finished. I focussed on D1978 first, which was built from a Ratio body, Parkside under frame, with Lanarkshire Buffers, Vents and Vac Pipes. Screwlinks were made up from the Masokits etch.

As well as this van, another 16T has been through the works this week. I wanted to take it a little further than the last one, working from a photo from Trawsfynydd in 1959.

_MG_8625

The more I have been looking through prototype photographs, the more I have felt my Van stock has been lacking that final little detail…. chalk markings. Just looking through the superb prototype section of Geoff Kent’s 4mm Wagon Volume 2, you can see a variety of scribbles all over the vans.

I’ve seen various methods for producing chalk markings, some more successful than others. It was on a google search I came across some convincing scribblings, and to my (not so much) surprise, it was the work of Ian Fleming. Ian had used a mapping pen with white ink which gave a rather nice result. A mapping pen and white ink were duly ordered via Amazon and arrived this morning. I practiced on some spare Van sides, before trying it out on D1978. I tried to pick locations local….and not so local seen as Vans are common user.

_MG_8642

_MG_8643

This older LMS van (D1676) you may remember from a previous blog post. I had worked from a photo in Geoff’s Book (Vol 2 again) and have based one side on the chalk markings (page 38). The other side I went for something a bit more local to the branch… 😉

_MG_8645

_MG_8646

Finally, and the latest van off the workbench is this, a BR Dia 1/204. The design of this is very much the last of LMS family, but was produced by BRITISH RAILWAYS. The model was produced from the old airfix body (now available by Dapol), a Parkside under frame, and again Lanarkshire Models for the detailing bits.

I wanted it to look different than D1976, so went for a far lighter approach. In my mind as a new build in 1950, it had been overhauled around 1956…so my model is probably 6 months-12 months after overhaul. Again I tried to give the chalk markings a local flavour as well as touch more distant.

_MG_8637

_MG_8641

So what is next? Well I would like to add the odd poster to some of these… not on everyone of them, but just enough to give a touch of variety and individualism. Overall this as been an enjoyable process once again, and hopefully will just add that little bit extra realism to the layout when it’s done. 🙂


Enjoying the Hobby

Apologies for the rather ‘basic’ title of this blog, but it sums up how I’m feeling at the point.

I have now finished the landscaping on the other board that runs behind the railway. I’m rather pleased with the results from this, which was probably the hardest task landscape wise.

IMG_3198

IMG_3199

The landscaping in front of the layout will be catered for once the electrics are done, the priority with the rear being finished was because of the painting of the backscene.

Today I was demonstrating wagon building and weathering at ‘Thirsk Model Railway Exhibition’. It was an enjoyable day meeting new people and seeing friends. Good banter was had all around with Ian Fleming, Ken Gibbons and Jonathan Wealleans, who was showing his beautiful LNER coaches and wagons.

13906697_10153853228407984_9048285969233107139_n

Jonathan also had a couple of items for me, two corridor Collett Coaches he had built and painted for me as a part of some ‘horse trading’. One is an E152 Brake Composite which will be permanently coupled to a Hornby all 3rd. I’ve a photo of these two seen at Trawsfynydd and Blaenau Ffestiniog in 1951, with the all 3rd still in Chocolate and Cream, a nice contrast!

_MG_8591

The E128 will be run on it’s own, as a mixed train or possibly joined to another Hornby all 3rd (in crimson and cream).

_MG_8593

In the meantime, I really better look into making a start on wiring the layout, just so I can run something up and down. Once happy with this, I will complete the points and get those wired too. I also have the fiddle yard boards on the way, so hopefully in the not to distant future (by late October I hope) I will be able to run the layout properly.


Back on Track

‘Schools out for summer!’ the lyrics go, and my start to the Summer has been a nasty stomach bug. One week on, and I’m still not quite over it, but I’m getting there. It’s funny the psychological effect something like this can have on you. Last weekend I felt like giving up the whole hobby, and seriously wondered how I could possibly feel positive about the layout again. Thankfully, those feelings have passed and today I began fixing the landscape to the boards.

_MG_8581

Insulation polystyrene two pieces thick glued with PVA, was shaped with a woodlands scenics polystyrene cutter. Some work with a bread knife was required to cut out the area of the moorland road.

_MG_8582

I will now need to do some work in the foreground, but it’s the area along the back scene I wish to get done before Tony Wright comes up to paint the back scene. The polystyrene will covered with modrock before scenic work.

9793 approaches Cwm Prysor with a Bala bound pick up goods.

_MG_8584


Vintage LMS

_MG_8566

I’ve said it before, but I do have a thing for LMS Vans. The high sides and shallow roof profile make for a distinctive looking van. These two are both kits from  Cambrian Models.

Both of these van’s represent slightly older variants of rolling stock, than the more common ratio van diagram.

_MG_8565

First up is a D1676. These vans were built from 1924-1928, with 2956 examples being built. The vans were built as fitted and unfitted, but after finding a nice early 50’s photo in Geoff Kent’s 4mm Wagon Book 2, I went with unfitted. As I mentioned at the beginning, this is a good example of an older van, but it’s heritage is undeniable.

_MG_8564

The second van is a D1832A which are from a slightly later period than the previous van, batches being being built in 1929-1930 and 1930-1931. The actual sides (other than the corrugation) are pretty similar to D1676 and the same as unventilated D1663, which makes commercial sense as production models (I’ve a D1676 to also finish, but in bauxite).

Both caused a little bit of a headache after building, with both developing a wobble. Thankfully I found out it wasn’t something I had done, but down to a case of a poor batch of markits wheels. The vans suffered from roofs too short for the model (they only just reached the ends) so I added microstrip to give the vans their overhang.

They have been finished with Lanarkshire Models buffers and torpedo vents. The coupling hook and links are from AMBIS Engineering.

Regarding painting, I took a different route after talking to Geoff Kent at Scale Four North. A number of Geoff’s unfitted wagons are painted a lighter shade of grey which I found  to be Railmatch’s ‘late grey’. I did discover however that the grey came off with white spirits very easily, even with a coat of Klear on top and after 3 weeks drying time, therefore both vans had two spray coats of Gameworkshop ‘purity seal’ once the transfers were in place.

Prior to weathering I painted over a couple of planks with the same grey, but it has given a nice change of tone on several of the planks. Weathering was done in my usual way, several washes over the body, building up and taking away in places. The chassis is a mix of Matt Black and Revell 84 which was finished off with a touch of powder work. Roofs were painted a mix of Matt Black, Metalcote Gunmetal and a touch of Revell 76 Grey. They were finished with powders to give a good textural finish.

My attention now turns to a couple of Parkside exLNER  vans to finish, which with the two LMS vans will form part of my demonstration at Thirsk Model Railway Exhibition at Thirsk Town Hall, 31st July.

_MG_8569 (1).jpg


She’s home!

With the weather finally dry last night, and with the help of a friend, Cwm Prysor was transported from my workroom, along a narrow landing and down a narrow flight of stairs. I’d forgotten how light the boards are, even at 5ft each so the moving through the house wasn’t as bad as I had envisioned.

IMG_2891

IMG_2893

I tried to explain the branch goods workings to two onlookers. I don’t think they were very interested though.

IMG_2896

Next task will be to begin wiring (I’m hanging off finishing the points) just so I can have something running up and down and get use to working the Lenz system.

Only 16 months until it’s first show….. I better crack on! 🙂

Design a site like this with WordPress.com
Get started