Real-Time Edge Detection using OpenCV in Python
Last Updated :
11 Nov, 2025
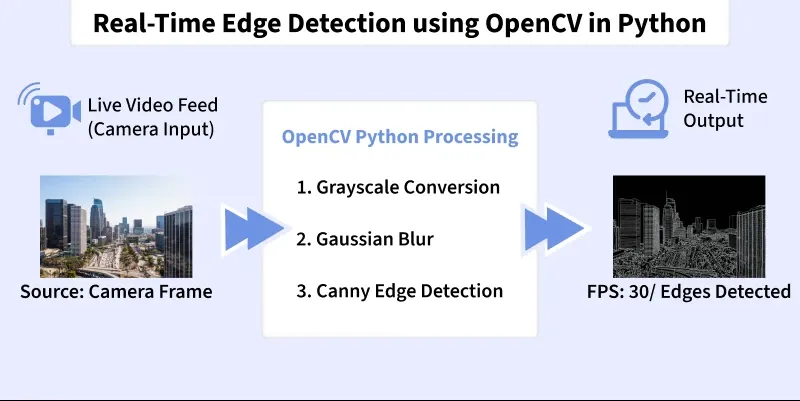
Edge detection is a computer vision technique used to identify boundaries in images. These boundaries highlight transitions in intensity. It makes it easier for algorithms to detect shapes, objects and structural features in real-time applications such as surveillance, robotics, medical imaging and self-driving cars.
 Training
Edge Detection Algorithms
OpenCV provides several built-in edge detection filters:
- Sobel Operator: Detects gradients in the horizontal and vertical directions.
- Laplacian Operator: Detects second-order derivatives to highlight regions of rapid intensity change.
- Canny Edge Detector: A multi-step, optimal edge detector that is most commonly used.
Implementation
Stepwise implementation of Real-Time Edge Detection.
Step 1: Install Required Libraries
Installing OpenCV for image video processing, NumPy for numerical computation and matplotlib for plotting.
Python
import cv2
import numpy as np
from matplotlib import pyplot as plt
Step 2: Import Modules
Importing required modules.
- cv2 to access OpenCV video and image functions
- numpy for array operations
- time for live FPS measurement
Python
img = cv2.imread("image-path")
Step 3: Setup Configuration Variables
Setting up paths for input video, output video and frame resolution.
Python
VIDEO_PATH = "your-video-file"
OUTPUT_PATH = "/content/edge_output.mp4"
FRAME_WIDTH = 640
FRAME_HEIGHT = 480
Step 4: Create a Resize Helper Function
Resizing every frame to keep consistent processing speed and output size.
Python
def resize_frame(frame, width, height):
    return cv2.resize(frame, (width, height), interpolation=cv2.INTER_AREA)
Step 5: Convert Frame to Grayscale
Converting frame to Grayscale as Edge detectors operate on intensity, not color.
Python
def to_grayscale(frame):
    return cv2.cvtColor(frame, cv2.COLOR_BGR2GRAY)
Step 6: Apply CLAHE Local Contrast Enhancement
Applying CLAHE Local Contrast Enhancement to improve edges in poorly illuminated areas.
Python
def apply_clahe(gray):
    clahe = cv2.createCLAHE(clipLimit=2.0, tileGridSize=(8,8))
    return clahe.apply(gray)
Step 7: Apply Edge-Preserving Bilateral Smoothing
Applying Edge-Preserving Bilateral Smoothing to reducing noise without blurring edges.
Python
def bilateral_smooth(gray):
    return cv2.bilateralFilter(gray, 9, 75, 75)
Adaptive thresholds based on frame statistics.
Python
def dynamic_canny(smooth):
    sigma = np.std(smooth)
    lower = max(20, int(0.66 * sigma))
    upper = min(200, int(1.33 * sigma))
    return cv2.Canny(smooth, lower, upper)
Step 9: Extract Sobel and Laplacian Gradients
Sobel and Laplacian Gradients detects directional and fine-texture edges.
Python
def sobel_gradient(gray):
    sx = cv2.Sobel(gray, cv2.CV_64F, 1, 0)
    sy = cv2.Sobel(gray, cv2.CV_64F, 0, 1)
    return cv2.convertScaleAbs(np.sqrt(sx**2 + sy**2))

def laplacian_edge(gray):
    lap = cv2.Laplacian(gray, cv2.CV_64F)
    return cv2.convertScaleAbs(lap)
Step 10: Fuse Multiple Edge Maps
Combining strengths of different operators.
Python
def fuse_edges(canny, lap, sobel):
    fused = cv2.addWeighted(canny, 0.6, lap, 0.3, 0)
    return cv2.addWeighted(fused, 0.7, sobel, 0.3, 0)
Step 11: Apply Morphological Closing
Morphological Closing closes small gaps for continuous edges.
Python
def morphology_close(fused):
    kernel = np.ones((3,3), np.uint8)
    return cv2.morphologyEx(fused, cv2.MORPH_CLOSE, kernel)
Step 12: Apply Temporal Smoothing Across Frames
Temporal Smoothing reduces flickering over time.
Python
prev_fused = None

def temporal_smooth(fused):
    global prev_fused
    if prev_fused is None:
        prev_fused = fused.copy()
    fused = cv2.addWeighted(fused, 0.7, prev_fused, 0.3, 0)
    prev_fused = fused.copy()
    return fused
Step 13: Overlay Detected Edges on Original Frame
Highlights edges in red while preserving details.
Python
def overlay_edges(frame, fused):
    overlay = frame.copy()
    overlay[fused > 40] = [0,0,255]
    return overlay
Step 14: Combine All Stages into process_frame()
Main pipeline executed for each frame.
Python
def process_frame(frame):
    gray = to_grayscale(frame)
    clahe_gray = apply_clahe(gray)
    smooth = bilateral_smooth(clahe_gray)
    canny = dynamic_canny(smooth)
    lap = laplacian_edge(smooth)
    sobel = sobel_gradient(smooth)
    fused = fuse_edges(canny, lap, sobel)
    fused = morphology_close(fused)
    fused = temporal_smooth(fused)
    output = overlay_edges(frame, fused)
    return output
Step 15: Open Video Stream and Create Writer
Video Stream and Create Writer reads input and prepares output file.
Python
cap = cv2.VideoCapture(VIDEO_PATH)
fps = cap.get(cv2.CAP_PROP_FPS)
if fps == 0: fps = 30
fourcc = cv2.VideoWriter_fourcc(*"mp4v")
out = cv2.VideoWriter(OUTPUT_PATH, fourcc, fps, (FRAME_WIDTH, FRAME_HEIGHT))
Step 16: Frame Processing Loop
Here, model reads then processes and writes each frame.
Python
prev_time = time.time()
frame_counter = 0

while True:
    ret, frame = cap.read()
    if not ret:
        print("Finished processing video.")
        break

    frame = resize_frame(frame, FRAME_WIDTH, FRAME_HEIGHT)
    output = process_frame(frame)
    out.write(output)

    frame_counter += 1
    curr_time = time.time()

    if curr_time - prev_time >= 1:
        fps_live = frame_counter / (curr_time - prev_time)
        print(f"Live FPS: {fps_live:.2f}")
        prev_time = curr_time
        frame_counter = 0
Step 17: Cleanup Resources and Save Output
Releases handles and downloads result in Colab.
Python
cap.release()
out.release()
print(f"ideo saved at: {OUTPUT_PATH}")
from google.colab import files
files.download(OUTPUT_PATH)
Output:
 Result
You can download the source code from here.
Applications
Some of the applications of Real-Time Edge Detection are:
- Object Recognition: Helps detect the boundaries of objects to assist classification and contour extraction.
- Image Segmentation: Separates objects from the background by highlighting strong edge boundaries.
- Medical Imaging: Extracts fine structural details in X-ray, MRI and CT scans for diagnostic purposes.
- Autonomous Driving: Detects lane markings, road edges and traffic signs for safe navigation.
- Video Surveillance: Tracks moving objects and identifies suspicious activities using edge outlines.
- Optical Character Recognition (OCR): Identifies character outlines to improve text extraction accuracy.
Explore
Python Fundamentals
Python Data Structures
Advanced Python
Data Science with Python
Web Development with Python
Python Practice