In a quest for a really small but useful bag like that old Lowepro (1 camera + 2 lenses), I’ve tried several. One thing I have been specifically looking for is a small enough bag to fit in my backpack while traveling, for plane stowage reasons. I like to travel with all carry-ons, so my clothes and stuff are in a shoulder bag, and my ‘personal’ item is a backpack, which needs to hold all the other crap + my camera bag. Once I get to the destination, the camera bag comes out and can be used with or without the backpack.
I think for the next trip we take, I’ll probably go with a small bag appropriate for a camera with 1-2 lenses, and then a few other lenses in a cube or individual pouches in my backpack.
This post is for anyone looking at these bags for a similar camera setup. There is info out there, but it wasn’t enough to prevent me from buying several bags I’m probably not going to use very much. Learn from my mistakes.
Bags
Think Tank Retrospective 5
I’ve been really happy with Think Tank Retrospective bags. I have two 5’s, the original version and the v2.0. The v2.0 is fantastic for M rangefinders, easily holding 1 or 2 cameras, several lenses, batteries, film, and a travel tripod. Definitely the default storage for stuff at home and often goes with me on car trips.
It is a bit bigger and doesn’t really fit in a backpack well. It can be a bit more than I’d like to carry on those all-day on-your-feet outings I often have on vacation.
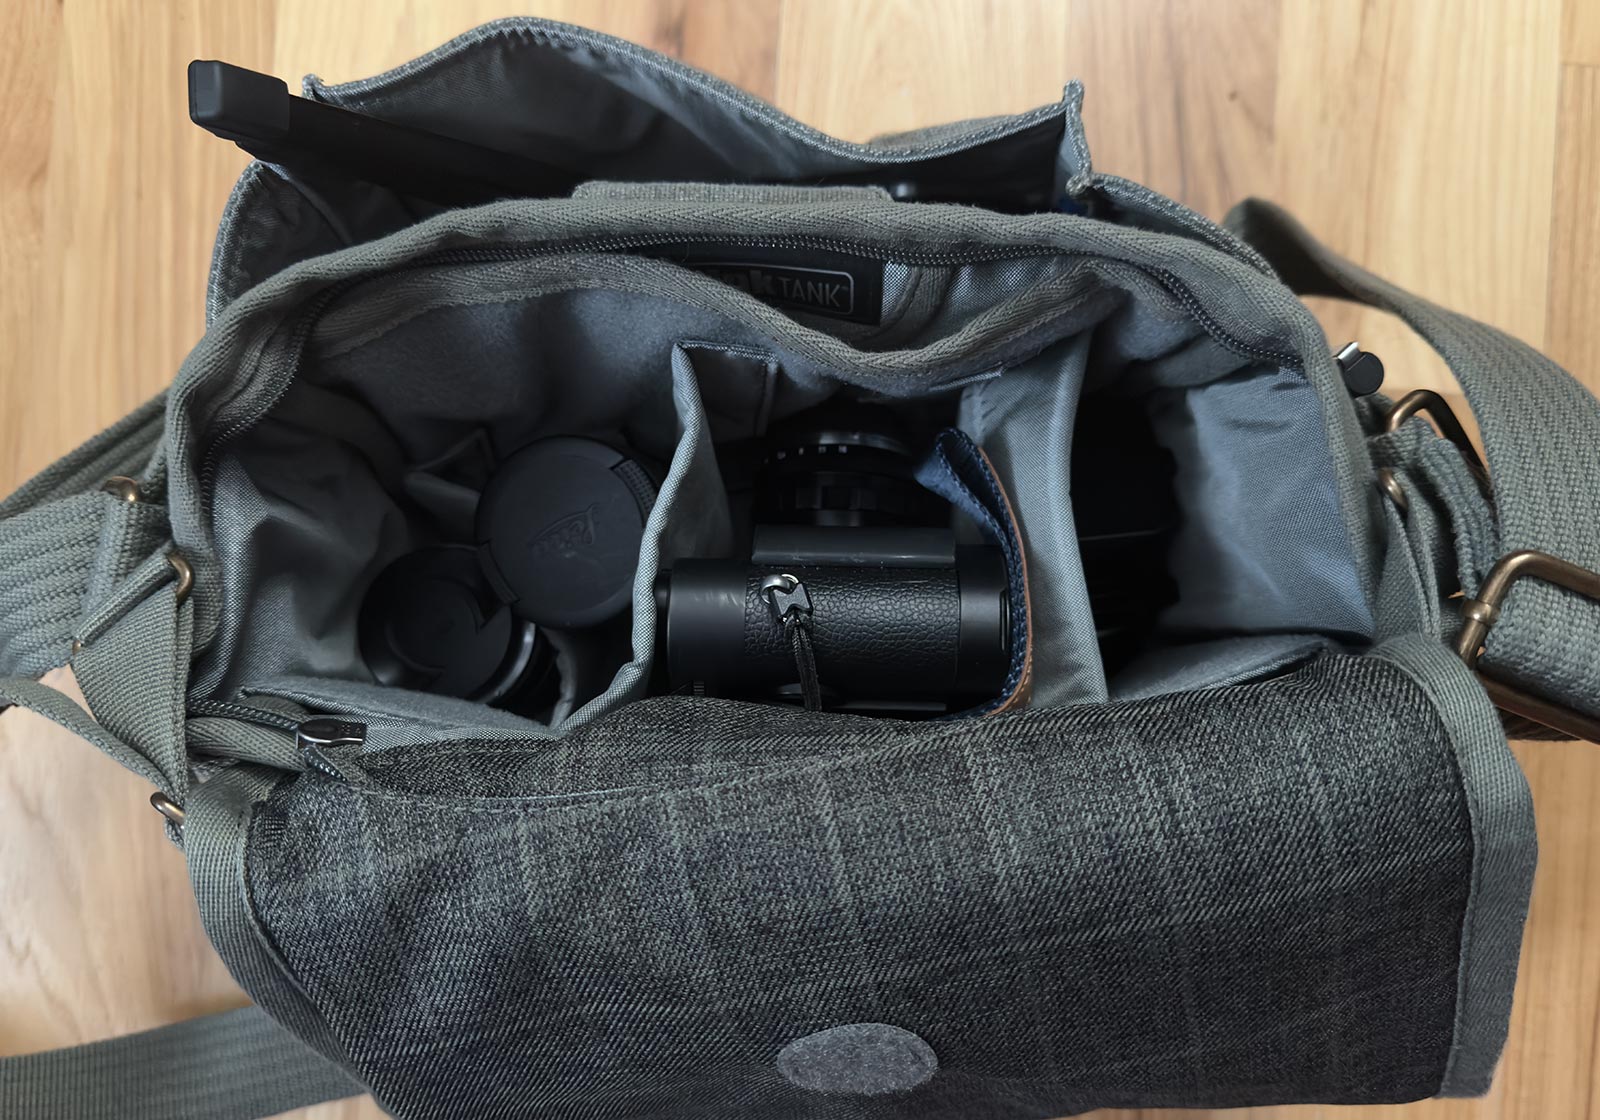
Retrospective 5 bag with camera, 3 lenses, and mini tripod.
Think Tank Retrospective 4
The Retrospective 4 is also great. A bit smaller in a noticeable way, and a great bag for 1 camera with a few lenses. It has fewer pockets for accessories, and unfortunately loses the expandable water bottle pouch on the side. The strap is also a step down. You could probably make it fit into a backpack if needed.
Retrospective 4 bag with camera, 2 lenses, and mini tripod.
Wandrd Rogue Sling 3L
Nice little bag but too small for an M camera in my opinion. The camera fits, but you have to kind of force the zipper closed because a camera with lens is just a little too deep for the interior space. It would comfortably fit the camera and lens if the lens was dismounted. The bag is a lot bigger externally than it needs to be for its internal volume as well. Maybe the 6L bag is the sweet spot, but I suspect it’s not going to meet the ‘fits in my backpack’ criteria.
Wandrd Rogue 3L with camera barely fitting.
Clever Supply Sidekick Pro
I thought this little bag would work, but alas, it didn’t. My camera has a grip on it and the slightly thicker base plate prevents it from fitting in the padded insert. Even without it, the camera is too tall for the bag to zip up. It fits without the padded insert, but now your camera is just rattling around with no protection.
It’s a nice little bag and a lot of the promo material on the website features Leica M’s, but it didn’t work out for me.
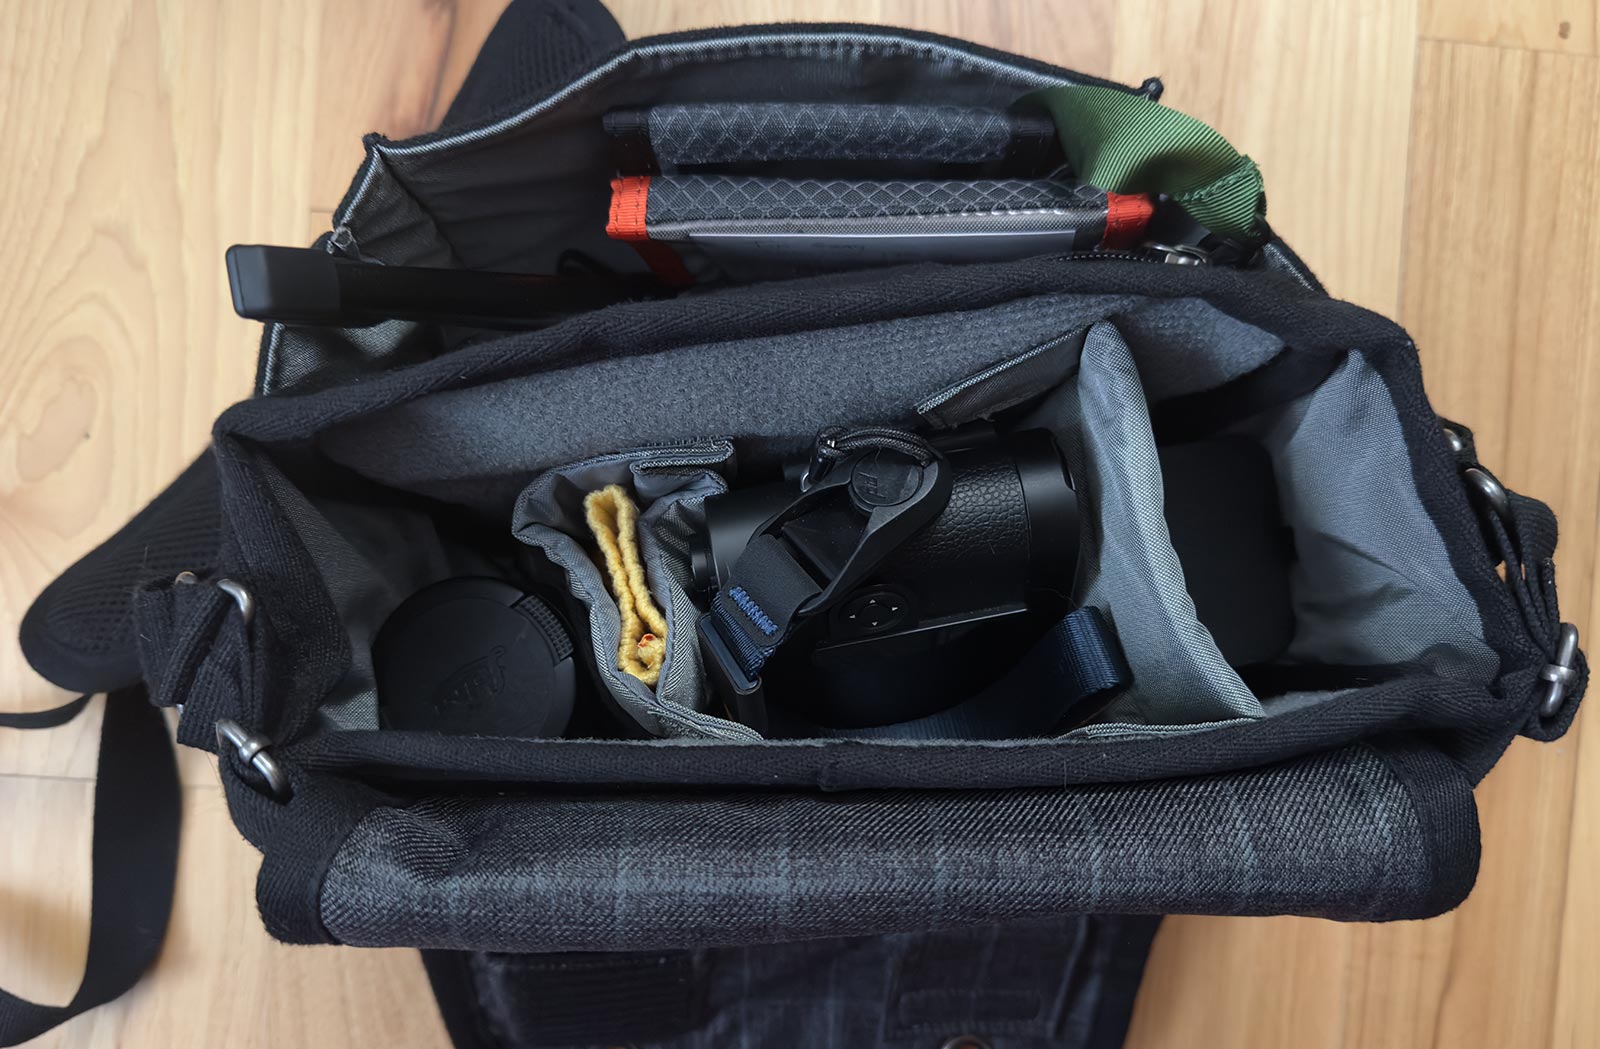
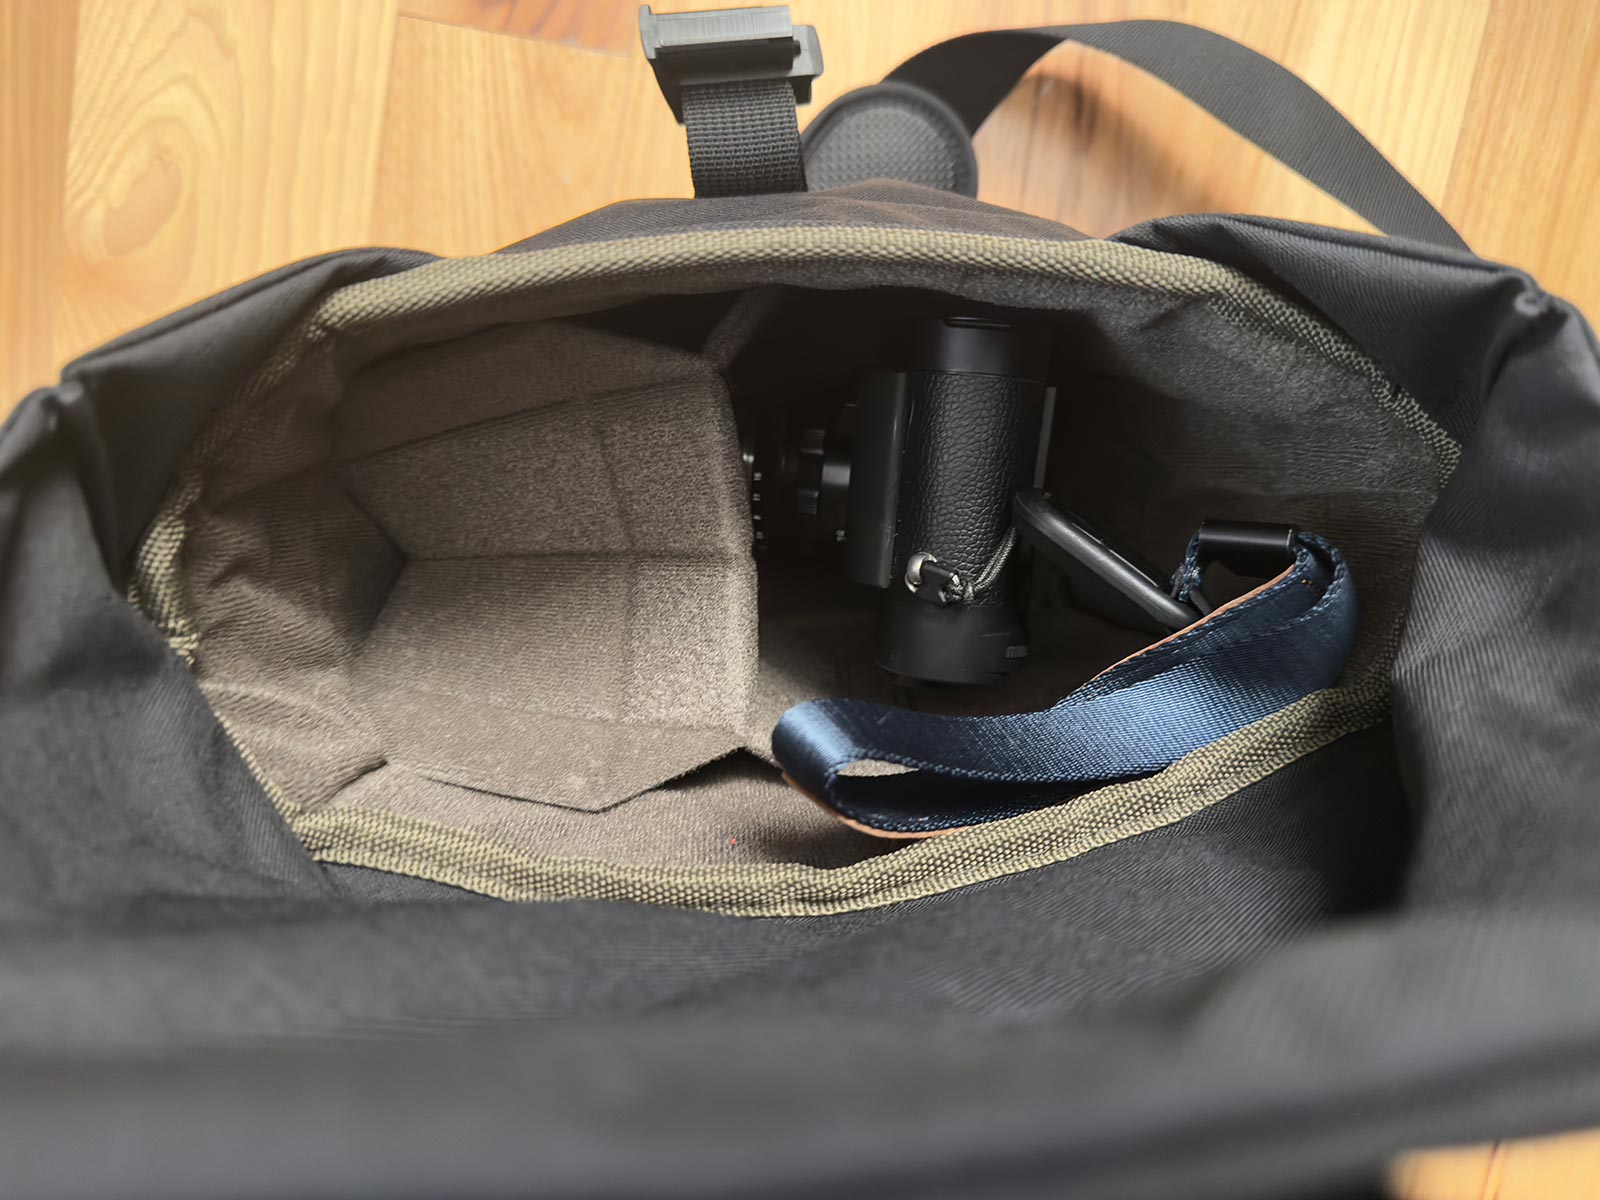
Wotancraft Pilot 3.5L
This bag gets good reviews and is pretty nice. The strap is good and easily adjustable and the front closure has a quick release mechanism which is very cool. Easily holds a camera and and two extra lenses. What’s the problem then? In my opinion, it’s a weird shape for a Leica M; it’s just too deep in way that makes it hard to use the internal space. A nice bag if I’m not worried about keeping it as compact as possible (e.g. a car trip) where I would appreciate having not to cram things in Tetris-style to maximize efficiency. It would be pretty amazing I think if it was 2" shorter.
I’ve bought both small small and medium velcro accessories for the interior, and they kind of get in the way for a bag of this size.
Wotancraft Pilot 3.5L with camera and 2 extra lenses.
Wotancraft Pilot 3.5L with camera and 2 extra lenses with the divider folded down.
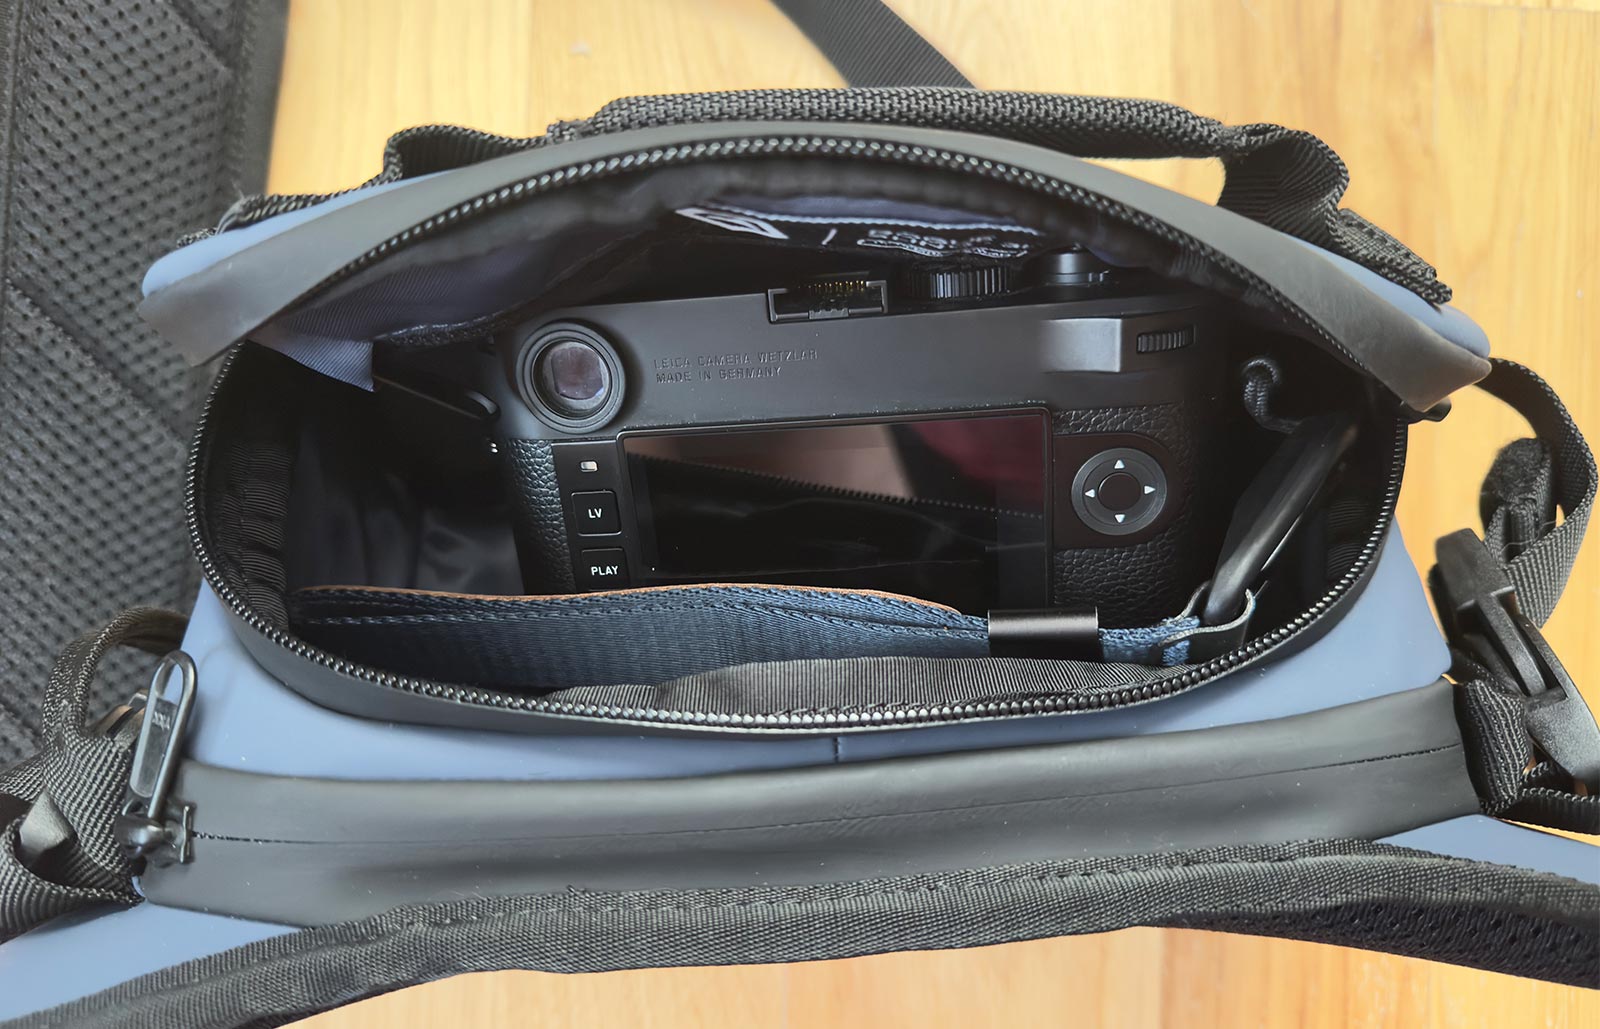
Wotancraft Pilot 2L
This is the bag that I’ve been looking for. Fits one camera with a lens mounted and one other lens. No bigger than it needs to be. Forget about the small-sized internal accessories; they interfere too much. The external clip-on pouches are need if you want to carry a bit extra, i.e. another lens or a small notepad.
The Peak Design FlexFold divider for their Everyday Sling 3L bag is perfect for this bag (and probably the 3.5L Wotancraft as well). It lets divide the bag perfectly for a camera with lens mounted plus another lens, with the 2nd lens hidden down under the folded down divider.
A camera with a 90 Summicron mounted fits fine. A camera with a 75 Summilux mounted also fits, but it’s a wee bit tight.
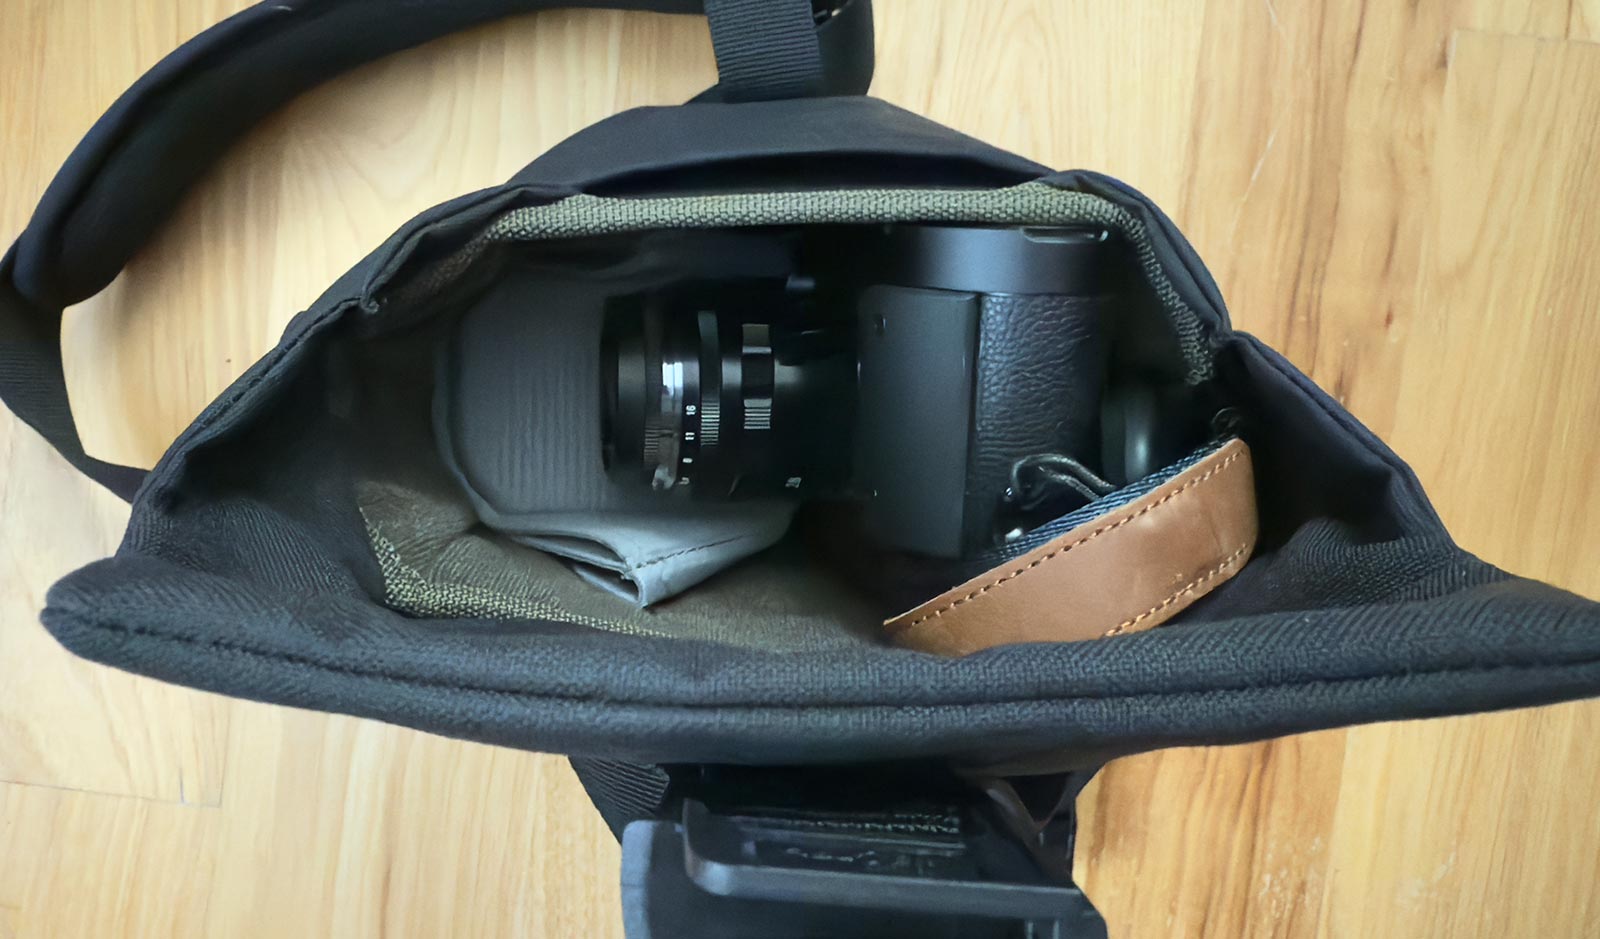
Wotancraft Pilot 2L with camera and extra lens. The Peak Design divider is folded down, hiding a lens.
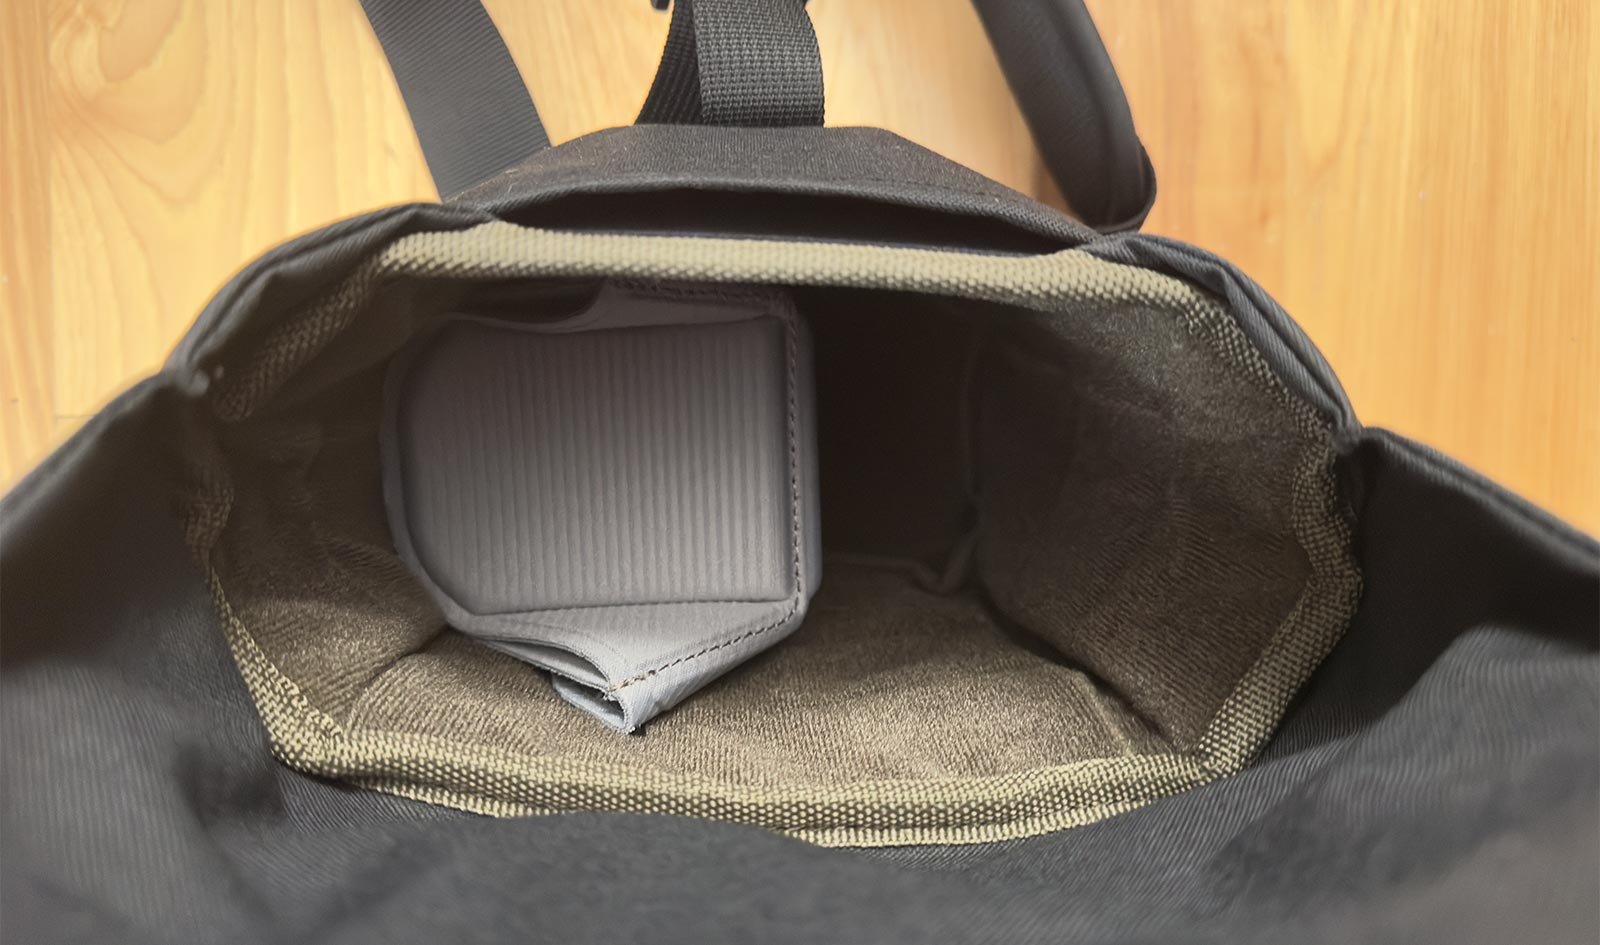
Wotancraft Pilot 2L with camera removed. The Peak Design divider is folded down, hiding a lens.

Comparison of the 3.5L and 2L Wotancraft bags.
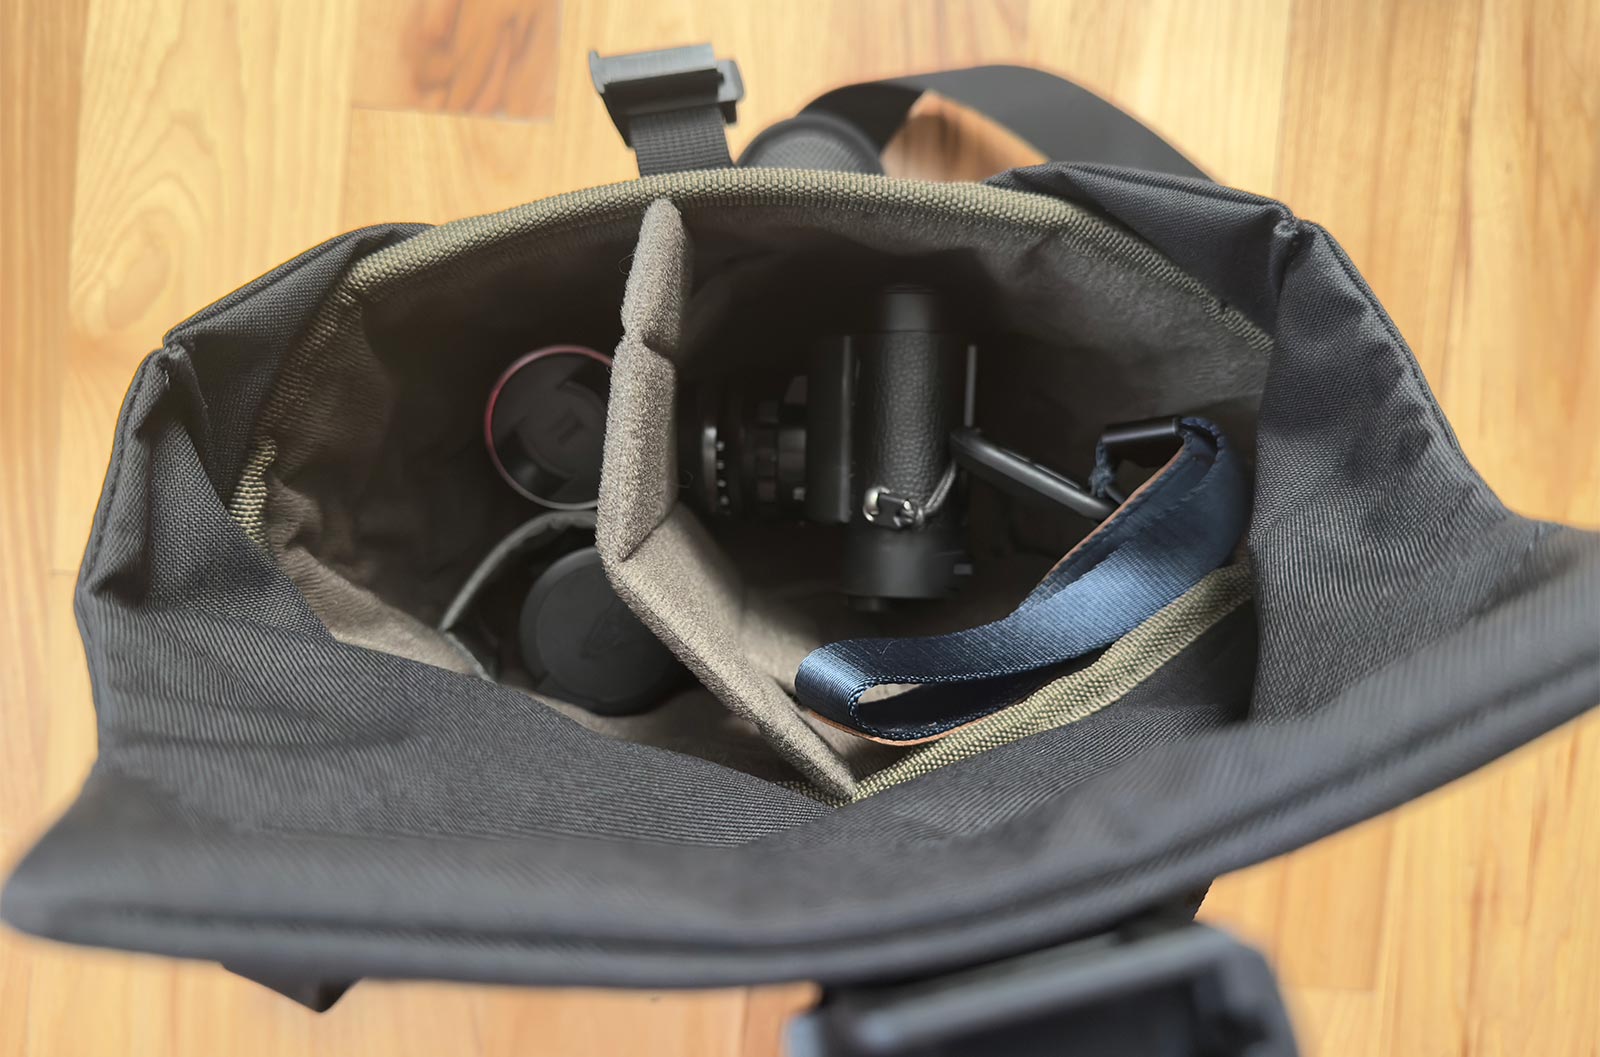
Domke F-5XA
This little bag is pretty darn close to the Lowepro as well. It’s got a great strap, though it doesn’t have the quick adjusting nature the Wotancraft does. Easily stores one camera with lens, another lens, and even a bit more. The ‘bit more’ can be another lens (as shown in the photo) but it gets a bit tight. It’s the perfect spot for an external finder, batteries, or something similar. Between the 2L Wotancraft and the little Domke, I’d say the Domke wins out on being more space efficient. It’s essentially the same size externally, but it can carry a bit more.
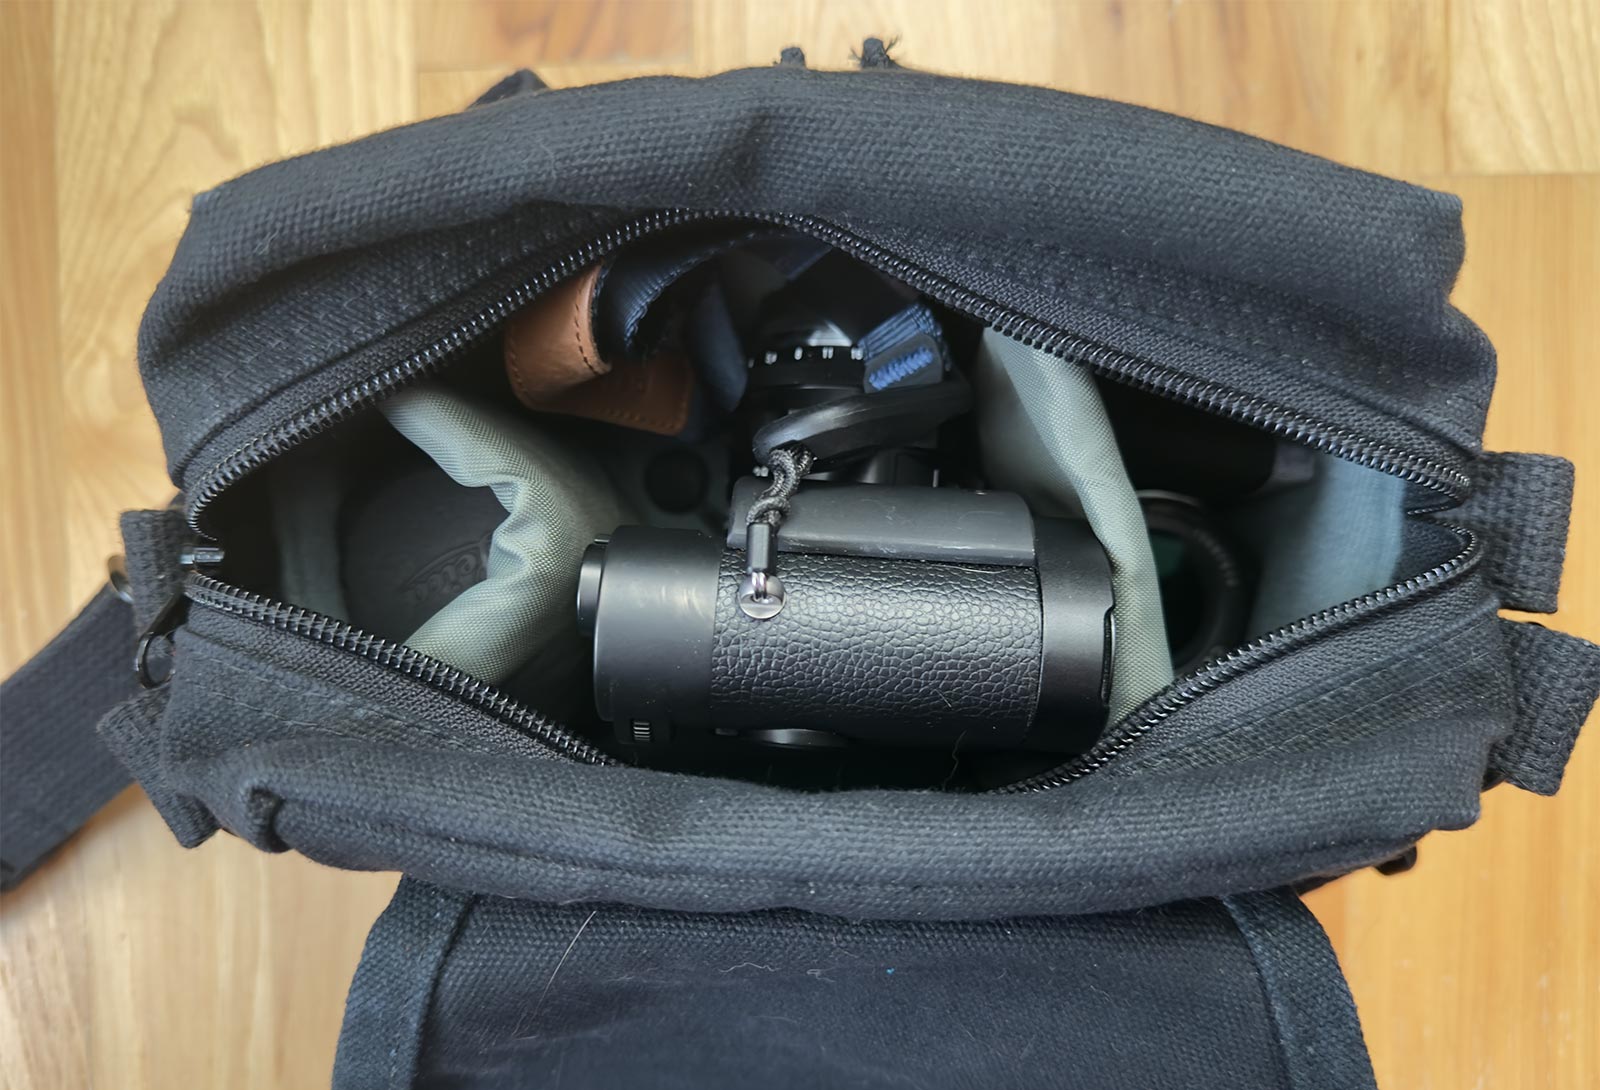
Domke F-5XA with camera and two extra lenses.
Domke F-5XB
I don’t have this bag but I am tempted. I think it’s going to be a bit wider than what I want, but I’ll probably end up with it at some point. A lot of Leica shooters seem to like it.
Thoughts
While the Think Tank bags are excellent and highly recommended, for my specific purpose of a small bag that can easily fit in my backpack and carry just a camera and 1-2 lenses, I’m using the Domke F-5XA and the Wotancraft 2L.
The Wotancraft 2L wins out on the quicker adjusting strap, a nicer closure mechanism (the Domke has some pretty loud velcro), and the strapping for mounting external accessories. It also feels a bit lighter and will probably be a bit more comfortable since you can adjust the strap so easily to reposition the load. The Domke holds a bit more and seems a bit more space efficient.
Both are good bags and I’m not sure which one I’m going to like more in the long run. I took the Domke on my last vacation and it was pretty good.
-
I found an email to Lowepro asking for a similar bag in my email while searching for the name of this bag for this blog post. ↩︎


