-
GOKLAHOMA Home Page for New Users
-
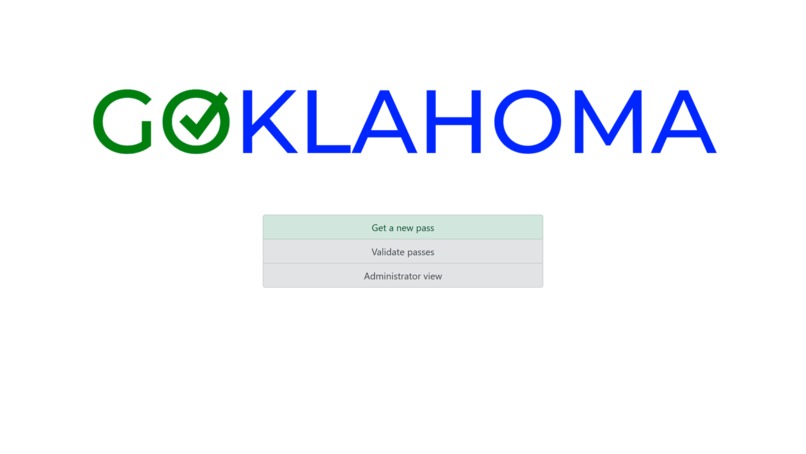
GOKLAHOMA Home Page for Administrators
-
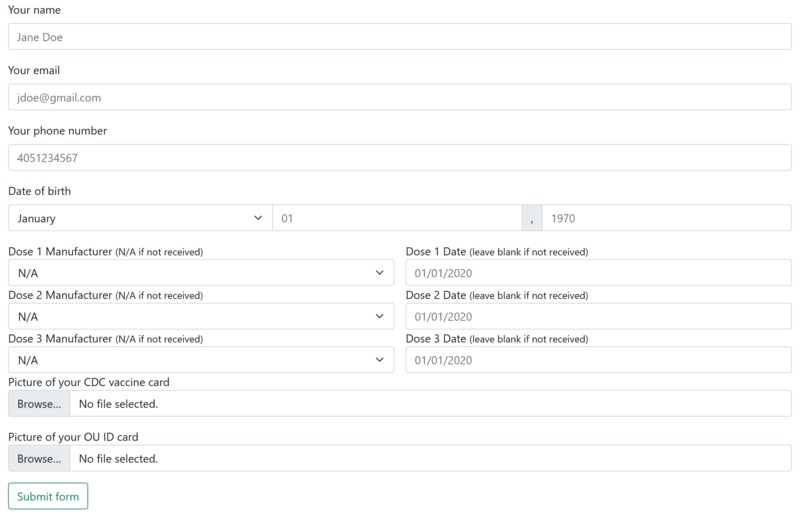
Example Data Entry Page for New Users
-
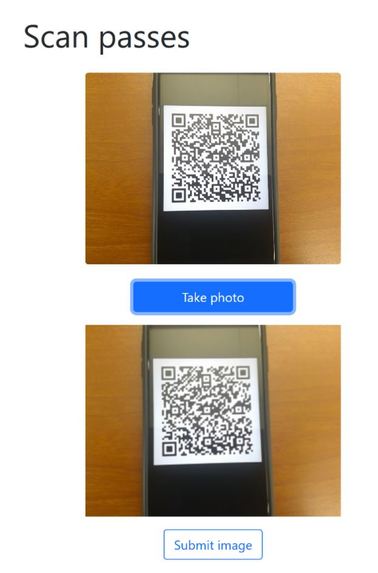
Validator QR Scan
-
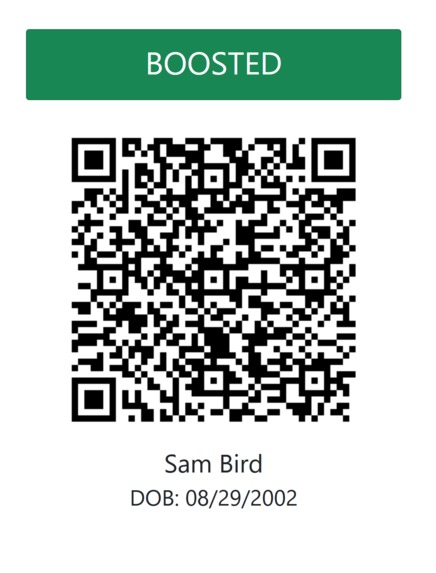
Validator QR Scan For Valid User
-
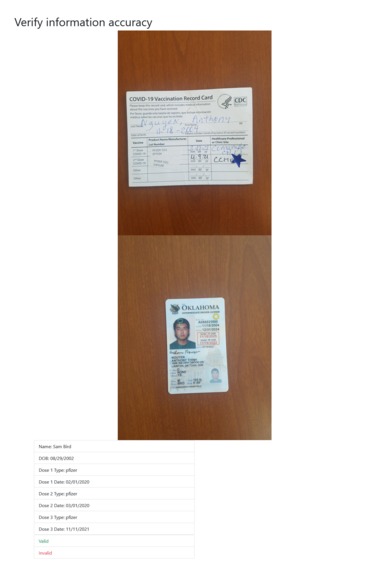
Example Data Check for Administrators
-
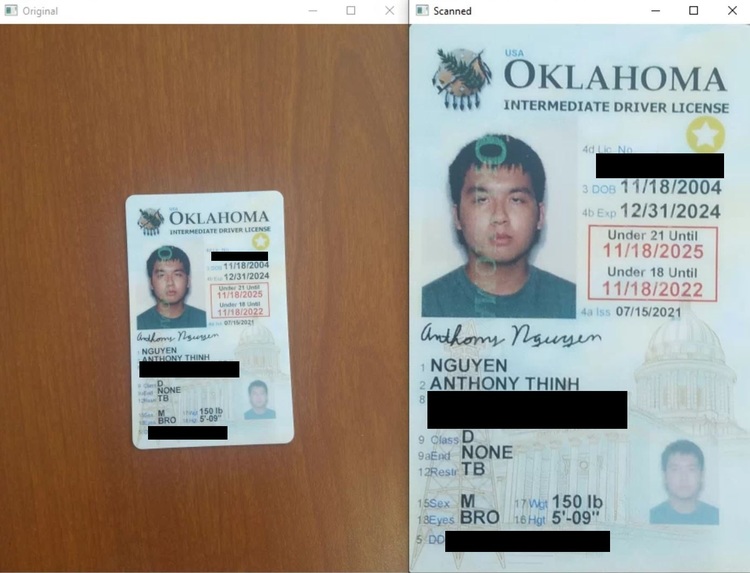
Example Document Scan


Inspiration
The COVID-19 pandemic has raged for nearly two years now and its presence is felt in every facet of everyday life. In the early days of the crisis, staying apart was important to keep each of us safe. But as vaccinations have been developed against the spread of the virus, health authorities have shared a unified message: vaccination is the best way to bring us together and defeat COVID-19. Many countries have started to turn towards vaccine passports as the solution to this problem.
The Australian Government created a vaccine passport in the (northern hemisphere) summer of 2021, but they quickly ran into an issue: their passports could be faked. As 1News reports, fake vaccine passports were circulating, compromising the integrity of the program.
We thought we could create a secure system for making vaccine passports as well as a way to scan others, so we set about making our own.
What it does
GOKLAHOMA allows users to receive a vaccine passport by entering their details into our system, as well as uploading their CDC vaccine card and their OU ID.

Administrators then review user input to ensure that it matches the information on their vaccine card. If the information matches, a vaccine passport is issued. When an administrator approves or rejects a vaccine passport, the applicant receives a text message notifying them.

Users called ‘validators’ have permission to scan vaccine passes and check their validity. This is all done through the website, and it will display the user’s vaccination status.

How We Built It – Document Scanning
In order to verify the data entered by our user, the administrator compares the information provided and the information on the vaccine card. As a result, one of our first ideas was to implement a “scanning” feature, similar to mobile apps like CamScanner. Although a human administrator would not have a difficult time discerning information from a distant or a rotated image of a vaccine card, an automated administrator, however, would find it hard to parse this information.
To “scan” our document, there were two major steps, which both utilized the Python opencv library. The first step was the Canny Edge Detection. This allowed us to grab all of our major contours, from which we searched for the largest 4-sided contour to serve as the “edges” of our document.

From here, we got the 4 corners of this contour and utilized linear algebra to apply a Perspective Matrix transformation. This stretched the corners of our contour toward the edges of our window.

Even though we did not end up using an automated administrator through OCR, this document-scanning function would set us up for success if we were to pursue it in the future.
How We Built It – Front End Interface
The front end client is built on a node.js stack. The server is an express server and it is running the pug rendering engine. We use fetch to send requests to the back end, which functions as an API.
The front end has three “modes” which each have several routes defined.
User mode is for the everyday end user, who will request and receive vaccine passports.
Validator mode is for people who are scanning vaccine passports.
Admin mode is for people who issue vaccine passports.
Several forms are used throughout the front end application. As data needs to be sent to the back end server, this makes sense. However, we were challenged by the fact that if a form was sent directly to the back end, our front end server side node.js application would not be able to access the form response. We resolved this by adding additional client side endpoints which simply repackage the data and send a request to the back end. For example, the following diagram illustrates how a new application for a vaccine passport is sent from the user to the back end server.

The validator client posed some interesting challenges in taking a photo from a live camera feed and sending it to the client. I found a tutorial which demonstrated the use of an HTML5 canvas to display a still frame of a camera input. I implemented a twist on this: I wasn’t interested in using the image itself, but the HTML5 canvas had an attribute which contained the base 64 encoding of the still frame. I used a hidden form to send this to the front end server, which passed it along with a user id to the back end.
How We Built It – User Database
Because we have future plans to expand this project to a larger consumer base, we chose to implement our database as a highly efficient JSON file. Particularly, we used a form of nested JSON files to store our data.
Our users are split into three major categories, in regard to their vaccine passport status. These are “PENDING,” “VALID,” and “INVALID.” These categories serve as our first set of “keys.” This first level of compartmentalization allows us to create efficient methods for parsing our data. For example, when the administrator goes to manually check the “PENDING” users, the system calls a generatePending() method. This method fetches all values under the “PENDING” key, saving us a significant amount of time compared to if we left the status as just another key/value pair.
Under this set of status keys, we find another dictionary between the user ID’s and the user’s data. Because many of our commands revolve around sending a command with the user ID and receiving information based on this ID, the dictionary’s look-up time of O(1) allows for fast searches.
Because all of these keys are under three unique statuses, we have to run three different search queries to find the location of a certain user ID. This may seem inefficient because we could rather have the IDs as the primary key system, but we believe that this small sacrifice benefits the speed of our retrieval algorithms as a whole.
Under our ID keys, we store the user’s data. Some parameters in this data include “NAME,” “DOB [Date of Birth],” “VACCINE-ONE-TYPE," and “EMAIL.”

How We Built It – Custom User IDs and QR Codes
In order to provide some form of high-level data security, we generate a randomized, unique ID for each user. This ID gets regenerated every time the user creates a new vaccine passport, such as in the case where the data was entered incorrectly.
To generate these keys, we utilized Python’s secrets library to generate 32-character hexadecimal strings. In addition to being used by the client as a means to data transmission between itself and the server, it is also used to generate unique QR codes for each passport. To generate these QR codes, we use Python’s pyqrcode library. Although any device could scan the QR code to get the ID, this key does nothing if the device does not have access to the private JSON database.
This QR code is used by Validator Clients by just scanning, in order to verify the user’s vaccination status through a digital medium. To scan these QR Codes, the Validator takes a picture of the QR code to convert to base64 format, before sending it to the server to decrypt with Python’s pyzbar library.

How We Built It – Twilio Notification System
After the user submits their information to the client, the administrator will need to manually check if both sets of information (user-inputted and vaccine card/ID) match. Because this may be a time-intensive process to go through many different users before an automated administrator is created, we created a text notification system through Twilio to let users know when their data has been reviewed.
In the future, we plan to implement the attachment of the user's QR code to this notification message.

How We Built It – Backend Server
To connect our frontend and our backend, we utilized Python’s Flask library. With this, we set up various endpoints, where the client would make several calls to the backend in order to run certain methods when given certain parameter data.
Challenges we ran into
We faced several challenges when working on this project. For example, we had very little prior experience when it came to setting up backend servers for the exchange of information between frontend and backend. This connection, additionally, came with a significant amount of difficulty, which led to many hours of bug-fixing. We also had troubles when it came to compressing our images into base64 (and vice-versa) for the purpose of portable data transmission between client and server.
Accomplishments that we're proud of
There are several accomplishments for us to be proud of. For example, this was both of our first hackathons, so we were very nervous coming into this 24-hour event. We struggled along the way, but we were able to successfully create a prototype for our project. Additionally, we learned many new concepts about both front-end and back-end software development.
What we learned
We learned many things during this 24-hour period. For example, in terms of back-end development, we learned more about opencv (such as Canny Edge Detection and Perspective Manipulation) and Flask. For front-end, we learned about using fetch() in node.js to interact with other web servers. We learned about using Bootstrap in order to make our front end client look presentable. While we have a long way to go in the world of web design, our website looks nice for having learned the framework in under a day.
What's next for GOKLAHOMA
For the future, there are many things that we look like to work on. For example, we would like to perfect the Document Scanning feature, since its results were not perfect. Additionally, we would like to use this Document Scanning feature in combination with potential OCR, in order to automate the role of the administrator. We would also want to improve our server’s security systems. Afterwards, if we have the time, we would like to improve on our client’s graphic design aspect.


Log in or sign up for Devpost to join the conversation.