-
-

Logo
-
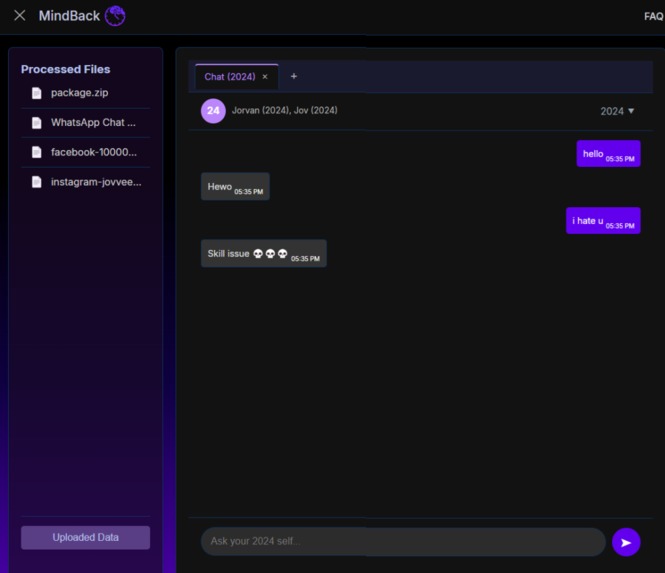
Sample usage
-
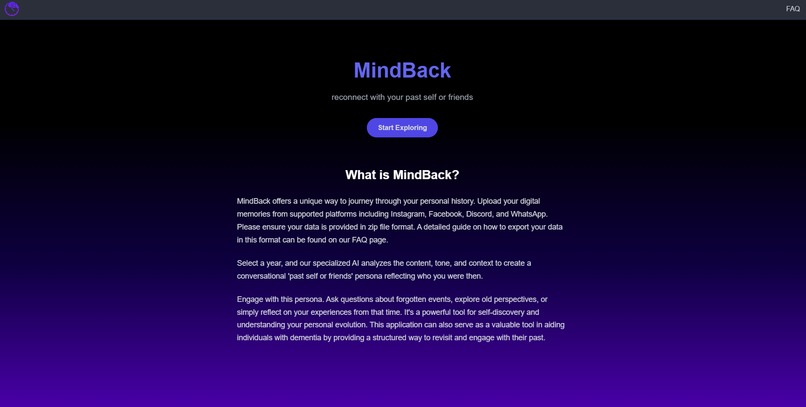
Home page
-

FAQ page


Team : 2.5 Yellows
- Jorvan (1744082)
- Iden (1543498)
- Vicky/IceKnight (non-unimelb student)
🧠 MindBack
MindBack is a web application designed to help you reconnect with your past self or friends by interacting with your digital memories through a conversational AI. Upload your personal data archives (e.g., from WhatsApp, Instagram, Facebook, Discord), and MindBack will process them, allowing you to chat with an AI persona based on the communication style and content from a specific year.
✨ Features
- AI Persona Generation: Creates a conversational AI based on your writing style and experiences from a selected year. 🤖
- Multi-Year Chat Tabs: Open multiple conversations simultaneously, each representing a different year. 📑
- Data Upload & Processing: Supports uploading
.ziparchives from various platforms (WhatsApp, Instagram, Facebook, Discord). 📤 - Local Processing: Prioritizes local data processing where possible. 🏠
- Persona Identification: Helps identify your username within different data sources for accurate persona generation. 👤
- FAQ Page: Provides guidance on exporting data from supported platforms. ❓
⚙️ Installation
Follow these steps to set up the MindBack project locally.
Prerequisites:
Steps:
Clone the repository:
git clone <repository-url>
cd mindback # Or your repository folder name
Set up Frontend:
- Navigate to the main project directory (e.g.,
my-appif that's the root containingpackage.json):bash # Make sure you are in the root project directory (e.g., my-app) npm install
- Navigate to the main project directory (e.g.,
Set up Backend:
- Navigate to the backend directory:
bash cd backend - Create and activate a Python virtual environment (Recommended):
- On macOS/Linux:
bash python3 -m venv venv source venv/bin/activate - On Windows:
bash
python -m venv venv
.\venv\Scripts\activate
- On macOS/Linux:
- Install Python dependencies:
bash pip install -r requirements.txt - Set up Environment Variables: 🔑
- Create a file named
.envinside thebackenddirectory. - Add your Google Gemini API key to the
.envfile:env GEMINI_API_KEY=YOUR_GEMINI_API_KEY_HERE # Optional: Adjust AI temperature (0.1 to 1.0, default 0.5) # GHOSTTEXT_TEMPERATURE=0.7 - Replace
YOUR_GEMINI_API_KEY_HEREwith your actual API key. You can obtain one from Google AI Studio.
- Create a file named
- Navigate to the backend directory:
▶️ Running the Application
Prerequisite: Ensure you have created the .env file inside the backend directory and added your GEMINI_API_KEY as described in the Installation steps above. The application will not function correctly without it. ❗
Start the Backend Server:
- Make sure you are in the
backenddirectory and your virtual environment is activated (if you created one). - Run the Flask API:
bash python api.py - The backend server should start, typically on
http://127.0.0.1:5000.
- Make sure you are in the
Start the Frontend Development Server:
- Open a new terminal or navigate back to the root project directory (e.g.,
my-app). - Run the Vite development server:
bash npm run dev - The frontend server should start, typically on
http://localhost:5173(or another port if 5173 is busy).
- Open a new terminal or navigate back to the root project directory (e.g.,
Access the Application:
- Open your web browser and navigate to the URL provided by the Vite development server (e.g.,
http://localhost:5173). 🌐
- Open your web browser and navigate to the URL provided by the Vite development server (e.g.,
🤔 How to Use
- Upload Data: Click the "Uploaded Data" button in the sidebar to open the upload modal. Drag and drop your
.zipdata archives or browse to select them. Click "Save Changes". - Process Data: The application will automatically process the uploaded data after you save changes in the upload modal. Wait for the processing to complete.
- Select Year/Persona: Once processing is done, available years will appear. Click on a year in the sidebar (or use the dropdown in an existing tab) to start a conversation. You will be prompted to identify your username within the data sources for that year to create the persona.
- Chat: Interact with the AI persona representing the selected year. Use the input field at the bottom to ask questions or chat. 💬
- Manage Tabs: Add new tabs (+) to chat with different years simultaneously, switch between tabs, or close tabs (x).
💻 Technology Stack
- Frontend: React, Vite, Framer Motion, CSS
- Backend: Flask (Python), Google Gemini API
- Data Processing: Python standard libraries (zipfile, json, re, etc.), BeautifulSoup


Log in or sign up for Devpost to join the conversation.