


Paddle Payment Integration
The Paddle addon allows you to accept credit cards for digital products using Paddle’s secure, tax-compliant system. Follow these steps to activate and configure the addon on your EasyCommerce store.
Here’s the step-by-step video tutorial guide:
Step 1: Activate the Addon
- Log in to your WordPress Dashboard.
- Go to EasyCommerce > Addons section and make it “Enabled” under the Paddle Payment Integration addon.
If you are facing any difficulties, read this documentation on how to install and activate addon on EasyCommerce.

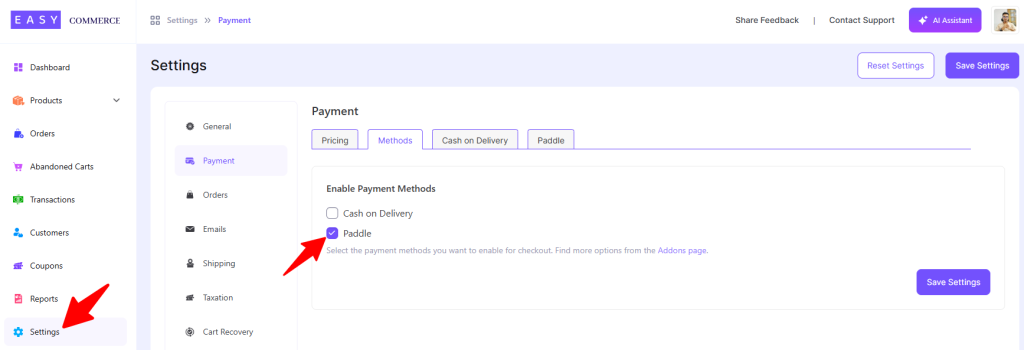
Step 2: Enable Paddle in Payment Settings
- In your dashboard, go to Store > Settings > Payments > Methods.
- Select Paddle as your payment gateway.
- Tap ‘Save Settings’ to finalize the changes.
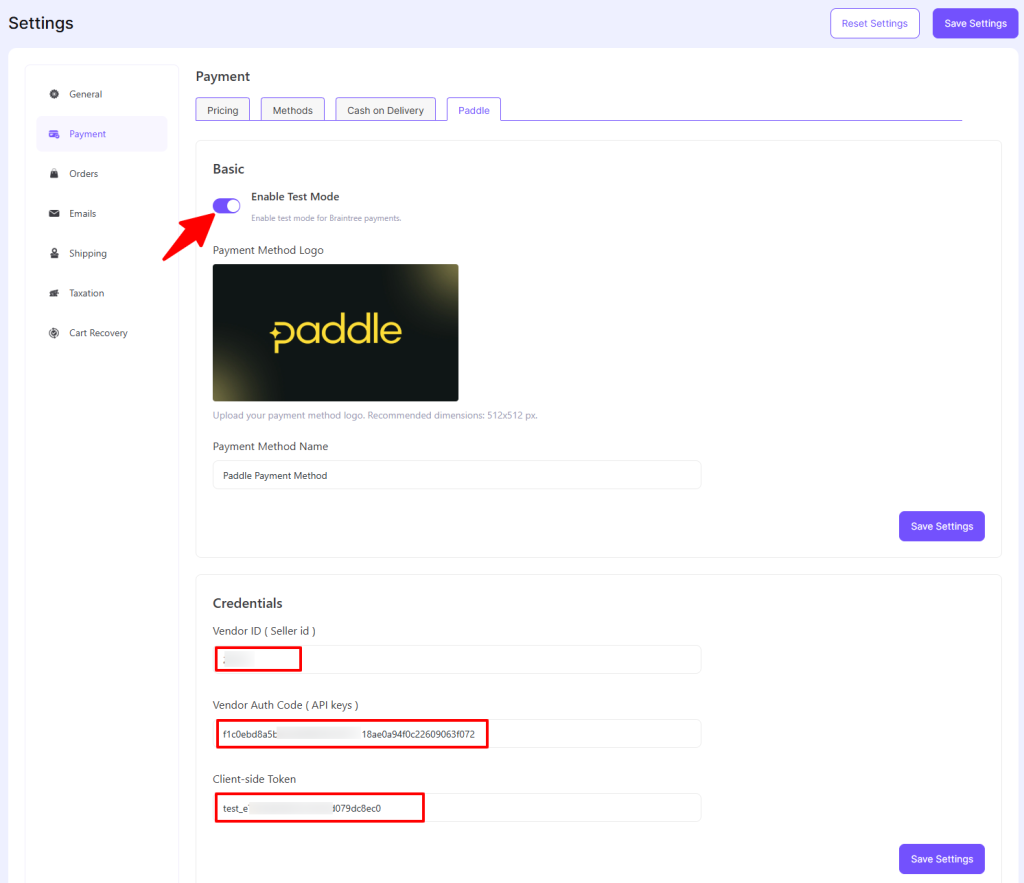
Step 3: Configure Paddle Settings
- Access the Paddle Payment Integration settings tab, beside the ‘Methods’ tab.
- Enable the ‘Test mode’ if it's a test scenario.
- Add the Paddle payment method logo from Media Library.
- Enter the Payment Method Name.
- Enter your Paddle Vendor ID, API Key, and Client Side Token. (get these from your Paddle account).
- Click Save Settings to apply changes.
Step 4: Test the Checkout (Optional)
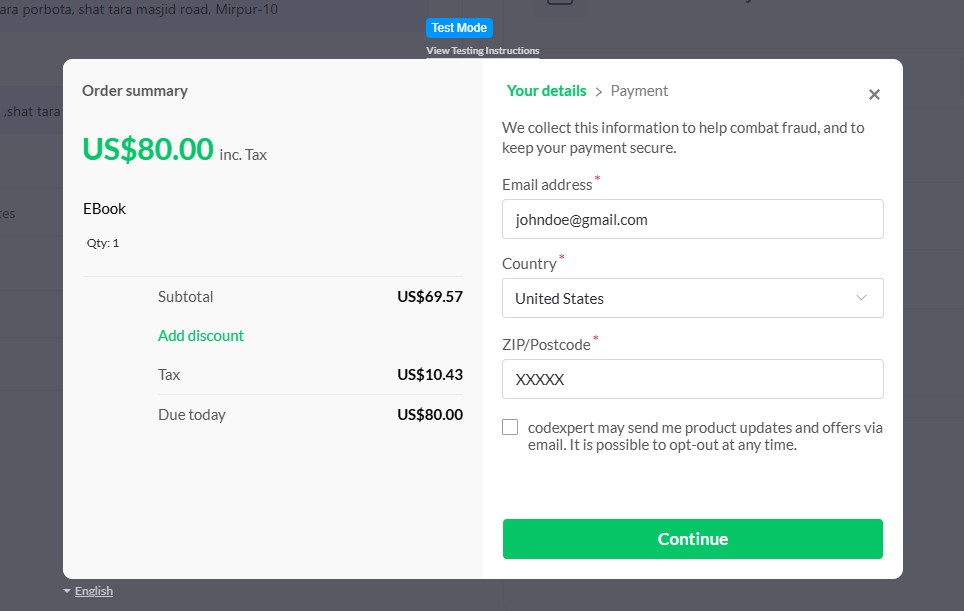
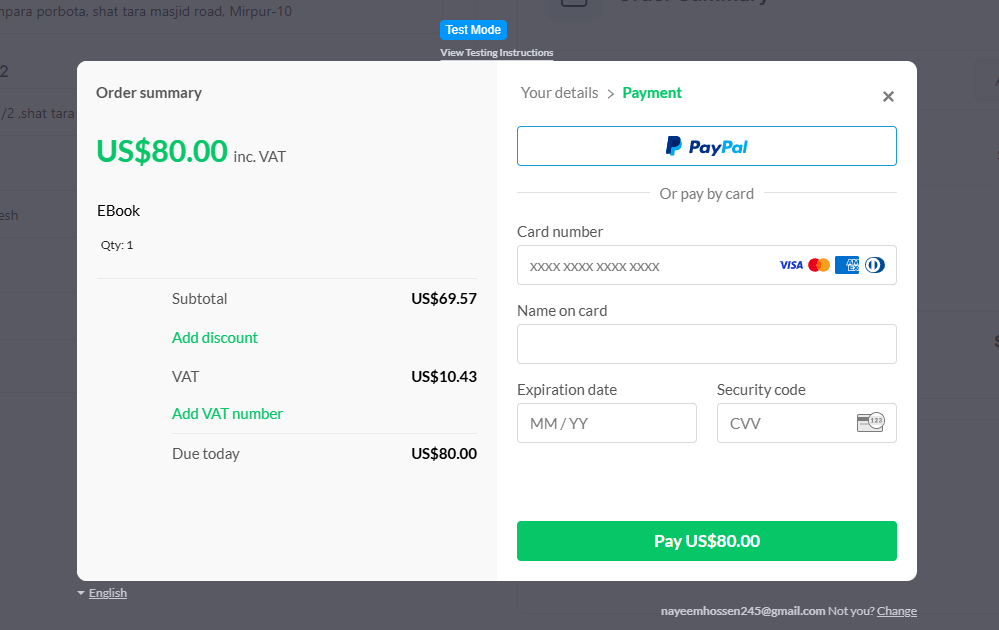
Use Paddle’s test mode to preview the checkout experience. There will be an additional checkout popup from Paddle after placing a digital product order. Next-
- You’ll see a secure payment window with options for credit cards.
- Fill in email, location, and payment details, then complete payment.
- You’ll need to wait a few more seconds for EasyCommerce to create an order against the payment.
- Lastly, you’ll be redirected to the Customer Dashboard from where the digital file can be downloaded.
That’s it! You’re now ready to sell digital products using Paddle on your EasyCommerce store.
Was this doc helpful?