- Maria Giulia Cecchini
- Federico Ponzi
Prof. Sterbini - Legolab course page
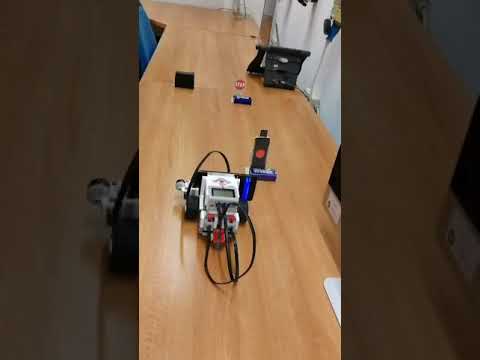
Realize a prototype of a simple autonomous-car, using computer vison and the Lego EV3 kit.

The Android App is made in Java, using the OpenCV library. The app is made of one MainActivity, and some classes.
After the initialization of the OpenCV library, the app enters in the main loop.
The class ConnectionHandler is, as the name suggest, in charge of handling the connection. It extends the Thread class and run in a separate thread in order to not block the main UI thread.
After getting a new frame, the detection loop will loops all the detectors and adds the findings to the LegoBot class. This loop is executed - hopefully - many times per second:
private void detect() {
    Imgproc.equalizeHist(mGray, mGray);
 if(mDetectors == null) return;
 for(AbstractDetector detector : mDetectors)
    {
            d = detector.detect(mRgba, mGray);
 if(!d.equals(Legobot.Analysis.NO_DETECTION))
            {
                legobot.addAnalysis(d);
  }
    }
}A detector interface, is defined as:
public abstract class AbstractDetector{
 public abstract Legobot.Analysis detect(Mat mRgba, Mat mGray);
}
This abstract class defines also helpful methods for debugging purposes. In order to add a new detector, one should:
- Extend the
AbstractDetectorclass, and implement the detect method. - Add a new element in the
Legobot.Analysisenum.
Legobot.Analysis defines the possible findings - with a color for debug purposes:
NO_DETECTION(new Scalar(0, 0, 0)),
SEMAPHORE_RED(new Scalar(255, 0, 0)),
SEMAPHORE_GREEN(new Scalar(83, 244, 66)),
SIGN_STOP(new Scalar(0, 255, 0));
The stop detector is implemented through an Haar classifier, taken from here. The classifier is a result of 19 stages of training. Even though there are many over available classifier for stop sign online - and one can train its own - this was considered good enough.
After loading the classifier:
String stopSignPath = Utils.copyFromRaw(context, R.raw.stopsign_classifier, "stop_sign_haar");
mClassifier = new CascadeClassifier(stopSignPath);
We can use it using the detect multiscale method:
mClassifier.detectMultiScale(mGray,
							stopDetected,
							1.1,
							2,
							Objdetect.CASCADE_SCALE_IMAGE
							  | Objdetect.CASCADE_FIND_BIGGEST_OBJECT,
							new Size(120,120),
							new Size(360,360));
In principle, it's possible to add new classifiers trained to detect more street signs and create a more complete system

The semaphore detector is handmade, using opencv. The idea is to:
- Move from rgb to hsv color space:
Imgproc.cvtColor(mRgb, hsv, Imgproc.COLOR_RGB2HSV);- Blur the image:
Imgproc.GaussianBlur(hsv, hsv, new Size(5, 5), 0);
Imgproc.medianBlur(hsv, hsv, 5);- Remove all the pixel not in the desired colorspace. For each pixel, this computes "white if pixel is in range, black otherwise".
Core.inRange(hsv, greenColors.get(0).first,
greenColors.get(0).second, hsv);- Apply the HoughCircles algorithm to detect circles.
Imgproc.HoughCircles(hsv, circles, Imgproc.HOUGH_GRADIENT, 2,
                     hsv.size().height / 4, 100, 30, (int)hsv.size().height/24,
                     (int) hsv.size().height/15);
The parameters are tuned accordingly, in order to detect the traffic light not too close or too far back.
The ConnectionHandler class run in another thread and is constructed with a reference of the Legobot object. It sets up a socket to the EV3, and create another Timer thread.
Timer timer = new Timer();
timer.schedule(new SendAction(), 0, N_MILLISECS);
Every N_MILLISECS, the ConnectionHandler will ask Legobot for an Analysis to send:
Legobot.Analysis a = legobot.getAnalysis();Legobot will return the Legobot.Analysis most detected in the last second - and the ConnectionHandler will send it to the EV3.
With a 100% rate detection system one could in principle send the Analysis as soon as something is detected. Since this is not the case, we create a summary of findings of the last second to enhance the resiliency of the detection process.


While the Android App has the duty to analyse the environment and detect the street signs, the EV3 has to implement the behaviour based on the findings.
The behaviour programming is a design pattern which offers a valid alternative to if-else. From the Lejos documentation:
The concepts of Behavior Programming as implemented in leJOS NXJ are very simple:
- Only one behavior can be active and in control of the robot at any time.
- Each behavior has a fixed priority.
- Each behavior can determine if it should take control.
- The active behavior has higher priority than any other behavior that should take control.
We have defined a package it.uniroma1.legolab.behaviors with a convenient abstract adapter class:
package it.uniroma1.legolab.behavior;

import it.uniroma1.legolab.Legobot;
import it.uniroma1.legolab.MovePilotCustom;
import lejos.robotics.subsumption.Behavior;

public abstract class BehaviorAdapter implements Behavior
{
	Legobot legobot;
	public BehaviorAdapter(Legobot legobot)
	{
		this.legobot = legobot;
	}
	@Override
	public boolean takeControl() {
		return false;
	}

	@Override
	public void action() {
	}
	@Override
	public void suppress() {
	}
}
The behaviour classes then, look like an if-then class:
public class GreenTrafficLightBehavior extends BehaviorAdapter {
	@Override
	public boolean takeControl() {
		return legobot.getAnalysis().equals(Analysis.SEMAPHORE_GREEN);
	}
	@Override
	public void action() {
		legobot.doForward();
	}
}
The behaviour classes takeControl in the order defined in the Legobot class:
		this.behaviors = new Behavior[]{
				new DefaultBehavior(this),
				new StopBehavior(this),
				new RedTrafficLightBehavior(this),
				new GreenTrafficLightBehavior(this),
				new EscBehavior(this)
};In the EV3 project, we can find the "other side" of theConnectionHandler class.
This class creates a server socket, and listen to incoming connections on port 8888.
The idea is that in principle we could connect multiple input sensors (e.g. more phones/cameras, temperature, light etc), in order to realize even more complex behaviours.
The communication protocol is very simple, and is based on the Analysis Enum:
public enum Analysis {
        NO_DETECTION,
        SEMAPHORE_RED,
        SEMAPHORE_GREEN,
        SIGN_STOP;
    }
The android app passes the Analysis.ordinal() to the EV3, using an ObjectInputStream.
A video of the Legobot in action is available here.
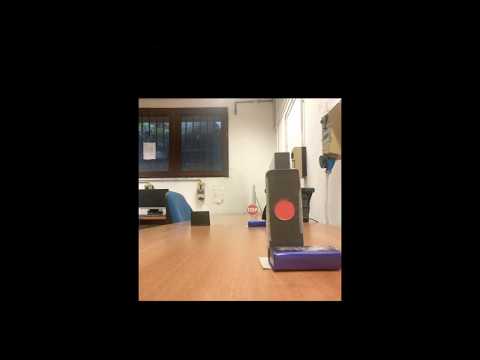
There is also a video from the prespective of the car.
In order to find the right color range, we used an HSV threshold color picker:

The source code is available here.