Image

Pickle Diodes, Asymmetric Jacobs Ladders, And Other AC Surprises

While we’re 100 years past Edison’s fear, uncertainty, and doubt campaign, the fact of the matter is that DC is a bit easier to wrap one’s head around. It’s just so honest in its directness. AC, though? It can be a little shifty, and that results in some unexpected behaviors, as seen in this video from [The Action Lab].

He starts off with a very relatable observation: have you ever noticed that when you plug in a pickle, only half of it lights up? What’s up with that? Well, it’s related to the asymmetry he sees on his Jacobs ladder that has one side grow hotter than the other. In fact, it goes back to something welders who use DC know about well: the Debye sheath.

The arc of a welder, or a Jacobs ladder, or a pickle lamp is a plasma: ions and free electrons. Whichever electrode has negative is going to repel the plasma’s electrons, resulting in a sheath of positive charge around it. This positively-charged ions in the Debye sheath are going to accelerate into the anode, and voila! Heating. That’s why it matters which way the current goes when you’re welding.

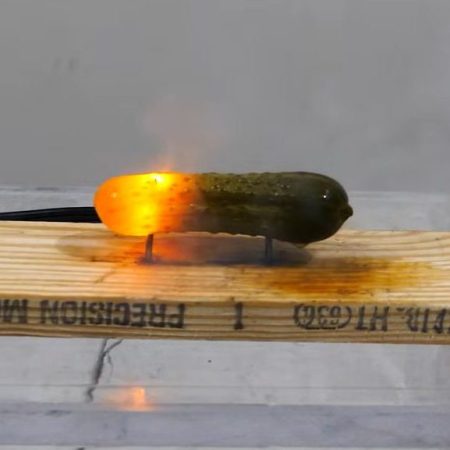
With DC, that makes sense. In AC, well — one side starts as negatively charged, and that’s all it takes. It heats preferentially by creating a temporary Debye sheath. The hotter electrode is going to preferentially give off electrons compared to its colder twin — which amplifies the effect every time it swings back to negative. It seems like there’s no way to get a pure AC waveform across a plasma; there’s a positive feedback loop at whatever electrode starts negative that wants to introduce a DC bias. That’s most dramatically demonstrated with a pickle: it lights up on the preferentially heated side, showing the DC bias. Technically, that makes the infamous electric pickle a diode. We suspect the same thing would happen in a hot dog, which gives us the idea for the tastiest bridge rectifier. Nobody tell OSHA.

[The Action Lab] explains in more detail in his video, and demonstrates with ring-shaped electrode how geometry can introduce its own bias. For those of us who spend most of our time slinging solder in low-voltage DC applications, this sort of thing is fascinating.  It might be old hat to others here; if the science of a plain Jacobs ladder no longer excites you, maybe you’d find it more electrifying built into a blade.

Continue reading “Pickle Diodes, Asymmetric Jacobs Ladders, And Other AC Surprises”

Image

Generating Plasma With A Hand-Cranked Generator

Everyone loves to play with electricity and plasma, and [Hyperspace Pirate] is no exception. Inspired by a couple of 40×20 N52 neodymium magnets he had kicking around, he decided to put together a hand-cranked generator and use it to generate plasma with. Because that’s the kind of fun afternoon projects that enrich our lives, and who doesn’t want some Premium Fire™ to enrich their lives?

The generator itself is mostly 3D printed, with the magnets producing current in eight copper coils as they spin past. Courtesy of the 4.5:1 gear on the crank side, it actually spins at over 1,000 RPM with fairly low effort when unloaded, albeit due to the omission of iron cores in the coils. This due to otherwise the very strong magnets likely cogging the generator to the point where starting to turn it by hand would become practically impossible.

Despite this, the generator produces over a kilovolt with the 14,700 turns of 38 AWG copper wire, which is enough for the voltage multiplier and electrodes in the vacuum chamber, which were laid out as follows:

Circuit for the plasma-generating circuit with a vacuum chamber & hand-cranked generator. (Credit: Hyperspace Pirate, YouTube)

Some of our esteemed readers may be reminded of arc lighters which are all the rage these days, and this is basically the hand-cranked, up-scaled version of that. Aside from the benefits of having a portable super-arc lighter that doesn’t require batteries, the generator part could be useful in general for survival situations. Outside of a vacuum chamber the voltage required to ionize the air becomes higher, but since you generally don’t need a multi-centimeter arc to ignite some tinder, this contraption should be more than sufficient to light things on fire, as well as any stray neon signs you may come across.

If you’re looking for an easier way to provide some high-voltage excitement, automotive ignition coils can be pushed into service with little more than a 555 timer, and if you can get your hands on a flyback transformer from a CRT, firing them up is even easier.

Continue reading “Generating Plasma With A Hand-Cranked Generator”

Image

Turning A Kombucha Bottle Into A Plasma Tube

Kombucha! It’s a delicious fermented beverage that is kind to your digestive system and often sold in glass bottles. You don’t just have to use those bottles for healthy drinks, though. As [Simranjit Singh] demonstrates, you can also use them to create your very own plasma tube.

[Simranjit’s] build begins with a nice large 1.4-liter kombucha bottle from the Synergy brand. To make the plasma tube nicely symmetrical, the bottle had its original spout cut off cleanly with a hot wire, with the end then sealed with a glass cap. Electrodes were installed in each end of the tube by carefully drilling out the glass and installing small bolts. They were sealed in place with epoxy laced with aluminium oxide in order to improve the dielectric strength and aid the performance of the chamber. A vacuum chamber was then used to evacuate air from inside the chamber. Once built, [Simranjit] tested the bottle with high voltage supplied from a flyback transformer, with long purple arcs flowing freely through the chamber.

A plasma tube may not be particularly useful beyond educational purposes, but it does look very cool. We do enjoy a nice high-voltage project around these parts, after all.

Continue reading “Turning A Kombucha Bottle Into A Plasma Tube”

Image

Pulsed Deposition Points A Different Path To DIY Semiconductors

While not impossible, replicating the machines and processes of a modern semiconductor fab is a pretty steep climb for the home gamer. Sure, we’ve seen it done, but nanoscale photolithography is a demanding process that discourages the DIYer at every turn. So if you want to make semiconductors at home, it might be best to change the rules a little and give something like this pulsed laser deposition prototyping apparatus a try.

Rather than building up a semiconductor by depositing layers of material onto a silicon substrate and selectively etching features into them with photolithography, [Sebastián Elgueta]’s chips will be made by adding materials in their final shape, with no etching required. The heart of the process is a multi-material pulsed laser deposition chamber, which uses an Nd:YAG laser to ablate one of six materials held on a rotating turret, creating a plasma that can be deposited onto a silicon substrate. Layers can either be a single material or, with the turret rapidly switched between different targets, a mix of multiple materials. The chamber is also equipped with valves for admitting different gases, such as oxygen when insulating layers of metal oxides need to be deposited. To create features, a pattern etched into a continuous web of aluminum foil by a second laser is used as a mask. When a new mask is needed, a fresh area of the foil is rolled into position over the substrate; this keeps the patterns in perfect alignment.

We’ve noticed regular updates on this project, so it’s under active development. [Sebastián]’s most recent improvements to the setup have involved adding electronics inside the chamber, including a resistive heater to warm the substrate before deposition and a quartz crystal microbalance to measure the amount of material being deposited. We’re eager to see what else he comes up with, especially when those first chips roll off the line. Until then, we’ll just have to look back at some of [Sam Zeloof]’s DIY semiconductors.

Image

Liquid Metal Ion Thrusters Aren’t Easy

What do scanning electron microscopes and satellites have in common? On the face of things, not much, but after seeing [Zachary Tong]’s latest video on liquid metal ion thrusters, we see that they seem to have a lot more in common than we’d initially thought.

As you’d expect with such a project, there were a lot of false starts and dead ends. [Zach] started with a porous-emitter array design, which uses a sintered glass plate with an array of tiny cones machined into it. The cones are coated in a liquid metal — [Zach] used Galinstan, an alloy of gallium, indium, and tin — and an high voltage is applied between the liquid metal and an extraction electrode. Ideally, the intense electric field causes the metal to ionize at the ultra-sharp tips of the cones and fling off toward the extraction electrode and into the vacuum beyond, generating thrust.

Getting that working was very difficult, enough so that [Zach] gave up and switched to a slot thruster design. This was easier to machine, but alas, no easier to make work. The main problem was taming the high-voltage end of things, which seemed to find more ways to produce unwanted arcs than the desired thrust. This prompted a switch to a capillary emitter design, which uses a fine glass capillary tube to contain the liquid metal. This showed far more promise and allowed [Zach] to infer a thrust by measuring the tiny current created by the ejected ions. At 11.8 μN, it’s not much, but it’s something, and that’s the thing with ion thrusters — over time, they’re very efficient.

To be sure, [Zach]’s efforts here didn’t result in a practical ion thruster, but that wasn’t the point. We suspect the idea here was to explore the real-world applications for his interests in topics like electron beam lithography and microfabrication, and in that, we think he did a bang-up job with this project.

Continue reading “Liquid Metal Ion Thrusters Aren’t Easy”

Image

Quick And Very Dirty Repair Gets Smoked PLC Back In The Game

When electronics release the Magic Smoke, more often than not it’s a fairly sedate event. Something overheats, the packaging gets hot enough to emit that characteristic and unmistakable odor, and wisps of smoke begin to waft up from the defunct component. Then again, sometimes the Magic Smoke is more like the Magic Plasma, as was the case in this absolutely smoked Omron programmable logic controller.

Normally, one tasked with repairing such a thing would just write the unit off and order a replacement. But [Defpom] needed to get the pump controlled by this PLC back online immediately, leading to the somewhat unorthodox repair in the video below. Whatever happened to this poor device happened rapidly and energetically, taking out two of the four relay-controlled outputs. [Defpom]’s initial inspection revealed that the screw terminals for one of the relays no longer existed, one relay enclosure was melted open, its neighbor was partially melted, and a large chunk of the PCB was missing. Cleaning up the damaged relays revealed what the “FR” in “FR4” stands for, as the fiberglass weave of the board was visible after the epoxy partly burned away before self-extinguishing.

With the damaged components removed and the dangerously conductive carbonized sections cut away, [Defpom] looked for ways to make a temporary repair. The PLC’s program was locked, making it impossible to reprogram it to use the unaffected outputs. Instead, he redirected the driver transistor for the missing relay two to the previously unused and still intact relay one, while adding an outboard DIN-mount relay to replace relay three. In theory, that should allow the system to work with its existing program and get the system back online.

Did it work? Sadly, we don’t know, as the video stops before we see the results. But we can’t see a reason for it not to work, at least temporarily while a new PLC is ordered. Of course, the other solution here could have been to replace the PLC with an Arduino, but this seems like the path of least resistance. Which, come to think of it, is probably what caused the damage in the first place.

Continue reading “Quick And Very Dirty Repair Gets Smoked PLC Back In The Game”

Image

Ultra-Black Material, Sustainably Made From Wood

Researchers at the University of British Columbia leveraged an unusual discovery into ultra-black material made from wood. The deep, dark black is not the result of any sort of dye or surface coating; it’s structural change to the wood itself that causes it to swallow up at least 99% of incoming light.

Image
One of a number of prototypes for watch faces and jewelry.

The discovery was partially accidental, as researchers happened upon it while looking at using high-energy plasma etching to machine the surface of wood in order to improve it’s water resistance. In the process of doing so, they discovered that with the right process applied to the right thickness and orientation of wood grain, the plasma treatment resulted in a surprisingly dark end result. Fresh from the plasma chamber, a wood sample has a thin coating of white powder that, once removed, reveals an ultra-black surface.

The resulting material has been dubbed Nxylon (the name comes from mashing together Nyx, the Greek goddess of darkness, with xylon the Greek word for wood) and has been prototyped into watch faces and jewelry. It’s made from natural materials, the treatment doesn’t create or involve nasty waste, and it’s an economical process. For more information, check out UBC’s press release.

You have probably heard about Vantablack (and how you can’t buy any) and artist Stuart Semple’s ongoing efforts at making ever-darker and accessible black paint. Blacker than black has applications in optical instruments and is a compelling thing in the art world. It’s also very unusual to see an ultra-black anything that isn’t the result of a pigment or surface coating.