davepolaschek

Wood. Food. More.

The finished cane, showing the handle, carved portion of the shaft, and the joint between them

I blogged the progress of building this cane as I was recovering from back surgery, and now it’s finished. Ash, a narrow strip of granadillo, white grain filler on the handle, and 7 coats of Tru-Oil to finish it. The diameter of the shaft is close to 1¼ inches (31mm).

The cane, laying flat on a brick patio, the handle pointing up from the left end of the shaft

I'm giving it to an acquaintance from the local farmers market this afternoon, who saw me with my cane on August 29, and said that he’d like one like it, so I made two. The other is still unfinished, but I’ll wrap it up over the next week or so.

The cane, laying flat on a brick patio, the handle pointing down from the left end of the shaft

#project

Discuss... Reply to this in the fediverse: @davepolaschek@writing.exchange

Today’s 90 minutes of shop time started with some shaping of the handle. I dry fit the shaft into the handle, and then shaped the piece of granadillo so all the curves were smooth.

Then I got out the mallet, and pounded the live oak peg through the holes in the handle and the shaft. They were ¼ inch (6mm) holes, with the one in the shaft offset by 1mm toward the shoulder of the joint. As you can see, I mushroomed the last bit of the peg pretty severely.

The head-end of the peg (trenail) that holds the shaft and handle together is quite seriously mushroomed - the peg was initially ¼ inch in diameter (6mm) and after pounding it through the handle and shaft, the end of it is over ½ inch (12mm)

The pointy end of the peg got bent somewhat by its trip through the holes. Note that I tapered only the first ¼ to ⅜ inch of the peg, and then soaked it for about a half-hour in almost-boiling water. That softened the peg enough that I had some problems driving it home. I'm not sure if I recommend that or not, but Elia Bizzarri did study boiled joints and I think they're a solid thing, but maybe don't combine well with drawboring.

The pointy end of the peg, visibly bent to one side after its trip through the slightly offset holes - the angle is about 30 degrees

The tenon on the cane shaft was intentionally a bit long. After getting the joint together, I added some small wedges (of soft maple, I think) to fill gaps.

The end of the tenon, poking through the mortise in the handle - small bits of soft maple wedges are visible on two sides of the tenon, wedging it tightly in place

I also filled the tiny gaps around the peg with ash sawdust and CA glue.

The end of the peg, sawn flush with the side of the handle, with a mixture of ash sawdust and CA glue around it, filling any gaps

Also filled around the tenon.

 The tenon, sawn flush with the top of the cane, and with ash and CA glue filler filling a few very tiny gaps

And after some sanding to clean things up, I put another coat of oil on everything. I can still see a few spots where there’s open grain, so I think I need at least 3-4 more coats of Tru-Oil before I can call this done.

The nearly-finished cane, looking shiny in the light, with no visible gaps and most of the grain filled

Overall, I think it’s looking pretty good, though.

Discuss... Reply to this in the fediverse: @davepolaschek@writing.exchange

I finished up the carving on the shaft. Going to keep it simple, with just a single set of lines, rather than full checkering. Sanded with 220 grit to take out any dings or such that accumulated while I was carving, then a coat of Tru-Oil. Note that the shaft appears darker than the handle. My expectation is that the colors will converge as I get more fine wood dust into the open grain of the shaft as I oil, then sand back with 0000 steel wool.

The "checkering" on the shaft, after cleanup

As for the handle, just some of the steel wool, then another coat of oil. There are a couple spots in the end grain that I’m not completely happy with the grain-filling so far, but I’m hoping that’ll get better as I put on more coats of oil.

The handle, about halfway finished

Tomorrow is the joinery, I think.

Discuss... Reply to this in the fediverse: @davepolaschek@writing.exchange

It’s getting into the home stretch, I think. I sanded off (using 220 grit) the excess white grain-filler, then hit the handle with a coat of Tru-Oil, trying to avoid the areas that will be part of the joint, though I’ll be doing some carving / shaping there, so a little oil won’t be the end of the world.

The handle will get smoothed with 0000 steel wool tomorrow, then another coat of Tru-Oil. I’m hoping for 8-10 coats, since that’s where it really starts to shine, based on previous experience. This probably means I’m going to need to get out to the shop two or three times a day the rest of this week. I’m thinking I’ll do the joinery on Wednesday, so I can get a few coats of finish on the areas of the handle and shaft I’ll be carving so they meet up smoothly.

The cane handle, placed on the shaft, with a scrap of T-shirt sitting on the shaft

Then I set up the shaft of the cane in the carving vise, and put two horizontal grooves around the top of the shaft, and connected them with lines in one direction using gunstock checkering tools. I haven’t decided if I’m going to complete the checkering tomorrow or what exactly, but even this will be a nice decorative touch. The lines were spaced with an 18lpi tool.

The top of the cane-shaft, with grooves cut into it running top-left to bottom-right - the grooves are fairly close together, and a little over an inch long

Discuss... Reply to this in the fediverse: @davepolaschek@writing.exchange

After section 11, I got asked by some woodworking friends about how one grips a cane, and how the physics of the joint work. Specifically:

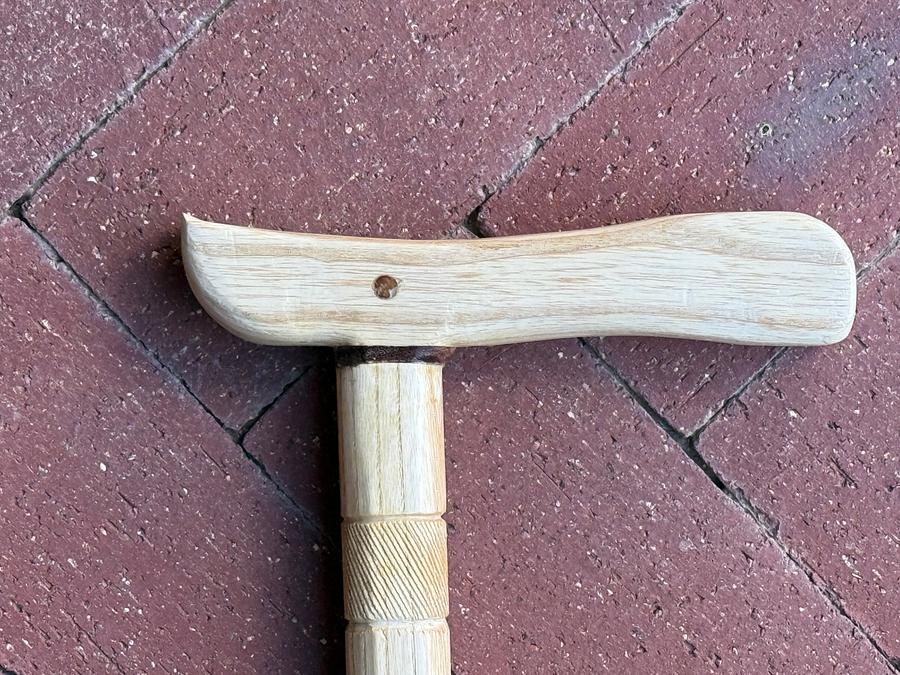
How does one grab that, hand behind the shaft or does one wrap the index finger around the front portion?

And:

I've never required the need for a cane, but my two cents for what it's worth: regarding the question asked by Mr. Splinter, it would seem to me that the cane should be held with the hand centered over the shaft. This would reduce or eliminate the handle being pushed down on one side, thus this lever action might loosen the joint, or elongate the mortise. What do you think?

I answered as follows:

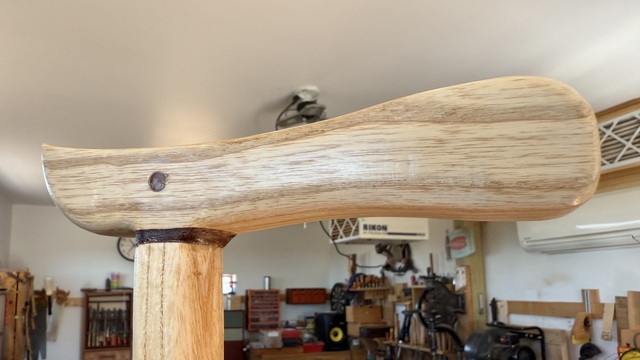
On my cane, I grip it as I described earlier, with my index finger either pointing down the shaft, or slightly ahead of it. One gal I know holds her cane “backwards” so the heel of her hand is directly over the shaft. It works for her, but I find it hugely uncomfortable.

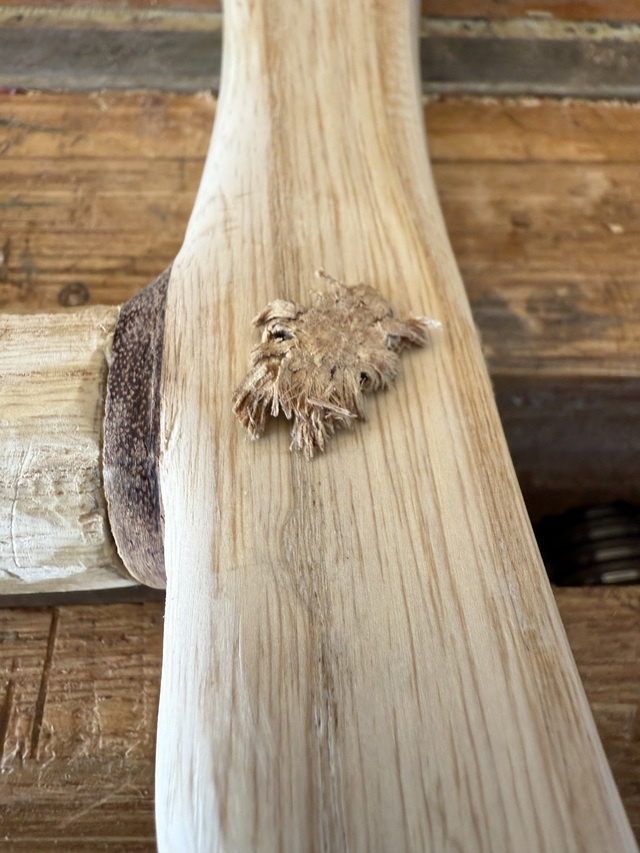
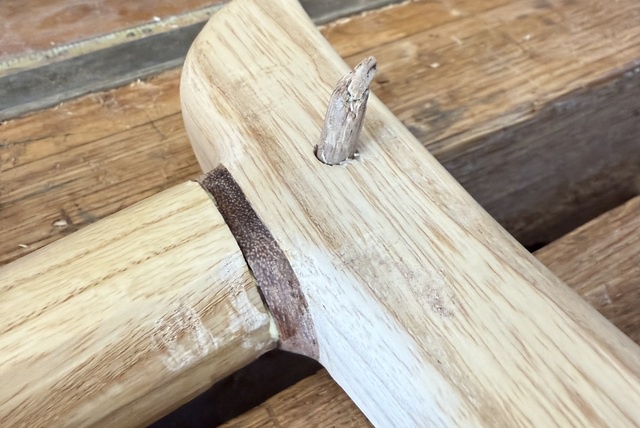
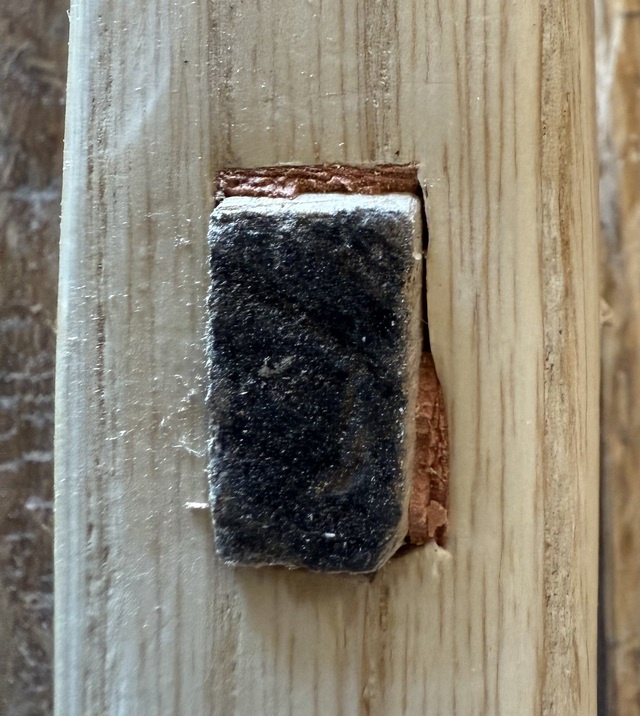
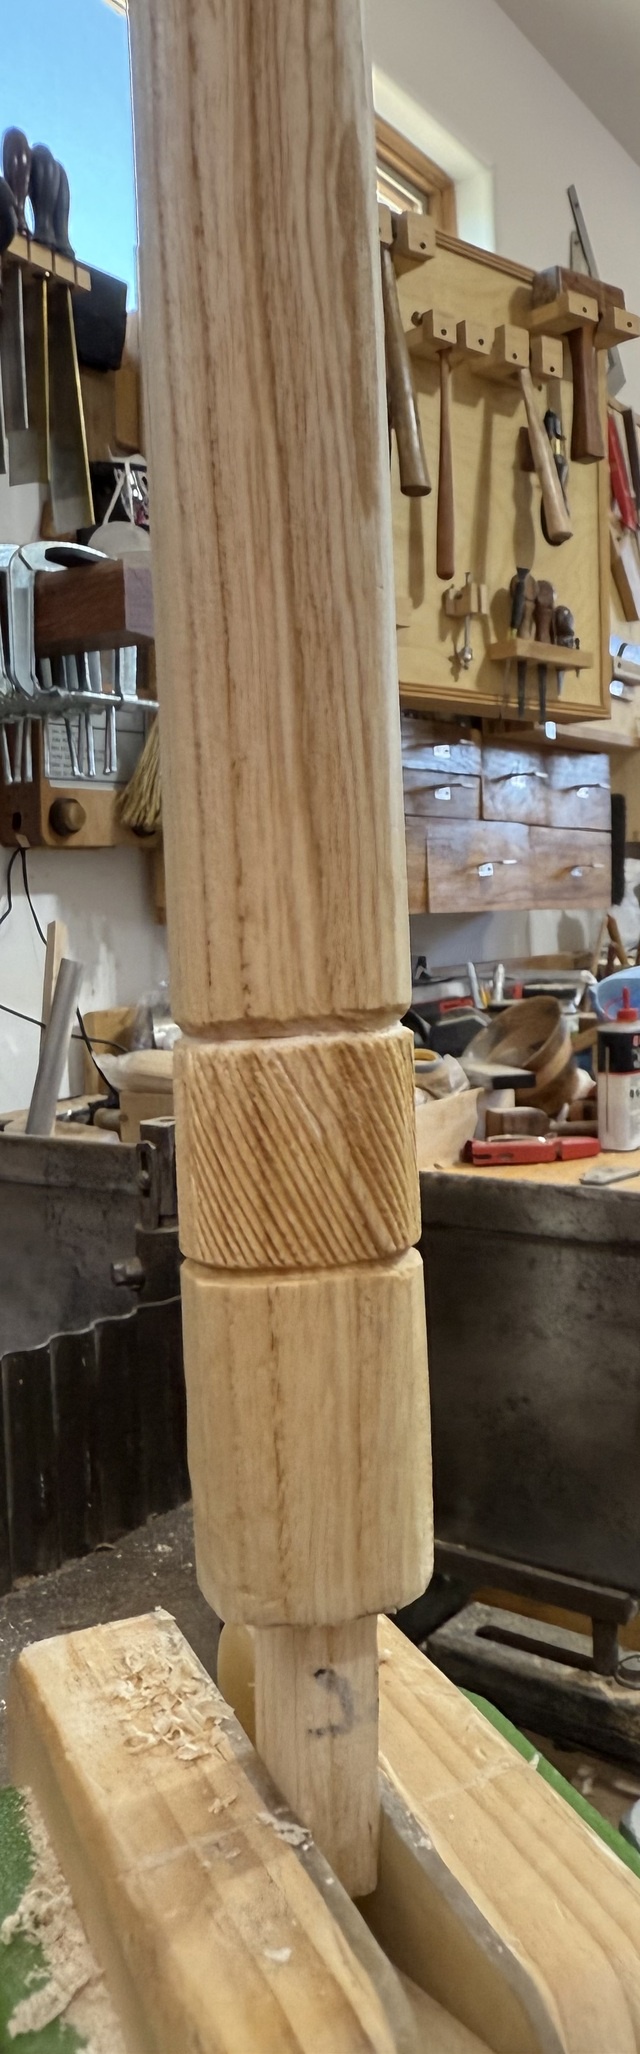
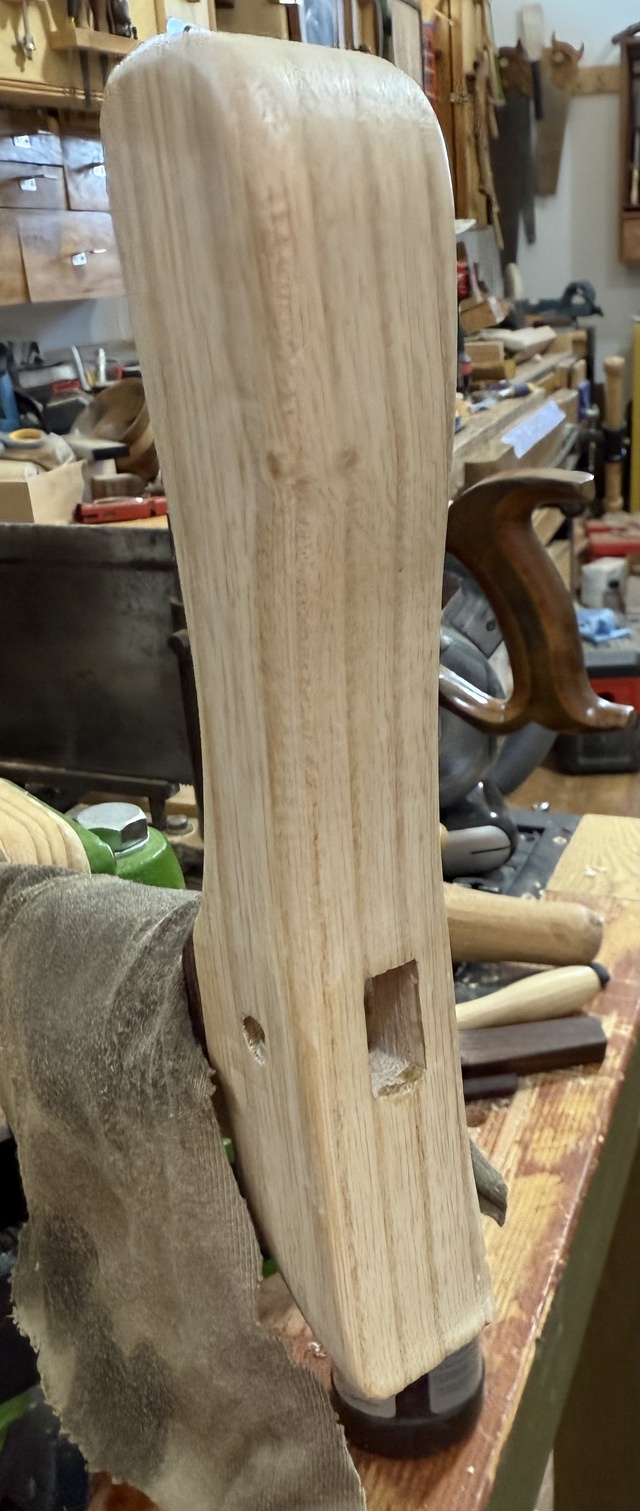
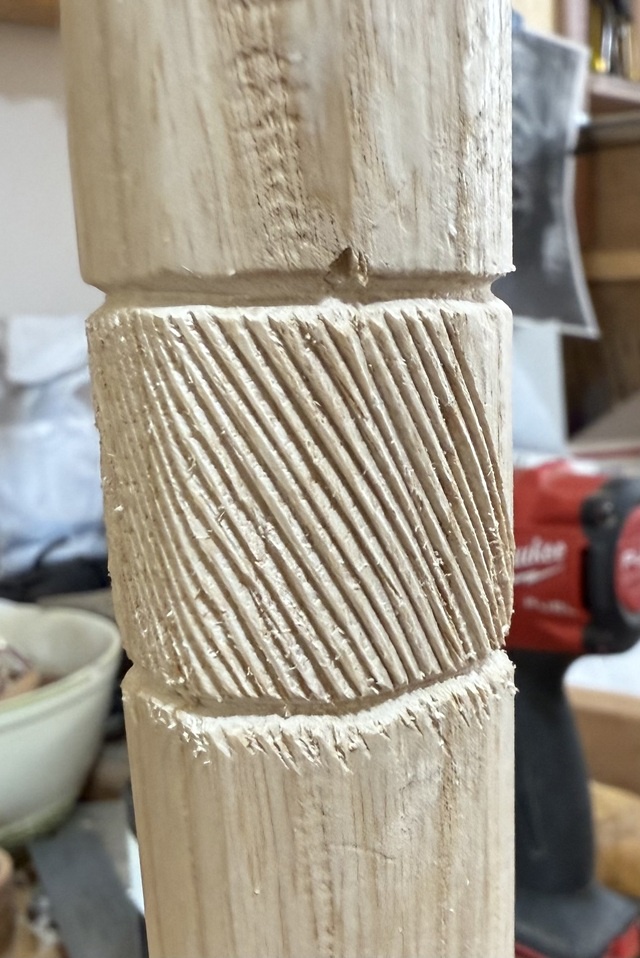
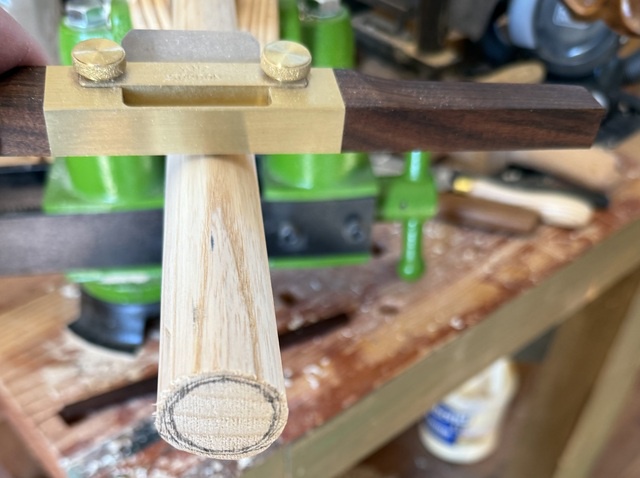
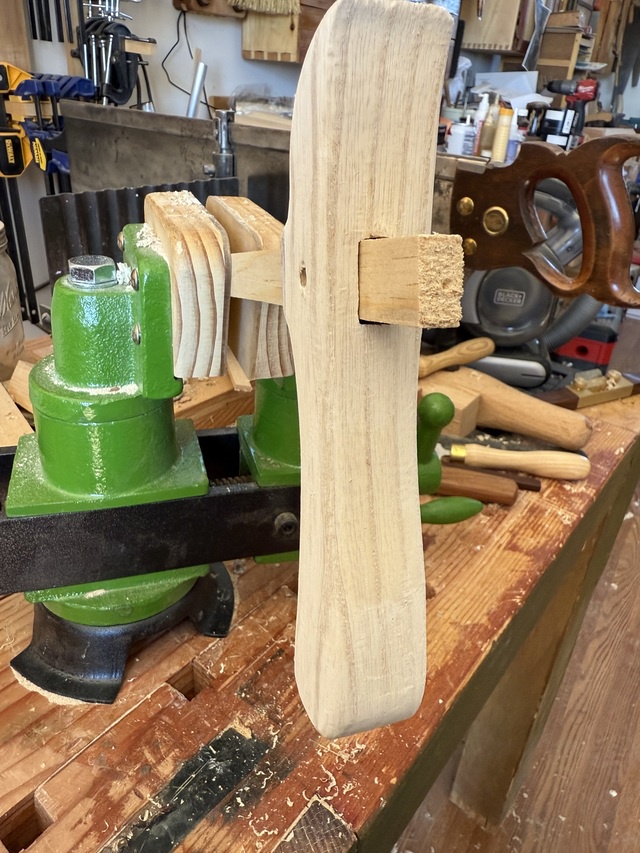
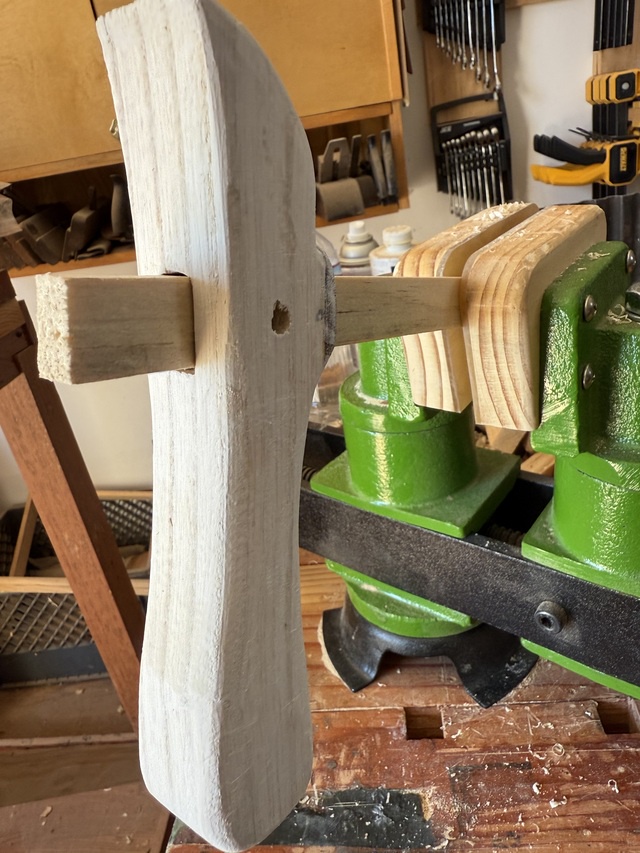
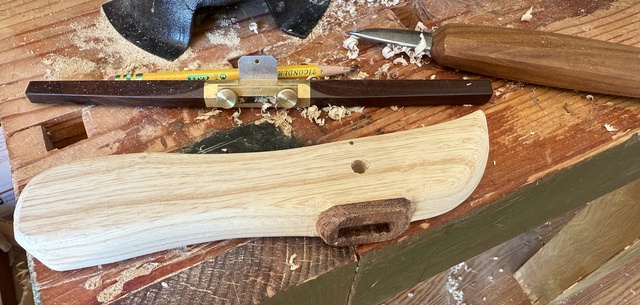
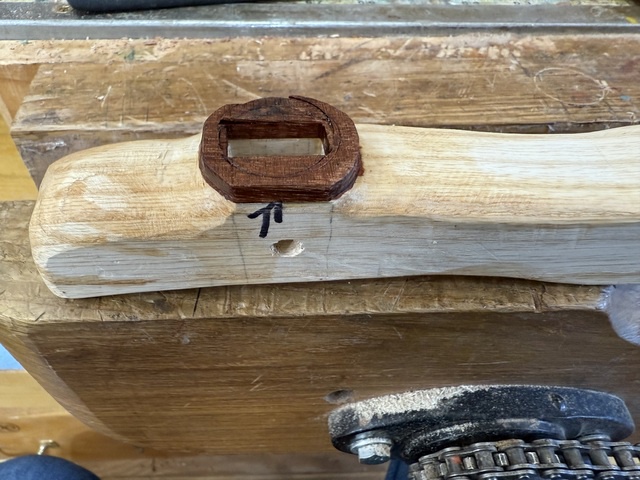
As for torque on the joint, yes, that’s a possibility, but I’m drawboring the joint, so the shoulder around the tenon should be tight against the cheeks of the mortise, and I’ll stick wedges around the tenon to take up any looseness in the mortise before I drive in the drawbore peg. That’s the same technique I used on mine, and with almost a decade of on and off use, plus moving from MN to NM and having all the wood shrink from the dry, the joint is still rock solid.

I would be a little concerned about the joint if he were going to take the cane to somewhere soupy like Houston or Nawlins after it was built here in the desert, but the monsoon this summer has kept our dewpoints above the mid-40s all summer, so the wood is not as bone-dry as usual.

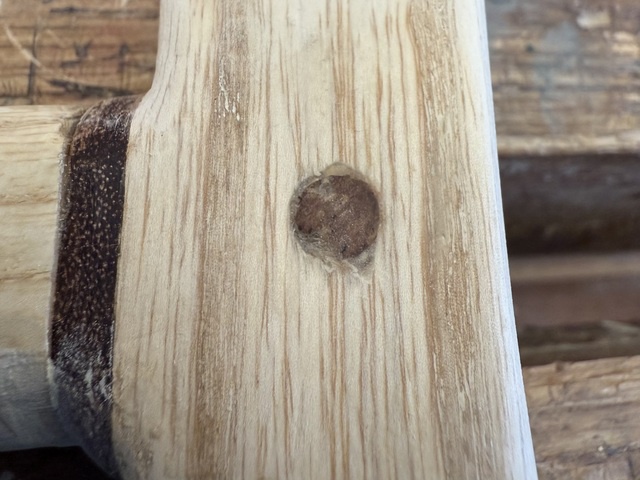
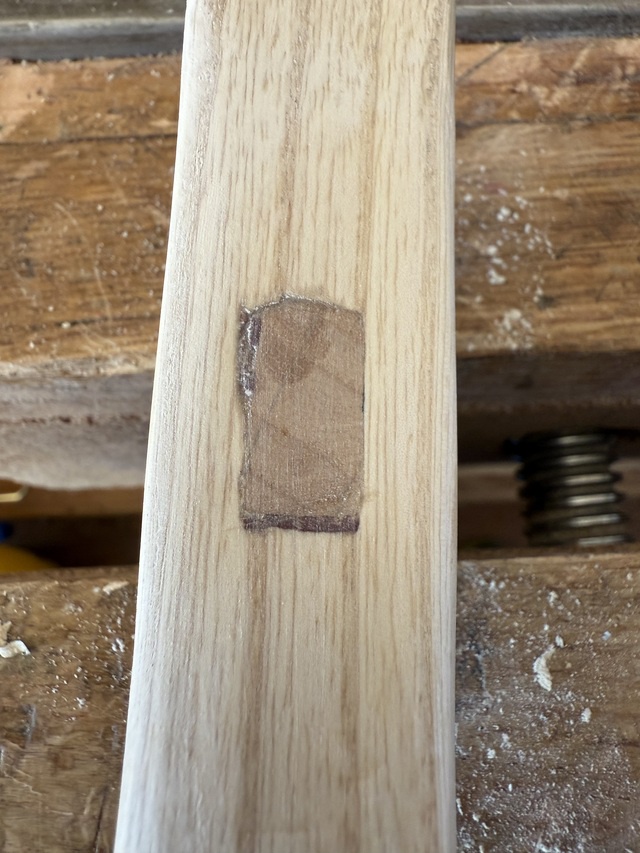
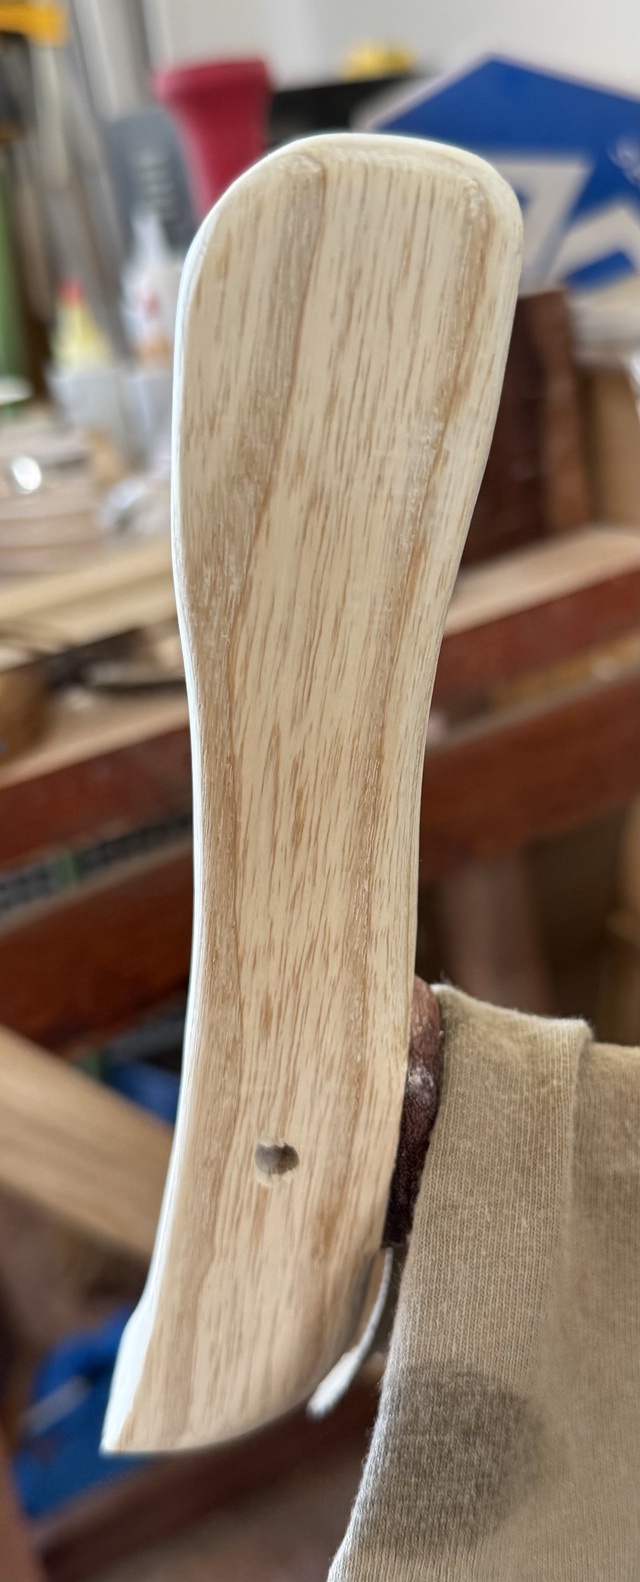
The only way I can think of to make the joint more solid would be to boil the joint, but that’s a one-and-done technique, and I don’t trust myself to get it perfect on the first try. I will be boiling the (live oak) trenail that will be holding the joint together (along with some glue), and as that dries, it should try to straighten out and pull the joint even more tightly together.

But yeah, in a perfect world, (along with the spherical cows and frictionless floors from my freshman physics course) the weight from your arm would be in a mostly straight line down the shaft. Then again, I’m overbuilding this fairly seriously, and it’s not as if it’s a completely original design.

Discuss... Reply to this in the fediverse: @davepolaschek@writing.exchange

90 minutes in the shop this morning, but quite a bit of progress.

First, I shaped the handle a bit more. When Greg tried it on Friday, we made marks where the handle felt “too big” to him, and I removed those marks with the small spokeshave. No photos.

Next, I trimmed the cane shaft to the proper length, then thinned the end a bit so the tip would fit on the shaft.

A cane shaft is held in a carving vise, and a large spokeshave sits atop the shaft - the end of the shaft has a circle drawn on it to guide my carving

The tip, fit onto the end of the cane shaft

Then I grabbed a scrap to hold the handle and put it in my carving vise. I mixed up some white grain-filler, and applied it with nitrile gloves, rubbing first with the grain, then across the grain.

The cane handle on the scrap of wood I previously used to check the mortise, held in the carving vise, before grain-filling

The cane handle on the scrap of wood I previously used to check the mortise, held in the carving vise, after grain-filling with white wood filler

I didn’t get the open pores completely filled, but once this coat dries, I’ll sand back with some 0000 steel wool, then start applying oil, sanding lightly (again with 0000 steel wool) between each coat, which should finish filling the grain with wood dust and oil.

Discuss... Reply to this in the fediverse: @davepolaschek@writing.exchange

About two hours more work (for two handles) mostly with a spokeshave and a knife, but also with some rasp work and a pencil to mark what I want to do at each step, as it’s easy to lose track of what I’m doing otherwise.

I am taking both handles along to today’s Eldorado Farmers Market to see which the guy prefers. The one pictured here has a slight waist in the middle when viewed from the top, which makes a bigger difference in how it feels than I expected. The pencil will go along as well, so I can mark the correct length on the shaft that goes with the handle he picks.

A cane handle with a small spokeshave, a pencil, and a slöjd knife

The carving vise that’s doing almost all of my workholding as I work on the handles is the cheap Chinese green carving vise that a ton of people sell in slightly different shades of green (or sometimes red). They go for about $180 post-tariff-madness, but there are deals to be found if you search a lot. “Patternmakers carving vise” is the search term I used, and it tells me that Taylor Toolworks has the best price today, at $150.

P.s. The granadillo layer on this handle has the grain running perpendicular to the grain of the handle. I don’t think it’ll make any difference in strength, but the appearance of the two will differ a little. I’ll see if anyone notices…

P.p.s Nobody did notice.

Discuss... Reply to this in the fediverse: @davepolaschek@writing.exchange

This morning’s progress was marking the position for the hole in the tenon,

My hand is inserting a small auger bit into the hole in the cane-handle to mark the center of that hole on the tenon on the cane shaft

A view into the hole in the handle to where the mark is on the cane shaft tenon

The mark on the side of the tenon

Then offsetting it by 1mm or so towards the shoulder

A larger hole, offset by 1mm or so toward the shoulder of the tenon on the cane shaft

And drilling it out (not shown). The idea behind drawboring is that when a wooden pin is driven through the slightly offset holes in the handle and shaft, the pin will pull the shaft into the handle quite tightly. Tightly enough that the pin usually can't be removed without destroying something. This ensures a solid fit between the two parts of a cane.

Once that was done, it was time to start shaping the handle. This is rasp, knife, and spokeshave work. I also had to take a break to fill some of the open grain with thin CA glue.

I have begun shaping the handle so it flows smoothly into the collar which will fit around the shaft

Discuss... Reply to this in the fediverse: @davepolaschek@writing.exchange

Another hour, some more progress. I started rounding the shafts with my homemade spokeshave, but that’s set for a pretty rough cut, and I was getting some chatter, especially when working against the grain. So after finishing with that, I got out the big HNT Gordon shave, which I keep set fairly fine, and went over them again. Not quite as smooth as a baby’s butt, but I got almost all the chatter out.

Both cane shafts are still 4 feet long for now, but I think the plan for my next shop session is to start carving some designs on these, though I also have some handle shaping I could work on.

Two canes with round-ish shafts, leaning against the shop wall

Note: The shafts are about 1¼ inch at this point.

Discuss... Reply to this in the fediverse: @davepolaschek@writing.exchange

Next up, making the shafts rounder, but first, done quick fine-tuning of the tenons with a float. I had aimed to make the mortises slightly larger at the bottom than the top, so mostly this is a matter of inserting the tenon into the mortise and seeing what rubs, then making the tenon a tiny bit smaller from that point down.

Eventually, things fit together.

A shaft and handle, paired up, with arrows to make sure I put the shaft into the handle in the correct direction

Then I mark lines on the four sides of the shaft. Somewhere between ¼ and ⅓ of the width.

Lines on the side of the shaft, between ⅓ and ¼ the width of the shaft

Then I set the shaft in a jig I have that holds it at a 45°︎ angle, and plane each corner down to the lines. When I hit the lines, it’s pretty close to octagonal.

An octagonal shaft, close enough

Tomorrow, or maybe later today, I’ll hold the shafts in my carving vise, and use a spokeshave to make them rounder.

Discuss... Reply to this in the fediverse: @davepolaschek@writing.exchange

Enter your email to subscribe to updates.