Sincere apologies for not posting any further techniques up this year, but for those of you who read my personal blog, you'll understand why.
So to make up for it I thought we could do a swap and I could give a bit of stash away.
All you have to do is send something to me, but you have to have used one of the techniques on this blog. You can send anything, but please enclose a pre-paid envelope for your return swap. For anyone who doesn't have my address, please email me at sam21@ntlworld.com tell me who you are and why you want my address, or I'll just think it's junk mail and ignore it!!!! (sorry!!!)
For everyone that sends something, your name will go into a draw and at the end of January, thats 31 January 2009, 2 names will be picked out and they will win blog candy
If anyone from overseas wishes to join in, please do so and I will take care of the return postage costs
Haven't decided on the blog candy yet, but when I do I will post up a photo
Hope you will join in
Happy Christmas to each and every one of you
xxxxxxx
Wednesday, 24 December 2008
Friday, 26 September 2008
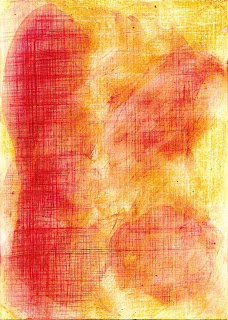
Resist Stamping
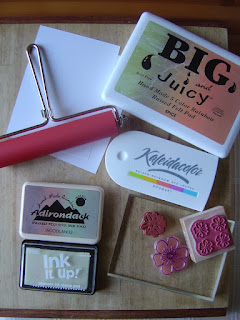
Supplies needed: Rainbow ink pad, brayer, high gloss card stock (the glossier the better), stamps of choice, clear ink pad
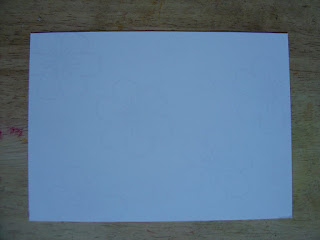
Ink up your stamps with the the clear ink pad

Randomly stamp on your piece of glossy card stock, be careful not to let the stamp slip
Load your brayer with lots and lots of ink. Keep rolling it over the rainbow ink pad until you have a good amount of ink and ensure you have all round coverage
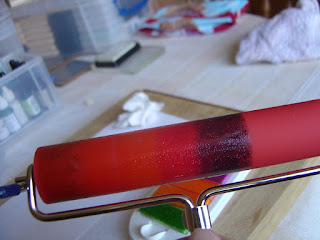
Roll your brayer backwards and forwards in a quick motion applying pressure, until all or most of the ink has disappeared off the brayer. By doing this you are pushing and spreading the coloured ink away from the clear ink, thus creating a resist. If you do not follow these steps, the technique will not work properly. You will know if you are doing it right as the stamped images will just 'pop' out at you. It does take a bit of practise

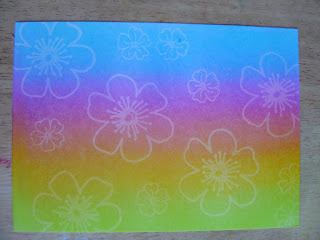
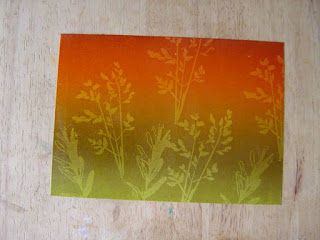
This is something like what you will end up with - the glossier the card the better
I did this in exactly the same way but used the Big n Juicy spice ink pad
I then decided to pick a colour from the rainbow pad and overstamped using the same images. Again, be careful not to let the stamp slip
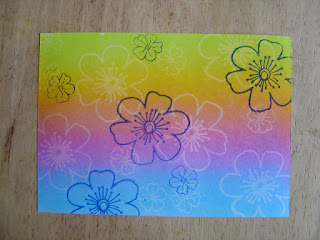
These are my two finished pieces


Ink up your stamps with the the clear ink pad

Randomly stamp on your piece of glossy card stock, be careful not to let the stamp slip

Load your brayer with lots and lots of ink. Keep rolling it over the rainbow ink pad until you have a good amount of ink and ensure you have all round coverage

Roll your brayer backwards and forwards in a quick motion applying pressure, until all or most of the ink has disappeared off the brayer. By doing this you are pushing and spreading the coloured ink away from the clear ink, thus creating a resist. If you do not follow these steps, the technique will not work properly. You will know if you are doing it right as the stamped images will just 'pop' out at you. It does take a bit of practise

This is something like what you will end up with - the glossier the card the better

I did this in exactly the same way but used the Big n Juicy spice ink pad

I then decided to pick a colour from the rainbow pad and overstamped using the same images. Again, be careful not to let the stamp slip

These are my two finished pieces

Friday, 12 September 2008
Acrylic Adirondack Dabbers
Supplies needed: Acrylic dabbers, black permanent ink pad, medium gel, splodger (or an old credit / store card), tag / card stock, text from an old book, peel offs, rubber stamps, heat tool, craft sheet 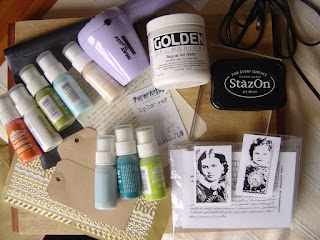
Apply a thin coat of the medium gel to the tag / card stock using your splodger (or an old credit / store card)


This should reveal the lighter colour you started with 


Apply a thin coat of the medium gel to the tag / card stock using your splodger (or an old credit / store card)

Stick you tag / card stock to the page from an old book


Give it a quick blast with the heat tool but don't completely dry it


Take hold of the excess paper and gently pull

You will end up with something like these

Cover the whole of the tag with the lightest of your chosen colours

Heat set

Add peel offs (I'm sure you own more interesting ones than I do!!!)

Cover the peel offs with a darker colour, adding further colour where you would like. Heat set

Remove your peel offs


Add another colour if you wish


Use the dabber to 'ink' up your stamp


Stamp the image but be sure to clean your stamp straight away

Ink up your main image using a permanent black ink (ie stazon)

Stamp your images onto your tag / card stock


Add fibres / embellishments to finish


Faux Linen
You will need
Glossy paper
sandpaper
inks
sponge
Sponge on your ink - I used vintage photo distress ink
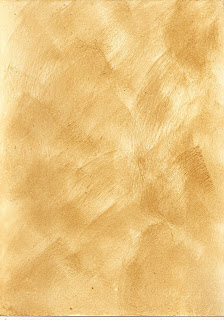
using sandpaper scratch card in one direction
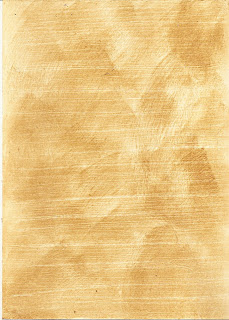
Turn it round and scratch in opposite direction
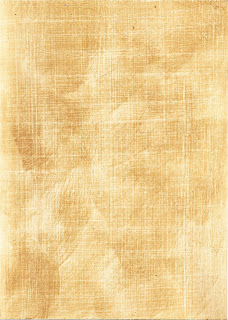
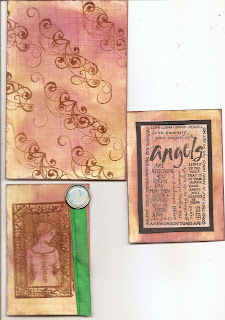
You can use it as it is as background paper or add more ink. I added aged mahogony - I've put more ink on the left hand side and brightened it up digitally so you can see the scratches better.
I then cut my card up and one piece I added background scrolls (I'll use this piece to make a card) My next piece I made into a skinny by stamping and embellishing. My final piece I made in to a topper by stamping on tissue and framing
Glossy paper
sandpaper
inks
sponge
Sponge on your ink - I used vintage photo distress ink

using sandpaper scratch card in one direction

Turn it round and scratch in opposite direction

You can use it as it is as background paper or add more ink. I added aged mahogony - I've put more ink on the left hand side and brightened it up digitally so you can see the scratches better.

I then cut my card up and one piece I added background scrolls (I'll use this piece to make a card) My next piece I made into a skinny by stamping and embellishing. My final piece I made in to a topper by stamping on tissue and framing

Sunday, 7 September 2008
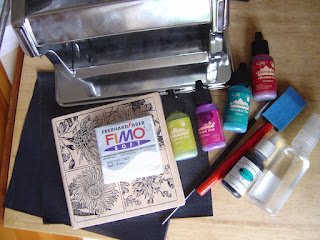
Clay and Alcohol Ink Toppers
Supplies needed: Light coloured clay, alcohol inks, rubber stamp, paint brush, water spritzer bottle, pasta machine or equivalent to roll clay with
.JPG)
Roll clay out
.JPG)
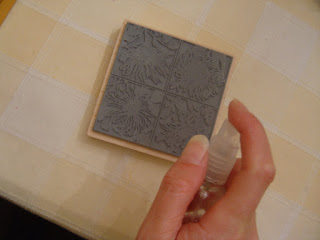
Spritz your stamp with water
.JPG)
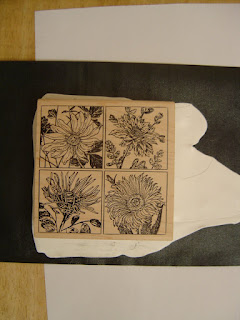
Stamp your image into the clay
.JPG)
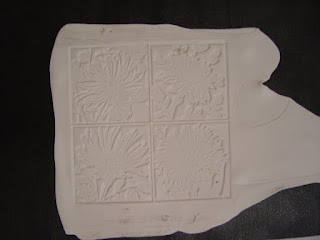
Remove stamp
.JPG)
Cut into sections if necessary
.JPG)
Apply alcohol ink direct from the bottle to the brush
.JPG)
.JPG)
Roll clay out
Spritz your stamp with water
Stamp your image into the clay
Remove stamp
Cut into sections if necessary
Apply alcohol ink direct from the bottle to the brush
Colour in your pieces using the alcohol inks
.JPG)
Pre-heated oven to 135C
.JPG)
Put on a tray lined with greaseproof paper and bake for 20 minutes
Remove from oven and leave to cool
.JPG)
You can add acrylics when cooled, if desired
Saturday, 6 September 2008
Bandana Technique
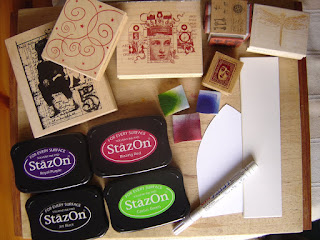
Supplies needed: An assortment of stamps, an assortment of brightly coloured ink pads, black permanent ink (stazon), ink applicator (cut n dry), white pen, card stock
.JPG)
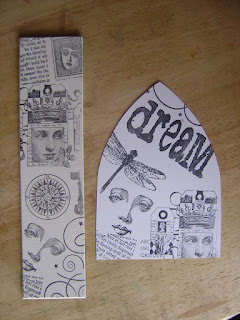
Stamp a collage of images onto your card stock using your black permanent ink, try to fill the whole area
.JPG)
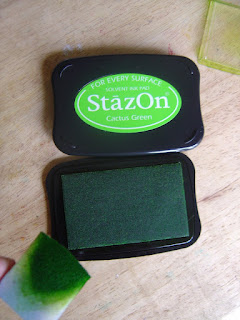
Ink up a piece of cut n dry with one of your brightly coloured inks
.JPG)
Apply the ink directly to areas of your card
.JPG)
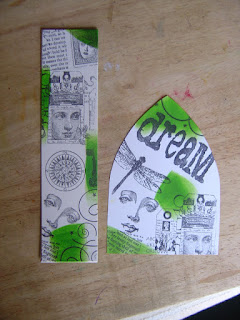
Completely cover your card stock using different colours of brightly coloured inks
.JPG)
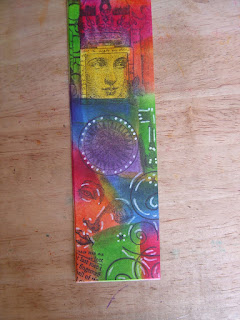
Using your white pen, outline just off the stamped images trying not to touch any of the black ink
.JPG)
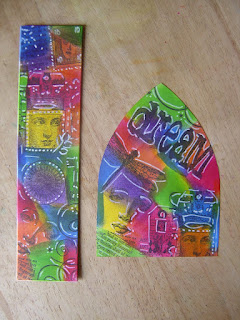
Continue until you have outlined all the images
.JPG)
.JPG)
.JPG)
Stamp a collage of images onto your card stock using your black permanent ink, try to fill the whole area
.JPG)
Ink up a piece of cut n dry with one of your brightly coloured inks
.JPG)
Apply the ink directly to areas of your card
.JPG)
Completely cover your card stock using different colours of brightly coloured inks
.JPG)
Using your white pen, outline just off the stamped images trying not to touch any of the black ink
.JPG)
Continue until you have outlined all the images
.JPG)
.JPG)
Subscribe to:
Comments (Atom)

