Getting Started with cPanel
When you log into cPanel, there are lots of features you can take advantage of. When you’re getting started, though, there are four main sections to focus on. These features allow you to manage files on your website, create subdomains, create and manage email, and install different services like WordPress. If you haven’t created a cPanel account for your domain yet, read Creating a cPanel User Account.
NOTE: |
| Due to cPanel’s new tiered pricing structure, the first thing you may need to do with your new server is adjust the licensing for cPanel. If you need to increase your license tier to allow for more domains, see Managing cPanel Tiered Licensing. |
In this article we will go over the most common functions our customers use in cPanel. Follow the links below to be directed to the section you’d like to view:
- Using File Manager
- Creating Subdomains
- Creating Email Accounts
- Installing Programs with Softaculous
- Finding Disk Usage
Using the File Manager
A website is a collection of files, just like your computer or a file cabinet. These files run different programs and can be written in markup languages like HTML or CSS. When someone goes to your website, the web page they see is a file that’s been turned into visuals and text. Other files in this section include logs, which tell you what’s recently changed your website.
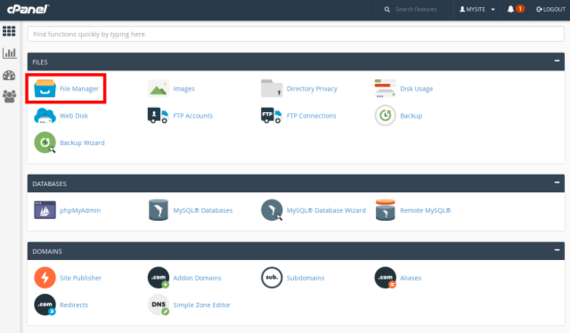
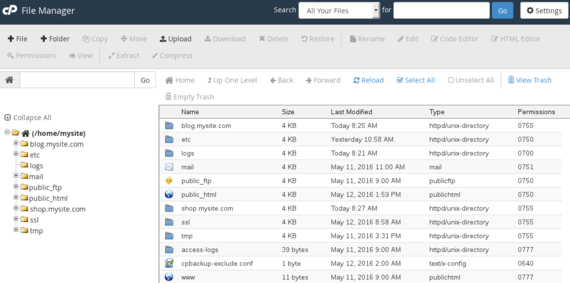
To manage these files in cPanel, log into your cPanel account and click File Manager under Files. You’ll see many different directories like etc, logs, and public_html. It looks a lot like the file system on your computer.
Click around your folders to see what’s inside each one. Your public_html directory is the most important directory to get your website up and running. This directory is where you’ll upload any files you want people to see when they visit your website. If you’re using a Content Management System (CMS) like WordPress or Drupal or Joomla, you won’t have to upload or edit many files in File Manager. Instead, you’ll upload content directly to your Content Management System (CMS).
Example: |
If you upload a file called thisismypage.html to /public_html/, the full path would be /public_html/thisismypage.html. This HTML will display when website visitors go to (example URL only shown here):http://www.mysite.com/thisismypage.html |
If you install packages like WordPress, all the WordPress code will be in your public_html directory. Check out our other articles on using the File Manager in cPanel:
- Using the File Manager in cPanel
- Adding Files and Folders in cPanel
- Uploading public_html Files in cPanel
- Deleting Files and Folders in cPanel
- Editing Code and HTML in cPanel
- Managing File Permissions in cPanel
- Modifying a cPanel License
Creating Subdomains
Subdomains are large subsections of websites and have URLs that look like:
blog.mysite.com
You can create a whole new website on a subdomain without buying a new domain name. Creating subdomains is useful if you want to have an online store, blog, or forum. Learn how to create a subdomain by reading: Creating a Subdomain in cPanel.
Tip: |
Subdomains are just like regular domains: DNS must be set up before anyone can view your subdomain. Every subdomain needs its own A record. Learn how to add an A record in Adding and Editing DNS Records. |
Creating Email Accounts
Heading back to the cPanel home page (remember the cPanel icon in the top left) scroll down to Email. If you want to have an email address that is myname@mysite.com, this is where you set that up. For a full walkthrough, read Creating Email Accounts in cPanel.
You can access your email from a webmail client or you can set up a desktop mail client like Thunderbird or Outlook. Right now, we’re going to focus on accessing webmail, but there are also articles about setting up your desktop mail client.
- Accessing webmail is as simple as clicking More to the far right of the email account you just created.
- Then, click the fourth option down, Access Webmail.
- You will have three webmail applications to choose from: Horde, Roundcube, and SquirrelMail. No matter which one you choose, you can switch between them at any time. Test them all out to see which one you like best.
- Whichever webmail client you click on will load and you’re ready to send email! Try it out by sending a test email to a different email address and by sending an email to your new email address. This will make sure you can send and receive email from your new address.
Tip:
If sending and receiving mail isn’t working, check your DNS records in your Liquid Web account. Every domain with email addresses needs an MX record. Learn how in Adding and Editing DNS Records.
You can also choose the option of a fully hosted email solution, such as our Premium Business Email and Hosted Exchange product offerings.
Installing Programs with Softaculous
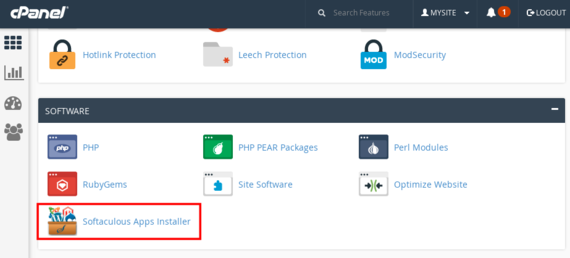
Click on the home icon one more time to return to the home page of cPanel. Scroll down to Software and click on Softaculous Apps Installer.
You can develop your website completely by yourself and load all the files into your public_html folder. But why not take advantage of applications that are already developed? Softaculous makes installing packages like WordPress, Magneto, and Joomla easy. For example, instead of downloading WordPress from WordPress.org and installing it yourself, simply install WordPress using Softaculous and you’re ready to start customizing.
When you install a program, Softaculous will walk you through where you want to install the program, if you want to create new directories, some basic settings, and setting up your first administrator account. Each program has a slightly different installation process, but if you follow the prompts you’ll be set up in no time.
Learn more about using Softaculous in our articles:
- Installing Software with Softaculous
- Backing Up Applications in Softaculous
- Removing an Application from Softaculous
- Restoring from a Backup in Softaculous
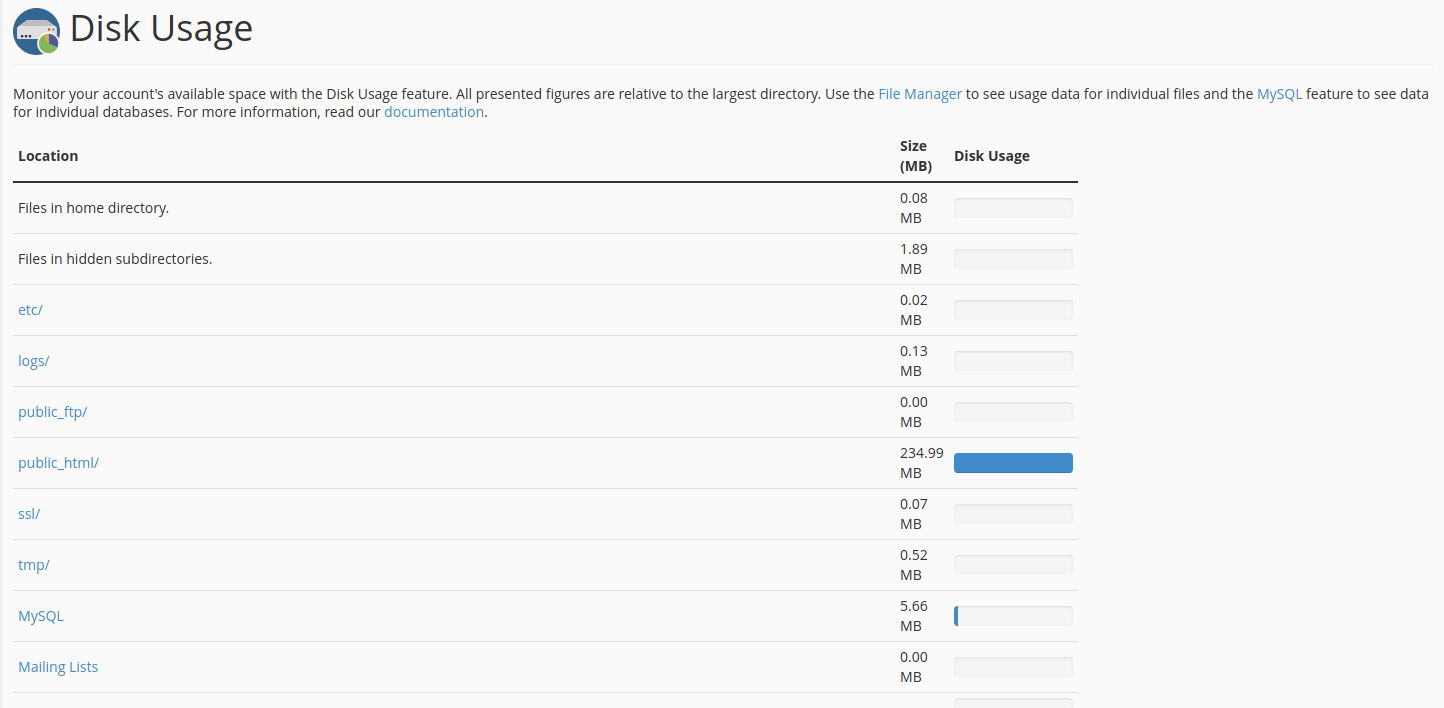
Finding Disk Usage
While this may not be an issue when you first start using your cPanel server, you’ll likely need to find disk usage statistics to help you manage the disk usage on your server at some point. cPanel makes finding disk usage easy. Just login to cPanel -> Home -> Files -> Disk Usage. You’ll get a graphic display of all of your disk usage which can help you identify older files/folders that may be better located on a backup disk or other location.