FluentBoards Pro offers a variety of advanced features to enhance your project management. To access these features, you need to activate the Pro version with a license key. You can purchase FluentBoards Pro from WPManageNinja.
Once you have the license key, simply activate it to unlock all the Pro functionalities.
Part 1: Downloading Your Plugin and License Key #
First, we need to gather the files and the license key required to unlock your Pro features. Everything you need is securely stored in your WPManageNinja account.
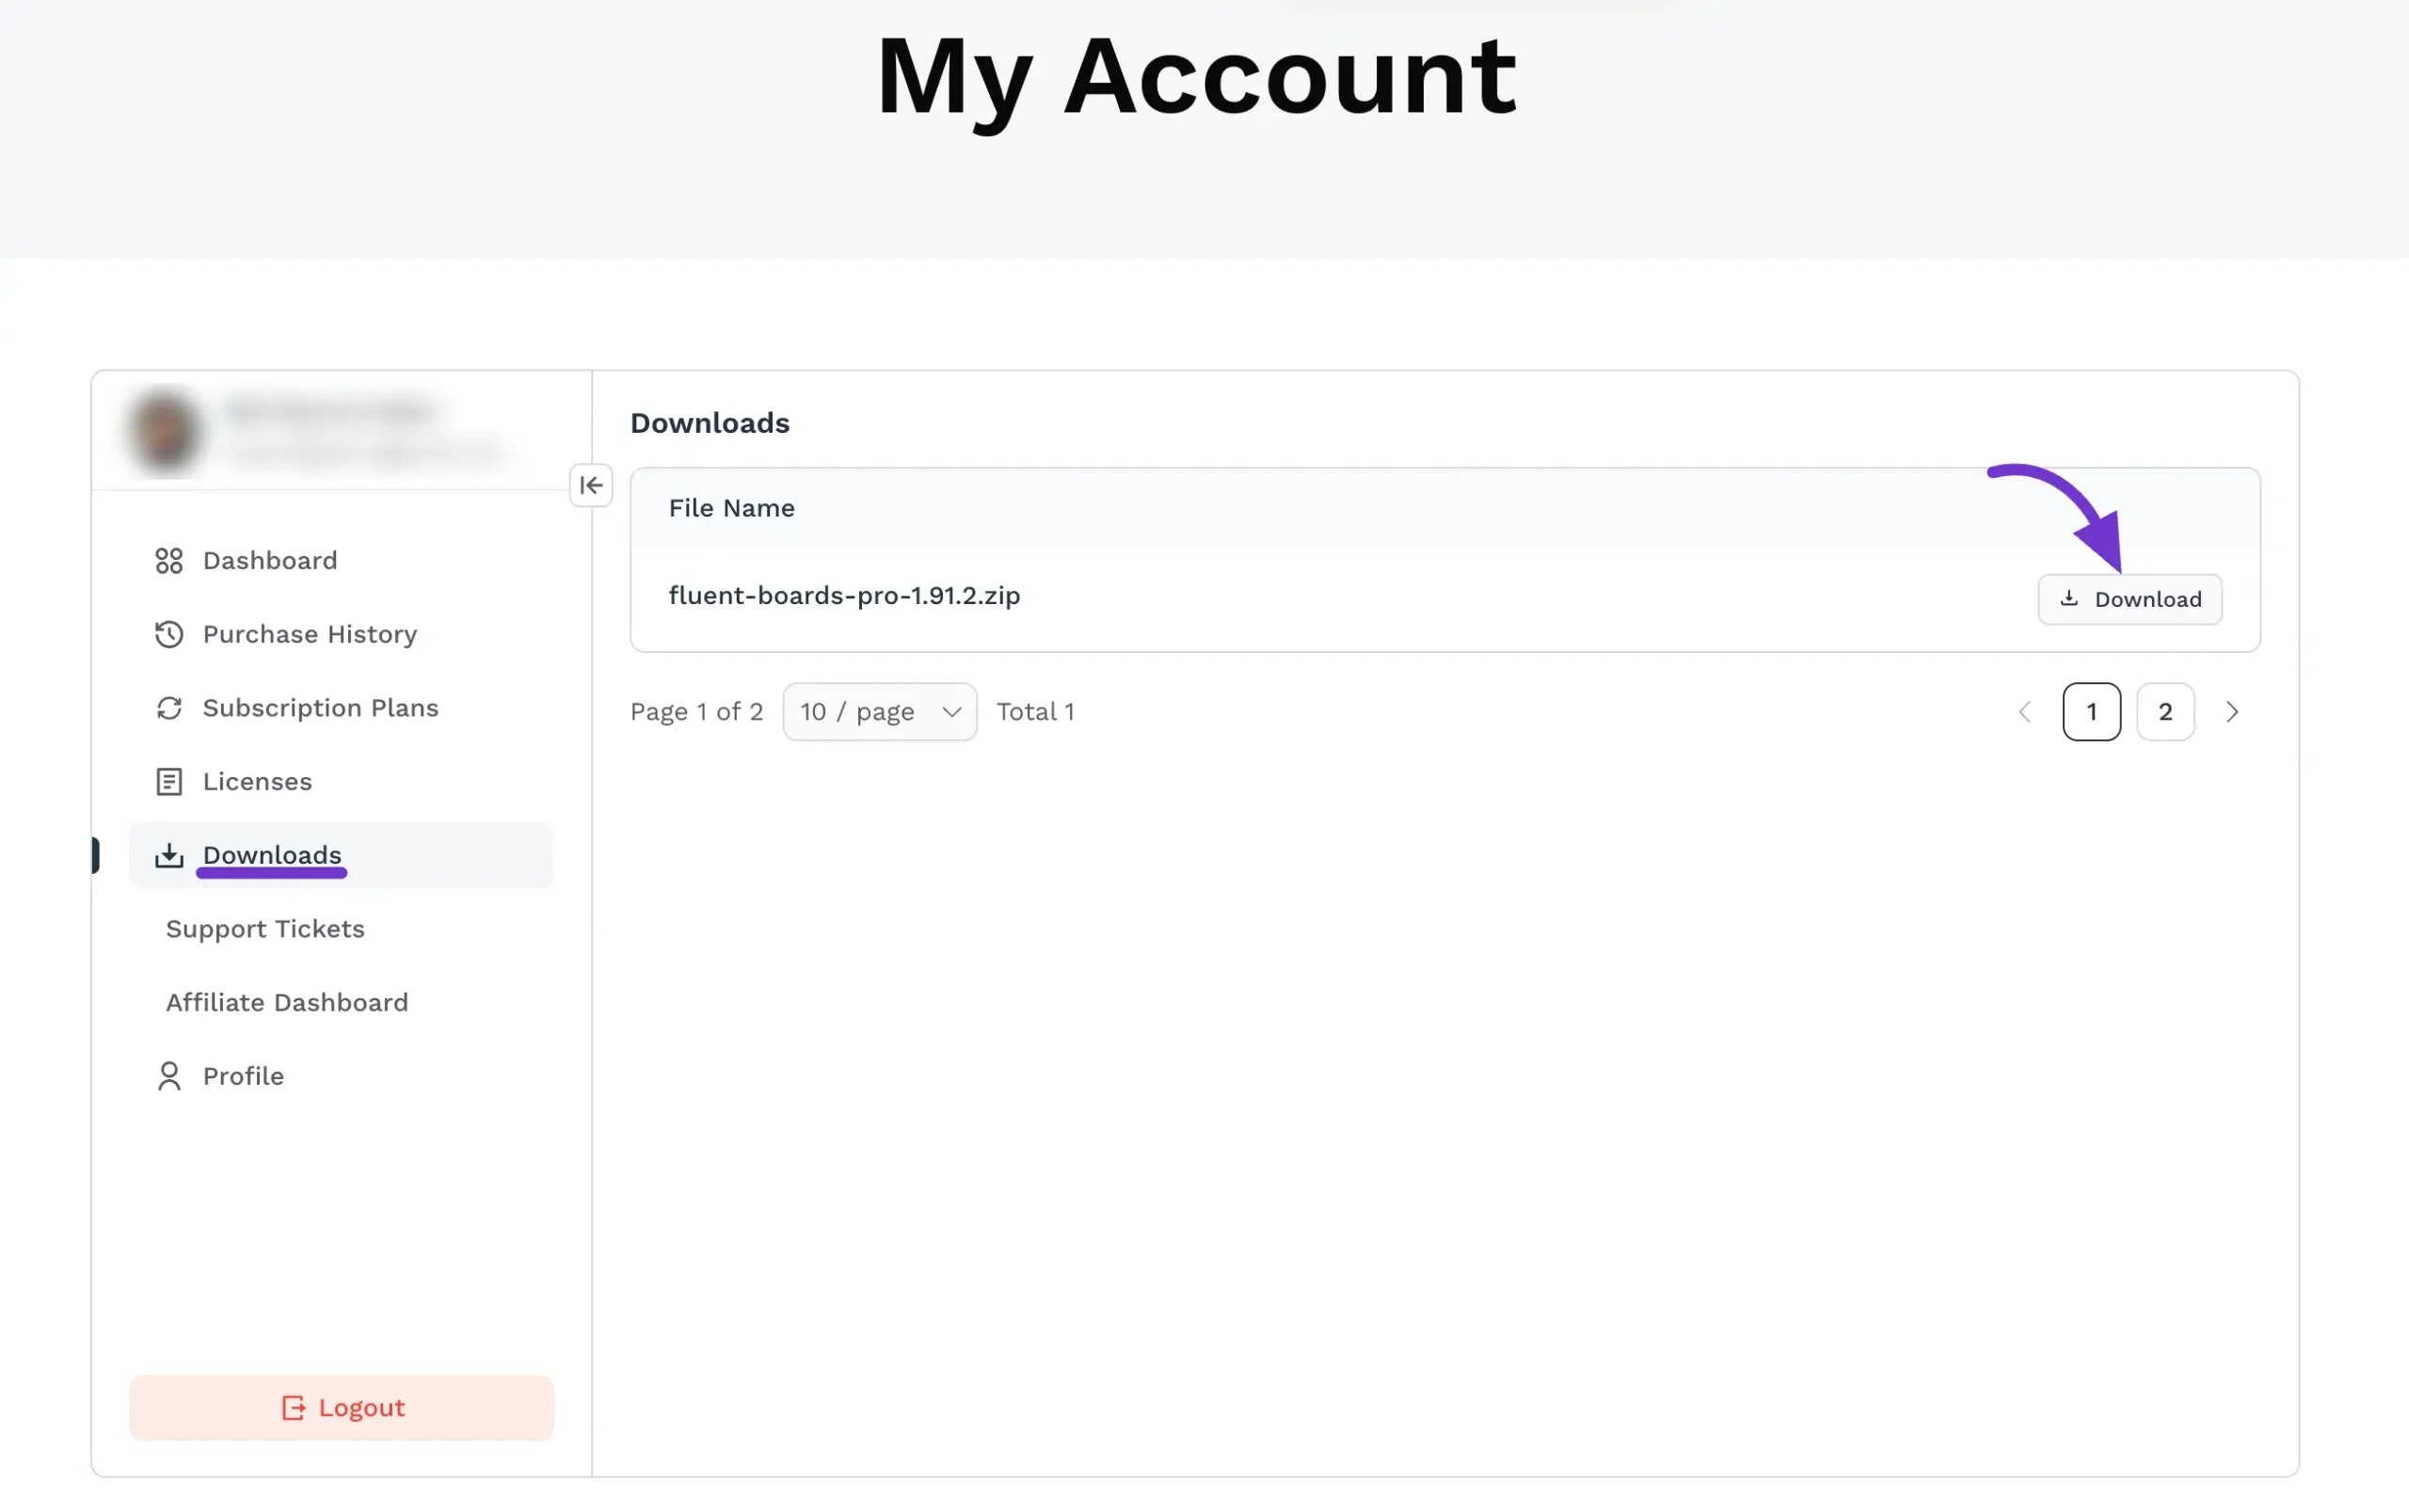
Step 1: Download the FluentBoards Pro File #
- Open a new tab in your web browser and log in to your WPManageNinja Dashboard (also known as your “My Account” page).
- Look at the menu on the left side of the screen and click on Downloads.
- Here, you will see a list of all the products you have purchased. Find FluentBoards Pro.
- Click the Download button located on the right side of the row.
- A file named something like
fluent-boards-pro.zipwill save to your computer.
Important: Do not unzip or extract this file! WordPress requires it to remain in the .zip format for installation.
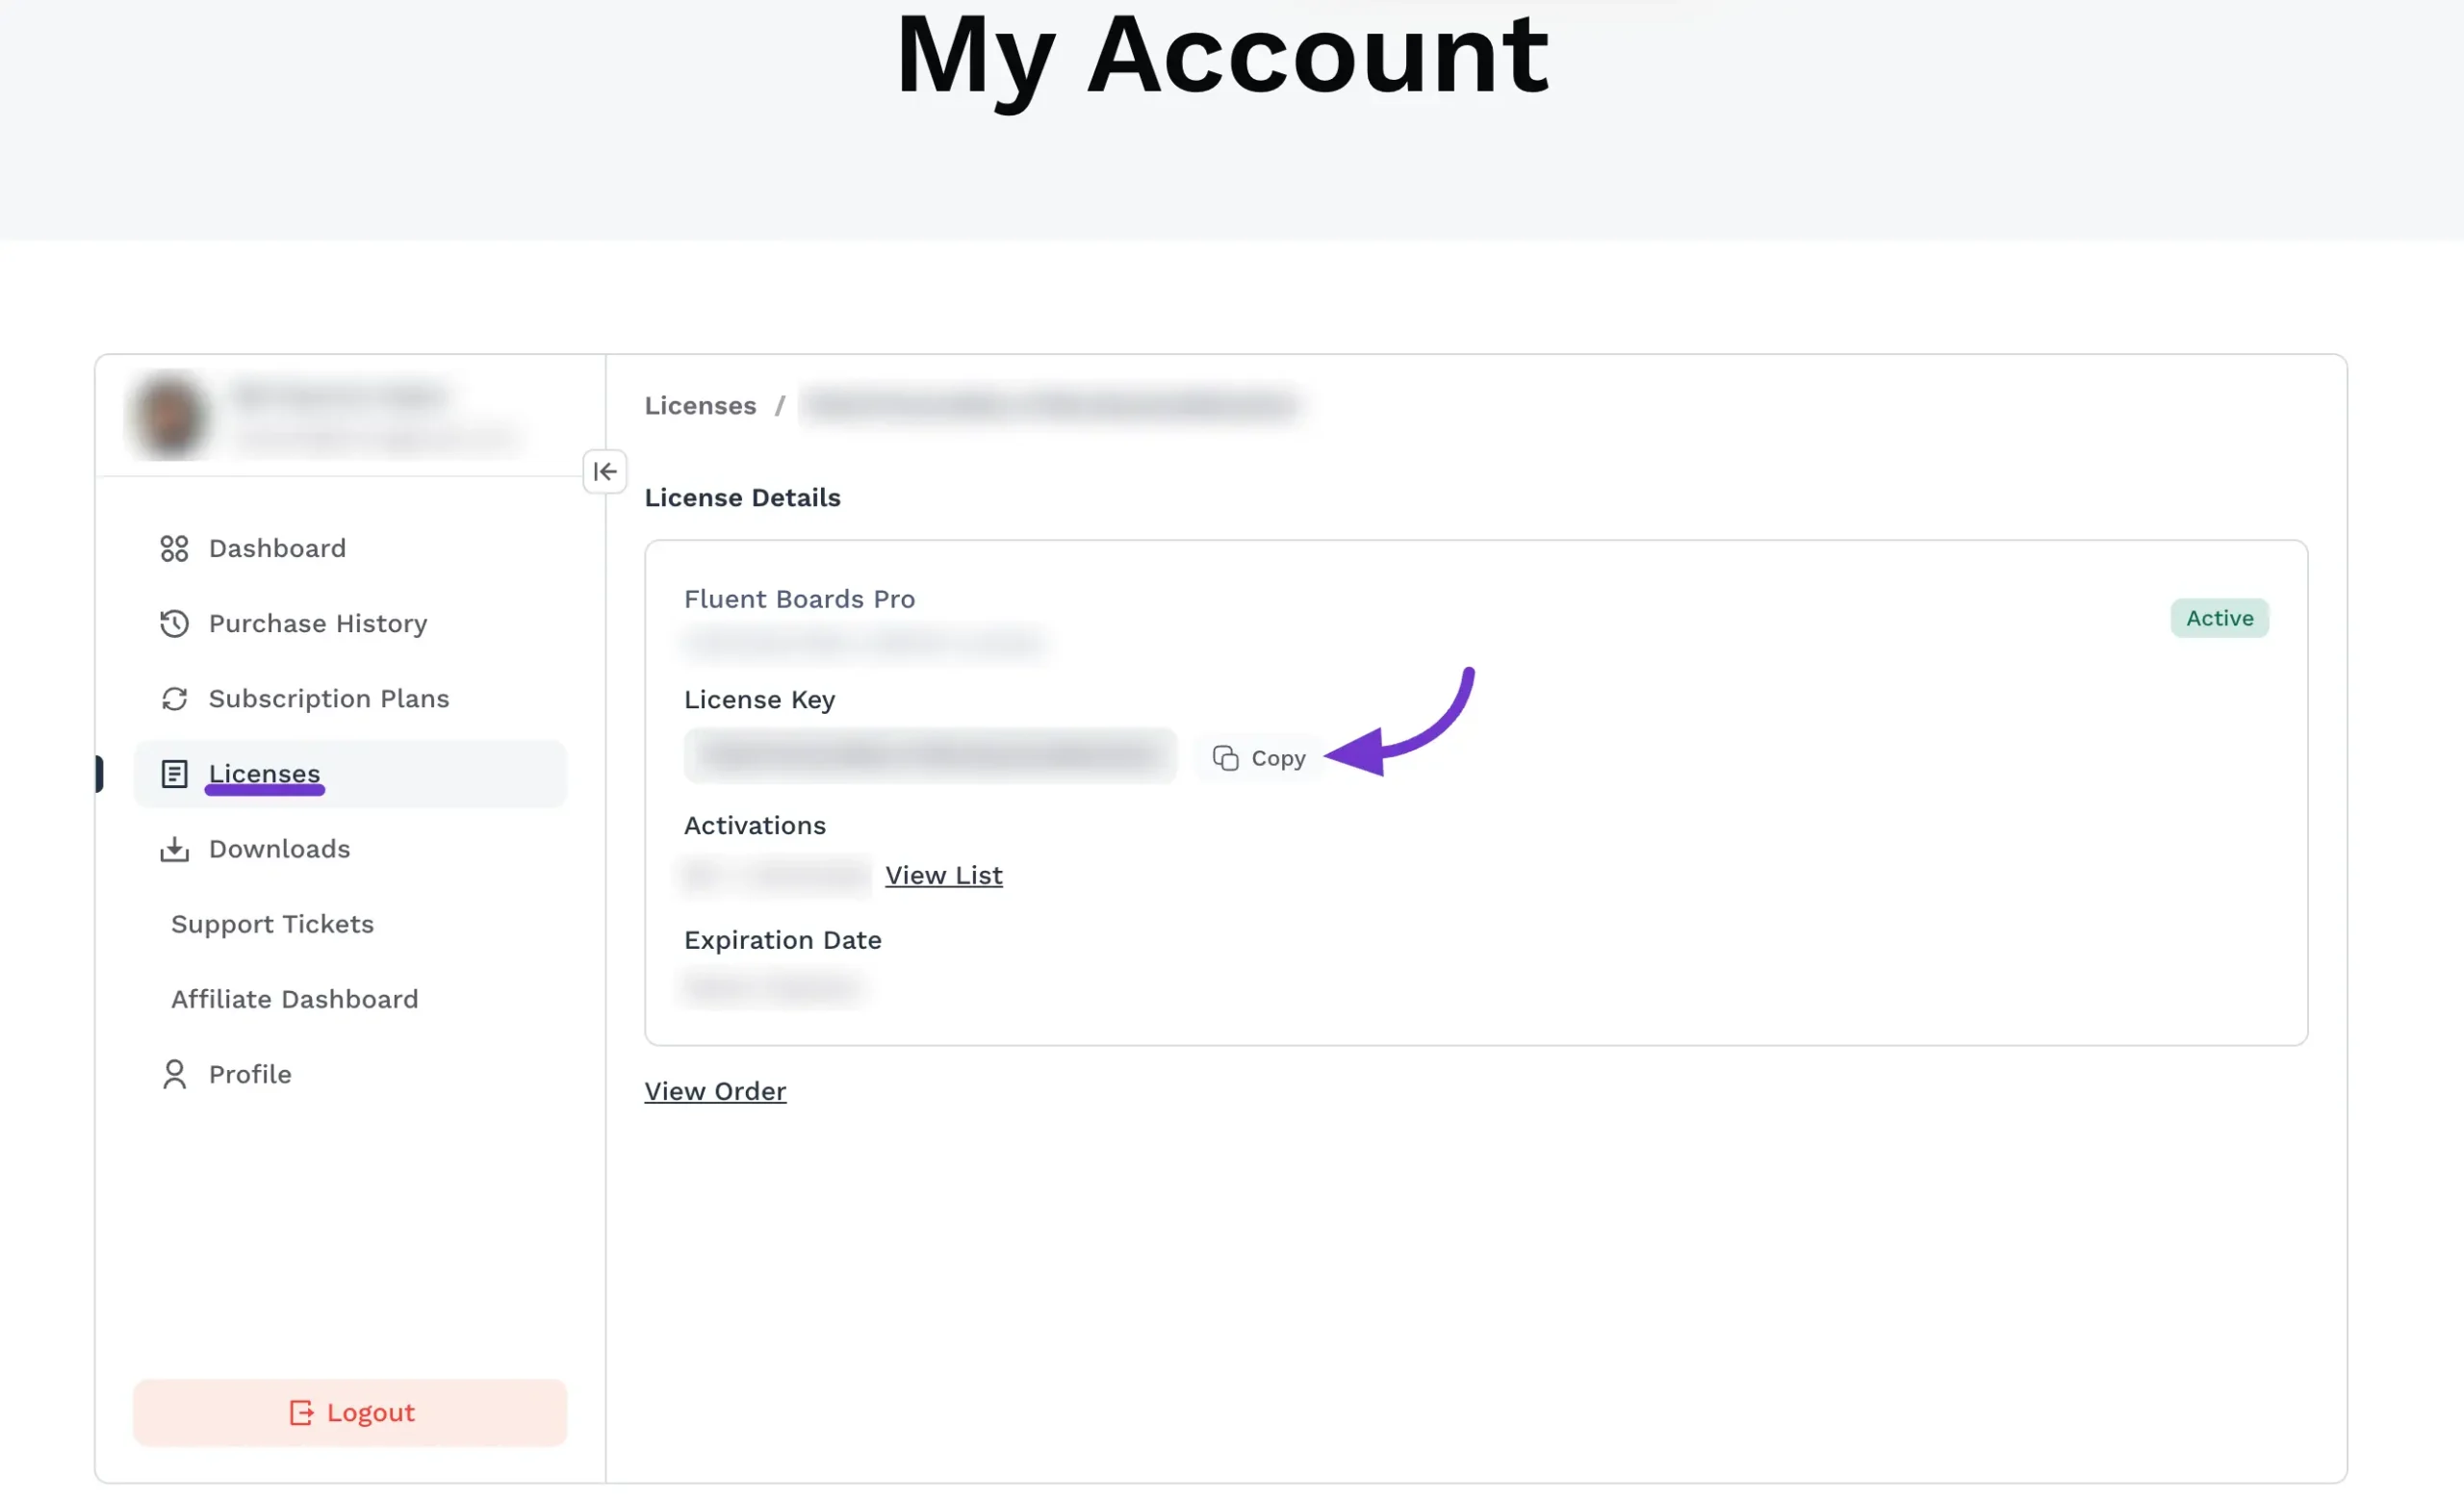
Step 2: Copy Your Unique License Key #
While we are still in your WPManageNinja account, let’s grab your license key. This key acts as your proof of purchase to unlock the premium tools.
- On the same left-hand menu, click on the Licenses tab.
- Find your FluentBoards Pro purchase in the list.
- You will see a long string of letters and numbers labeled License Key.
- Simply click the small Copy button right next to it. Your key is now saved to your computer’s clipboard, ready to be pasted later.
- Click on the View List button to see the activate site lists against this license key.
Part 2: Installing and Activating on Your Website #
Now that you have your .zip file and your license key, let’s head over to your WordPress website to put them to use.
Crucial Note Before You Begin: FluentBoards Pro is an “add-on” to the free version. Do not delete the free version of FluentBoards! Both the free version and the Pro version must be installed and active on your site at the same time for the plugin to work.
Step 3: Upload and Install the Pro Plugin #
- Log in to your WordPress Admin Dashboard.
- On the left-hand menu, hover over Plugins and click on Add New Plugin.
- At the very top of the page, click the Upload Plugin button.
- Click Choose File and select the
fluent-boards-pro.zipfile you downloaded earlier. - Click Install Now. WordPress will take a few seconds to unpack the file.
- Once the installation is complete, click the blue Activate Plugin button.
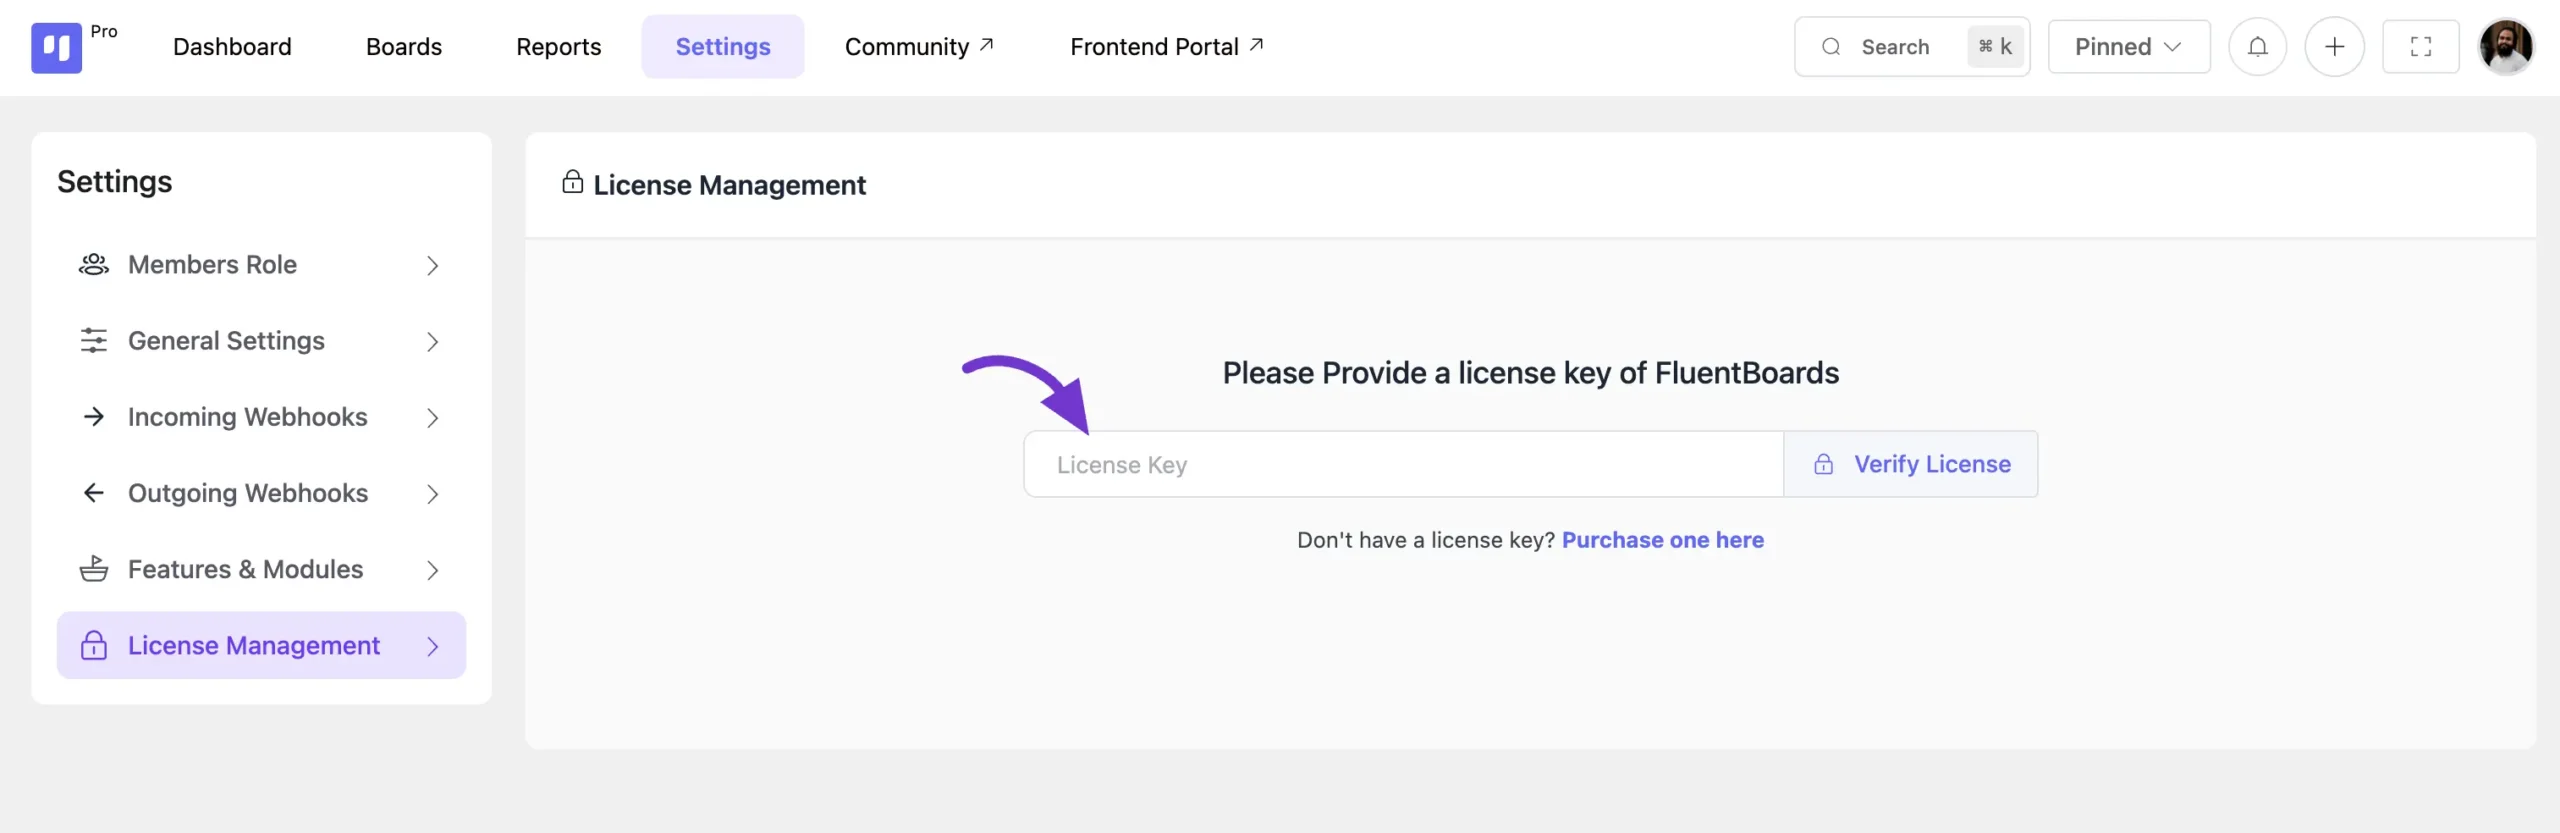
Step 4: Verify Your License Key #
The plugin is installed, but the Pro features are currently locked. Let’s use the key you copied in Step 2 to unlock them!
- In your WordPress dashboard menu, find FluentBoards and click on Settings.
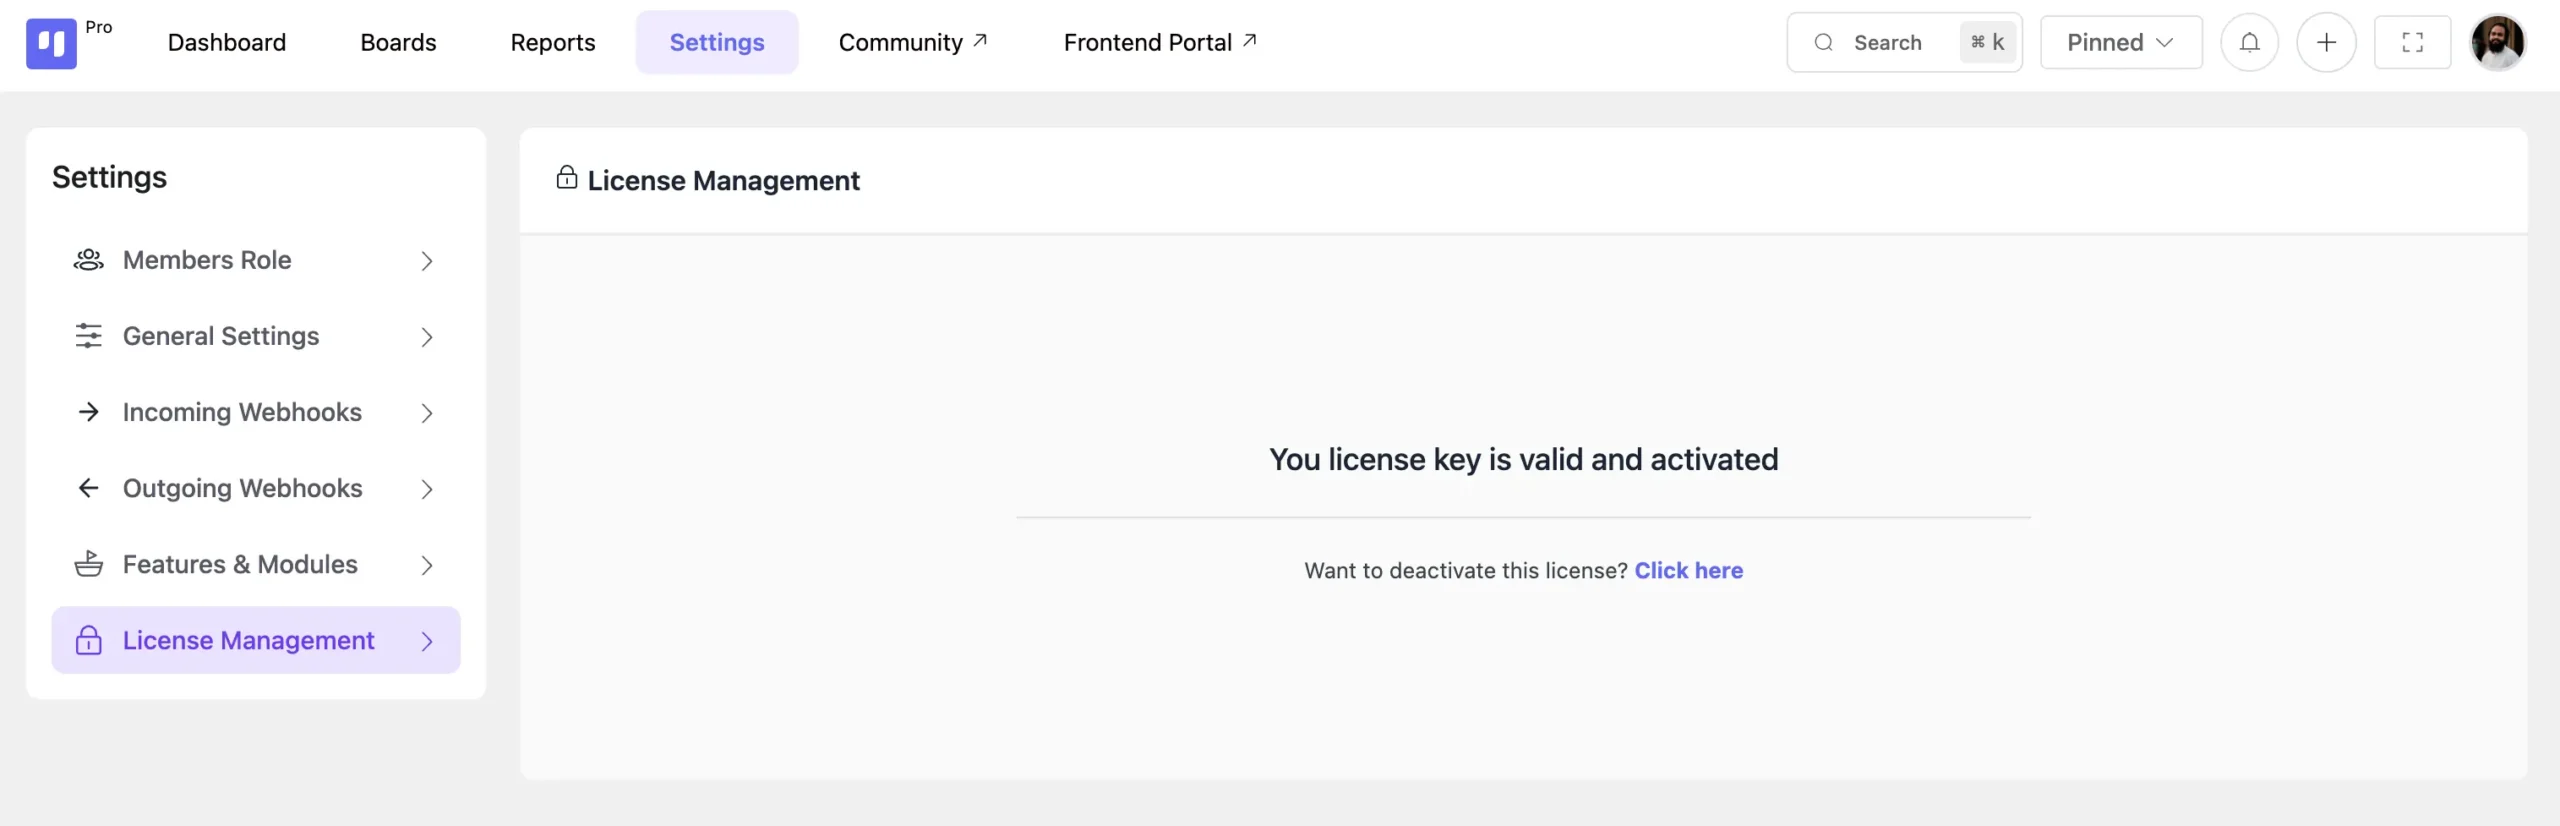
- Look at the left sidebar within the FluentBoards settings menu and click on License Management (it is usually at the very bottom).
- Click inside the blank text box that says License Key.
- Right-click and select Paste (or press Ctrl+V / Cmd+V on your keyboard) to insert the key you copied from your WPManageNinja account.
- Click the blue Verify License button.
Step 5: Success! #
Once you click verify, the system will check your key in real-time. If everything is correct, the screen will update to show a success message: “Your license key is valid and activated.”
Congratulations! You have successfully upgraded to FluentBoards Pro. You can now explore all the advanced project management features right from your dashboard.
Need further assistance? If you run into any trouble during this process, or if your key isn’t verifying, please don’t hesitate to reach out to our support team. We are always here to help!