
Kimchi CLI
Configure your AI coding tools to use open-source models in seconds.
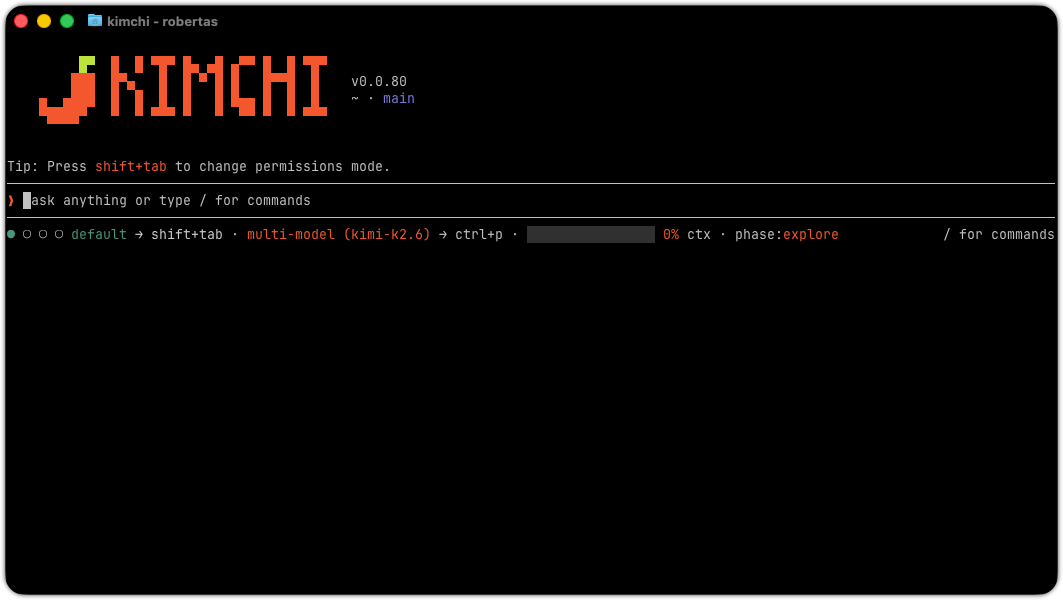
Overview
The CLI configures your favorite AI coding assistants to use open-source models hosted by Cast AI. No API keys from Anthropic or OpenAI needed, just your Cast AI API key.
Supported Models
| Model | Best For | Context | Output |
|---|---|---|---|
| kimi-k2.7 | Orchestration, planning, image understanding | 256K | 256K |
| minimax-m3 | Coding, review, image understanding | 1M | 1M |
| nemotron-3-ultra-fp4 | Fast inference, cost-efficient tasks | 1M | 1M |
| deepseek-v4-flash | Fast code generation and reasoning | 1M | 1M |
| glm-5.2-fp8 | General reasoning and code tasks | 1M | 1M |
Quick Start
One-Line Install
curl -fsSL https://github.com/getkimchi/kimchi/releases/latest/download/install.sh | bashThis downloads and installs the CLI, then launches the setup wizard automatically.
Manual Install
Download the latest release for your platform:
| Platform | Architecture | Download |
|---|---|---|
| macOS | Intel | kimchi_darwin_amd64.tar.gz |
| macOS | Apple Silicon | kimchi_darwin_arm64.tar.gz |
| Linux | x86_64 | kimchi_linux_amd64.tar.gz |
| Linux | ARM64 | kimchi_linux_arm64.tar.gz |
| Windows | x86_64 | kimchi_windows_amd64.zip |
Download and extract:
curl -fsSL https://github.com/getkimchi/kimchi/releases/latest/download/kimchi_linux_amd64.tar.gz | tar xzf -Make executable and move to PATH:
chmod +x kimchisudo mv kimchi /usr/local/bin/Getting Started
Supported Tools
| Tool | Description | Config File |
|---|---|---|
| Claude Code | Anthropic's agentic coding CLI | ~/.claude/settings.json |
| OpenCode | Agentic coding CLI | ~/.config/opencode/opencode.json |
| Codex CLI | OpenAI's coding CLI | ~/.codex/.env |
| Cursor | AI-powered code editor | state.vscdb (SQLite) |
| Windsurf | AI-powered code editor | globalStorage/storage.json |
| Zed | High-performance editor | ~/.zed/settings.json |
| Cline | VS Code extension | ~/.cline/data/globalState.json |
| OpenClaw | AI coding assistant | ~/.openclaw/openclaw.json |
Usage
Launch the harness:
kimchiLaunch in plan mode (read-only exploration and structured planning):
kimchi --planAttach files to your session with @:
kimchi @notes.txt @src/main.tsThe @ prefix resolves the path to a file and includes its contents as context at the start of the session. Paths can be relative or absolute. If the path points to a directory instead of a file, the CLI exits with an error:
Error: @file path must be a file, not a directory: /absolute/path/to/directoryRun initial setup (auth, RTK, telemetry):
kimchi setupConfigure coding tools:
kimchi setup-toolsThis launches an interactive wizard to select and configure coding tools (Cursor, OpenCode, Claude Code, OpenClaw, GSD2) in one pass.
Manage session tags (from within the harness):
/tags                        # list all active tags
/tags add key:value ...      # add one or more tags
/tags remove tag ...         # remove one or more user-defined tags
/tags clear                  # remove all user-defined tags
Tags added with /tags add are saved to ~/.config/kimchi/tags.json and persist across sessions until removed. Static tags set via the KIMCHI_TAGS environment variable cannot be modified with /tags. See Tags for tag format rules and analytics integration.
Log in (from within the harness):
/loginThis presents an authentication method selector with three options:
- Use a Kimchi account — opens your browser to authenticate. On success, your API key is saved and the active model is set automatically.
- Use a Kimchi API key — prompts you to enter an API key and an endpoint (defaults to
https://llm.kimchi.dev). The key is validated against the endpoint before saving. - Use a subscription — routes to upstream OAuth providers.
Show version:
kimchi versionManage resources (hooks, tools, extensions, plugins):
kimchi resources list
kimchi resources enable <resource-id>
kimchi resources disable <resource-id>
kimchi resources reset <resource-id>
Resume the most recent session:
kimchi --continue
# or
kimchi -c
Pick a previous session from an interactive list — includes all sessions and any branches you've created with /branch:
kimchi -rResume a specific session directly by ID (full or partial UUID), skipping the picker:
kimchi -r abc12345Run without saving a session file:
kimchi --no-sessionSet a session name:
kimchi --name "my task"Enable experimental features:
kimchi --enable-experimental-featuresUse this flag to access models and capabilities that are still under active development. Experimental features may change or be removed without notice and are not recommended for production use. The flag is not persisted — you need to pass it each time you launch Kimchi.
Disable auto-update for a single launch:
kimchi --no-auto-updateEnable debug output:
kimchi --debugGenerate shell completion:
kimchi completion bash > /etc/bash_completion.d/kimchiHow It Works
The CLI configures each tool to use the inference endpoint:
Your AI Tool ──► CLI Config ──► Inference Endpoint ──► Open-Source Models
                                        │
                                        ▼
                               https://llm.kimchi.dev
Configuration Example (OpenCode)
{
  "provider": {
    "kimchi": {
      "name": "Kimchi",
      "options": {
        "baseURL": "https://llm.kimchi.dev/openai/v1",
        "apiKey": "your-api-key"
      },
      "models": {
        "kimi-k2.7": { "reasoning": false },
        "minimax-m3": { "reasoning": false }
      }
    }
  }
}
Configuration
Global Config
The global configuration file lives at ~/.config/kimchi/config.json. It stores your API key and other settings that apply to all projects by default.
Per-Project Config
You can override global settings on a per-project basis by creating a .kimchi/config.json file in your project root:
mkdir -p .kimchi
cat > .kimchi/config.json <<'EOF'
{
  "apiKey": "project-specific-key",
  "llmEndpoint": "https://custom-endpoint.example.com",
  "skillPaths": ["/project/skills"],
  "mcpSearch": {
    "strategy": "bm25"
  }
}
EOF
All fields are optional — only include the settings you want to override.
Config Precedence
Configuration is resolved in the following order (highest to lowest):
KIMCHI_API_KEYenvironment variable- Project
.kimchi/config.json(in the current working directory) - Global
~/.config/kimchi/config.json
Merge Behavior
| Field | Merge strategy |
|---|---|
apiKey, llmEndpoint, maxToolResultChars, mcpSearchLimit | Project value wins; falls back to global if not set |
mcpSearch, retry | Shallow merge — project overrides individual keys, global fills in the rest |
skillPaths | Project replaces global (not concatenated) |
Empty strings in the project config are ignored and the global value is used instead. Malformed JSON in the project config is silently ignored, falling back to the global config.
The project config file is only read from the exact working directory — Kimchi does not walk up the directory tree to find it.
Context Files
You can provide custom instructions that are injected into the system prompt on every session. Kimchi discovers two kinds of context files:
Global — applied to every session, regardless of project:
~/.config/kimchi/harness/AGENTS.mdPlace rules that apply everywhere (e.g., your name, code style preferences, or global tool defaults) in this file. It is loaded before any project-level files.
Project-level — applied when working in a specific directory tree. Kimchi walks from the working directory up to the filesystem root and collects one context file per directory:
AGENTS.md
CLAUDE.md
Per directory, AGENTS.md takes priority over CLAUDE.md. A .local.md variant (e.g. AGENTS.local.md) is appended to its primary file for user-specific, gitignored overrides.
When both global and project files exist, global instructions appear first in the prompt, followed by ancestor directories, and finally the working directory. This means project-level rules can refine or override global ones.
Superpowers Skills
The obra/superpowers skill library is a set of 14 methodology skills that guide the agent through structured workflows like test-driven development, systematic debugging, code review, and planning.
To use superpowers with Kimchi, install them into a scanned skill directory:
git clone https://github.com/obra/superpowers.git ~/.config/kimchi/harness/skills/superpowersOnce installed, the skills are available in every session. See the superpowers repository for full documentation.
For full documentation on skills — including the skill file format, directory layout, how to install and create custom skills, and project rules — see Skills and Project Rules.
Included skills
| Skill | Purpose |
|---|---|
using-superpowers | Entry point — how to discover and invoke skills |
brainstorming | Structured ideation and option evaluation |
writing-plans | Break tasks into actionable implementation plans |
executing-plans | Step-by-step plan execution with checkpoints |
test-driven-development | Write failing tests first, then implement |
systematic-debugging | Methodical root-cause analysis |
subagent-driven-development | Delegate subtasks to parallel agents |
dispatching-parallel-agents | Run multiple agents concurrently |
writing-skills | Create reusable skill definitions |
requesting-code-review | Prepare code for review |
receiving-code-review | Process and apply review feedback |
verification-before-completion | Final checks before marking work done |
finishing-a-development-branch | Clean up and prepare a branch for merge |
using-git-worktrees | Work across multiple branches simultaneously |
Plan Mode
Plan mode is a read-only planning workflow. Launch it with kimchi --plan. The agent explores the codebase, asks clarifying questions, and produces a structured plan — all without making any changes. You review and approve the plan before execution begins.
How it works
kimchi --plan
↓
1. Agent explores the codebase (read-only)
2. Agent asks clarifying questions via structured prompts
3. Agent produces a structured plan
4. Approval menu appears
5. You choose: Execute / Start as ferment / Rework
↓
Plan saved → mode switches → agent executes with full access
In plan mode, the agent has read-only access: it can read files, search, list directories, and run read-only shell commands. It cannot edit, write, or run commands that change state.
Structured plan format
The agent follows a consistent plan template:
| Section | Purpose |
|---|---|
| Goal | One-sentence statement of what the plan achieves |
| Constraints | Non-negotiable requirements (e.g., no new dependencies, preserve existing API) |
| Chunks | Ordered, independently-verifiable units of work — each with scope, files changed, dependencies, acceptance criteria, test coverage, and open questions |
| Verification Strategy | How to confirm each chunk is correct (test command, manual check, etc.) |
| Decision Log | Tracked choices with rationale and rejected alternatives |
| Risks | Named risks with likelihood and mitigation |
Clarifying questions
When the request is ambiguous — missing a technology choice, scope boundary, or performance target — the agent asks 1–3 focused questions using a structured questionnaire before committing to a plan. Open questions within the plan must be resolved with you before the plan is finalized.
Approval gate
When the plan is complete, an approval menu appears with three options:
| Option | What happens |
|---|---|
| Execute the plan | Plan is saved to .kimchi/plans/plan-<timestamp>.md, mode switches to auto-approve, and the agent begins execution with the full plan as context |
| Start as ferment | The plan is decomposed into a Ferment project, saved as a ferment artifact under .kimchi/ferments/, and the agent transitions to the ferment implementation profile with the full toolset — useful for complex, multi-session projects |
| Rework the plan | Stay in plan mode — provide feedback and the agent revises the plan |
Plan persistence
Approved plans are saved to .kimchi/plans/ as timestamped markdown files (e.g., plan-1719849600000.md). The executing agent receives the saved file path and the full plan text as immediate context, so it can begin work without scanning conversation history.
Status Line Customization
The status line shows your permission mode, active model, context usage, and other status at a glance. Some segments — like agent count or current phase — hide themselves when inactive. You can pin segments to keep them visible at all times.
By default, Agents, Context, and Token I/O are pinned. You can unpin them or pin additional segments to suit your workflow.
Run /customize-status-line during a session to choose which segments to pin:
/customize-status-lineNavigate with ↑/↓ (or j/k), toggle with Space or Enter, and close with Esc. The following segments can be pinned:
| Segment | Shows |
|---|---|
| Ferment | Ferment status and controls |
| Agents | Active sub-agent count |
| Context | Context usage bar and percentage |
| Token I/O | Token input and output |
| Phase | Current work phase |
| Tags | Active tags (env:, region:, etc.) |
| Team | Team tag value |
| Credits | Remaining credit balance |
| Budget | Budget usage and limit |
Permissions and Model are always visible and cannot be toggled.
Your pinning choices are saved automatically to ~/.config/kimchi/harness/settings.json and persist across sessions.
Budget
Use the /budget command during a session to view your current API key budget and usage:
/budgetThe output shows a table of your budget scopes, the amount used, the limit, and the usage percentage. Provider-level breakdowns are shown beneath each entry. The budget period (e.g. Jul 1–Aug 1 UTC) is displayed in the header.
Budget warnings appear automatically when usage reaches 90% of a limit, and an exhausted notice appears when a hard budget is fully consumed.
You can also pin the Budget segment to the status line via /customize-status-line to keep budget usage visible at all times. See Status Line Customization for details.
Thinking Block Display
Kimchi hides thinking/reasoning output by default, showing a clean collapsed view. To display thinking blocks inline (dimmed), set hideThinkingBlock to false in ~/.config/kimchi/harness/settings.json:
{
  "hideThinkingBlock": false
}
Tips
Kimchi displays contextual tips above the editor to help you discover features and shortcuts. You can manage tips using the /tips command during a session:
/tips              # show all available tips
/tips disable      # hide the tips widget
/tips enable       # show the tips widget again
The preference is saved to your global config file (~/.config/kimchi/config.json) under preferences.hideTips and persists across sessions.
Themes
Use /theme during a session to open an interactive theme picker. The picker lists all available color themes and supports live preview — navigate with arrow keys to preview each theme in real time, press Enter to confirm your selection, or Esc to cancel and restore the original theme.
/themeBackground Agents
Detach to background (Ctrl+B)
When a foreground subagent is running, press Ctrl+B to detach it to the background. The agent keeps running while you get the editor back immediately — useful when a task is taking longer than expected and you want to continue with other work.
While a foreground agent is active, a (ctrl+b to run in background) hint appears in the agent widget. Press Ctrl+B and the agent moves to the background, showing a [background] label in the widget and in /agents. A notification fires when it completes.
Pressing Ctrl+B when no foreground agent is running is a no-op.
Kill a background agent (Ctrl+X)
Press Ctrl+X to kill the most recently spawned running background agent. The /agents list shows a (ctrl+x to kill) hint next to the target agent. Each press kills one background agent — if multiple are running, press again to kill the next one.
Token Optimization (RTK)
RTK compresses command output (git, cargo, npm, docker, etc.) by 60–90%, significantly reducing LLM context usage. Kimchi automatically installs and manages RTK for you.
How it works: Before every bash tool execution, kimchi calls rtk rewrite "<command>". If RTK returns a rewritten command (e.g. git status becomes rtk git status), the rewritten version is executed instead. The agent receives compact, filtered output without any workflow changes.
Automatic installation: RTK is installed automatically on first session start. The binary is placed at ~/.config/kimchi/harness/rtk and symlinked into ~/.local/bin/rtk (macOS/Linux). The setup wizard also offers an RTK installation step. Kimchi checks for updates once every 24 hours.
To disable automatic installation, set the environment variable before launching:
KIMCHI_RTK_AUTO_INSTALL=0 kimchiManual installation:
brew install rtk # macOS / LinuxIf RTK is already on your PATH, kimchi uses it directly.
Disabling RTK rewriting:
Disable via the resource system:
kimchi resources disable hooks.rtk-rewriteOr disable for a single session with an environment variable:
KIMCHI_RTK=0 kimchiSet KIMCHI_RTK to 0, false, or off to disable rewriting even when RTK is installed.
Bash Tool Guard
The bash tool guard steers the agent away from using shell commands (cat, sed -i, echo >, and similar) for file operations that have a dedicated tool. When the agent reads a file through bash, the full content streams verbatim into the conversation context — often hundreds of KB. The read, edit, and write tools avoid this: the harness truncates intelligently, shows line numbers, and triggers LSP hooks.
The guard is enabled by default. On the first intercepted command per category (read / edit / write) in a turn, it injects a steering message and lets the call proceed. Counters reset at the start of each turn. The guard is inactive in plan mode.
Overriding: If your prompt names the command or expresses the intent clearly, the guard allows the call — "use sed to fix this" or "show me what's in foo.ts" both bypass it for the relevant category. Word-boundary matching is used, so "categorize the files" does not bypass the guard for cat.
Disabling:
kimchi resources disable extensions.bash-tool-guardThe change takes effect immediately. To re-enable:
kimchi resources enable extensions.bash-tool-guardPII Redaction
Kimchi can scrub personally identifiable information (PII) and secrets from messages before they reach the LLM, and from session transcripts and exports. Redaction is disabled by default.
What is redacted:
| Category |
|---|
| Email addresses |
| Phone numbers |
| SSNs |
| Credit card numbers |
| IBANs |
| Bearer tokens |
| AWS access keys |
| GitHub tokens |
Redaction covers outgoing messages, session transcripts, exports, and session data attached to /bug reports.
To enable:
KIMCHI_REDACTION_ENABLED=1 kimchiOr set it permanently in ~/.config/kimchi/config.json:
{
  "redaction": {
    "enabled": true
  }
}
Stream Idle Timeout
Kimchi enforces an idle timeout on outbound requests to detect stalled network connections. If no bytes are received from the provider for a configurable window (default: 5 minutes), the request is aborted and retried automatically.
This is an inactivity timeout, not a total-request timeout — the clock resets on every received chunk. A slow-but-alive stream (e.g. a model generating a long response) is never interrupted. Only a completely silent connection triggers the timeout.
To set a custom timeout, use the environment variable or set httpIdleTimeoutMs in ~/.config/kimchi/harness/settings.json:
KIMCHI_STREAM_IDLE_TIMEOUT_MS=60000 kimchi{
"httpIdleTimeoutMs": 60000
}To disable the timeout entirely:
KIMCHI_STREAM_IDLE_TIMEOUT_MS=0 kimchi| Variable | Default | Description |
|---|---|---|
KIMCHI_STREAM_IDLE_TIMEOUT_MS | 300000 | Milliseconds of inactivity before a request is aborted. 0 disables the timeout. |
The environment variable takes precedence over the settings file. If neither is set, the default is 5 minutes.
Prompt History
Kimchi automatically loads prompts from previous sessions into the editor's up/down arrow history. When you start a session, the harness scans past sessions in the current project's .kimchi/ directory, extracts user prompts, and makes them available for navigation — so you can reuse previous prompts without retyping.
Behavior:
- Prompts are loaded from all past sessions in the current project directory
- The current session's own prompts are excluded
- Forked and subagent sessions are skipped (their prompts are synthetic)
- System-generated messages (annotations, orchestrator instructions) are filtered out
- Duplicate prompts are deduplicated across sessions
- Prompts are ordered most-recent first, up to 100 entries
No configuration is needed — prompt history is always active.
Network Reliability
Kimchi automatically retries failed network requests with exponential backoff and jitter. This covers all first-party API calls (authentication, session metadata, stats), LLM model calls, and background operations such as telemetry and session naming. Third-party calls — GitHub release checks for updates and npm-based RTK installs — are retried independently with a fixed ceiling of 4 attempts regardless of your config.
Default behavior: Each request has a 30-second timeout. Kimchi retries up to 10 times on transient failures: network errors, and HTTP 429, 500, 502, 503, 504, and 524 responses. Retries use exponential backoff starting at 1 second, capped at 60 seconds, with random jitter to avoid thundering-herd effects. When a server returns a Retry-After header (common on rate-limited APIs), Kimchi waits at least that long before the next attempt.
The retry count controls LLM retries too. The retry.maxRetries setting is applied to both HTTP fetch calls and model API retries via the SDK. It also propagates automatically to any subagents spawned during a session — one setting governs the whole session.
Configuring retry count:
Set retry.maxRetries in your global or project config.json to override the default of 10:
{
  "retry": {
    "maxRetries": 5
  }
}
Values must be a positive integer — 0 or negative values are ignored and the default applies. The timeout per request (30 seconds) is not configurable.
Resource Management
Kimchi provides a centralized resource system for controlling which hooks, tools, extensions, and plugins are active. Resources can be managed from the CLI or from within a chat session.
CLI
kimchi resources list                        # show all resources and their status
kimchi resources enable <resource-id>        # enable a resource
kimchi resources disable <resource-id>       # disable a resource
kimchi resources reset <resource-id>         # reset to default
In-Chat Commands
Use /resources during a session to open an interactive settings overlay, or pass subcommands directly:
/resources              # open the resource manager UI
/resources list         # print resource status
/resources enable <id>  # enable a resource
/resources disable <id> # disable a resource
/hooks                  # open the resource manager filtered to hooks
/plugins                # open the resource manager filtered to plugins
Available Resources
| Resource ID | Kind | Default | Description |
|---|---|---|---|
hooks.bash | hooks | enabled | Enable Bash hook scripts discovered from hooks/bash directories |
hooks.rtk-rewrite | hooks | enabled | Rewrite bash commands through RTK before execution |
tools.web_search | tools | enabled | Allow the web_search tool |
tools.web_fetch | tools | enabled | Allow the web_fetch tool |
extensions.agents | extensions | enabled | Enable subagent delegation tools |
extensions.ferment | extensions | enabled | Enable guided project workflow tools |
extensions.todos | extensions | enabled | Enable tactical todo tracking with a live overlay |
plugins.mcp-apps | plugins | enabled | Enable MCP/app connector tools |
extensions.lsp | extensions | enabled | Built-in Language Server Protocol support — type-aware diagnostics, hover, go-to-definition, references, and rename |
extensions.bash-tool-guard | extensions | enabled | Steer the agent away from using bash for file operations that have a dedicated read, edit, or write tool |
extensions.bash-default-timeout | extensions | enabled | Apply a 120s default timeout to every bash command when none is supplied, so misbehaving commands cannot hang a session indefinitely |
extensions.cursor-rules | extensions | enabled | Load Cursor-style project rules from .cursor/rules and .agents/rules and inject matching rules into the system prompt |
extensions.claude-code-hook-adapter | extensions | disabled | Run Claude Code command hooks from .claude settings files |
extensions.claude-code-skills | extensions | disabled | Load Claude Code skills from .claude/skills into Kimchi's native skill prompt |
extensions.pi-package-lookup | extensions | disabled | Load packages installed by the original pi CLI |
In addition to the static resources above, Kimchi discovers bash hook scripts placed in ~/.config/kimchi/harness/hooks/bash/ (global) and .kimchi/hooks/bash/ (project-level). Global hooks are enabled by default; project-level hooks are disabled by default. Installed Pi packages also appear as plugin resources (e.g. plugins.package.npm-context-mode) and can be toggled like any other resource. Disabling a package resource requires a restart to take effect.
Resource Settings
Resource overrides are persisted in ~/.config/kimchi/harness/settings.json under the resources key:
{
  "resources": {
    "hooks.rtk-rewrite": true,
    "tools.web_search": false
  }
}Most tool and extension toggles require a Kimchi restart to take effect. Hook changes (such as RTK rewrite and bash hooks) apply immediately.
Bash Hooks
Bash hooks are shell scripts that intercept commands before execution. They can rewrite commands or block them entirely. The entire bash hook subsystem can be disabled with kimchi resources disable hooks.bash.
Hook locations:
- Global:
~/.config/kimchi/harness/hooks/bash/— enabled by default - Project:
.kimchi/hooks/bash/— disabled by default
Hook scripts receive a JSON payload on stdin with the tool name, command, and working directory. They can output a JSON response with a decision (allow or block) and optionally a rewritten command, or simply print a rewritten command as plain text.
Discovered hooks appear as resources (e.g. hooks.bash.global.my-hook-sh) and can be toggled like any other resource.
Claude Code Hook Adapter
If you already have hooks configured for Claude Code (in a .claude/settings.json or ~/.claude/settings.json file), you can reuse them in Kimchi without rewriting them. The Claude Code hook adapter is a disabled-by-default extension that reads your existing Claude Code hook configuration and runs those hooks during Kimchi sessions.
To enable it:
kimchi resources enable extensions.claude-code-hook-adapterRestart Kimchi after enabling. Discovered Claude Code hook commands also appear under the Hooks tab in /resources, where they can be enabled or disabled individually.
The adapter reads hooks from the user config and the nearest ancestor project config:
~/.claude/settings.json(user).claude/settings.json(project).claude/settings.local.json(local project)
To disable all hooks from Claude Code config files at once, set "disableAllHooks": true at the top level of any of those files.
What hooks can do
Hooks can run on the following events:
| Event | Description |
|---|---|
PreToolUse | Runs before a tool executes. Can inspect or rewrite tool input. Exit code 2 blocks the tool call. |
PostToolUse | Runs after every tool result (success or error). |
PostToolUseFail | Runs only when a tool result is an error. PostToolUse still fires for all results. |
PostToolBatch | Synthesized once per turn after all tool executions in that turn finish. Skipped on tool-less turns. |
Notification | Fires when the harness emits a lifecycle notification — e.g. permission_prompt before a permission dialog, or agent_needs_input before the agent prompts the user. Observer-only. |
SessionStart | Runs when a session starts. |
PreCompact | Runs before context compaction. |
PostCompact | Runs after context compaction. |
UserPromptSubmit | Runs when the user submits a prompt. |
Stop | Fires once when the agent finishes responding. A {"decision":"block","reason":"..."} result continues the run, with stop_hook_active set on re-entry. Payload includes stop_reason and error_message. |
StopFail | Fires in addition to Stop only when the run ends with stop_reason error or aborted. Same block/continuation semantics as Stop. |
TaskCompleted | Fires at the end of each turn. Observer-only — block decisions are ignored. |
TurnStart | Fires at the start of each turn. Observer-only. |
MessageStart | Fires when a message begins. Observer-only. |
MessageEnd | Fires when a message ends. Observer-only. |
ModelSelect | Fires when the model changes. Observer-only. |
UserBash | Fires when the user runs a bash command. Observer-only. |
SubagentStart | Fires when a subagent spawns. Observer-only. |
SubagentStop | Fires when a subagent completes or fails. Observer-only. |
SessionEnd | Runs when a session ends. |
Example
A PreToolUse hook that runs a script before every Bash command:
{
  "hooks": {
    "PreToolUse": [
      {
        "matcher": "Bash",
        "hooks": [
          {
            "type": "command",
            "command": "python3 ~/.claude/hooks/pre_tool_use.py"
          }
        ]
      }
    ]
  }
}
Place this in any of the settings files listed above. The "matcher": "Bash" field limits the hook to Bash tool calls; omit it to run on all tools.
If your hooks depend on Claude Code skills, enable the separate skill compatibility extension:
kimchi resources enable extensions.claude-code-skillsKimchi Hooks Adapter
You can configure hooks directly in your project by placing JSON hook files in a .kimchi/ directory at the project root. The Kimchi hooks adapter discovers and runs hooks from these files automatically — no resource toggle required.
Hook commands run with the same privileges as the Kimchi process. Only use hook files from projects you trust, and review hook commands before running them. Add
.kimchi/hooks.local.jsonto your.gitignoreto keep personal overrides out of version control.
Hook file locations:
| File | Scope | Description |
|---|---|---|
.kimchi/hooks.json | project | Shared hook configuration — commit to version control |
.kimchi/hooks.local.json | local | Personal hook overrides — add to .gitignore |
Both files use the same format as the Claude Code hook adapter. When both files exist, hooks from both are discovered and run.
Example
A Notification hook that runs a script whenever the harness emits a lifecycle notification:
{
  "hooks": {
    "Notification": [
      {
        "hooks": [
          {
            "type": "command",
            "command": "python3 .kimchi/hooks/on-notification.py"
          }
        ]
      }
    ]
  }
}
The hook receives a JSON payload on stdin identifying the notification type (e.g. "permission_prompt", "agent_needs_input").
Supported events are the same as listed in the Claude Code Hook Adapter section above.
Claude Code Skills
The Claude Code skills extension loads skills from ~/.claude/skills and the nearest project .claude/skills directory into Kimchi's native available-skills prompt. It also contributes them through Pi resource discovery so /skill:name works, and provides a Claude-compatible Skill tool for hooks that invoke Skill("name").
To enable it:
kimchi resources enable extensions.claude-code-skillsRestart Kimchi after enabling.
Pi Package Extensions
Plugin packages installed via kimchi install may ship a hooks/hooks.json (or .claude-plugin/hooks/hooks.json). Those hooks honor the same full event set as the Claude Code hook adapter. SessionStart context from packages is injected into the system prompt. Hooks run unconditionally alongside any pi extension the package ships — avoiding duplicate behavior across a package's hooks.json and its pi extension is the package author's responsibility.
Pi packages that ship native hooks can be installed and managed through the CLI:
kimchi install npm:<package-name>
kimchi list
Installed packages subscribe to native Pi events such as tool_call, tool_result, session_start, and session_shutdown. Each installed package appears as a plugin resource (e.g. plugins.package.npm-context-mode) and can be enabled or disabled from the resource manager or CLI. Package resource changes require a restart to take effect.
Updating Packages
The kimchi update command handles manual self-updates and Pi package updates. Kimchi can also auto-update on launch — see Auto-Update below.
kimchi update                          # update packages and Kimchi
kimchi update --extensions             # update installed packages only
kimchi update --extension <name>       # update a single package
kimchi update --self                   # update Kimchi only
kimchi update <package-name>           # update a single package by name
kimchi update v1.2.3                   # install a specific Kimchi release (downgrades work too)
kimchi update v1.2.3-rc.1              # install a release candidate
kimchi update --canary                 # install the latest canary build from master
Use --dry-run for Kimchi self-update checks. Use --canary to install the latest canary build. A version positional (e.g. v1.2.3) can only target Kimchi itself and cannot be combined with --extensions, --canary, or a package name.
Local Ollama Models
Kimchi automatically discovers models running on a local Ollama server and makes them available in the model picker and multi-model role pools — no manual configuration required.
How it works
On every startup, Kimchi probes the Ollama API (/api/tags and /api/show) to discover installed models. Discovered models are:
- Persisted into
models.jsonunder anollamaprovider - Exposed in the
/modelpicker asollama/<model-name>(e.g.ollama/llama3:8b) - Added to the explorer, reviewer, and builder role pools
The probe is silent on failure — if Ollama is not running or unreachable, startup continues normally with no errors or warnings. When Ollama goes offline between runs, any previously discovered models are automatically removed from models.json.
Configuring the Ollama host
By default, Kimchi probes http://localhost:11434. To point to a different Ollama server, set one of these environment variables:
| Variable | Description |
|---|---|
OLLAMA_HOST | Primary — takes precedence over all other values |
KIMCHI_OLLAMA_HOST | Fallback — used when OLLAMA_HOST is not set |
OLLAMA_HOST=http://gpu-box.lan:11434 kimchiRole pool rules
Ollama models are added to the explorer, reviewer, and builder role pools only. They are never assigned to the orchestrator, planner, or judge roles.
Capabilities
The probe detects model capabilities automatically:
- Vision — models with vision capability accept image inputs
- Reasoning — models with thinking capability are marked as reasoning models
- Tools — tool-calling support is detected and preserved
These are expressed in models.json via the input array and reasoning flag:
{
  "id": "llava:7b",
  "name": "llava:7b",
  "reasoning": false,
  "input": [
    "text",
    "image"
  ]
}
Because inference runs locally, Kimchi reports zero cost for all Ollama models. No API usage is metered or billed. This is reflected in models.json as:
{
  "cost": {
    "input": 0,
    "output": 0,
    "cacheRead": 0,
    "cacheWrite": 0
  }
}
Auto-Update
Kimchi can update itself in the background every time it launches. When an update is available, it installs silently before the UI loads — you always open into the latest version without running a separate update command.
Auto-update is off by default. To enable it, run /update and toggle it on. Once enabled, the first launch that installs an update shows a one-time confirmation:
kimchi now updates itself in the background. Run
/updateto disable.
If a network or install error occurs during auto-update, Kimchi falls back to your current version and starts normally — a failed update never blocks a session.
Auto-update is not available if kimchi is installed via Homebrew — use brew upgrade kimchi instead. It also does not run in ACP or other non-interactive modes, where kimchi is spawned by an IDE or external tool rather than launched directly in a terminal.
On Windows, the updated binary takes effect on your next terminal launch rather than immediately.
/update command
/update commandRun /update during any session to manage auto-update:
- Auto-update: ON/OFF — toggle auto-update on or off. Your preference is saved to
~/.config/kimchi/harness/auto-update.json. - Update kimchi now — check for and install an update immediately, regardless of your auto-update setting.
- View current version — show the running kimchi version.
If kimchi is installed via Homebrew or KIMCHI_NO_UPDATE_CHECK is set, /update shows a notice explaining why auto-update is unavailable.
FAQ
Will this break my existing config?
No. The CLI preserves your existing tool configurations and only adds its provider settings. Custom providers you add to models.json (e.g., vLLM, LM Studio) are also preserved across CLI restarts. Ollama models are discovered and injected automatically — see Local Ollama Models.
Clipboard image pasting doesn't work on WSL or headless Linux
Kimchi disables clipboard image pasting on WSL and headless Linux because these environments typically lack a display server. Without one, the clipboard feature would crash on startup.
If you have an X server running in WSL (e.g. VcXsrv, X410), opt back in by setting an environment variable before launching:
export KIMCHI_CLIPBOARD_FORCE=1
kimchi
On non-WSL Linux, clipboard image pasting requires a running display server and a clipboard command-line tool. Kimchi uses xclip on X11 or wl-paste on Wayland to access the clipboard. Install the appropriate tool for your display server:
# X11
sudo apt install xclip

# Wayland
sudo apt install wl-clipboard
If the tool is not installed, clipboard image support silently degrades — availableFormats() returns an empty list and image pasting is unavailable.
Also check that $DISPLAY (X11) or $WAYLAND_DISPLAY (Wayland) is set in the shell where you launch Kimchi.
iTerm2 viewport jumps to the top of the session
In iTerm2 on macOS, the terminal viewport can jump to the very start of the session during long sessions or when rendering large diffs. To fix this, set PI_TUI_NO_CLEAR_SCROLLBACK:
PI_TUI_NO_CLEAR_SCROLLBACK=1 kimchiCan I switch back?
Yes. Simply remove the kimchi provider from your tool's config file, or re-run the tool's original setup.
Where is my API key stored?
- Global config file:
~/.config/kimchi/config.json(permissions: 600) - Per-project config file:
.kimchi/config.json(in your project root) - Environment variable:
KIMCHI_API_KEY
Session Branching
Use the /branch command during a session to create a branch of the current conversation. The branch is saved as a separate session that you can resume independently.
/branchThe command waits for any in-progress agent work to finish, then forks the session at the current point. It prints a resume command with the new session's ID:
You can resume a branch of this session with -r <session-id>You can use the printed ID directly, or pick the branch from a session list. The easiest path is /resume inside any active session — it opens a picker with all your sessions including branches:
/resumeYou can also start kimchi with kimchi -r to get the same picker before a session begins.
Reporting Bugs
Use /bug during a harness session to open a pre-filled GitHub issue form:
/bug Something is brokenThe command auto-fills the bug report template with your harness version and any description you provide. If PII redaction is enabled, session data attached to the bug report gist is redacted before upload (see PII Redaction). In TUI mode it opens your browser; in headless mode it prints the URL to stdout. If the browser fails to open, the full URL is displayed so you can copy it manually.
For the latest releases and source code, visit the GitHub repository.
Updated 9 days ago
