
Git Log Viewer
Browse your commit history directly in Maestro: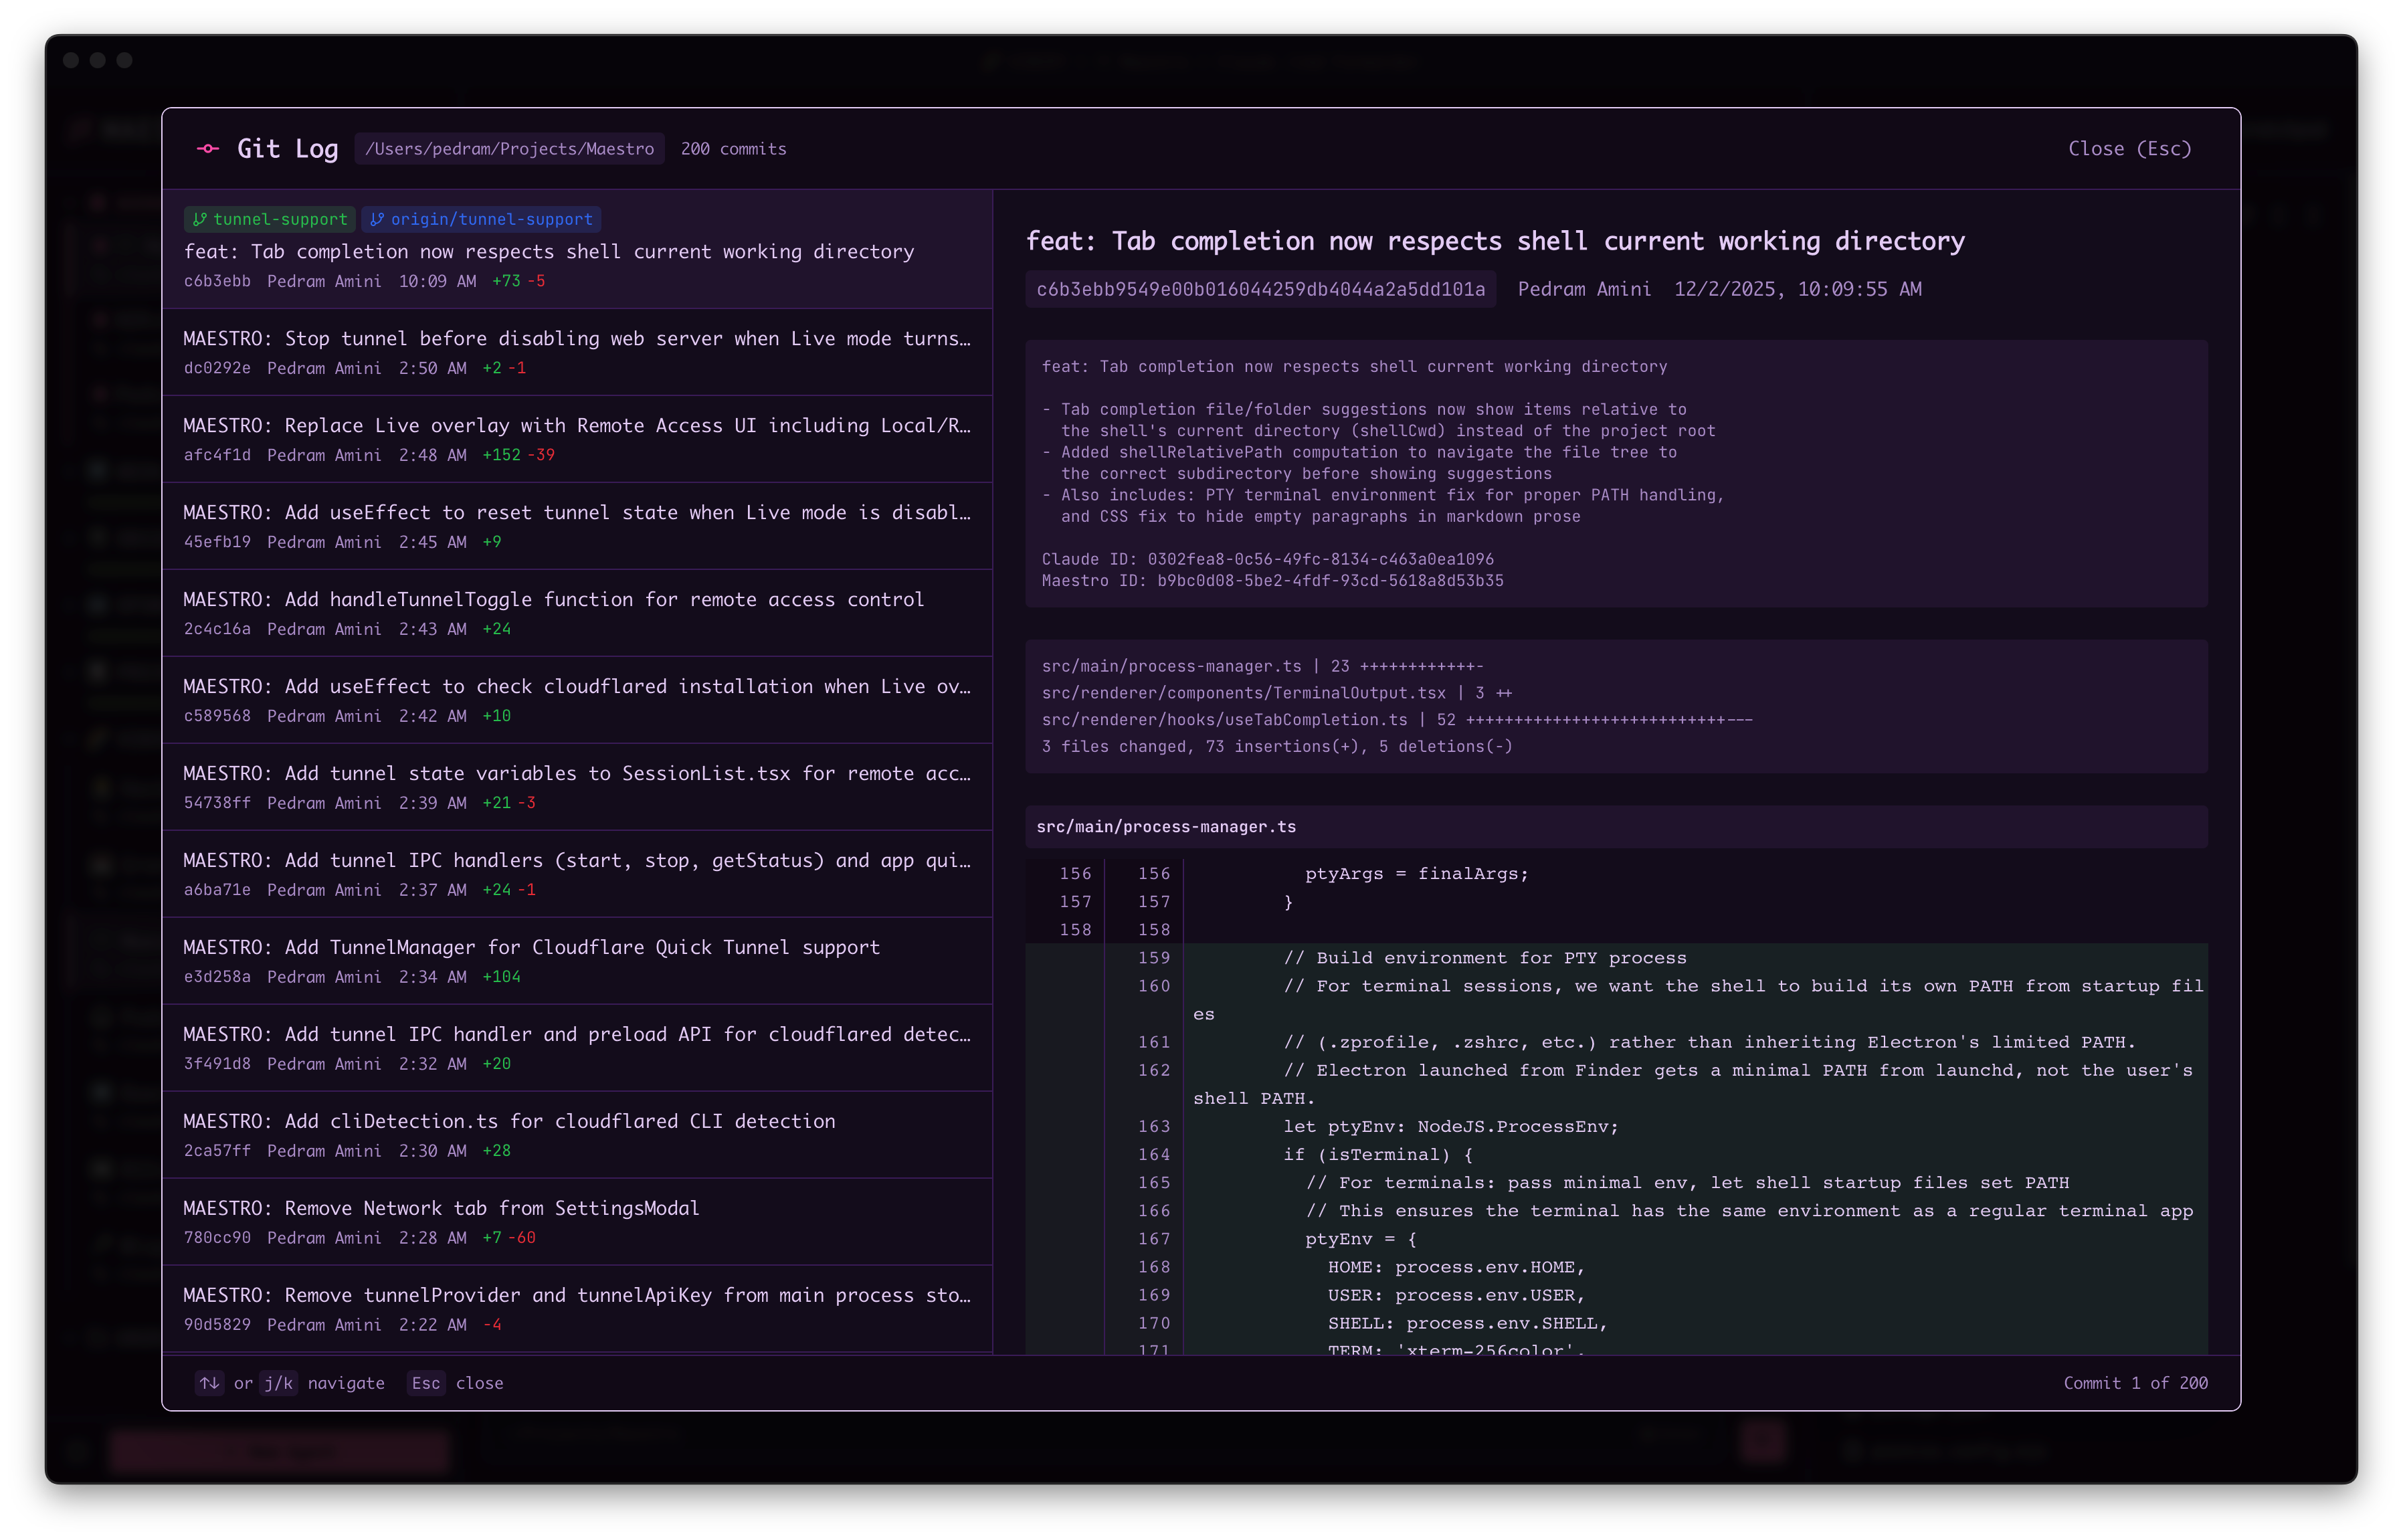
- Commit history with messages, authors, and timestamps
- Branch visualization with merge points
- Quick navigation to any commit
Cmd+K / Ctrl+K) → “Git Log” or the git menu in the Left Bar.
Diff Viewer
Review file changes with syntax-highlighted diffs: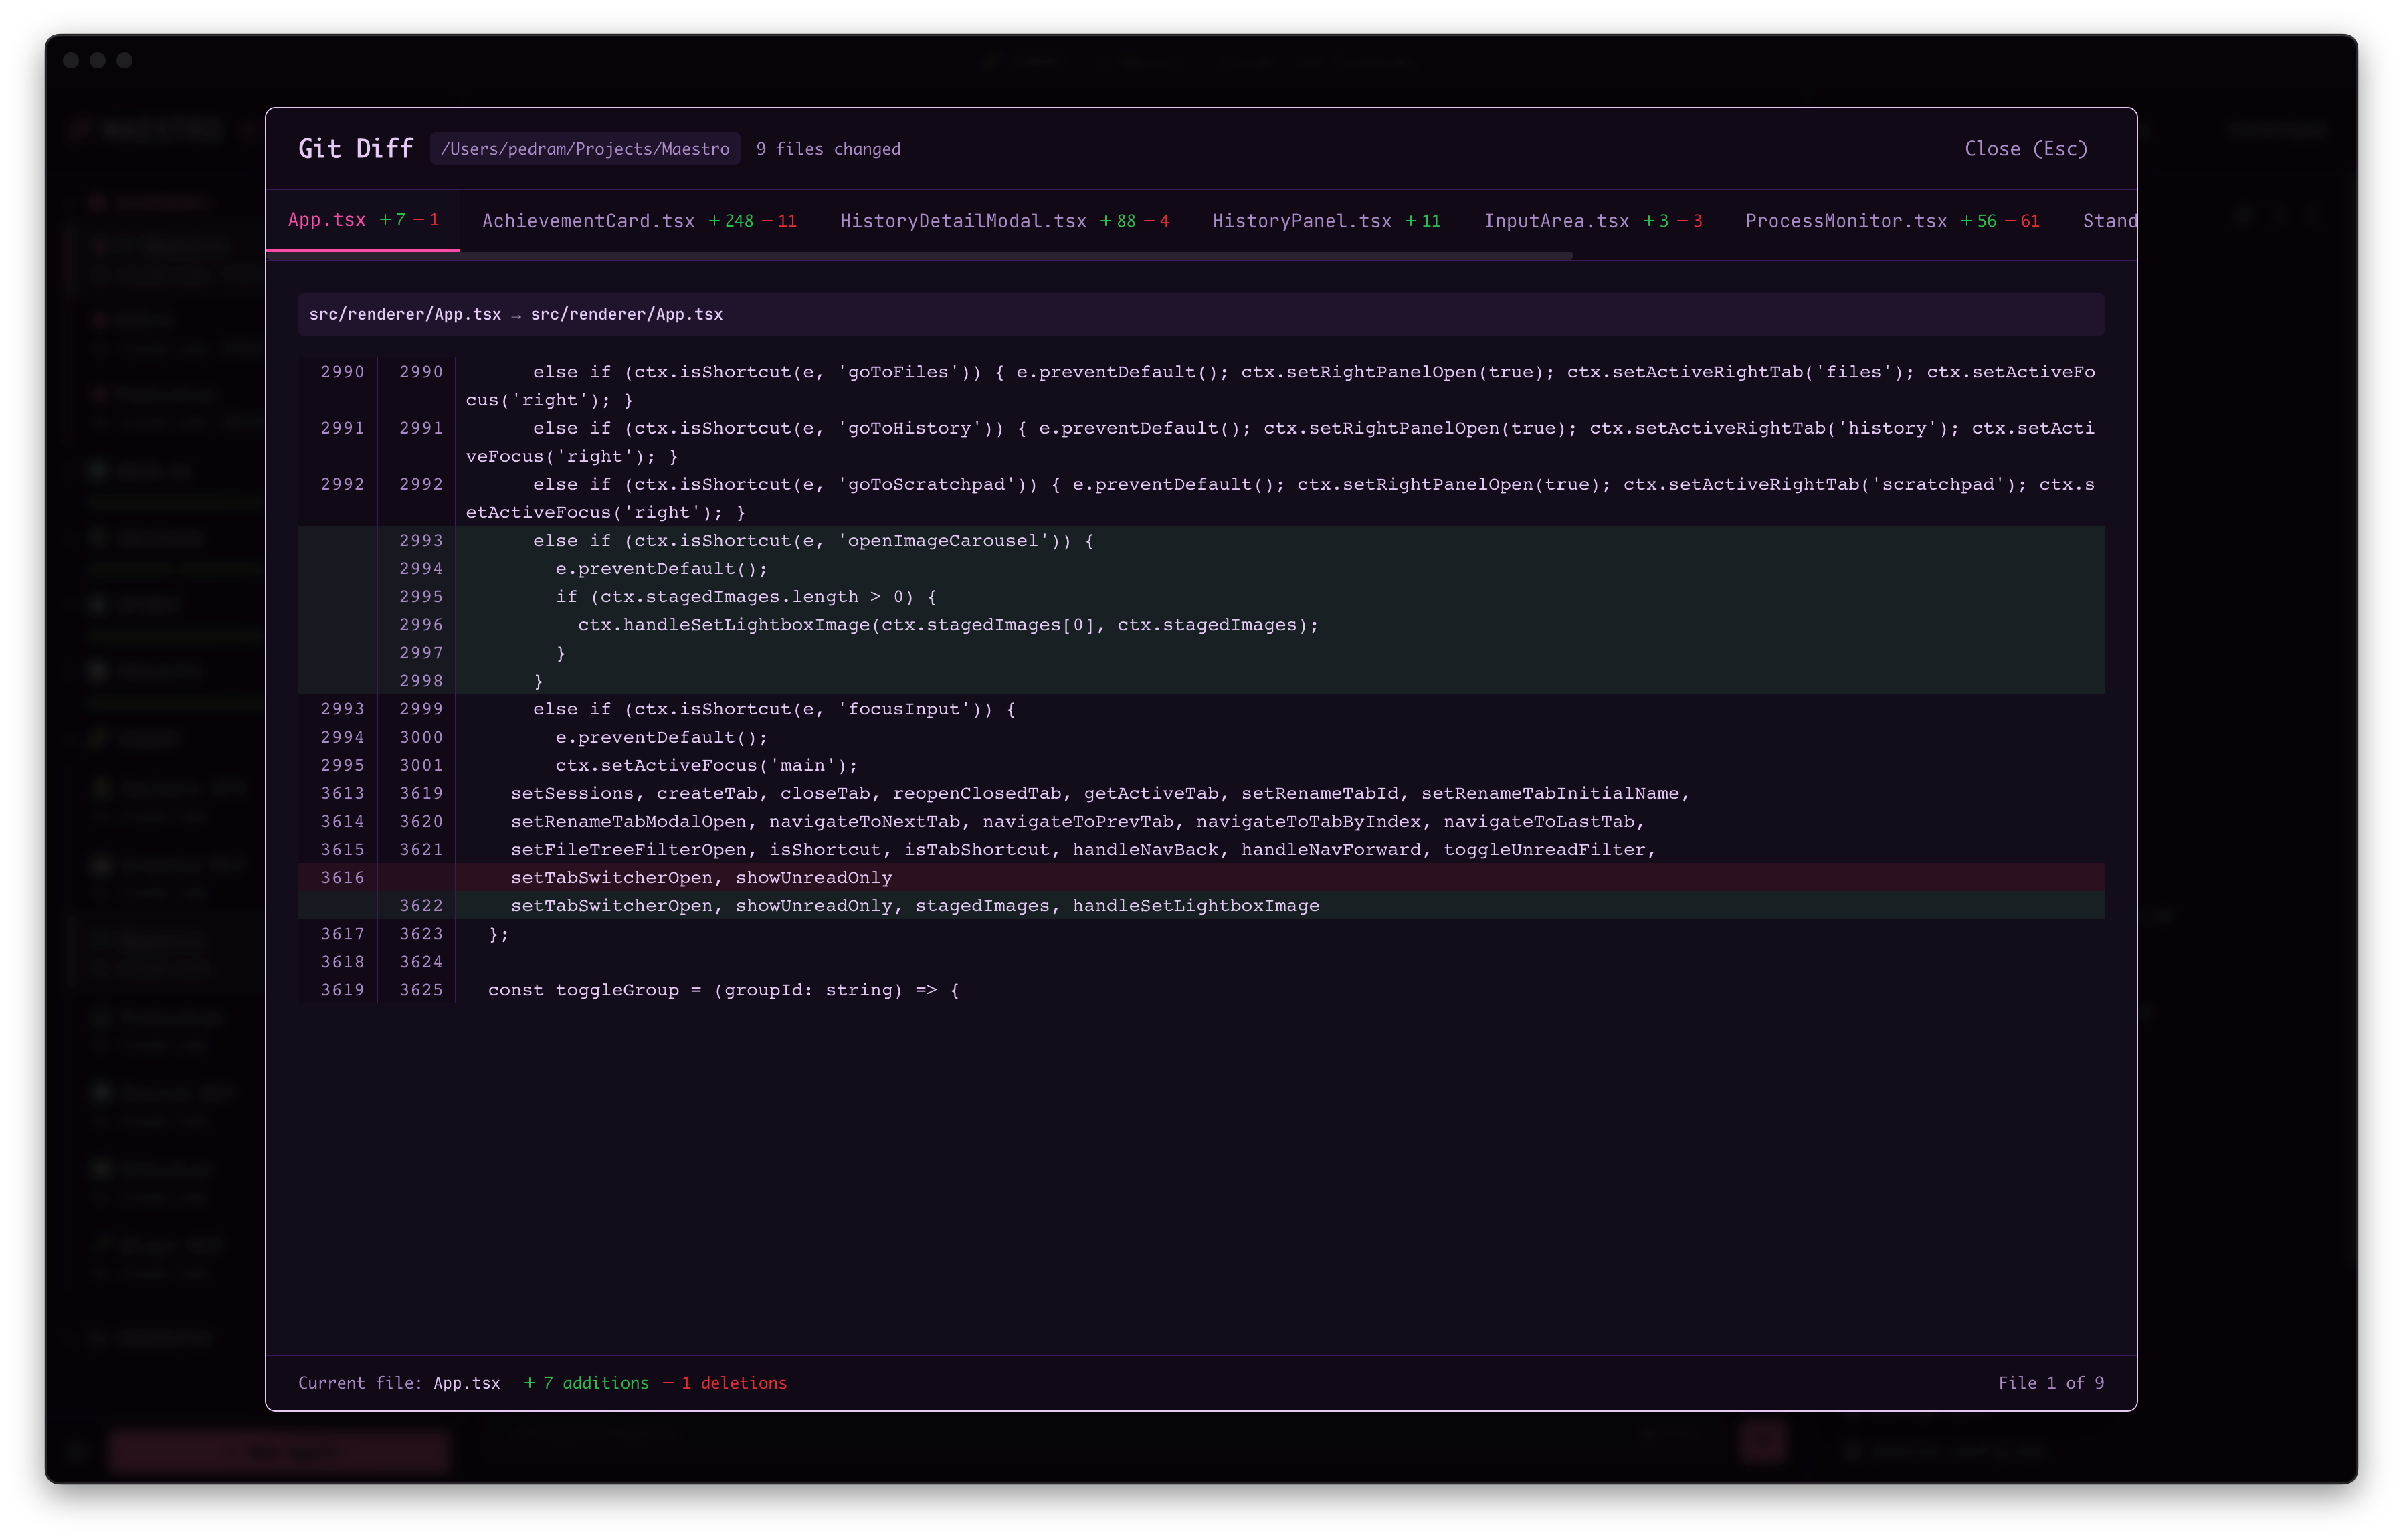
- Side-by-side comparison of file versions
- Syntax highlighting matched to file type
- Line-by-line changes with additions and deletions clearly marked
Git Worktrees
Git worktrees enable true parallel development by letting you run multiple AI agents on separate branches simultaneously. Each worktree operates in its own isolated directory, so there’s no risk of conflicts between parallel work streams.Managing Worktrees
Worktree sub-agents appear nested under their parent agent in the Left Bar: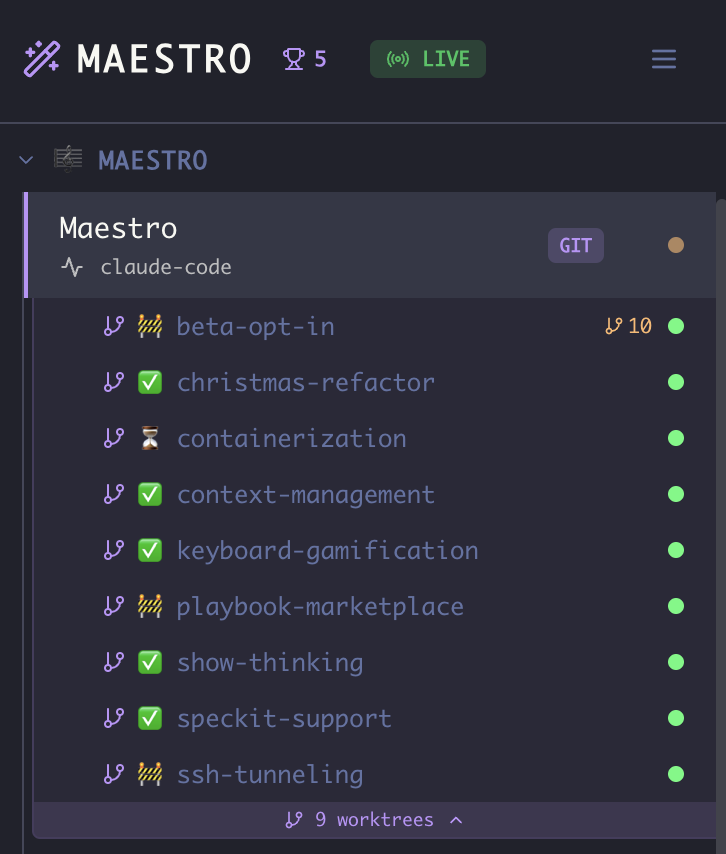
- Nested Display - Worktree sub-agents appear in a drawer below their parent agent, styled with a subtle accent background
- Branch Icon - Worktree children show a
GitBranchicon next to their name - Collapse/Expand - Click the worktree count band below the parent session to show/hide worktree children (e.g., “2 worktrees ▾”)
- Independent Operation - Each worktree agent has its own working directory, conversation history, and state
Creating a Worktree Sub-Agent
There are two ways to access worktree configuration: From the Header (Main Panel):- Select an agent that’s in a git repository
- Hover over the branch pill in the header (shows the current branch name, e.g., “main”)
- In the hover overlay, click “Configure Worktrees”
- Right-click an agent in the session list
- Select “Configure Worktrees” (only shown for git repositories)
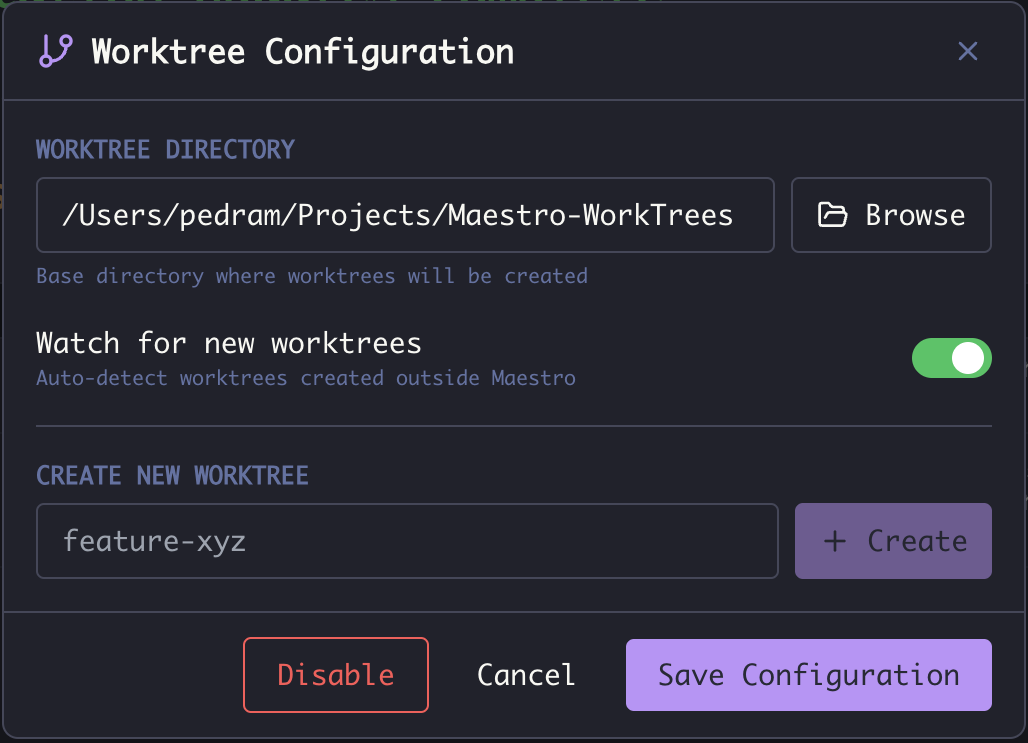
Tip: Configure the worktree directory to be outside your main repository (e.g.,
~/Projects/Maestro-WorkTrees/). This keeps worktrees organized and prevents them from appearing in your main repo’s file tree.
Note: Once configured, you can quickly create additional worktrees by right-clicking the parent session and selecting “Create Worktree” (bypasses the full configuration modal).
Worktree Actions
Right-click any worktree sub-agent to access management options: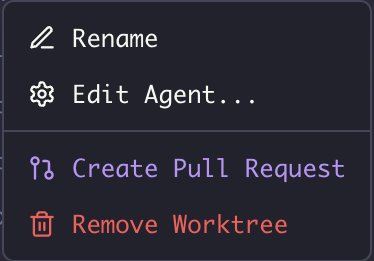
Creating Pull Requests
When you’re done with work in a worktree:- Right-click the worktree agent → Create Pull Request, or
- Press
Cmd+K/Ctrl+Kwith the worktree active → search “Create Pull Request”
- Source branch (your worktree branch)
- Target branch (configurable)
- Auto-generated title and description based on your work
gh) must be installed and authenticated. Maestro will detect if it’s missing and show installation instructions.
Removing Worktrees
When removing a worktree, you have two options: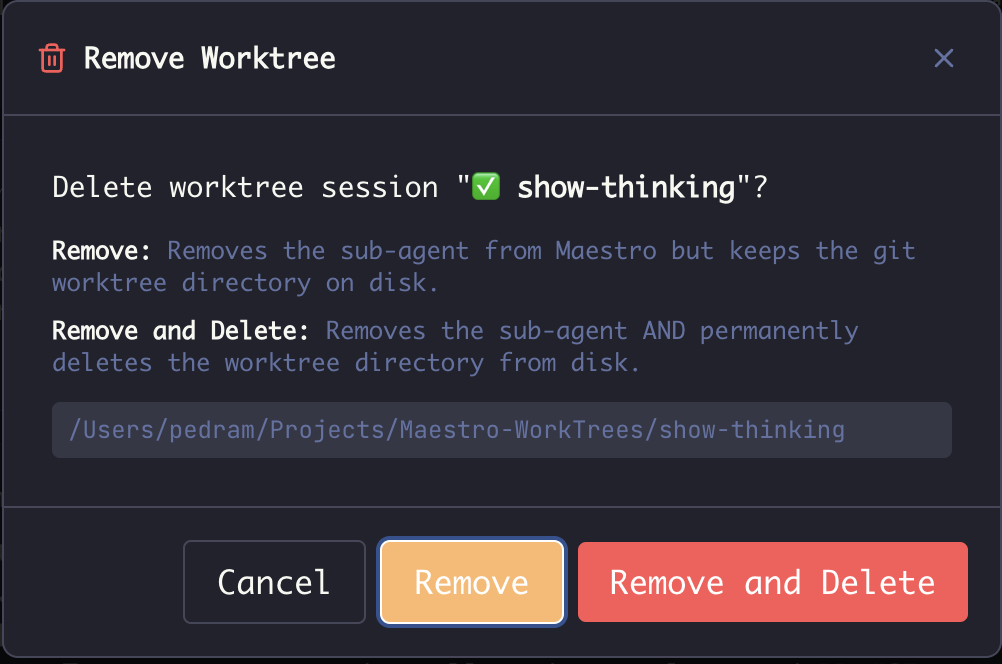
The confirmation dialog shows the full path to the worktree directory so you know exactly what will be affected.
Use Cases
Auto Run integration: You can dispatch an Auto Run directly into a new worktree from the run configuration modal - no need to create the worktree first. See Run in Worktree for details.
CLI integration: The same worktree-backed Auto Run is also reachable from the command line via
maestro-cli auto-run --worktree --branch <name> --worktree-path <path> --launch (add --create-pr to open a PR on completion). See CLI - Configuring Auto-Run.
Tips
- Name branches descriptively - The branch name becomes the worktree directory name
- Use a dedicated worktree folder - Keep all worktrees in one place outside the main repo
- Clean up when done - Remove worktree agents after merging PRs to avoid clutter
- Watch for Changes - Enable file watching to keep the file tree in sync with worktree activity
-
Run multiple dev instances - Use
VITE_PORTenvironment variable to run Maestro in multiple worktrees simultaneously:
