
Overview
SSH Remote Execution wraps agent commands in SSH, executing them on a configured remote host while streaming output back to Maestro. Your local Maestro instance remains the control center, but the AI agent runs remotely. Use cases:- Run agents on a powerful cloud VM with more CPU/RAM
- Access tools or SDKs installed only on specific servers
- Work with codebases that require particular OS or architecture
- Execute agents in secure/isolated environments
- Coordinate multiple agents across different machines in Group Chat
- Run Auto Run playbooks on remote projects
Configuring SSH Remotes
Adding a Remote Host
- Open Settings (
Cmd+,/Ctrl+,) - Navigate to the SSH Hosts tab
- Click Add SSH Remote
- Configure the connection:
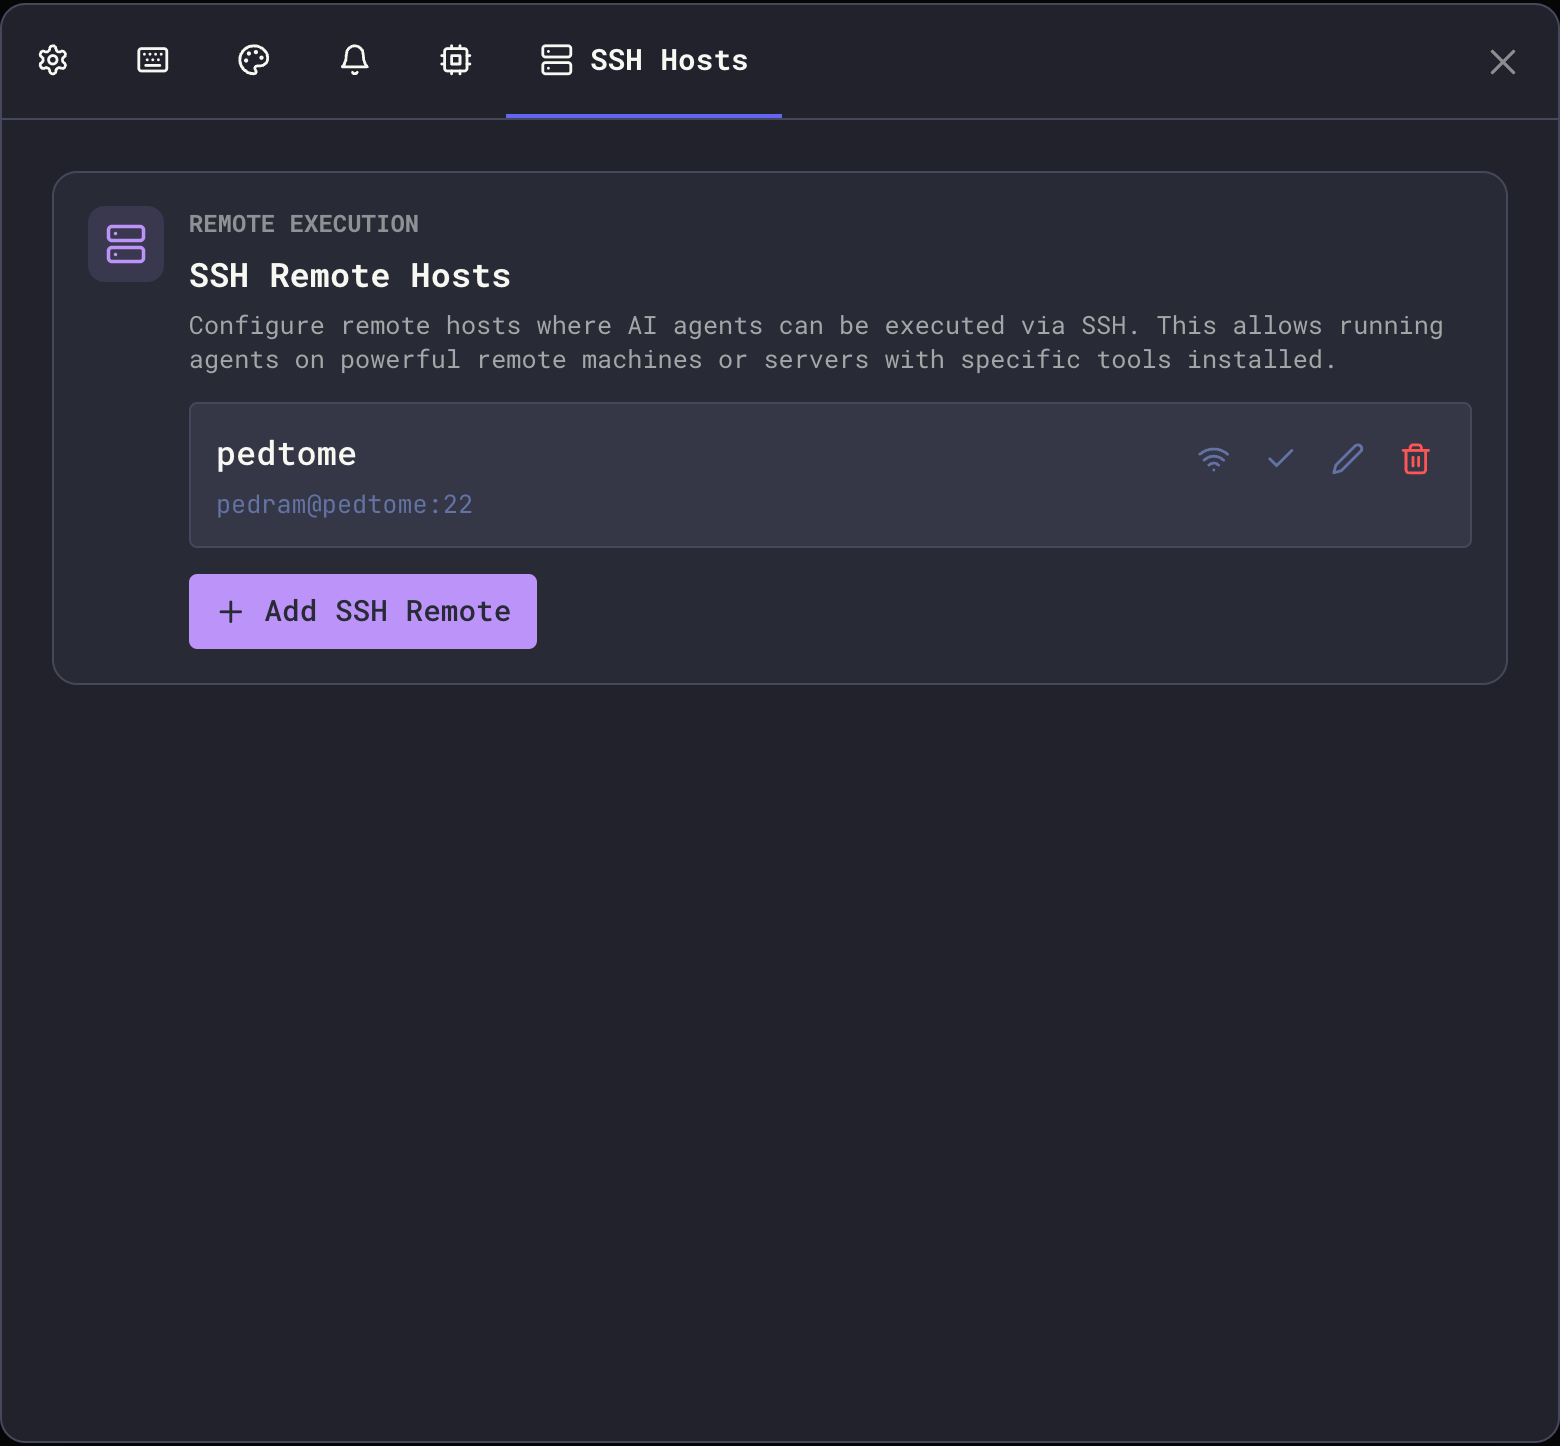
- Click Test Connection to verify connectivity
- Click Save to store the configuration
Using SSH Config File
Maestro can import connection settings from your~/.ssh/config file, making setup faster and more consistent with your existing SSH workflow.
Importing from SSH Config
When adding a new remote, Maestro automatically detects hosts defined in your SSH config:- Click Add SSH Remote
- If SSH config hosts are detected, you’ll see an Import from SSH Config dropdown
- Select a host to auto-fill settings from your config
- The form shows “Using SSH Config” indicator when importing
How It Works
When using SSH config mode:- Host becomes the SSH config Host pattern (e.g.,
dev-serverinstead of192.168.1.100) - Username and Private Key Path become optional - SSH inherits them from your config
- Port defaults to your config’s value (only sent to SSH if overriding a non-default port)
- You can still override any field to customize the connection
~/.ssh/config:
- Select “dev-server” from the dropdown
- Leave username/key fields empty (inherited from config)
- Optionally override specific settings
- Benefit from advanced features like
ProxyJumpfor bastion hosts
Field Labels
When using SSH config mode, field labels indicate which values are optional:- Username (optional) - leave empty to use SSH config’s
User - Private Key Path (optional) - leave empty to use SSH config’s
IdentityFile
Clearing SSH Config Mode
To switch back to manual configuration:- Click the × button next to “Using SSH Config” indicator
- Fill in all required fields manually
Connection Testing
Before saving, you can test your SSH configuration:- Basic test: Verifies SSH connectivity and authentication
- Agent test: Checks if the AI agent command is available on the remote host
Setting a Global Default
Click the checkmark icon next to any remote to set it as the global default. When set:- The “Default” badge appears next to the remote name
- The default remote is highlighted in selection dropdowns
- New sessions still require explicit selection - the default serves as a visual indicator of your preferred remote
The global default is a convenience marker, not an automatic setting. Each session must explicitly select an SSH remote via the “SSH Remote Execution” dropdown in the New Agent dialog or session configuration.
Per-Session Configuration
Each session can have its own SSH remote setting configured when creating the session or editing its configuration.Configuring a Session
- When creating a new agent session (via New Agent dialog or the wizard), find the SSH Remote Execution dropdown
- Select an option:
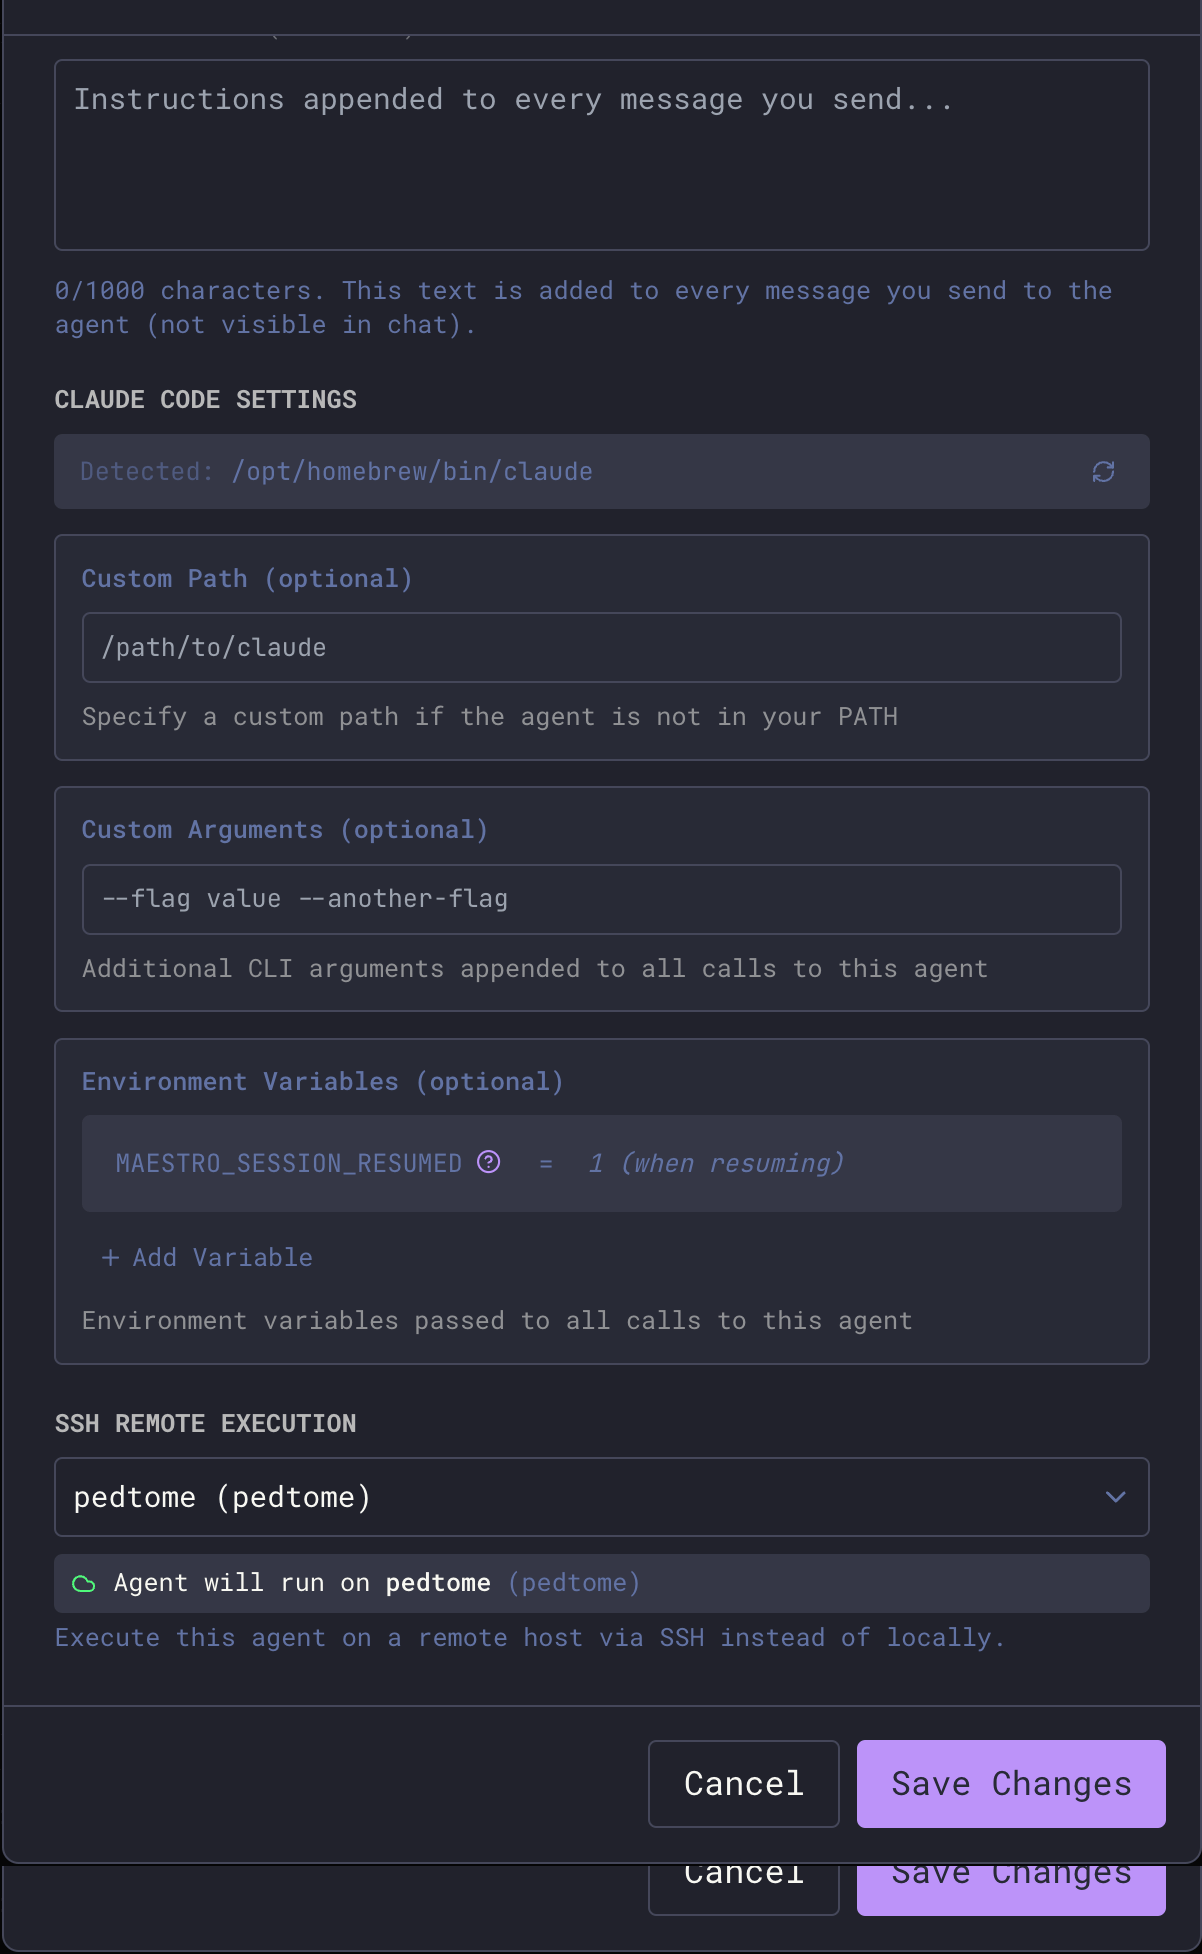
How It Works
SSH remote execution is configured at the session level:- When you create a new session, you choose whether it runs locally or on a specific remote
- The configuration is saved with the session and persists across restarts
- Each session maintains its own SSH setting independently
- Changing a session’s SSH remote requires editing the session configuration
Status Visibility
When a session is running via SSH remote, you can easily identify it: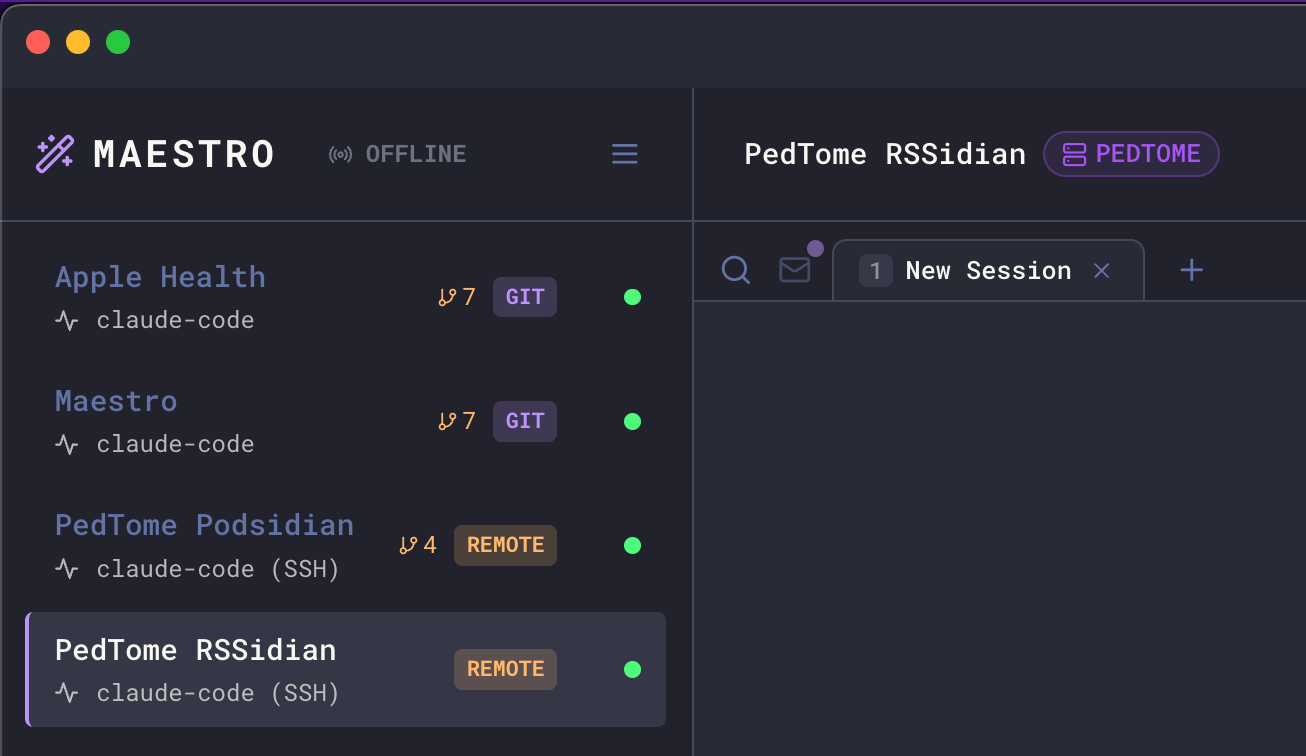
- REMOTE pill - Appears in the Left Bar next to the session, indicating it’s configured for remote execution
- Host name badge - Displayed in the Main Panel header showing which SSH host the agent is running on (e.g., “PEDTOME”)
- Agent type indicator - Shows “claude-code (SSH)” to clarify the execution mode
- Connection state reflects SSH connectivity
- Errors are detected and displayed with SSH-specific context
Full Remote Capabilities
Remote agents support all the features you’d expect from local agents:Remote File System Access
The File Explorer works seamlessly with remote agents:- Browse files and directories on the remote host
- Open and edit files directly
- Use
@file mentions to reference remote files in prompts
Remote Auto Run
Run Auto Run playbooks on remote projects:- Auto Run documents can reference files on the remote host
- Task execution happens on the remote machine
- Progress and results stream back to Maestro in real-time
Remote Git Worktrees
Create and manage git worktrees on remote repositories:- Worktree sub-agents run on the same remote host
- Branch isolation works just like local worktrees
- PR creation connects to the remote repository
Remote Command Terminal
The Command Terminal executes commands on the remote host:- Full PTY support for interactive commands
- Tab completion works with remote file paths
- Command history is preserved per-session
Claude Max Plan on Remote Hosts
Running a Claude Code agent against your Max plan quota (the TUI Wrapper and Dynamic token sources) relies on the maestro-p helper. It ships bundled with the desktop app for local agents, but over SSH the Claude TUI runs on the remote machine, so maestro-p must be on the remote host’s PATH. If it is missing, Maestro disables the Max plan options for that agent and falls back to the per-token API source. To enable Max plan billing on a remote host, install maestro-p from the maestro-p install page on that host, then click Re-check in the agent’s Claude Token Source panel.Group Chat with Remote Agents
Remote agents can participate in Group Chat alongside local agents. This enables powerful cross-machine collaboration: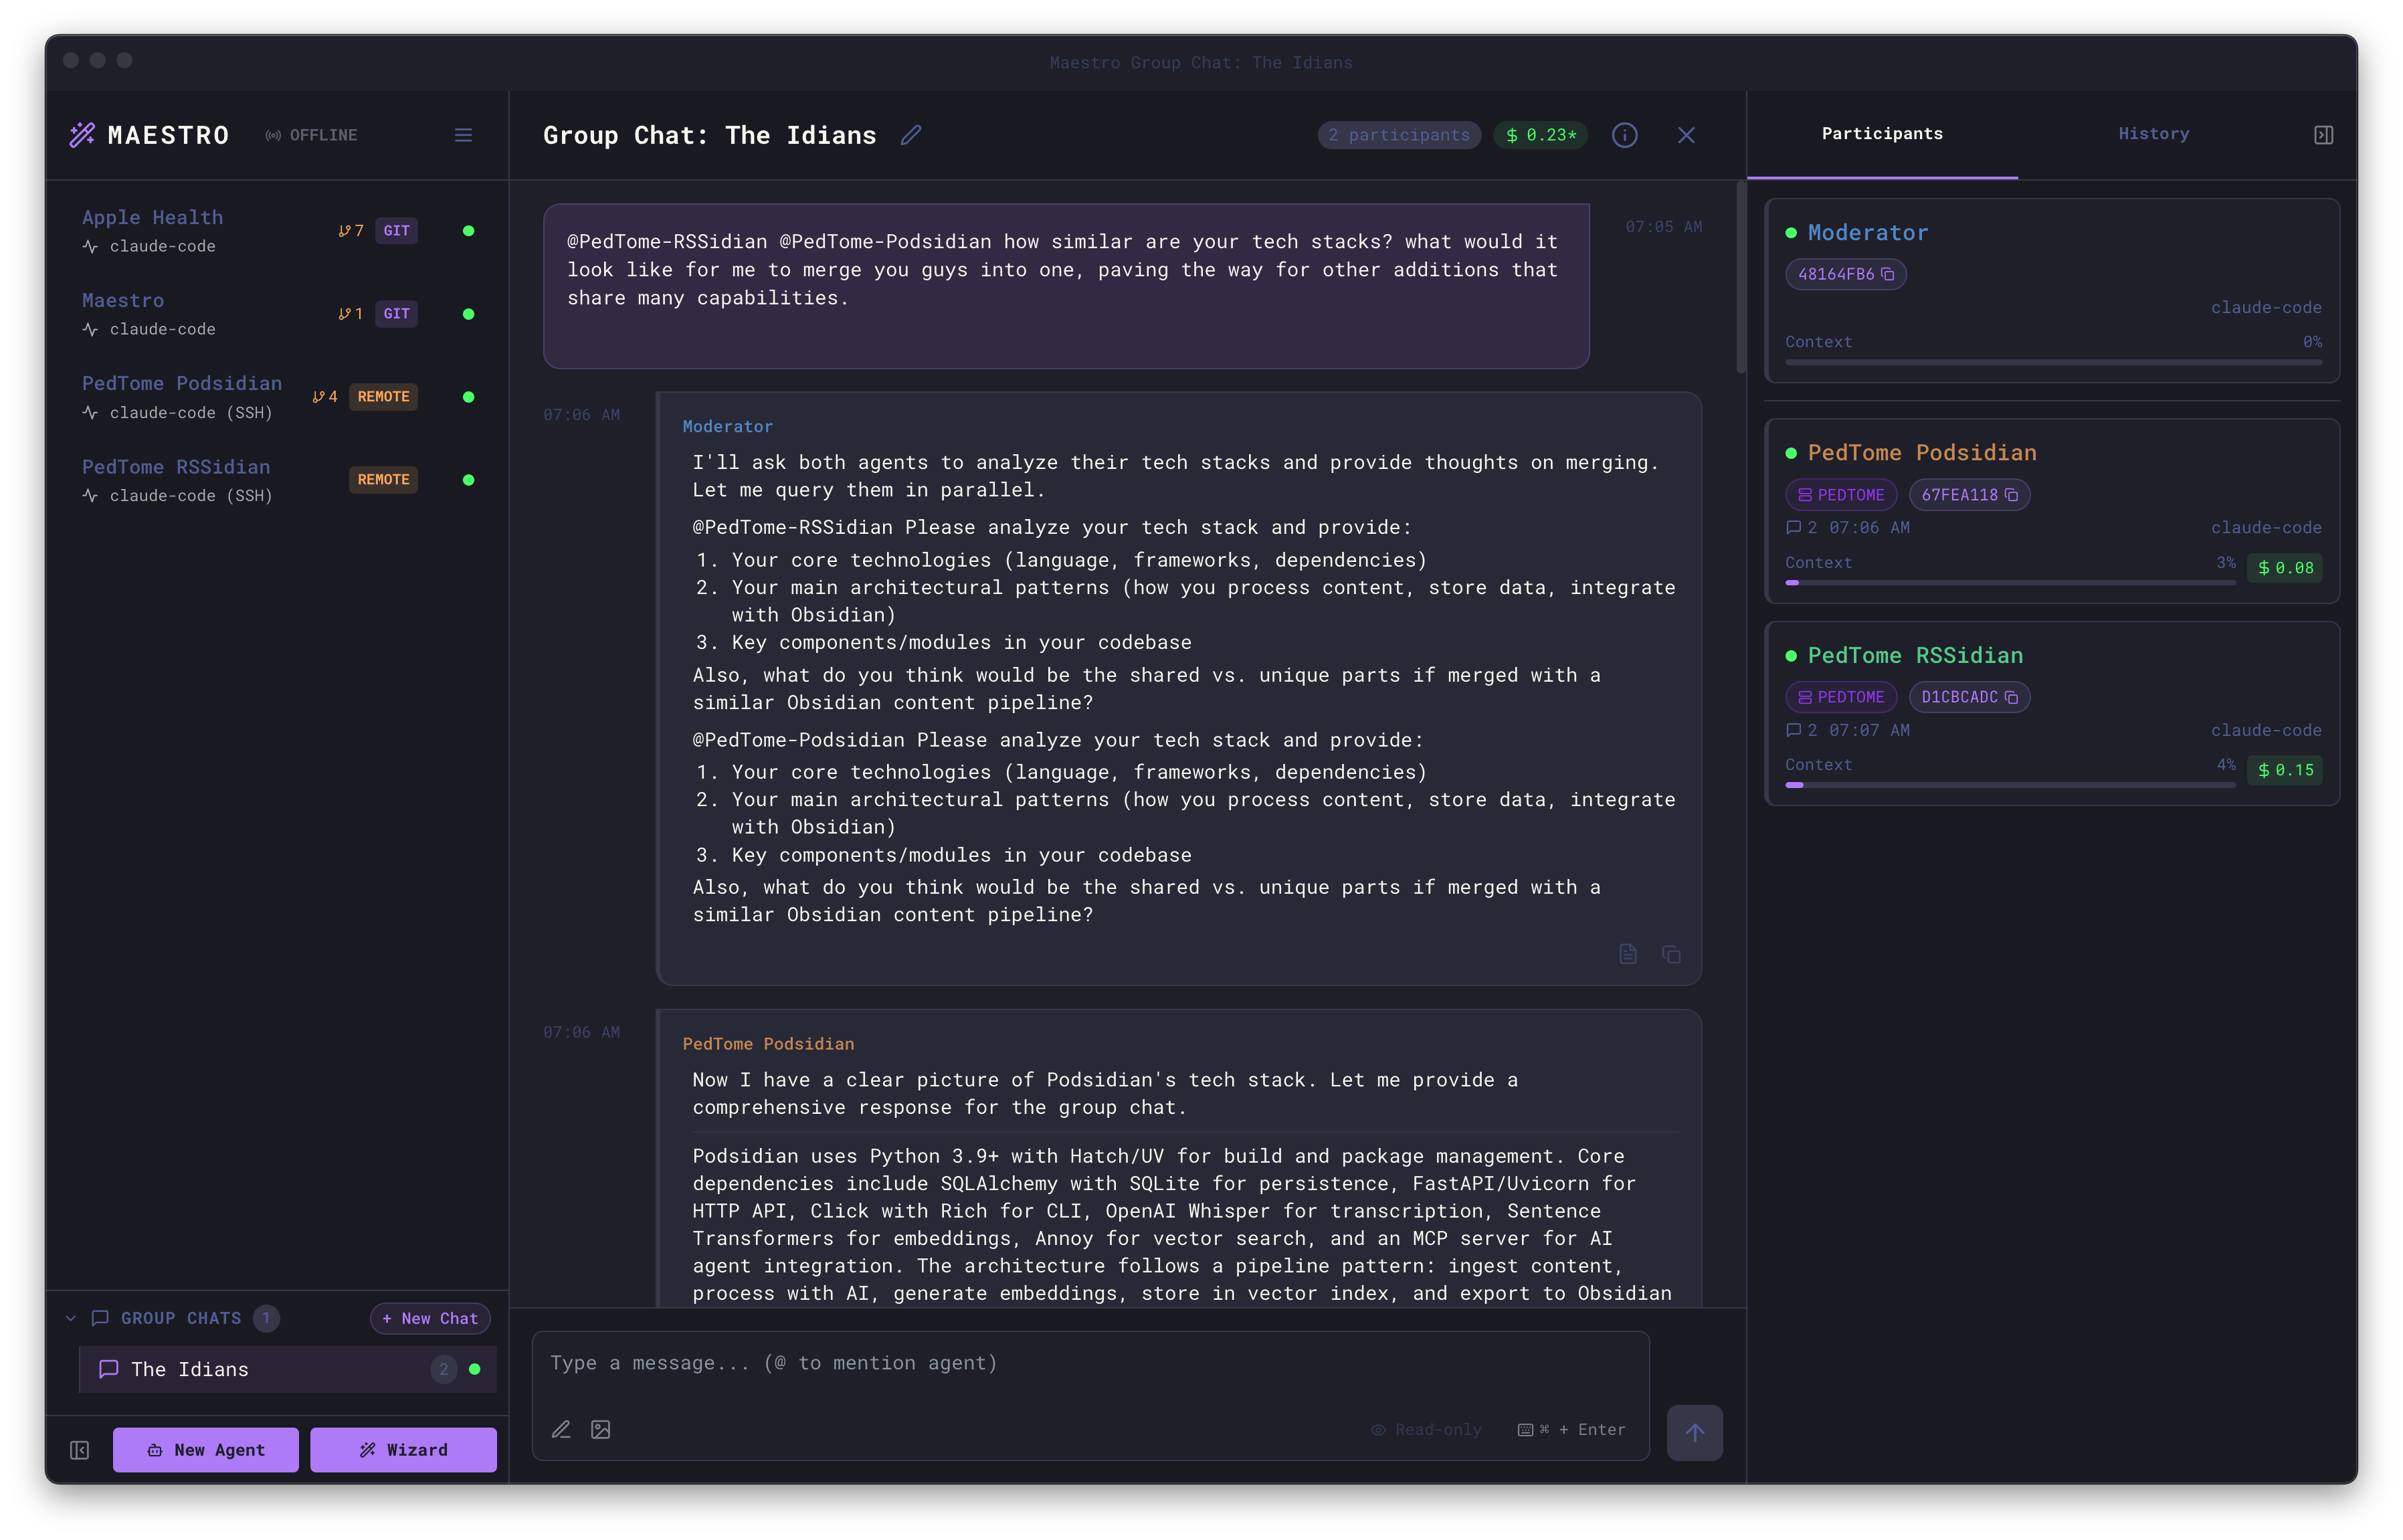
- Mix local and remote agents in the same conversation
- The moderator can be local or remote
- Each agent works in their own environment (local or remote)
- Synthesize information across different machines and codebases
- Comparing implementations across different environments
- Coordinating changes that span multiple servers
- Getting perspectives from agents with access to different resources
Collaborating over SSH
When multiple people (or the same person from multiple machines) work on a shared project via SSH, Maestro can synchronize history entries across all participants. This gives everyone visibility into what work has been done - regardless of which machine initiated it.How Shared History Works
Each Maestro instance writes a per-hostname history file to the project’s.maestro/history/ directory on the remote host:
- Each machine writes only its own file - no conflicts between writers
- When loading history, Maestro merges entries from all other hosts’ files
- Entries are deduplicated by ID and sorted by timestamp
- Remote entries appear with a ☁ Remote pill and the originating hostname in the History panel
Enabling Shared History
Shared history is enabled per-session via the Sync history to remote toggle, which appears in the SSH Remote Execution dropdown when an SSH host is selected:- Create or edit an agent session
- Select an SSH remote from the dropdown
- The Sync history to remote checkbox appears below the status indicator (disabled by default)
- When enabled, every history entry is written to both your local Maestro store and the remote project’s
.maestro/history/directory
Use Case: Same User, Multiple Machines
You have Maestro on your laptop (pedbook) and desktop (pedopswat). Both machines have an agent pointed at the same project on pedopswat:
- pedopswat runs the agent locally - history writes to its local store and
.maestro/history/history-pedopswat.jsonl - pedbook runs the agent via SSH to pedopswat - history writes to its local store and
.maestro/history/history-pedbook.jsonlon pedopswat - Both machines see each other’s entries when loading the History panel
Use Case: Team Collaboration on a Shared Server
Multiple team members (pedbook, stephan, mattj) each have Maestro installed locally and SSH into a shared VPS where the project lives. No Maestro is installed on the VPS - just the agent CLI:
- Each person’s Maestro writes to their own
history-<hostname>.jsonlon the VPS - Each person sees entries from all other team members
- Entries display the originating hostname so you can tell who did what
Entry Limits
Shared history files respect the Maximum Log Buffer setting (Settings → Display). Each hostname’s file retains up to this many entries (default: 5,000). When reading another host’s file, Maestro reads only the most recent entries up to your own buffer limit.Notes
- Shared history files use JSONL format (one JSON object per line) for safe concurrent appending
- Malformed lines are skipped gracefully - a partial write won’t corrupt the file
- If the SSH connection is unavailable when reading, local history is shown without remote entries (no error displayed)
- The
.maestro/history/directory is created automatically on first write - Consider adding
.maestro/history/to your.gitignore- history is operational data, not source code
Troubleshooting
Authentication Errors
Connection Errors
Agent Errors
Tips
- Import from SSH config - Use the dropdown when adding remotes to import from
~/.ssh/config; saves time and keeps configuration consistent - Bastion hosts - Use
ProxyJumpin your SSH config for multi-hop connections; Maestro inherits this automatically - Key management - Use
ssh-agentto avoid passphrase prompts - Connection multiplexing - Maestro respects
ControlMaster,ControlPath, andControlPersistfrom your~/.ssh/config. This is highly recommended if you use hardware security keys (e.g., YubiKey) to avoid repeated touches per connection. Example config:Make sure the socket directory exists (mkdir -p ~/.ssh/sockets). Use%h,%p, and%rtokens inControlPathto keep sockets unique per host/port/user. - Keep-alive - Configure
ServerAliveIntervalin SSH config for long sessions - Test manually first - Verify
ssh host 'claude --version'works before configuring in Maestro
Security Considerations
- SSH keys should have appropriate permissions (
chmod 600) - Use dedicated keys for Maestro if desired
- Remote working directories should have appropriate access controls
- Environment variables may contain sensitive data; they’re passed via SSH command line
Limitations
- Network latency affects perceived responsiveness
- The remote host must have the agent CLI installed and configured
- Some shell initialization files (
.bashrc,.zshrc) may not be fully sourced - agent commands use$SHELL -lcto ensure PATH availability from login profiles
