
LDAP, or Lightweight Directory Access Protocol, is an open-vendor protocol for accessing directory information such as X.500 service containers. It is useable in Linux and other OS environments.
This write-up describes how to set up the LDAP directory on a Linux server. It will provide a step-by-step tutorial on installing, configuring, and testing the OpenLDAP server on Linux systems. It is an open-source implementation of LDAP.
This guide will use Ubuntu 22.04|20.04|18.04 LTS as our operating software.
Step 1: Set Hostname and IP for the Ubuntu Server
So, set a hostname for your system before beginning the installation process. This command should help:

As the host, you should proceed to add your IP address to the /etc/hosts file as shown below:
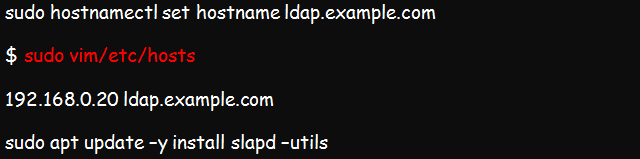
At this point, you can replace example.com with your valid hostname. For example, I may choose to use kenhint.com instead.
Step 2: Install the OpenLDAP Server to the Ubuntu 22.04 System
The actual installation begins at this point. And you will need to begin by installing LDAP alongside some of its management utilities and packages. This command will help you accomplish the installation on Ubuntu 22.04:

As part of the installation, you will see a prompt to set your LDAP administrator password. Enter your preferred password in the provided space and press <ok> to continue. This will be the interface on your screen:
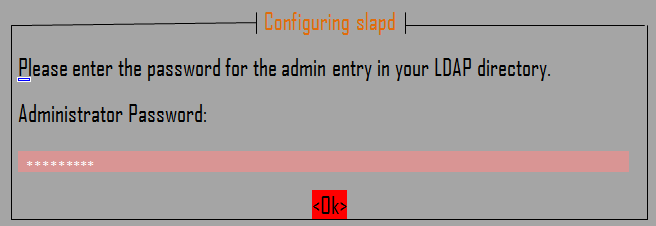
The following interface will prompt you to enter the password. Key in your password again and press OK.
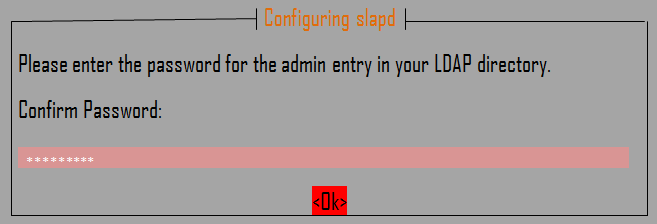
Step 3: Confirm If the Installation Is Successful
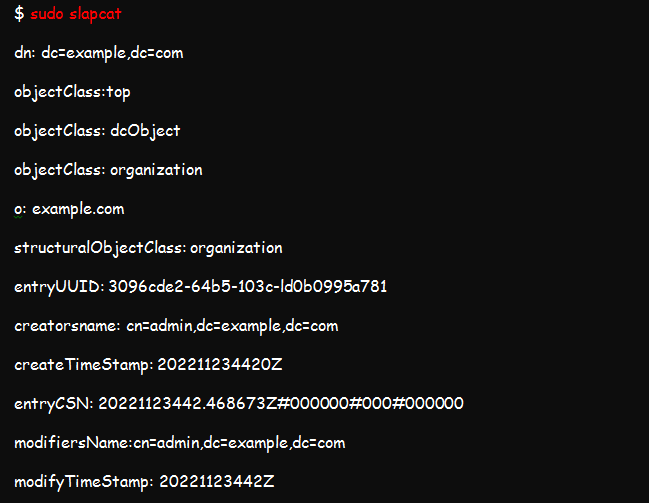
You can use the slapcat command to review the contents and packages in your installation. Expect an outcome similar to the ones in the screenshot below:

The result of the above command should read as shown in this illustration;
Step 4: Add a Base DN for all the Users and Groups
You can add a base DN for each user or group by creating a basedn.ldif file with the following contents:
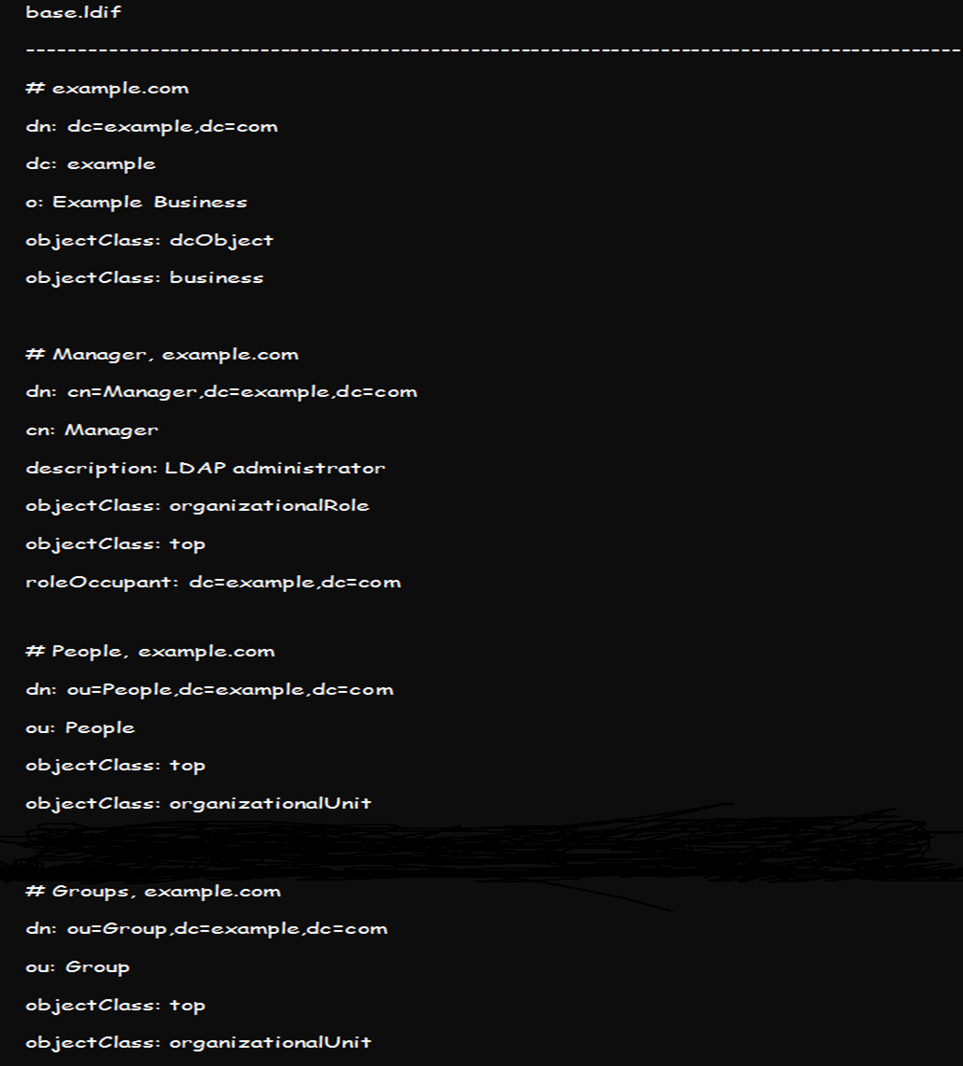
Create a similar base DN for groups using the above format and replace the example and com in the file with your correct domain credentials and add the base file by running this command:
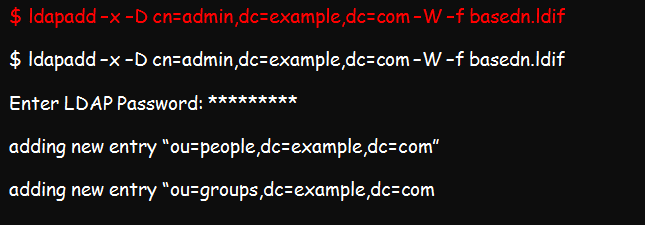
Step 5: Configure the LDAP Server by Adding User Accounts and Groups
Firstly, it is not recommended to edit the LDAP configuration files manually. So, for better results, it is advisable to add your edits into the configuration file and either use ldapmodify or ldapadd commands to load them into the directory.
You can create an OpenLDAP user account and assign a password to the account with the slappasswd command.
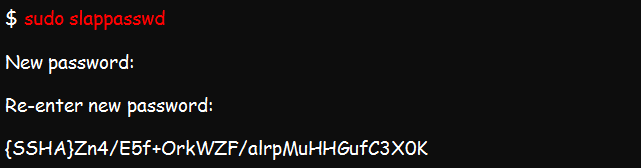
Proceed to create a ldif file which you will use for adding users.
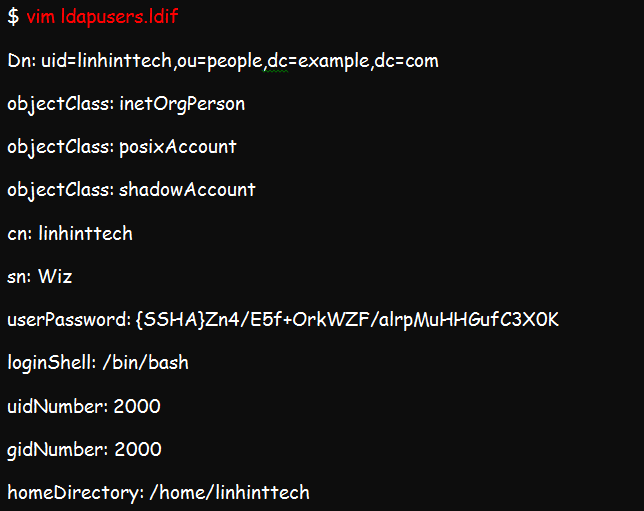
We already talked about how you can replace example and com with the right domain credentials. Now, replace {SSHA}Zn4/E5f+Ork7WZF/alrpMuHHGufC3x0k with your password, cn and sn with the correct username values, and linhinttechs with the username you expect to add.
Once you are done editing, you are free to add the account by running this command:

You can do the same to create a group account by first creating the ldif file. This file is what you will use for adding entries into the directory.
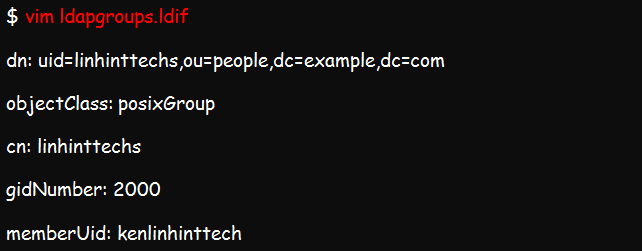
Now, add the group by running this command:

Step 6: Configure the LDAP Database
Configuring the LDAP database starts with copying the sample database of slapd file into the corresponding /var/lib/ldap directory. You can then set the recommended permissions as in the screenshot below:

Import common LDAP protocol schemas from /etc/openldap/schema directory into the database. This example should help:

Add your domain to the database and create the ldapdomain.ldif, which will help you modify the credentials in the database. Create the file using the below command:

Add the following required information and replace the relevant sections as earlier advised and add the outcome into the database using the following command:

Conclusion
OpenLDAP is an open-vendor implementation of the LDAP protocol in Linux environments. The article demonstrates how to install and set up the OpenLDAP server and database for centralized authentication in Ubuntu.

