Image

3D Printed Cubes Provide Passive Cooling

Passive evaporative cooling has been used for centuries to reduce temperatures. Heat is drawn off as water evaporates, which in turn reduces temperature. The more efficiently this process happens the greater the temperature differential, and that’s exactly what the 3D-printed structure pictured above aims for. Created at the Graz University of Technology in Austria, the cubes noticeably reduce surrounding air temperature thanks to their careful construction. As long as they’re kept wet, anyway.

The key is exposing the maximum amount of water to the maximum amount of airflow, and there are two ways the prototype cooling wall — which is 3D printed from a special clay mixture — does this.

First, the macro design of the 3D-printed blocks maximizes surface area. If the cube in the image above looks familiar, that’s because it’s the gyroid infill pattern. Gyroid is a porous pattern with no “dead ends” or closed sections, and the fact that it 3D prints cleanly with no supports also makes it an ideal structural candidate.

The second advantage is the clay used for the blocks themselves. Firing clay at a low temperature keeps it porous, but this particular mixture goes even further. It’s a bio-inspired formulation of clay, fungal mycelium, and wood chips. After printing, the cubes are fired and the fungus and wood chips burn away, leaving a network of thread-like capillaries with occasional larger pockets throughout.

The result is a porous ceramic cube with a massive evaporative surface area relative to its size. A practical test in a hot attic showed the air near a water-laden cube was nearly 7º C lower, a noticeable difference.

A home experimenter might not have access to fancy mycelium-laced clay mixtures, but it still strikes us as something that could be tried out at home. After all, clever hackers have successfully made DIY versions of passive cooling paint.

Image

Harvesting Namib Desert Fog With High Voltage

As fun as mucking about with simulated environments in a laboratory is, at some point you have to do those field tests to demonstrate that your prototype actually works in the real world, under real conditions. This is what the [Plasma Channel] recently did for their fog harvesting system by setting it up in the Namib desert.

We previously covered the atmospheric water harvesting attempts, using electrostatic precipitation to draw the moisture in the air onto the collectors where it can then be harvested. This is rather different from existing approaches with e.g. fine meshes and hoping that enough water molecules bump into your mesh, so theoretically it should be much more efficient. In the lab it worked well, but reality always has the last word.

The Namib desert is at the top of the world’s most arid regions, competing with the Atacama desert. What it does have going for it is regular fog rolling in that lasts until sunrise, providing a good target for water harvesting. Interestingly, this field test was performed together with the University of Namibia.

Of course, moving the prototype in check-in luggage for the flight to Namibia took some redesigning and testing. Fortunately everything, including the solar panel, arrived intact, allowing trials to commence. This initially took place at the campus of the University of Namibia, joining a number of other atmospheric water harvesting projects that had been previously installed there.

Unfortunately the fog proved to be rather elusive, leading to a few fruitless attempts. It also proved that the salt in the air from the ocean spray, even a few kilometers inland, was highly corrosive, especially to high-voltage electronics. Although the system basically worked, happily harvesting water under the right conditions, it does need some redesign before it’ll be tested next in the Atacama desert.

Continue reading “Harvesting Namib Desert Fog With High Voltage”

Image

Creating The Greenest Possible Clothing With Living Fungi

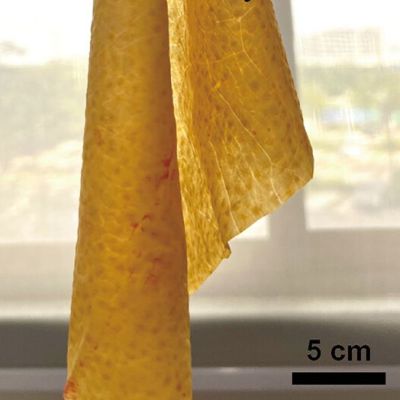
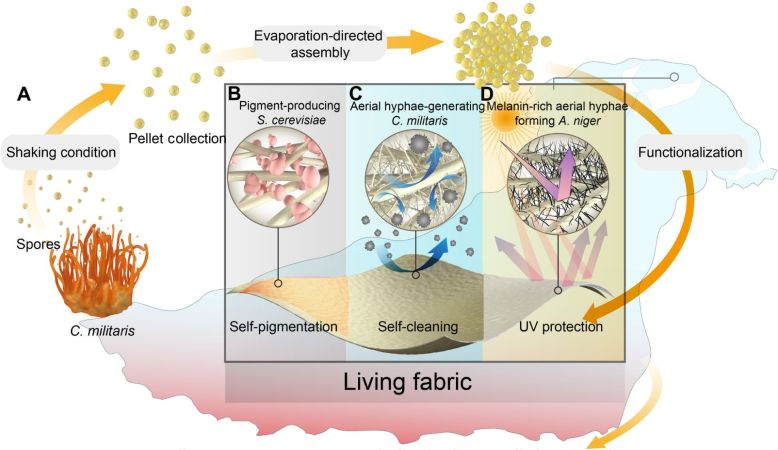
Despite the wide variety of fabrics used for our clothing, they all share the property of not being living tissues. This could be due to them never having been part of an organism, or having been removed from said organism. Another approach here entails so-called engineered living materials (ELMs), with a recent research article by [Ke Li] et al. in Science Advances providing a good example of a fungal platform for such living textiles.

Image

Although it may seem frivolous to create something like this, the direct benefits would be to have a fabric that can self-heal and respond to its environment, including blocking UV radiation and changing its coloring through pigmentation.

The research demonstrated in this paper covers essentially a platform for creating a living textile that can be adapted to a wide variety of applications and colorizations. Of note is that the researchers have not yet tested aspects like washability, abrasion resistance, breathability and wearer comfort, so this should definitely be regarded as setting the stage for more research.

For the basic material the fungi Cordyceps militaris was chosen, which were subsequently placed between films. To this additional microbial cultures were added, including the pigment-producing S. cerevisiae and melanized A. niger for UV blocking.

As for what it can look like with clothing, this article at De Zeen gives somewhat of an idea, as well as how the living textile is prepared.

Image

Sloan Digital Sky Survey Releases New Map Of Supermassive Black Holes

The Universe is a large place, yet despite it being mostly empty space, there are still a lot of things to find and catalogue. This includes mildly terrifying things like supermassive black holes (SMBHs), one of the study subjects of the Sloan Digital Sky Survey (SDSS) project. In their 20th data release of the fifth all-sky survey (SDSS-V), the results of the Black Hole Mapper (BHM) program provides a lot of new insights into these SMBHs.

For a good primer on the SDSS’s ongoing survey, you can read this paper by [Kollmeier] et al. from 2017 in which this fifth survey and its three programs, including the BHM, are explained. This comes after four previous phases of the SDSS, all of them focusing on multispectral imaging and spectroscopic redshift survey with the 2.5 m Apache Point Observatory (APO) in New Mexico.

With SDSS-V a second 2.5 m observatory at Las Campanas (LCO) was added, with both observatories combined able to observe the entire sky, not just as static images, but also any changes over time. While these observations are in the near-infrared, combined with the data from other observatories this gives us probably one of the most comprehensive maps of the Milky Way and everything therein, including black holes.

This 20th data release gives us one of the clearest glimpses yet at the formation, growth and behavior of SMBHs and similar objects over time. A big part of this achievement are the automatic positioning robots at the observatories that handle the fiber optics that feed spectrographs, enabling faster and more accurate observations.

Image

Making Better Rubies At Home

Not the prettiest ruby, for sure. (Credit: Gems of Science, YouTube)

Sapphires and rubies aren’t just pretty, they also got a range of practical uses. This makes it even more useful to be able to make them at home for obviously completely innocent experiments. Cue [Gems of Science] and his attempts to make good-looking rubies, without resorting to the brute-force laser blasting approach that [Styropyro] previously used to create murky-looking gems.

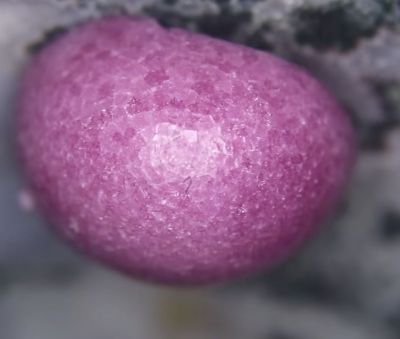
That basic method used involves blasting aluminium oxide with a laser, which results in a container full of what are technically gems, but – as the image on the right makes clear – not exactly the prettiest or easiest to shine up. Much of the problem here is that these are hollow geodes composed of countless tiny crystals instead of solid singular crystals.

Although there are commercial ways to fairly easily create large crystals from a small seed crystal, none of these lend themselves to a DIY hobbyist with just a garage to muck about in. This leaves one alternative: the flux method. Rather than melting the material that will be grown onto the seed crystal, this flux crystal growth method uses a solvent (flux) and temperatures that a home kiln can achieve.

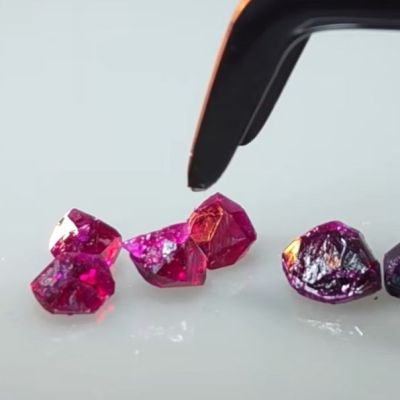
These rubies may be small, but are very shiny. (Credit: Gems of Science, YouTube)

Of note here is also that it’s the addition of Cr3+ ions into the base Al2O3 matrix that makes a ruby into a ruby, by giving it its red glow. In order to grow crystals this way you need to pick not only a suitable solvent, but also use a crucible that doesn’t want to become part of said crystal. Unfortunately a platinum crucible runs into the thousands of USD, but a graphite crucible should do if you keep oxygen away from it.

For the flux molybdenum oxide was used, mixed with chromium oxide and aluminium oxide to provide the ingredients for crystal growth. Unfortunately added charcoal interfered with the molybdenum, ruining that batch. This led to trying out more crucible types to find a recipe that worked, thereby finding out that an ‘alumina’ crucible also contained silica, which poisons the reaction, resulting in only tiny ruby crystals.

Ultimately pure alumina crucibles seemed to work great, until they began to shatter en masse, resulting in pained wallet noises and the purchases of some pre-loved platinum crucibles. This worked really well, but now the flux was evaporating too quickly to enable large crystal growth, thus requiring additives to stabilize it. Along with temperature cycling to induce the growth of larger crystals, this finally generated some solid results. After a first batch of smaller rubies, next up larger ones of up to 10 mm were grown.

While cutting one of these large rubies to set into a ring it was clear that it was still rather flawed, with pockets of flux captured into the crystal, but with the basic method now more or less dialed in it should be possible to address these small flaws as well.

Continue reading “Making Better Rubies At Home”

Image

Superconducting Temperature Record Set At Ambient Pressure

An interesting type of superconductors available to us today are the ones that achieve this property at room temperature, with only the small snag that they require crushing pressures that would render biological lifeforms into a very thin layer of molecules. What these however suggest is that something in these materials changes at these high pressures, and if we could retain that state upon releasing said pressure, we might be able to have our superconducting cake and eat it too.

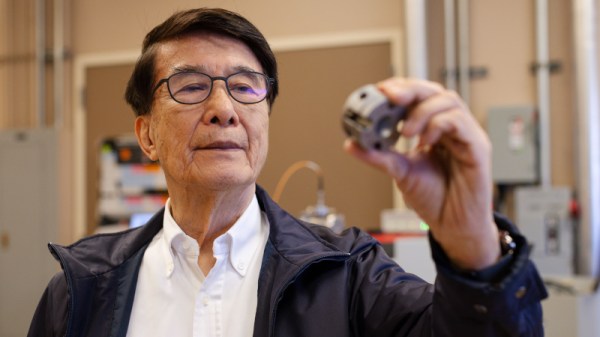
This is effectively what researchers recently achieved, with a research article in PNAS Physics by [Liangzi Deng] et al. covering the pressure-quench protocol (PQP) that they used for this feat. There is also an associated easy-to-read press release by Argonne National Laboratory (ANL) as well as one by the University of Houston.

Target material was a cuprate, specifically HgBa2Ca2Cu3O8+δ, also known as the HBCCO series or Hg1223 for short. Hg1223 has been the subject of much research and experimentation since the 1990s, with it demonstrating a transition temperature (Tc) of 133 K (-140°C). With this quenching method – which sees the high pressures on the cooled sample suddenly released – this bumped the Tc up to 151 K, or -122°C.

While still a far cry from room temperature superconductors, managing to lock in these superconducting properties at an 18 K higher temperature using a straightforward procedure does raise the prospect of massively reducing the cooling needs for superconductors.

Art of 3D printer in the middle of printing a Hackaday Jolly Wrencher logo

3D Printering: Why Is My PLA So Brittle?

Over the years poly(lactic acid) (PLA) – also known as polylactide – has become a popular thermoplastic for a variety of reasons. One of these reasons is that it’s easily produced from a renewable resource, i.e. lactic acid, with the resulting polymer even being compostable if you assume that your compost pile hits a steady 65°C or more, well above the polymer’s glass transition temperature (Tg).

That said, PLA by itself is a pretty crummy material, being exceedingly brittle and inferior to common alternatives like PET(G) in many metrics. Over the decades much research has gone into figuring out this material, its amorphous and crystalline states, as well as how to use plasticizers, copolymers, mechanical manipulation and PLLA/PDLA blends to produce more useful variants of PLA.

Today’s spools of thermoplastic filament that gets marketed as ‘PLA’ are the result of such engineering, though with plenty of remaining issues, as anyone who has struggled through a spool of brittle PLA filament can attest to. Although you can find plenty of tips online about how you should ‘just’ toss said spool into an filament dryer, oven or similar to bake it – with accusing fingers pointed at moisture intrusion, hydrolysis and kin – it helps to understand the fundamentals of how PLA works, and how it degrades.

Continue reading “3D Printering: Why Is My PLA So Brittle?”