Image

A Hot End And Material Database For 3D Printing

When it comes to 3D printing in the FDM world, you can go a long way just relying on standard settings that ship with your 3D printer and/or slicer. If you want to push the limits, though, it pays to better understand the hardware and materials you’re working with to know what you can get away with. To that end, [Robert Samples] put together the MeltCalc database to help. 

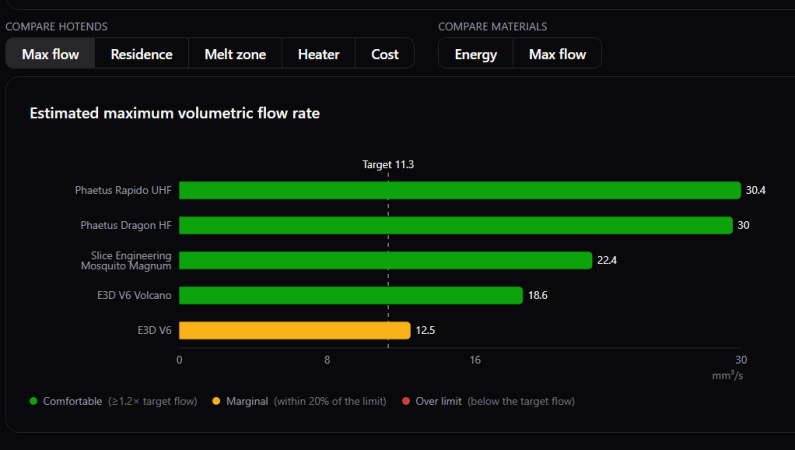
The purpose of MeltCalc is simple—it collates data on hot ends and materials regarding factors like maximum flow rate, print speeds, and heater requirements. If you’re wondering whether a given hot end can flow a given filament at a given rate, for example, this tool is a great place to start. It features 64 different hot ends and 36 polymers typically used in the 3D printing world, and can spit out maximum flow rates and print speed estimations even accounting for fancy tech like Core Heating Technology (CHT) nozzles. It’s all based on thermodynamic modelling which [Robert] put together based on his experience as a chemist who works with polymers. His aim was to provide a tool with realistic flow rates for hot ends, so that end users don’t have to just rely on often-optimistic marketing numbers.

For those eager to dive deeper into the code and modelling, the project source is available on Github. We’ve featured all kinds of other useful hacks in this space lately, too, like our recent look at how to achieve wave overhangs. If you’ve got your own nifty 3D printing tools in the works, don’t hesitate to notify the tipsline.
Image

Hacking Different Sized Nozzles For AnyCubic Printers

If you’ve got a popular 3D printer that has been on the market a good long while, you can probably get any old nozzles you want right off the shelf. If you happen to have an AnyCubic printer, though, you might find it a bit tougher. [Startup Chuck] wanted some specific sized nozzles for his rig, so set about whipping up a solution himself.

[Chuck]’s first experiments were simple enough. He wanted larger nozzles than those on sale, so he did the obvious. He took existing 0.4 mm nozzles and drilled them out with carbide PCB drills to make 0.6 mm and 0.8 mm nozzles. It’s pretty straightforward stuff, and it was a useful hack to really make the best use of the large print area on the AnyCubic Kobra 3.

But what about going the other way? [Chuck] figured out a solution for that, too. He started by punching out the 0.4 mm insert in an existing nozzle. He then figured out how to drive 0.2 mm nozzles from another printer into the nozzle body so he had a viable 0.2 mm nozzle that suited his AnyCubic machine.

The result? [Chuck] can now print tiny little things on his big AnyCubic printer without having to wait for the OEM to come out with the right nozzles. If you want to learn more about nozzles, we can help you there, too.

Continue reading “Hacking Different Sized Nozzles For AnyCubic Printers”

Prusa Mini with endoscope nozzle cam and pip preview

Prusa Mini Nozzle Cam On The Cheap

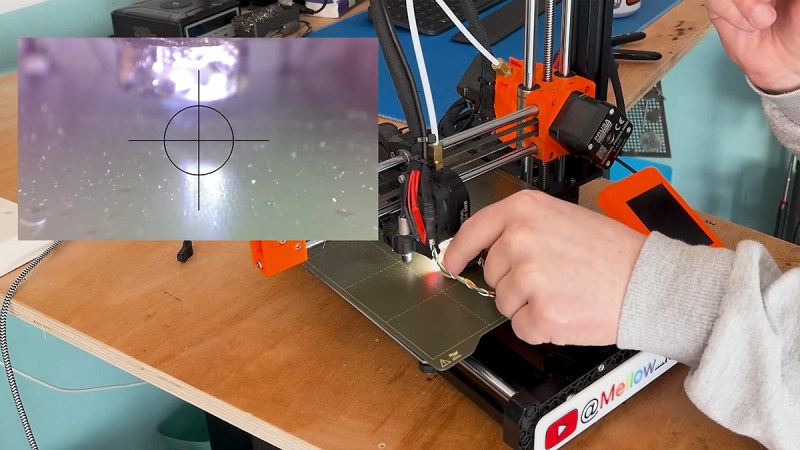
Let me throw in a curveball—watching your 3D print fail in real-time is so much more satisfying when you have a crisp, up-close view of the nozzle drama. That’s exactly what [Mellow Labs] delivers in his latest DIY video: transforming a generic HD endoscope camera into a purpose-built nozzle cam for the Prusa Mini. The hack blends absurd simplicity with delightful nerdy precision, and comes with a full walkthrough, a printable mount, and just enough bad advice to make it interesting. It’s a must-see for any maker who enjoys solder fumes with their spaghetti monsters.

What makes this build uniquely brilliant is the repurposing of a common USB endoscope camera—a tool normally reserved for inspecting pipes or internal combustion engines. Instead, it’s now spying on molten plastic. The camera gets ripped from its aluminium tomb, upgraded with custom-salvaged LEDs (harvested straight from a dismembered bulb), then wrapped in makeshift heat-shrink and mounted on a custom PETG bracket. [Mellow Labs] even micro-solders in a custom connector just so the camera can be detached post-print. The mount is parametric, thanks to a community contribution.

This is exactly the sort of hacking to love—clever, scrappy, informative, and full of personality. For the tinkerers among us who like their camera mounts hot and their resistor math hotter, this build is a weekend well spent.

Continue reading “Prusa Mini Nozzle Cam On The Cheap”

Image

A Look Inside A DIY Rocket Motor

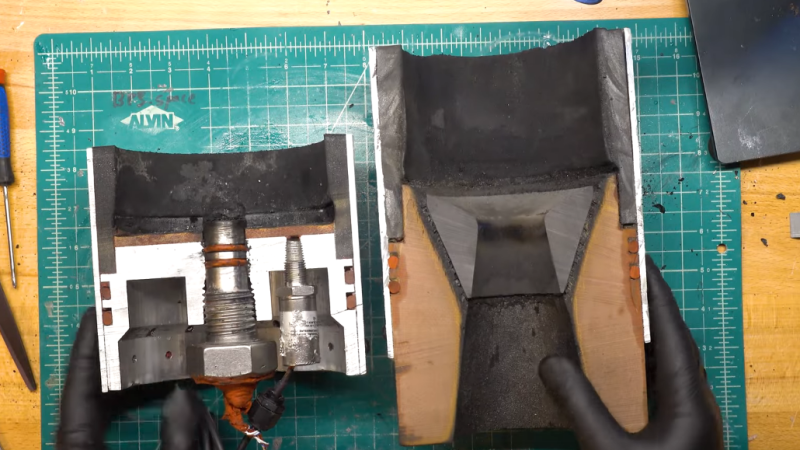
[Joe Barnard] made a solid propellant rocket motor, and as one does in such situations, he put it through its paces on the test stand. The video below is not about the test, nor is it about the motor’s construction. Rather, it’s a deconstruction of the remains of the motor in order to better understand its design, and it’s pretty interesting stuff.

Somewhere along the way, [Joe], aka “BPS.Space” on YouTube, transitioned from enthusiastic model rocketeer to full-fledged missile-man, and in the process stepped up his motor game considerably. The motor that goes under the knife — or rather, the bandsaw — in this video is his “Simplex V2,” a completely DIY build of [Joe]’s design. For scale, the casing is made from a 6″ (15 cm) diameter piece of aluminum tubing over a meter in length, with a machined aluminum forward closure and a composite nozzle assembly. This is a pretty serious piece of engineering.

The closure and the nozzle are the focus of the video, which makes sense since that’s where most of the action takes place. To understand what happened during the test, [Joe] lopped them off and cut them roughly in half longitudinally. The nozzle throat, which was machined from a slug of graphite, fared remarkably well during the test, accumulating only a little slag from the propellant, a combination of powdered aluminum, ammonium perchlorate, and HTBP resin. The lower part of the nozzle, made from phenolic-impregnated linen, did pretty well too, building up a pyrolyzed layer that acted much like a space capsule’s ablative heat shield would. The forward closure, whose sole job is to contain the inferno and direct the exhaust anywhere but up, took more of a beating but stood up to the challenge. Especially interesting was the state of the O-rings and the way that the igniter interfaced with the closure.

Post mortems like these are valuable teaching tools, and while it must be heartbreaking to destroy something you put so much work into, you can’t improve what you can’t measure. Hats off to [Joe] for the peek inside his world. Continue reading “A Look Inside A DIY Rocket Motor”

Image

DIY Spacer Increases FDM Flow Rate For Faster, Better Printing

The host of problems to deal with when you’re feeling the need for FDM speed are many and varied, but high on the list is figuring out how to melt filament fast enough to accommodate high flow rates. Plus, the filament must be melted completely; a melty outside and a crunchy inside might be good for snacks, but not for 3D printing. Luckily, budget-minded hobbyists can build a drop-in booster to increase volumetric flow using only basic tools and materials.

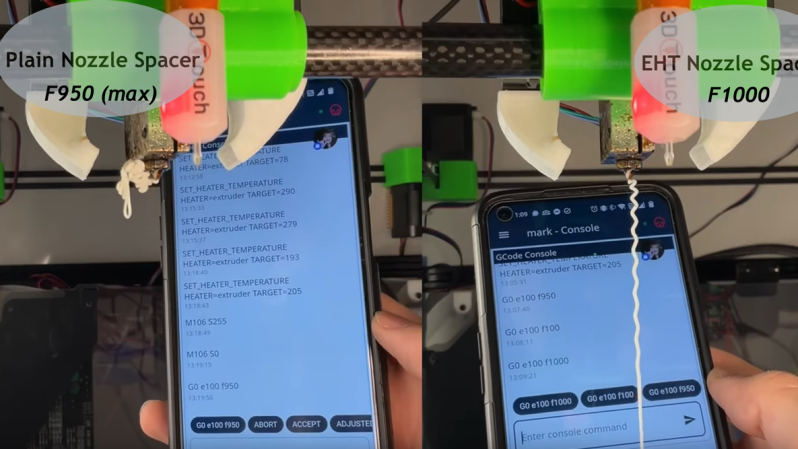
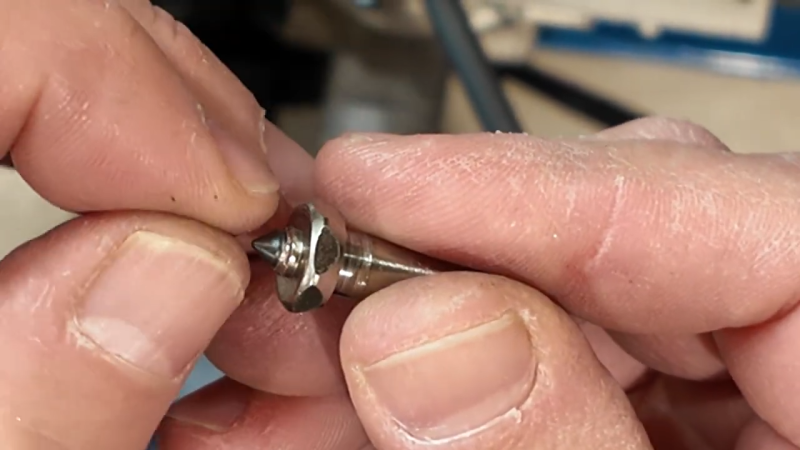
[aamott]’s booster, which started life as a copper screw, is designed to replace the standard spacer in an extruder, with a bore that narrows as the filament gets closer to the nozzle to ensure that the core of the filament melts completely. Rather than a lathe, [aamott]’s main tool is a drill press, which he used to drill a 0.7 mm bore through the screw using a PCB drill bit. The hole was reamed out with a 10° CNC engraving bit, generating the required taper. After cutting off the head of the screw and cleaning up the faces, he cut radial slots into the body of the booster by threading the blade of a jeweler’s saw into the bore. The result was a bore wide enough to accept the filament on one end, narrowing to a (roughly) cross-shaped profile at the other.

Stacked up with a couple of knock-off Bondtech CHT nozzles, the effect of the booster was impressive — a 50% increase in flow rate. It’s not bad for a prototype made with simple tools, and it looks a little easier to build than [Stefan]’s take on the same idea.

Continue reading “DIY Spacer Increases FDM Flow Rate For Faster, Better Printing”

Image

Deep Dive Into 3D Printing Nozzles

[Lost in Tech] set out to examine a variety of 3D printing nozzles. Before he got there, though, he found some issues. In particular, he found that his current crop of printers don’t take the standard E3D or MK8 nozzles. So, instead, he decided to examine various nozzles under the microscope.

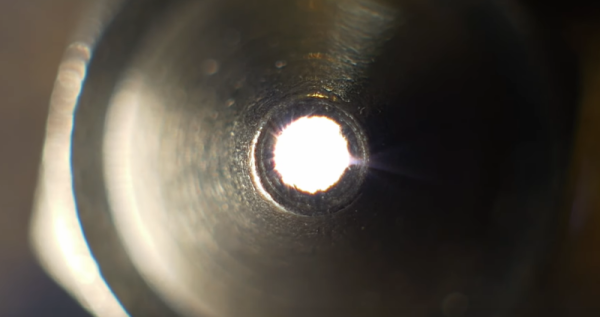
Unsurprisingly, each nozzle had a tiny hole at the end, although the roundness of the hole varied a bit from nozzle to nozzle. As you might expect, more expensive nozzles had better orifices than the cheap ones. Grabbing pictures of nozzles at magnification isn’t easy, so he set up a special image stacking setup to get some beautiful images (and he has another video on how that works).

But the real star of the video is when he virtually travels into the orifice to show the innermost details of the nozzle from the inside out. This let him visualize the smoothness and finish. The Creality nozzles looked very good and weren’t terribly expensive. Many of the expensive nozzles were quite good. However, as you would expect, the quality of cheap nozzles were all over the place.

By the end, [Lost in Tech] speculates if the non-standard nozzles are a way to prevent you from buying low-cost nozzles and eating into sales or if they are a way to prevent you from buying low-cost nozzles that may give you poor print quality. What do you think?

There’s more than one way to look inside a nozzle. We just buy our nozzles, but some people make their own.

Continue reading “Deep Dive Into 3D Printing Nozzles”

Image

Printed Gas Can Accessories Make Refueling A Little Neater

No matter what your position is on internal combustion engines, it’s pretty safe to assume everyone is on the same page regarding wasting fossil fuels: it’s a bad thing. And nothing is as frustrating as spilling even a drop of the precious stuff before you even get a chance to burn it.

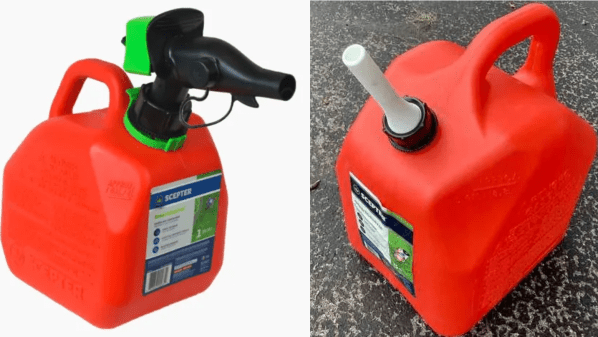
Unfortunately, the design of gas cans, at least here in North America, seems to have been optimized for fuel spillage. Not willing to settle for that, [avishekcode] came up with a 3D-printable replacement nozzle that should make dispensing gas a bit neater. It’s designed to fit one of the more popular brands of gasoline jugs available here in the States, and rather than the complicated stock nozzle, which includes a spring-operated interlock that has to be physically forced into a filler neck to open the valve, the replacement is just a slender tube with a built-in air vent. The vent keeps a vacuum from forming in the gas can and makes for a smooth, easy-to-control flow of gas and less spillage. The video below shows it in action.

The obvious issue here is chemical compatibility, since gasoline doesn’t work and play well with all plastics. [avishekcode] reports that both PLA and PETG versions of the nozzle have performed well for up to two years before cracking enough to need replacement. And then, of course, the solution is just to print another one. There may be legal issues, too — some localities have ordinances regarding gasoline storage and dispensing, so it’s best to check before you print.

Of course, one way to avoid the problems associated with storing and dispensing gasoline is to convert to electric power tools and vehicles. But as we’ve seen, that presents other problems.

Continue reading “Printed Gas Can Accessories Make Refueling A Little Neater”