Summary: in this tutorial, you will learn how to create a drawer navigator from the React Navigation library.
Introduction to React Native Drawer Navigation #
A drawer is a UI element that slides from the left or right edge of the screen. It contains a list of menu items that you can select to navigate to different screens:
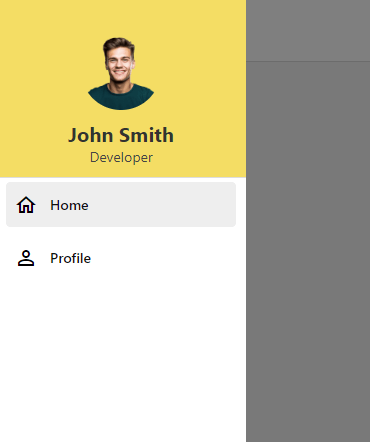
Typically, you open the drawer by tapping a button such as a hamburger icon or through a swipe gesture:
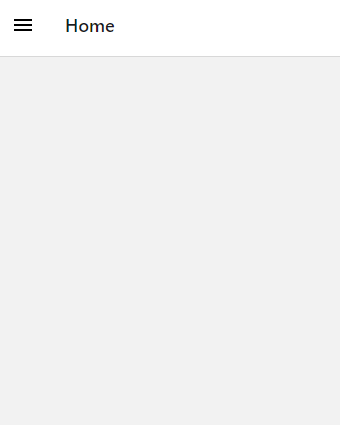
Drawer navigation is a common pattern in mobile apps. To set up a drawer navigation, you can use the drawer navigator provided by the React Navigation library.
Creating a React Native app #
In this section, you’ll explore how to set up and use the drawer navigation.
Requirements #
Before getting started, make sure that you have the following:
react-native>=0.63.0expo>= 41 (if you use Expo Go)
Setting up a new project #
First, open your terminal and execute the following command to create a new React Native app:
npx create-expo-app drawer --template blankThis command creates the drawer directory and initializes the React Native app structure.
Second, navigate to the project directory drawer:
cd drawerThird, install the React Navigation library and its dependencies by executing the following command:
npm install @react-navigation/native @react-navigation/drawer react-native-gesture-handler react-native-reanimatedCreating screens #
Step 1. Create a new directory screens in the project directory to store the screens.
Step 2. Create a Home screen in the screens directory:
import { SafeAreaView, StyleSheet, Text, View } from 'react-native';
const Home = () => {
return (
<SafeAreaView style={styles.container}>
<View style={styles.screen}>
<Text>Home Screen</Text>
</View>
</SafeAreaView>
);
}
const styles = StyleSheet.create({
container: {
flex: 1,
},
screen: {
flex: 1,
justifyContent: 'center',
alignItems: 'center',
}
});
export default Home;Step 3. Create a Profile screen in the screens directory:
import { SafeAreaView, StyleSheet, Text, View } from 'react-native';
const Profile = () => {
return (
<SafeAreaView style={styles.container}>
<View style={styles.screen}>
<Text>Profile Screen</Text>
</View>
</SafeAreaView>
);
}
const styles = StyleSheet.create({
container: {
flex: 1,
},
screen: {
flex: 1,
justifyContent: 'center',
alignItems: 'center',
}
});
export default Profile;Step 4. Create an index.js in the screens directory, import the Home and Profile screens, and export them right away:
import Home from './Home.jsx';
import Profile from './Profile.jsx';
export { Home, Profile }Step 5. Import the Home and Profile screens into the App.js file and place the Home screen as the main component:
import { Home, Profile } from './screens/index';
export default function App() {
return (
<Home />
);
}Step 6. Open the terminal and run the app:
npm startSetting up a drawer navigation #
Step 1. Modify the App.js with the following code:
import { NavigationContainer } from '@react-navigation/native';
import { createDrawerNavigator } from '@react-navigation/drawer';
import { Home, Profile } from './screens/index';
const Drawer = createDrawerNavigator();
const App = () => {
return (
<NavigationContainer>
<Drawer.Navigator initialRouteName="Home">
<Drawer.Screen name="Home" component={Home} />
<Drawer.Screen name="Profile" component={Profile} />
</Drawer.Navigator>
</NavigationContainer>
);
}
export default App;Output:
How it works.
First, import the NavigationContainer component and createDrawerNavigator function:
import { NavigationContainer } from '@react-navigation/native';
import { createDrawerNavigator } from '@react-navigation/drawer';Second, import the Home and Profile screen:
import { Home, Profile } from './screens/index';Third, create a drawer navigator object by calling the createDrawerNavigator() function:
const Drawer = createDrawerNavigator();The drawer navigator object (Drawer) has two properties:
- Navigator
- Screen
Fourth, set up the drawer navigation:
<NavigationContainer>
<Drawer.Navigator initialRouteName="Home">
<Drawer.Screen name="Home" component={Home} />
<Drawer.Screen name="Profile" component={Profile} />
</Drawer.Navigator>
</NavigationContainer>The NavigationContainer component manages the navigation tree and state. To enable navigation, we wrap the drawer navigator within the NavigationContainer component. This allows React Navigation to manage the navigation state properly across different screens.
The Drawer.Navigator component sets up the drawer navigator. It manages the state and behavior of the drawer such as opening, closing, and navigating between screens.
The optional initialRouteName prop specifies the screen to be rendered first. If you don’t specify the initialRouteName prop, the Drawer.Navigator will show the first screen in the list.
The Drawer.Screen component declares screens that can be accessed via drawer:
namedefines the name of the route, which can be referenced programmatically.componentspecifies the component to be rendered when the screen is selected. In this example, we specify two componentsHomeandProfile, which corresponds to the two screens.
When the app starts, the NavigationContainer initializes the navigation context and the Drawer.Navigator sets up a drawer navigation. It adds two screens to the drawer as specified by the Drawer.Screen components.
When you open the drawer, you’ll see two options: Home and Profile.
The drawer will show the Home screen because we define it as the initialRouteName in the drawer navigator component. If you select Profile, it’ll render the Profile screen.
Customizing the drawer #
We’ll customize the drawer by adding a header including an avatar, name, and title. Additionally, we’ll add an icon to each navigation item:
Step 1. Download and copy the following avatar.png file to the assets directory:

Step 2. Modify the App.js file to customize the drawer:
import { NavigationContainer } from '@react-navigation/native';
import { createDrawerNavigator, DrawerItemList } from '@react-navigation/drawer';
import Icon from '@expo/vector-icons/MaterialCommunityIcons';
import { Home, Profile } from './screens/index';
import { View, Text, StyleSheet, Image } from 'react-native';
const Drawer = createDrawerNavigator();
const App = () => {
return (
<NavigationContainer>
<Drawer.Navigator
initialRouteName="Home"
drawerContent={
(props) => {
return (
<View style={styles.drawer}>
<View style={styles.drawerHeader}>
<Image source={require('./assets/avatar.png')} style={styles.logo} />
<Text style={styles.title}>John Smith</Text>
<Text style={styles.subtitle}>Developer</Text>
</View>
<DrawerItemList {...props} />
</View>
);
}
}
screenOptions={{
drawerStyle: {
width: 250
},
drawerActiveBackgroundColor: '#eee',
drawerLabelStyle: {
color: '#111',
marginLeft: -20,
}
}}
>
<Drawer.Screen
name="Home"
component={Home}
options={{
drawLabel: 'Home',
title: 'Home',
drawerIcon: () => <Icon name="home-outline" size={24} color="black" />
}}
/>
<Drawer.Screen
name="Profile"
component={Profile}
options={{
drawLabel: 'Profile',
title: 'Profile',
drawerIcon: () => <Icon name="account-outline" size={24} color="black" />
}} />
</Drawer.Navigator>
</NavigationContainer>
);
}
const styles = StyleSheet.create({
drawer: {
flex: 1,
},
drawerHeader: {
paddingTop: 20,
width: '100%',
height: 180,
justifyContent: 'center',
alignItems: 'center',
borderBottomColor: '#ddd',
borderBottomWidth: 1,
backgroundColor: '#f9dc5c'
},
logo: {
width: 80,
height: 80,
borderRadius: 40,
resizeMode: 'center',
marginBottom: 10
},
title: {
fontSize: 20,
color: '#323330',
fontWeight: 'bold'
},
subtitle: {
fontSize: 14,
color: '#444'
}
});
export default App;How it works.
Here is the list of components:
NavigationContainercomponent wraps the drawer navigation and manages the navigation state.Drawer.Navigatorcomponent creates a drawer navigator.Drawer.Screencomponent represents each screen in the drawer navigator.DrawerItemListcomponent renders a list of drawer items.Iconcomponent displays an icon from the@expo/vector-iconspackage.
First, wrap drawer navigation using the NavigationContainer component to properly manage the navigation state:
<NavigationContainer>
</NavigationContainer>Second, set the initial route name to the Home screen in the Drawer.Navigator component and customize the drawer content using the drawerContent prop:
<Drawer.Navigator
initialRouteName="Home"
drawerContent={/*...*/}>The drawer content shows an avatar, name (John Smith), title (developer), and a list of drawer items. The DrawerItemList component renders the navigation items based on the props passed to the drawerContent function.
Third, set the drawer properties using the screenOptions prop:
drawerStyleproperty sets the drawer’s width to 250.drawerActiveBackgroundColorsets the background color of the active drawer item to a light grey (#eee).drawerLabelStyle: sets the color andmarginLeftof the drawer item labels.
Finally, set the screens for the drawer navigation items. For each screen, set the route name (name), component to render (component), and options for the label and icon:
<Drawer.Screen
name="Home"
component={Home}
options={{
drawLabel: 'Home',
title: 'Home',
drawerIcon: () => <Icon name="home-outline" size={24} color="black" />
}}
/>
<Drawer.Screen
name="Profile"
component={Profile}
options={{
drawLabel: 'Profile',
title: 'Profile',
drawerIcon: () => <Icon name="account-outline" size={24} color="black" />
}} />Output:
Summary #
- Use the drawer navigator from the React Navigation to create a drawer navigation.
Thank you for your feedback!
