
Summary: in this tutorial, you will learn how to download SQLite JDBC Driver and connect to the SQLite database via JDBC.
We’ll use the following tools:
- IntelliJ IDEA 2024.2.4 (Community Edition)
- SQLite JDBC driver located at https://mvnrepository.com/artifact/org.xerial/sqlite-jdbc
- The SQLite sample database called
chinook.db.
SQLite connection strings #
The SQLite JDBC driver allows you to load an SQLite database from the file system using the following connection string:
jdbc:sqlite:path_to_sqlite_fileThe path_to_sqlite_file is the path to the SQLite database file, which can be either a relative path:
sample_dbThe connection string will be:
jdbc:sqlite:sample_dbOr an absolute path
C:/sqlite/db/chinook.dbThe connection string will look like this:
jdbc:sqlite:C:/sqlite/db/chinook.dbCreate a new Java Project using IntelliJ IDEA #
Step 1. Launch the IntelliJ IDEA.
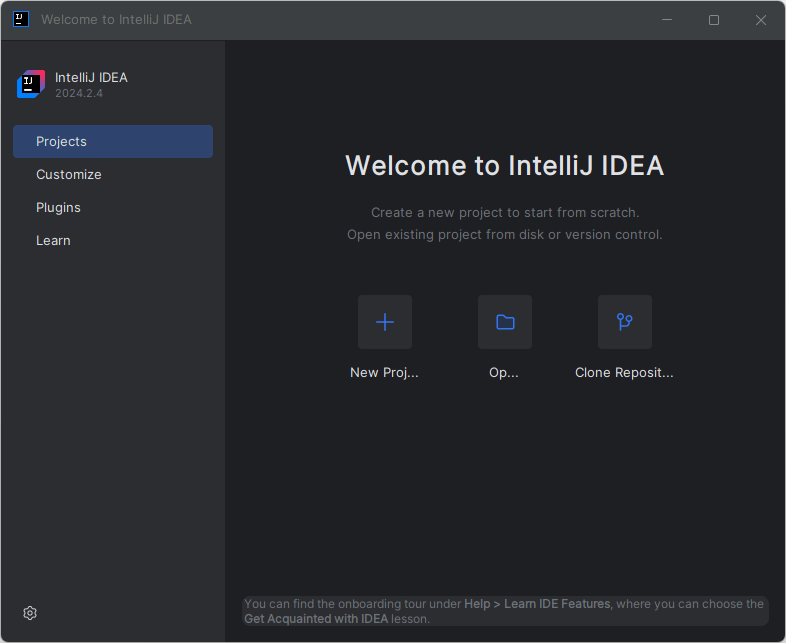
Step 2. Click the New Project button to create a new project:
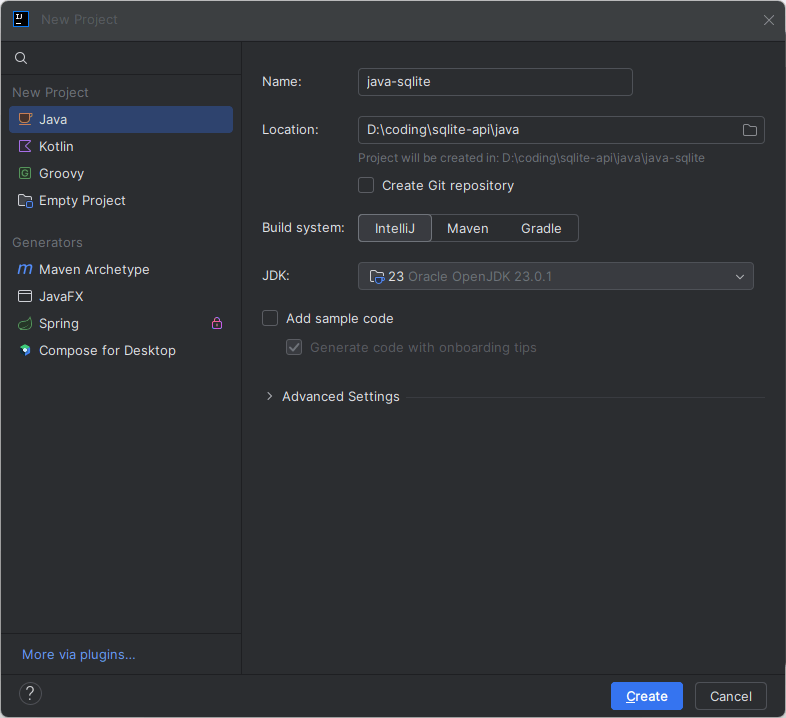
Step 3. Enter the project name java-sqlite, choose the Location (D:\coding\sqlite-api\java), and click the Create button to create a new Java project:
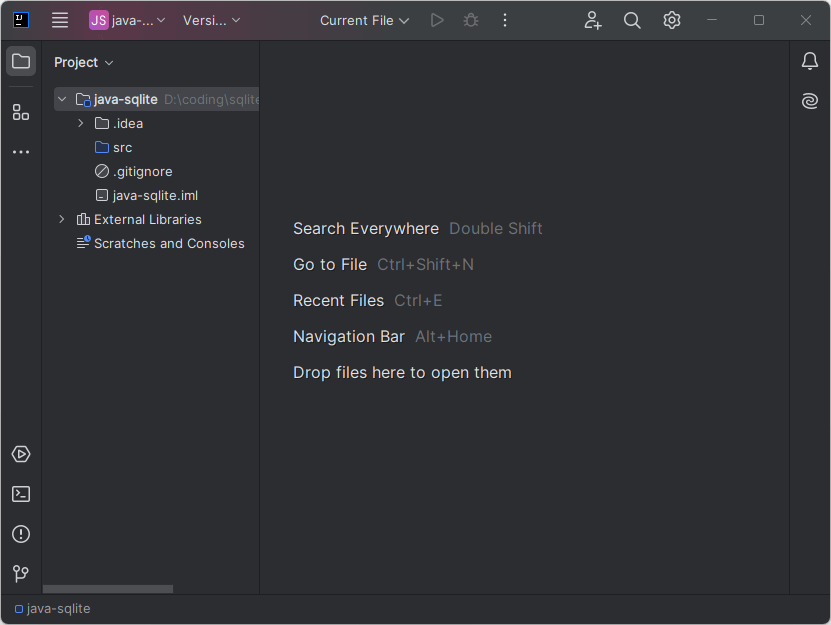
The project will look like this:
Adding SQLite JDBC driver to the project #
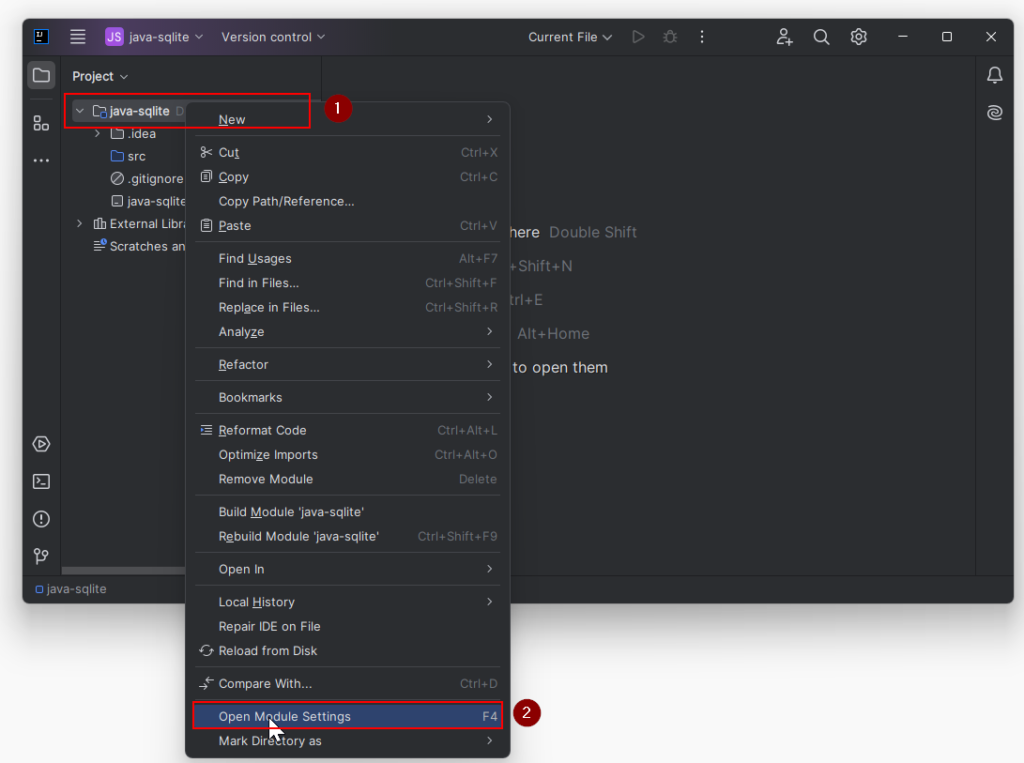
Step 1. Right-click the project name and select the Open Module Settings menu item:
Step 2. Select the Libraries (1) under the Project Settings, and click the + button (2) to download the library from Maven Repository:
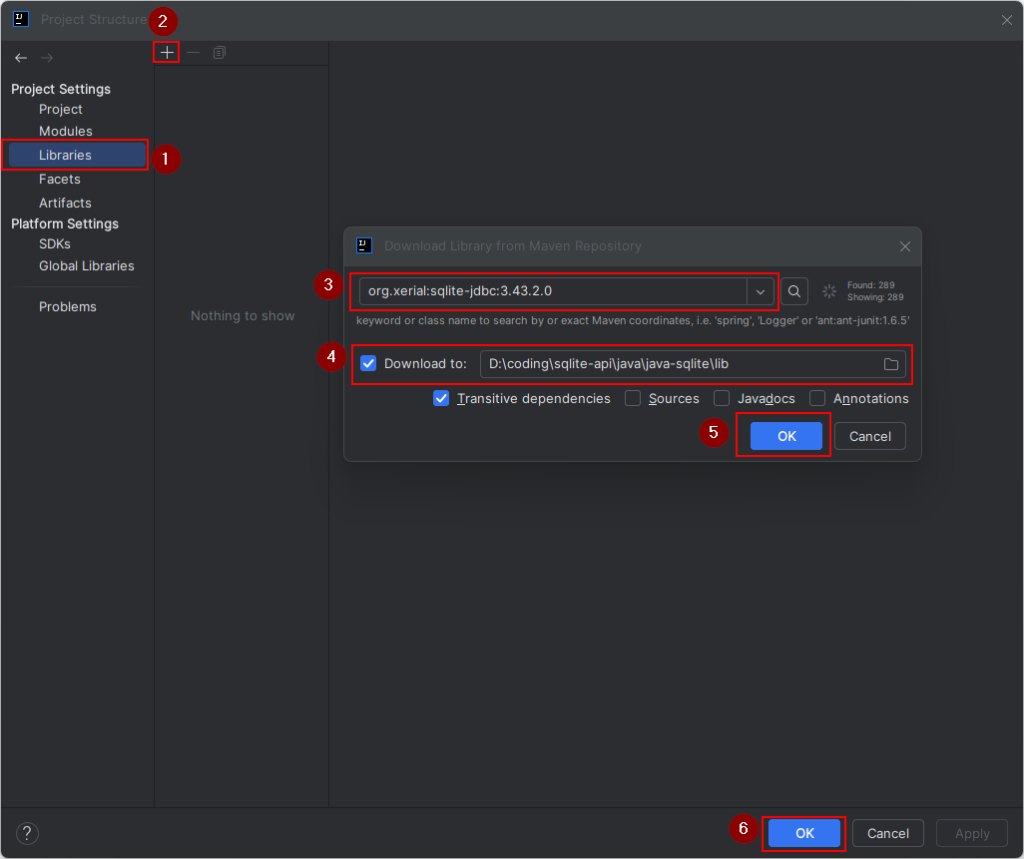
Enter the driver org.xerial:sqlite-jdbc:3.43.2.0 click the search button (3), check the Download to (4), and click the OK button to download the SQLite JDBC driver (5).
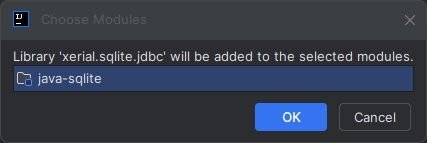
Once you click the OK button, it’ll show the following dialog to confirm adding the library xerial.sqlite.jdbc to the project.
Step 3. Click the OK button to confirm.
Creating a Java program #
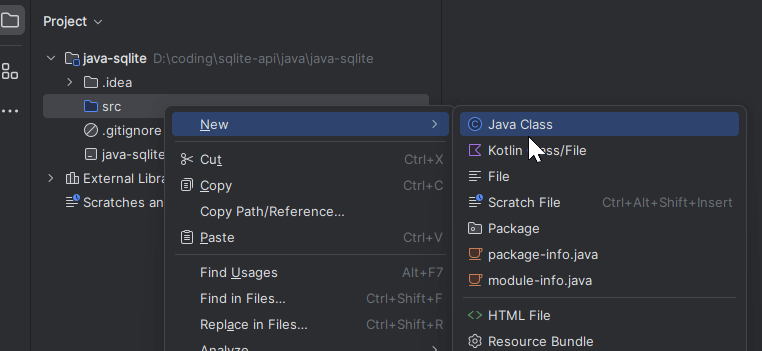
Step 1. Right-click the src directory in the Project and Create a new class:
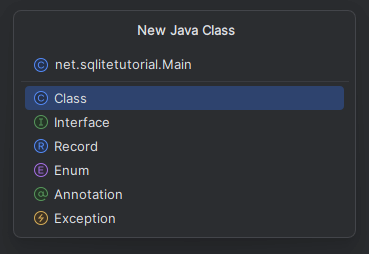
Step 2. Enter the class name net.sqlitetuorial.Main:
Step 3. Change the Main.java code to the following:
package net.sqlitetutorial;
import java.sql.DriverManager;
import java.sql.SQLException;
public class Main {
public static void connect() {
// connection string
var url = "jdbc:sqlite:c:/sqlite/db/chinook.db";
try (var conn = DriverManager.getConnection(url)) {
System.out.println("Connection to SQLite has been established.");
} catch (SQLException e) {
System.out.println(e.getMessage());
}
}
public static void main(String[] args) {
connect();
}
}Note that you should have the chinook.db file downloaded and copied to the C:/sqlite/db/ directory.
Step 4. Run the Java Program by clicking the Run button:
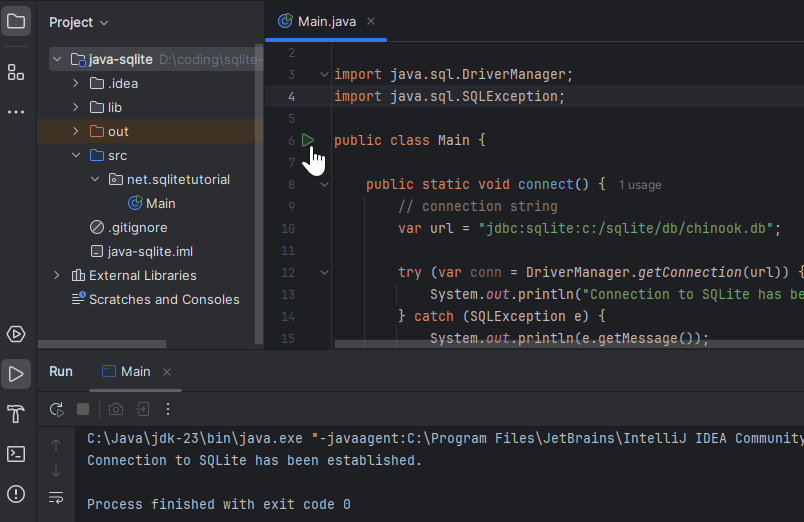
The output indicates that the Java program has successfully connected to the SQLite database file.
How the program works #
In the connect() method:
First, declare a variable that holds a connecting string to the SQLite database c:\sqlite\db\chinook.db
var url = "jdbc:sqlite:C:/sqlite/db/chinook.db";Second, use the DriverManager class to get a database connection:
var conn = DriverManager.getConnection(url);Since we use the try-with-resources statement, the database connection will be automatically closed.
Third, display a success message if the connection is opened successfully:
System.out.println("Connection to SQLite has been established.");Fourth, show an error message if the connection failed:
System.out.println(e.getMessage());Finally, call the connect() method in the main() method to open a new database connection:
public static void main(String[] args) {
connect();
}In this tutorial, you have learned how to use the SQLite JDBC driver to connect to an SQLite database from a Java program.
Thank you for your feedback!
