Image

Commodore 128 Becomes Marine Vessel Tracker

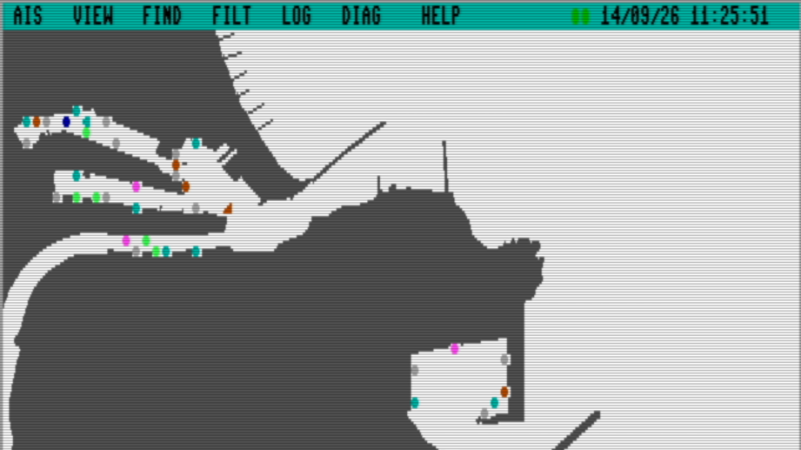
The Automatic Identification System (AIS) is a maritime radio communications tool used to allow different vessels to identify each other and communicate their movements and other telemetry. You can readily view a variety of AIS trackers online. Alternatively, you could build your own, and display the data on a retrocomputer from 40-plus years ago.

The concept is straightforward enough—it’s a Commodore 128 displaying vessel tracks from AIS data. The team behind AIS4CBM implemented this with assembly code to receive data over serial, parse and decode the AIS reports, and manage vessel data. Meanwhile, the front end is coded in BASIC 8, which provides useful graphic routines for plotting vessels on a map. There’s also a BASIC 7 text interface if you prefer to view the vessel data that way.

It’s worth noting that you can’t just run this on a barebones C128. AIS4CBM requires a 512 KiB REU RAM expansion, as well as 64 KiB VDC memory. You also need a SwiftLink compatible serial interface to get the data into the machine in the first place from your AIS receiver or other source. The project website notes that an Ultimate-II+ unit is a great way to fulfill most of these requirements with a single piece of hardware.

If you dig the project, you can check out a live stream from the C128 doing its thing below. We wouldn’t recommend a Commodore 128 if you’re a harbor master or otherwise commanding ships on the water. Still, it’s a fun project, and much like the NES that was set up to track planes with ADS-B data. Video after the break.

Continue reading “Commodore 128 Becomes Marine Vessel Tracker” →
Image

Modern USB Controllers On Win98 (and Up)

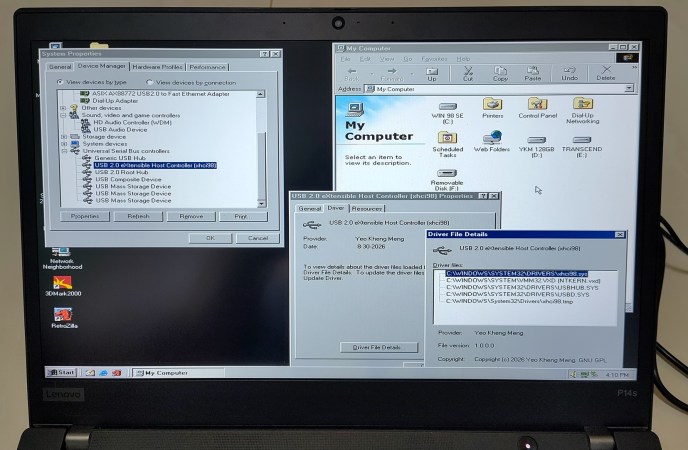
[Yeo Kheng Meng] has a problem: he likes Windows 98, but he also likes his 2020 ThinkPad, which only has an xHCI USB controller– you know, the kind needed for USB 3.0, something that post-dates Windows 98 by a full decade. Drivers? Finding none existed, he decided to do it himself, or at least guide the process of using  LLMs to produce drivers for Windows 98 and up.

Some of you just stopped reading, but can you blame him for making a demonic pact for this project? Driver development isn’t really a one-man show, especially as a part-time hobby project you’re not sure anyone else will ever use. If you do want to use it, you can find the code on GitHub.

It does work, though, he admits it might be buggy. Unlike purely vibe-coded projects, [Meng] intends to address bugs put forth in the repo, at least. If you want to know how he did it, check out the link to [Meng]’s blog– which is human-authored, we can tell– and the videos embedded therein. He demonstrates it working on a 2020 ThinkPad, which should be usable even with Windows 11, and another model from 2016– neither of which have any old-style USB ports. Older laptops might, while any desktop can just use a PCI card with a USB2.0 controller– or you can do like [Meng] did prior to this project, and use the PCI card via adapters. 

[Yeo Kheng Meng] evidently gets as much of a kick out of joining old and new as we do, like running DOS a modern ThinkPad X13, and running Slack on Windows 3.11 For Workgroups on a slightly-less-modern but still 21st Century Thinkpad T400.

Image

Myst On The Atari 2600

Although the Atari 2600 was a hugely popular game console in the late 70s, its hardware specs were limited, to say the least. For a dedicated game console of the era this isn’t too surprising, but things like 128 bytes of RAM meant programmers had to work hard to make games that were fun and playable (and they didn’t always succeed). Programming on this system even now is difficult, but nonetheless [Vince] wanted to get a version of Myst running on this system.

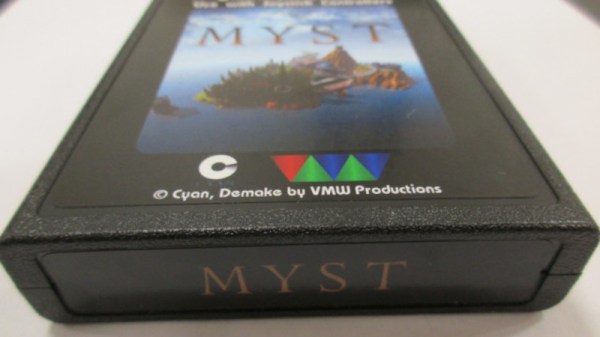
Obviously a PC game from the 90s is much to large, in many ways, to fit into an Atari cartridge or play on the 70s-era hardware. For that, there is a “demake” of Myst, a recreation of the game purposely built to run on older hardware it was never meant for. Even so, the game is running on a specialized cartridge built by [Vince] using parts from the real Atari game cartridge BurgerTime which had a bit more memory than normal. It wasn’t quite as straightforward as flashing the new game file to an old EEPROM though; [Vince] came across all kinds of timing issues and other miscellaneous problems that stretched this project out to around a three-year endeavor.

At the end of everything, though, he has a cartridge that will run Myst on the Atari, using the E7 bank switching scheme which afforded this system more memory within the cartridge. For [Vince], who is a fan of the demo scene for consoles like this, this was an interesting experiment to push original hardware to its limits. And, if you want to try this on an Atari 2600 handheld which also uses original hardware, we’d recommend using one of these.

Image

A Computer Terminal The Old Way

Here in 2026 if we need a terminal the chances are we fire one up on our computer and continue on our way without a thought. What we are doing of course is emulating the experience of earlier hardware terminals, ones with a serial port on the back, a keyboard, a screen, or if they are a bit older, a teletype printer. [Sheila Dixon] is recreating that experience for the RC2014 retrocomputer, and she’s using some period-appropriate hardware and techniques.

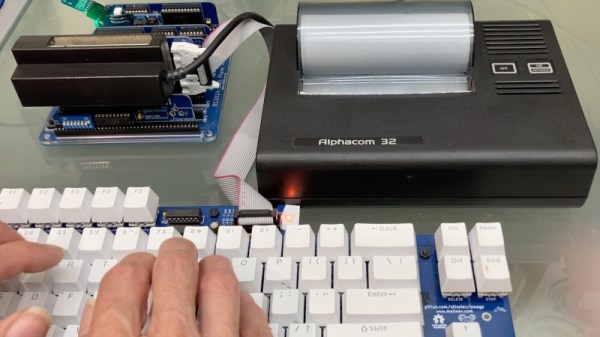
Perhaps the most obvious thing about her build is her choice of printer. Sir Clive released a notoriously bad thermal printer for the ZX81, and it wasn’t long before a third-party alternative appeared in the form of the Alphacom. This printer connected directly to the ZX’s bus via its expansion port, and like the Sinclair printer, was serviced by ROM routines linked to BASIC commands. This is joined by a keyboard, first an MSX item, and then one she’s made with some retro typewriter keycaps.

She’s interfaced her Alphacom to the RC2014’s Z80 bus in the same way as it would be with the ZX81, and with a few teething troubles created some routines in a ROM to drive it as though it was the RC2014 terminal output. The keyboard is scanned using an 8255 I/O port card, much as it might have been back in the day.

If you’re curious about the Sinclair printer, we used one (without harming it!) for an April Fools’ joke during the pandemic. Meanwhile we have reviewed more than one RC2014 model, the most recent one being in 2019.

Image

The Sinclair Spectrum Gets A Desktop GUI

Of the popular 1980s 8-bit computers, it’s fair to say that Sinclair’s ZX Spectrum punched above its weight. Sir Clive’s love of squeezing more functionality out of less hardware meant the compromises he made left it less powerful than competitors from Apple, Commodore, or Acorn. Still, the brightest programmers of the age took the little machine to heart and made it do some very impressive things. A desktop GUI, though, surely that would be pushing things too far. Never say never because now [mindbox77] has done it.

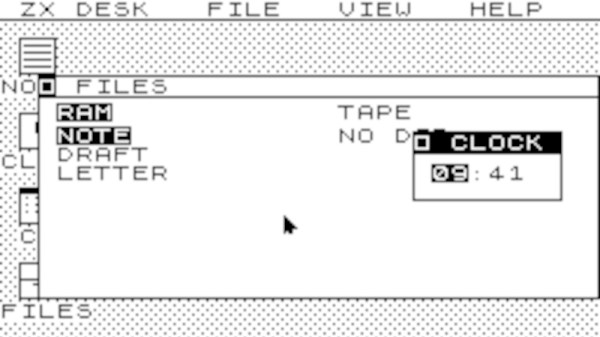
ZXdesk is an assembly language program for the 48k Spectrum that gives you something that looks a lot like GEM. It’s got all the things you’d expect from a desktop GUI, with menus, windows, and applications, and we find ourselves suitably impressed.

Continue reading “The Sinclair Spectrum Gets A Desktop GUI” →

Image

Sony’s First Computer

In 1982, desktop computers were coming into their own, and no clear leaders had emerged. But everyone knew they wanted a piece of the action. This led to, among other things, Sony’s SMC-70, which, frankly, for 1982, was a good-looking, if not oddball, machine. [Tech Tangents] shows the machine off in a recent video.

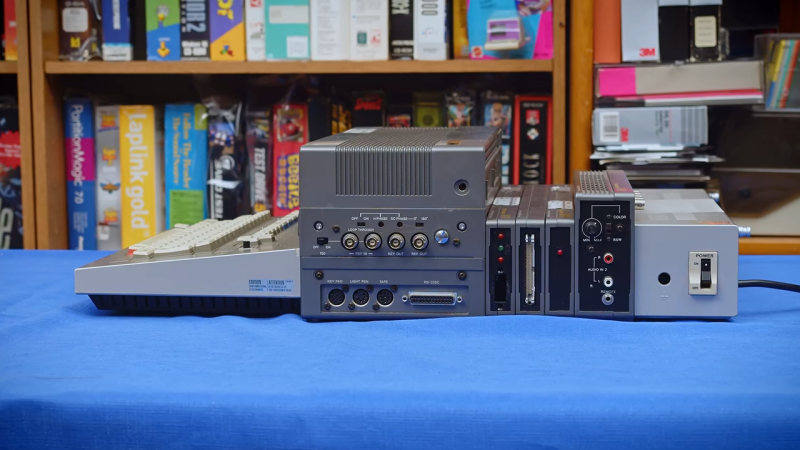
From the front, the computer looks more-or-less like everything else. But as you move backward, you can see this computer wasn’t another typical entry into the market. One of the things that was the hallmark of successful business computers of the day was expandability. The earlier Altair had the later-titled S100 bus. The IBM PC had the ISA bus. But in both cases, you had to open the box to plug and unplug cards.

Continue reading “Sony’s First Computer” →

Image

Reconstructing A Pin On A Pin Grid Array Package

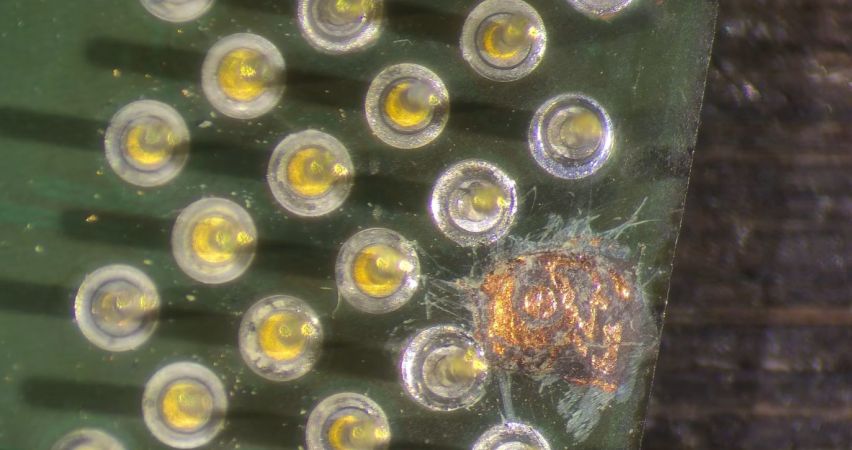
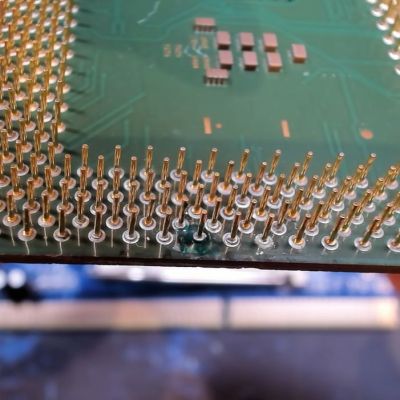
ImageBefore moving to land grid array (LGA) packaging whereby each pin on the substrate is just a copper pad, processors commonly used pin grid array (PGA) packaging, including the still highly relevant AMD AM4 socket. With PGA you get a pin soldered onto the copper pad which inserts into the ZIF socket, rather than a fragile pin on the mainboard side. Repairing a damaged PGA pin can be easy if just the pin broke off at the solder joint, or rough if the pad was destroyed, as in the case of this Pentium III CPU that [Bits und Bolts] recently tried to fix.

In the case of something like a ground pin or similarly unimportant pin you can ignore the damage, but in this case it concerned an important pin for this 1.2 GHz Tualatin PIII core, with the damage consisting of a well and truly destroyed pad. The first step to repair the damage is thus to try and rebuild the pad, which was done using solder mask and solder.

Although a PIII-era Celeron CPU is definitely not a high-value CPU, since they have so few and such large pins they do make for useful test subjects when it comes to PGA repair practicing. In this case the affected data pad and pin appears to have been repaired successfully, with it running overclocked to 1.6 GHz and crushing similarly or higher clocked Pentium 4 and AMD Athlon CPUs of the era.

Continue reading “Reconstructing A Pin On A Pin Grid Array Package” →