Image

Tiny Scratch-Built Cyberdeck Is In Mint Condition

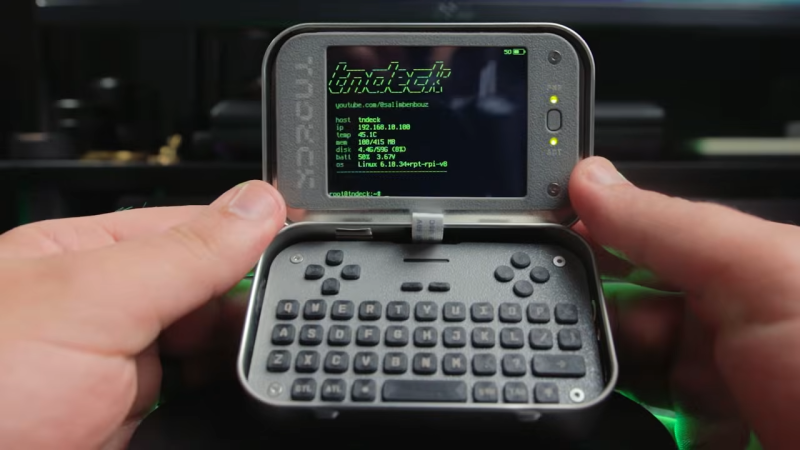
[Salim Benbouziyane] shows off his TN Deck, a tiny custom cyberdeck built into an Altoids tin. It’s a skillful build that really makes the most of the available space, and includes not only screen and keyboard but also rechargeable power supply and speaker.

The TN Deck is built around the Raspberry Pi Compute Module Zero, which is essentially the same as a Pi Zero W but in a more compact, castellated PCB form factor intended to be integrated into other designs. [Salim]’s custom PCB also handles power, sound, and puts a custom keyboard at the front running QMK, which is pretty much the best choice for custom keyboards and macropads of all kinds.

Image
A D-pad and some gamepad buttons come in handy. The slot in the center is for the speaker.

The keyboard itself is mostly 3D printed. Each button consists of a dome tactile switch on the PCB, covered with a thin and flexible membrane printed in TPU and topped with 3D-printed keycaps. The markings are courtesy of [Salim]’s desktop IR laser marking machine, because a little trial-and-error with lasers can yield good marks on 3D prints. [Salim] says the keys don’t have much travel and the ergonomics aren’t the best, but what it lacks in comfort it makes up for in small size and economical design.

We also really liked [Salim]’s use of a printed drill guide for putting precise holes in the Altoid tin for things like an audio jack, taking the guesswork out of tool positioning.

Some cyberdecks are made to suit specific needs, and others are made for the love of the game. The TN Deck is one of the latter and [Salim]’s previous CM Deck was a bit of both. We can’t wait to see what he makes next.

Continue reading “Tiny Scratch-Built Cyberdeck Is In Mint Condition” →
Image

Homebrew Macropad Looks Good

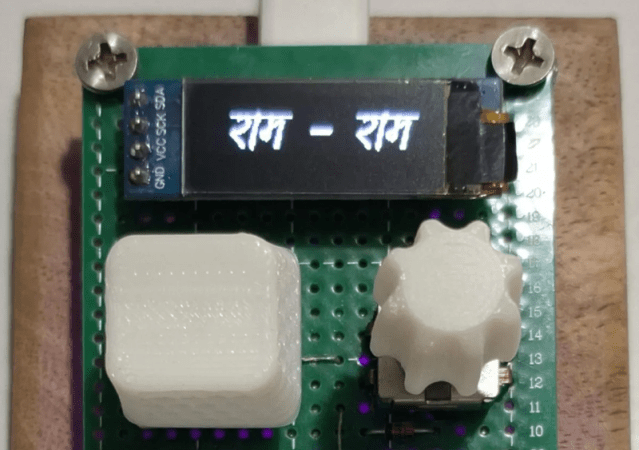
We are fans of macro pads and especially homebrew ones. The Apna Dost project by [np_vishwakarma] ticks most of our boxes. In addition to a few buttons, there’s an encoder, an OLED display, and it runs QMK firmware. Plus, it looks good, too.

We like that the system uses an RP2040. It is possible you have everything you need to put one of these together right now. We would wish for a few more keys, but it wouldn’t be hard to add them, either.

Continue reading “Homebrew Macropad Looks Good” →

Image

Custom Clamshell Cyberdeck Shows Off Underlighting

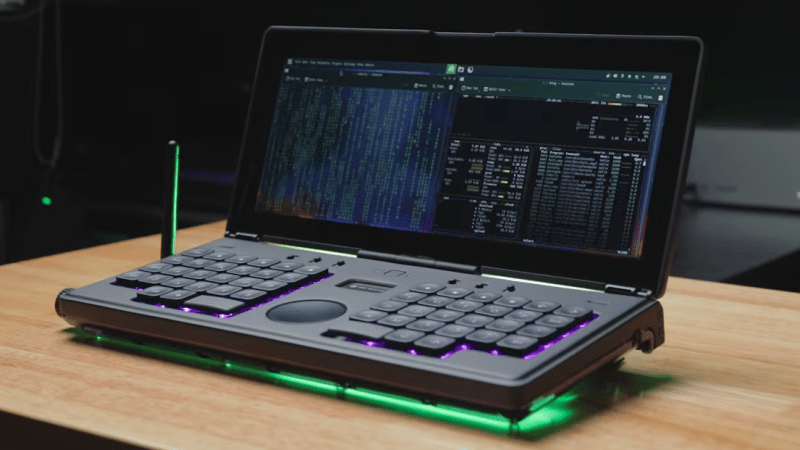
Cyberdecks are great projects, and [Salim Benbouziyane]’s scratch-built CM Deck is a fantastic specimen. It’s a clamshell-style cyberdeck with custom split keyboard, trackpad, optional external WiFi antenna, and some slick underlighting thanks to a translucent bottom shell. There’s even a hidden feature that seems super handy for a cyberdeck: a special USB-C port that, when plugged in to another host (like another computer), lets the cyberdeck act as an external keyboard and trackpad for that downstream machine.

Image
The CM Deck is built around the Raspberry Pi Compute Module 5, which necessitates a custom PCB but offers more design freedom.

Notably, the CM Deck is custom-built around the Raspberry Pi Compute Model 5. When we first peeped the CM5 the small size was striking, but of course that comes at the cost of having no connectors, supporting hardware, or heat management. That’s something [Salim] embraced because it meant being able to put connectors exactly where he wanted them, and not have to work around existing hardware. A custom PCB let him to lay out his cyberdeck with greater freedom, less wasted space, and ultimately integrate a custom-built keyboard (with RP2040 and QMK firmware).

Even the final enclosure is custom-made, with 3D printing being used to validate the design and PCBway providing finished plastic shells in addition to manufacturing the PCBs. [Salim] admits that doing so was an indulgence, but his delight at the quality of the translucent purple undercarriage is palpable.

[Salim]’s video (embedded below) is a deep dive into the whole design and build process, and it’s a great watch for anyone interested in the kind of work and decisions that go into making something like this. Experienced folks can expect to nod in sympathy when [Salim] highlights gotchas like doing CAD work based on the screen’s drawings, only to discover later that the physical unit doesn’t quite match.

The GitHub repository contains the design files for everything, so give it a browse if you’re interested. [Salim] is no stranger to clean builds, so take a moment to admire his CRT-style Raspberry Pi terminal as well.

Continue reading “Custom Clamshell Cyberdeck Shows Off Underlighting” →

Image

Debugging The Instant Macropad

Last time, I showed you how to throw together a few modules and make a working macropad that could act like a keyboard or a mouse. My prototype was very simple, so there wasn’t much to debug. But what happens if you want to do something more complex? In this installment, I’ll show you how to add the obligatory blinking LED and, just to make it interesting, a custom macro key.

There is a way to print data from the keyboard, through the USB port, and into a program that knows how to listen for it. There are a few choices, but the qmk software can do it if you run it with the console argument.

The Plan

In theory, it is fairly easy to just add the console feature to the keyboard.json file:

{
...
    "features": {
        "mousekey": true,
        "extrakey": true,
        "nkro": false,
        "bootmagic": false,
        "console": true
    },
...

That allows the console to attach, but now you have to print.

Continue reading “Debugging The Instant Macropad” →

Image

Instant Macropad: Just Add QMK

I recently picked up one of those cheap macropads (and wrote about it, of course). It is surprisingly handy and quite inexpensive. But I felt bad about buying it. Something like that should be easy to build yourself. People build keyboards all the time now, and with a small number of keys, you don’t even have to scan a matrix. Just use an I/O pin per switch.

The macropad had some wacky software on it that, luckily, people have replaced with open-source alternatives. But if I were going to roll my own, it would be smart to use something like QMK, just like a big keyboard. But that made me wonder, how much trouble it would be to set up QMK for a simple project. Spoiler: It was pretty easy.

The Hardware

Image
Simple badge or prototype macropad? Why not both?

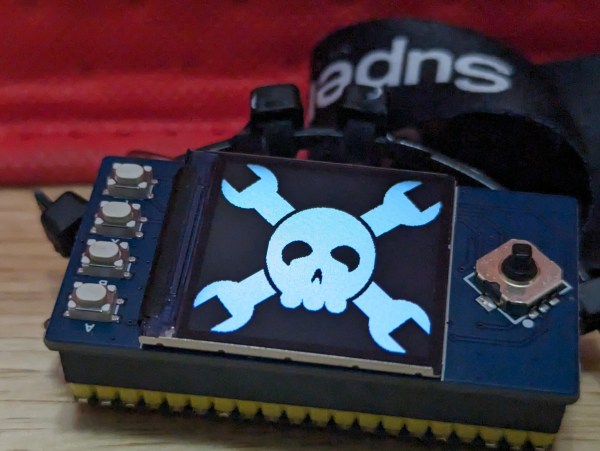
Since I just wanted to experiment, I was tempted to jam some switches in a breadboard along with a Raspberry Pi Pico. But then I remembered the “simple badge” project I had up on a nearby shelf. It is simplicity itself: an RP2040-Plus (you could just use a regular Pi Pico) and a small add-on board with a switch “joystick,” four buttons, and a small display. You don’t really need the Plus for this project since, unlike the badge, it doesn’t need a battery. The USB cable will power the device and carry keyboard (or even mouse) commands back to the computer.

Practical? No. But it would be easy enough to wire up any kind of switches you like. I didn’t use the display, so there would be no reason to wire one up if you were trying to make a useful copy of this project.

Continue reading “Instant Macropad: Just Add QMK” →

Image

A Precisely Elegant Cyberdeck Handheld

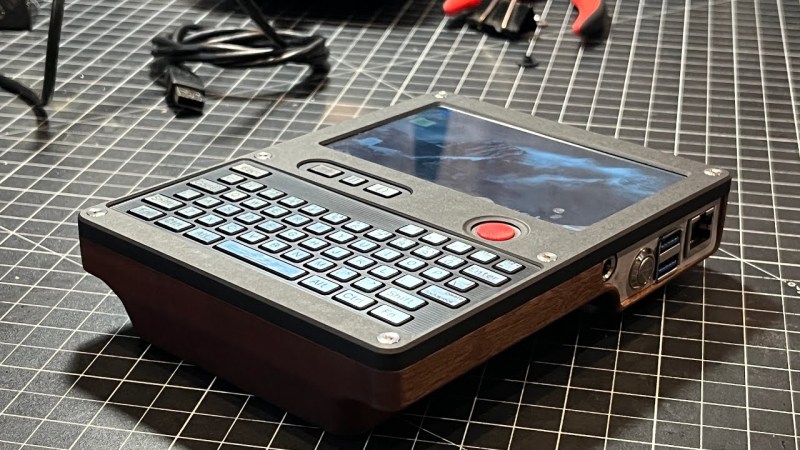
[Nicholas LaBonte] shows off a Cyberdeck Handheld that demonstrates just how good something can look when care and attention goes into the design and fabrication. He wanted to make something that blended cyberpunk and nautical aesthetics with a compact and elegant design, and we think he absolutely succeeded.

On the inside is a Raspberry Pi and an RTL-SDR. The back of the unit is machined from hardwood, and sports a bronze heat sink for the Raspberry Pi. The front has a prominent red PSP joystick for mouse input and a custom keyboard. The keyboard is especially interesting. On the inside it’s a custom PCB with tactile switches and a ATmega32U4 running QMK firmware — a popular choice for DIY keyboards — and presents to the host as a regular USB HID device.

Image
The keys are on a single plate of little tabs, one for each key, that sits between the front panel and press on the tact switches inside.

How did he make those slick-looking keys? It’s actually a single plate that sits between the front panel and the switches themselves. [Nicholas] used a sheet of polymer with a faux-aluminum look to it and machined it down, leaving metal-looking keys with engraved symbols as tabs in a single panel. It looks really good, although [Nicholas] already has some ideas about improving it.

On the right side is the power button and charging port, and astute readers may spot that the power button is where a double-stack of USB ports would normally be on a Raspberry Pi 5. [Nicholas] removed the physical connectors, saving some space and connecting the USB ports internally to the keyboard and SDR.

As mentioned, [Nicholas] is already full of ideas for improvements. The bronze heat sink isn’t as effective as he’d like, the SDR could use some extra shielding, and the sounds the keyboard ends up making could use some work. Believe it or not, there’s still room to spare inside the unit and he’d maybe like to figure out a way to add a camera, GPS receiver, or maybe a 4G modem. We can’t wait! Get a good look for yourself in the video, embedded below.

Continue reading “A Precisely Elegant Cyberdeck Handheld” →

Illustrated Kristina with an IBM Model M keyboard floating between her hands.

Keebin’ With Kristina: The One With The Cutting Board Keyboard

Doesn’t this look fantastic? Hard to believe it, but the base of this keyboard began life as a cutting board, and there’s a gallery to prove it. This is actually [androidbrick]’s second foray into this type of upcycling.

This time, [androidbrick] used a FiiO KB3 and replaced the bottom half of the plastic shell with a hand-routed kitchen cutting board. The battery has been disabled and it works only in wired mode, which is fine with me, because then you get to use a curly cord if you want.

A lovely keyboard built into a kitchen cutting board.
Image by [androidbrick] via reddit
The switches are mostly Gateron EF Currys, though [androidbrick] left some of the original Gateron G Pro 3.0 on the stabilized keys just for comparison. As you might imagine, the overall sound is much deeper with a wooden bottom. You can check out the sound test on YouTube if you’d like, though it’s pretty quiet, so turn it up.

Those keycaps look even nicer from top-down, which you’ll see in the sound test video linked above. Just search ‘JCM MOA GMK’ on Ali and you’ll find them in a bunch of colorways for around $20. Apparently, [androidbrick] was saving them for months, just waiting for this build.

Via reddit

Continue reading “Keebin’ With Kristina: The One With The Cutting Board Keyboard” →