
Google Analytics is one of the most popular web visitor analytics platforms. NotificationX lets you connect your Google Analytics account and display total site visitors or real-time visitors as an attractive notification alert on your website.
Before getting started, make sure you’ve installed and activated NotificationX Free & PRO on your website to use this feature.
How to Connect Google Analytics with NotificationX #
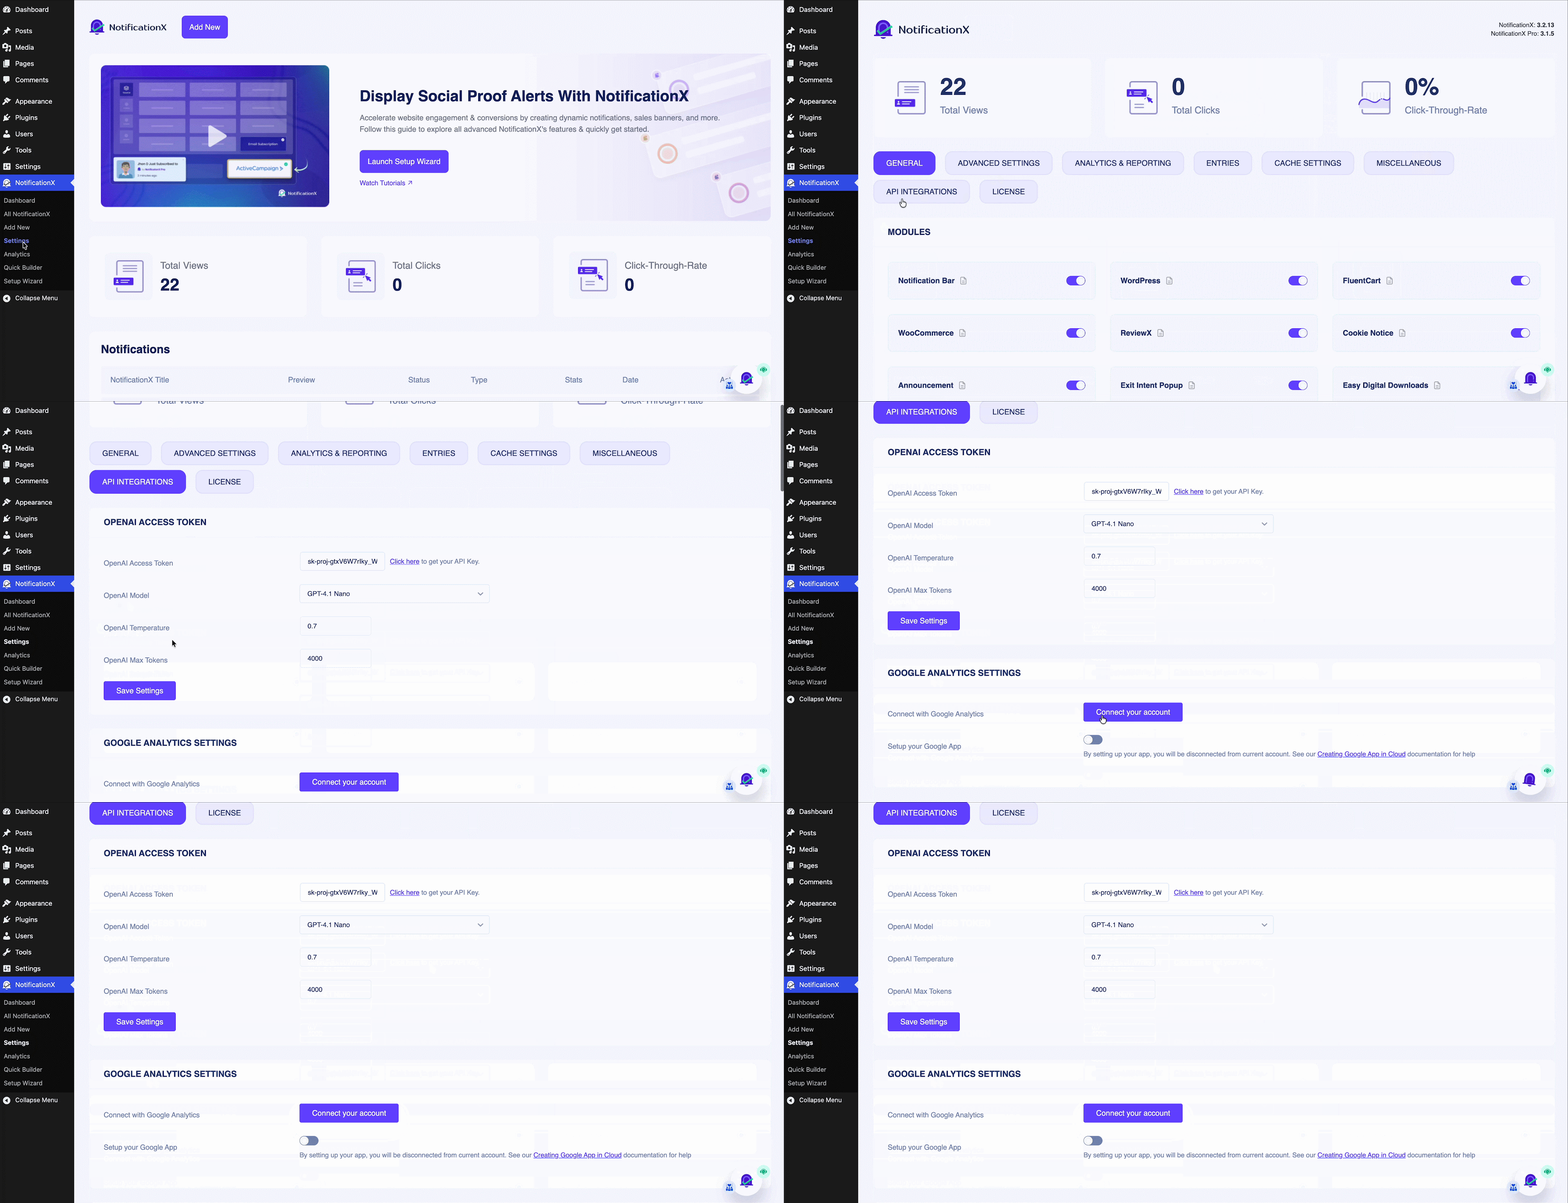
To connect your Google Analytics account with NotificationX, navigate to NotificationX → Settings → API INTEGRATIONS & click on Connect your account.
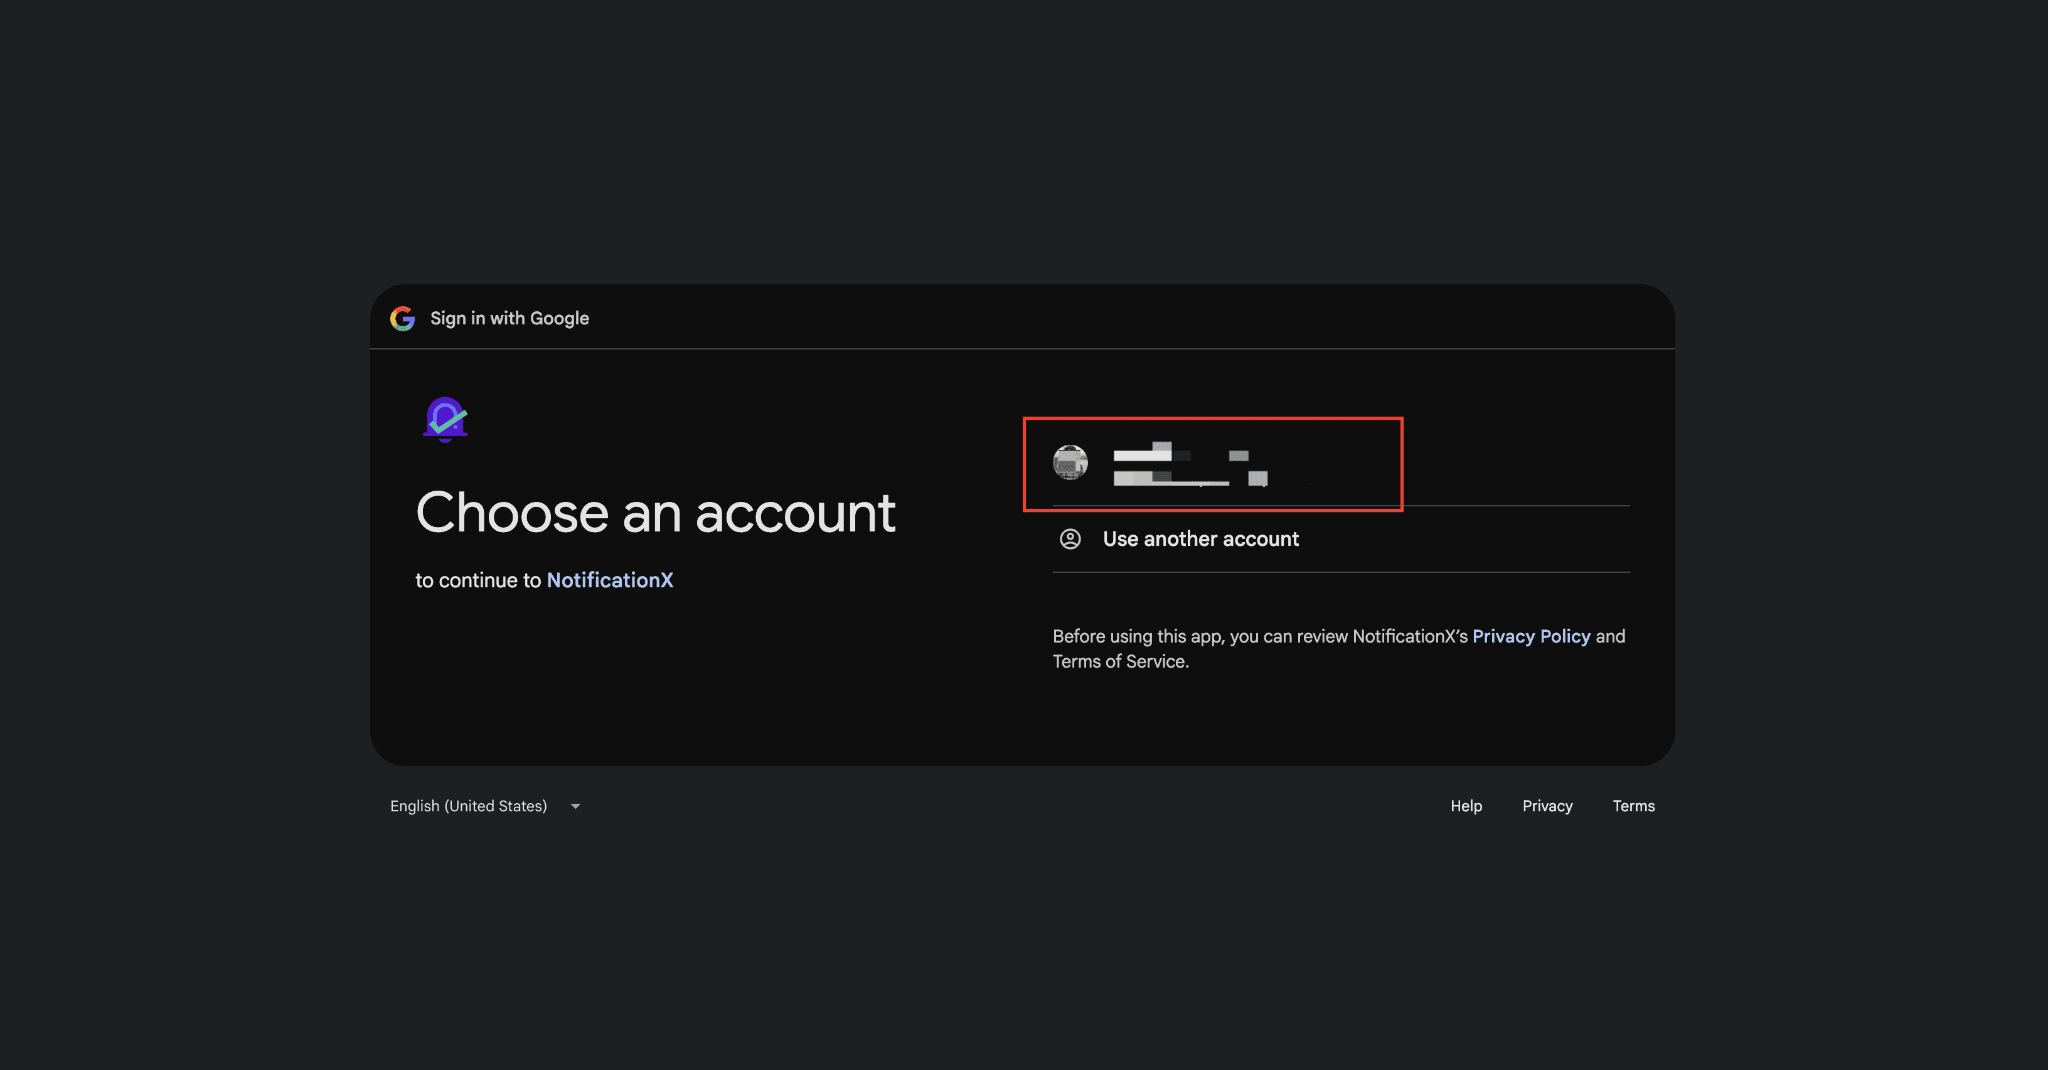
You’ll be redirected to the page below, where you need to select the Google account whose data you want to show on your website.
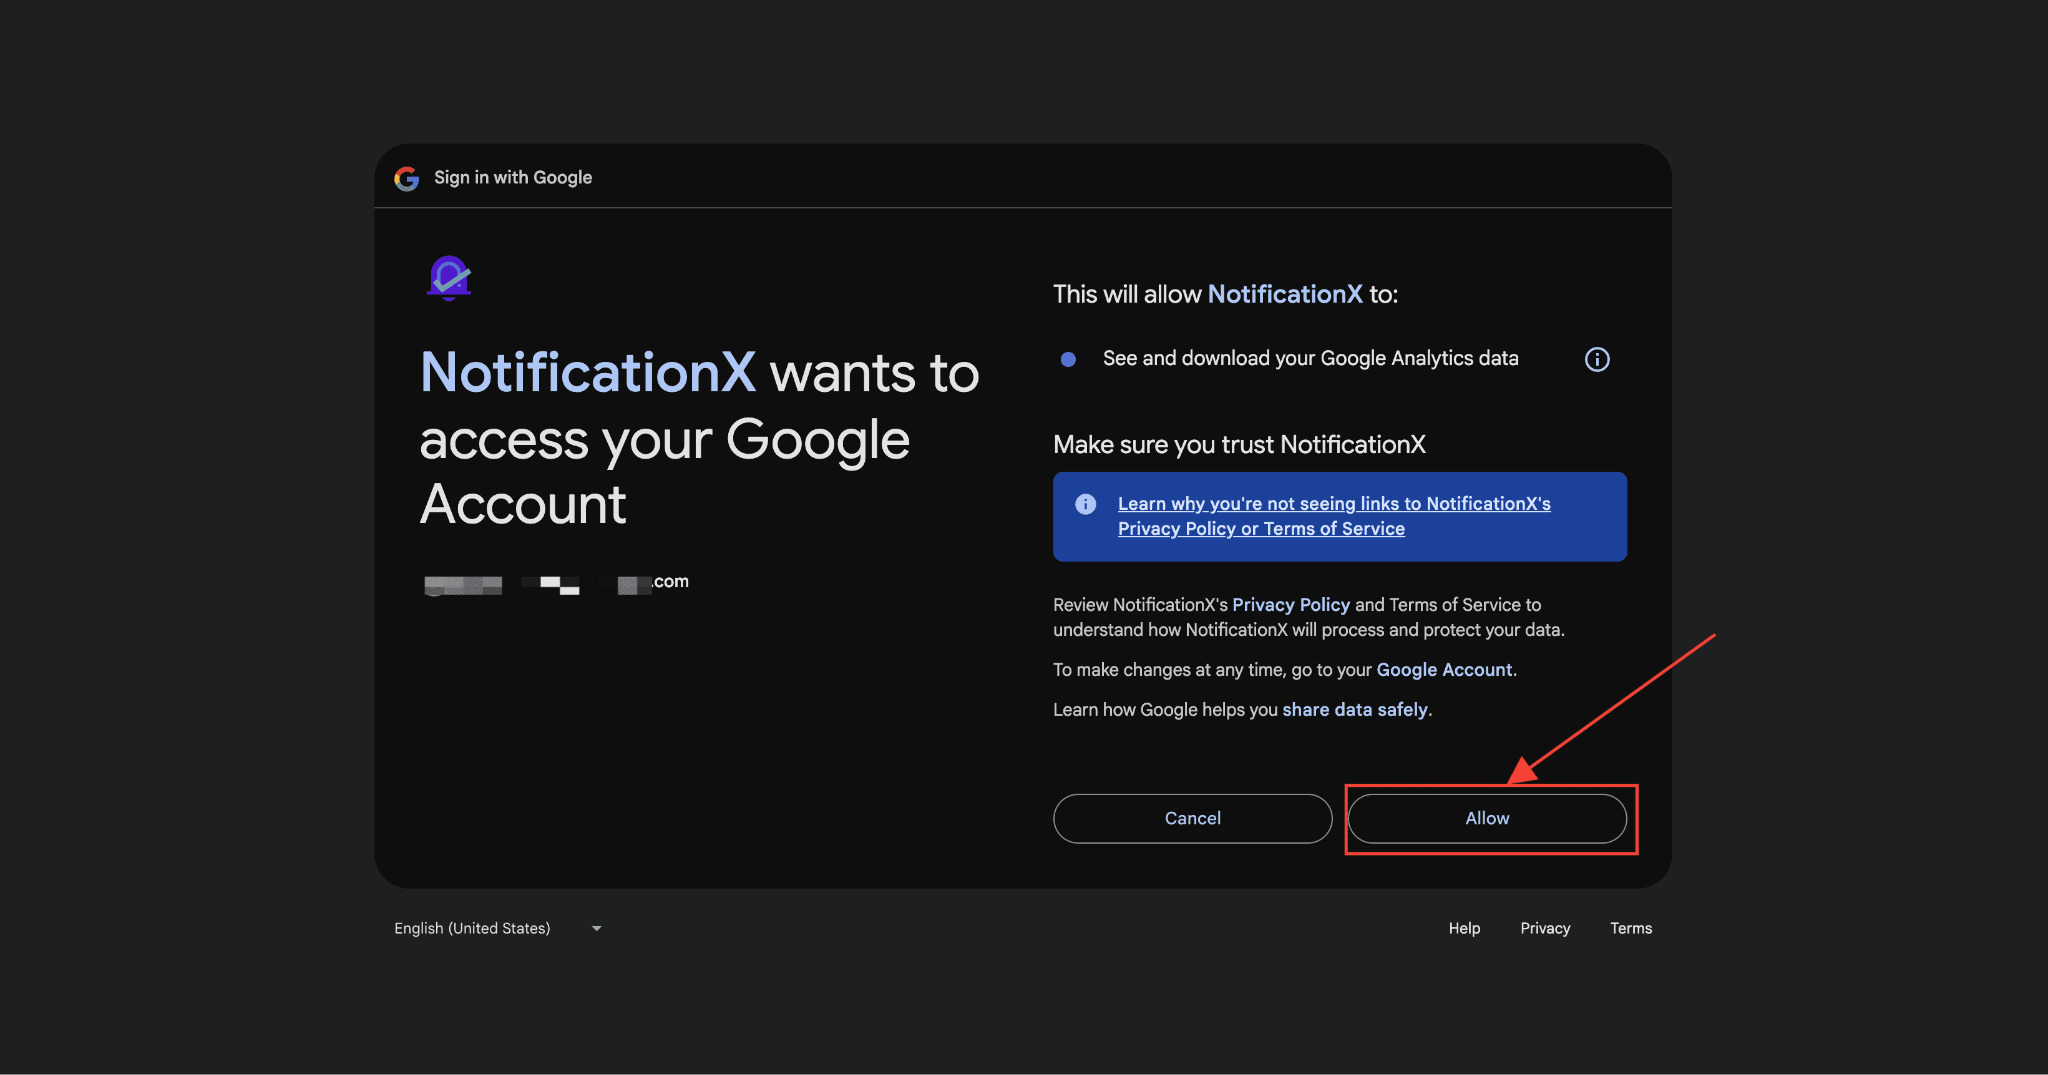
Click on ‘Allow’ to give all the permissions that NotificationX needs to be connected with Google Analytics.
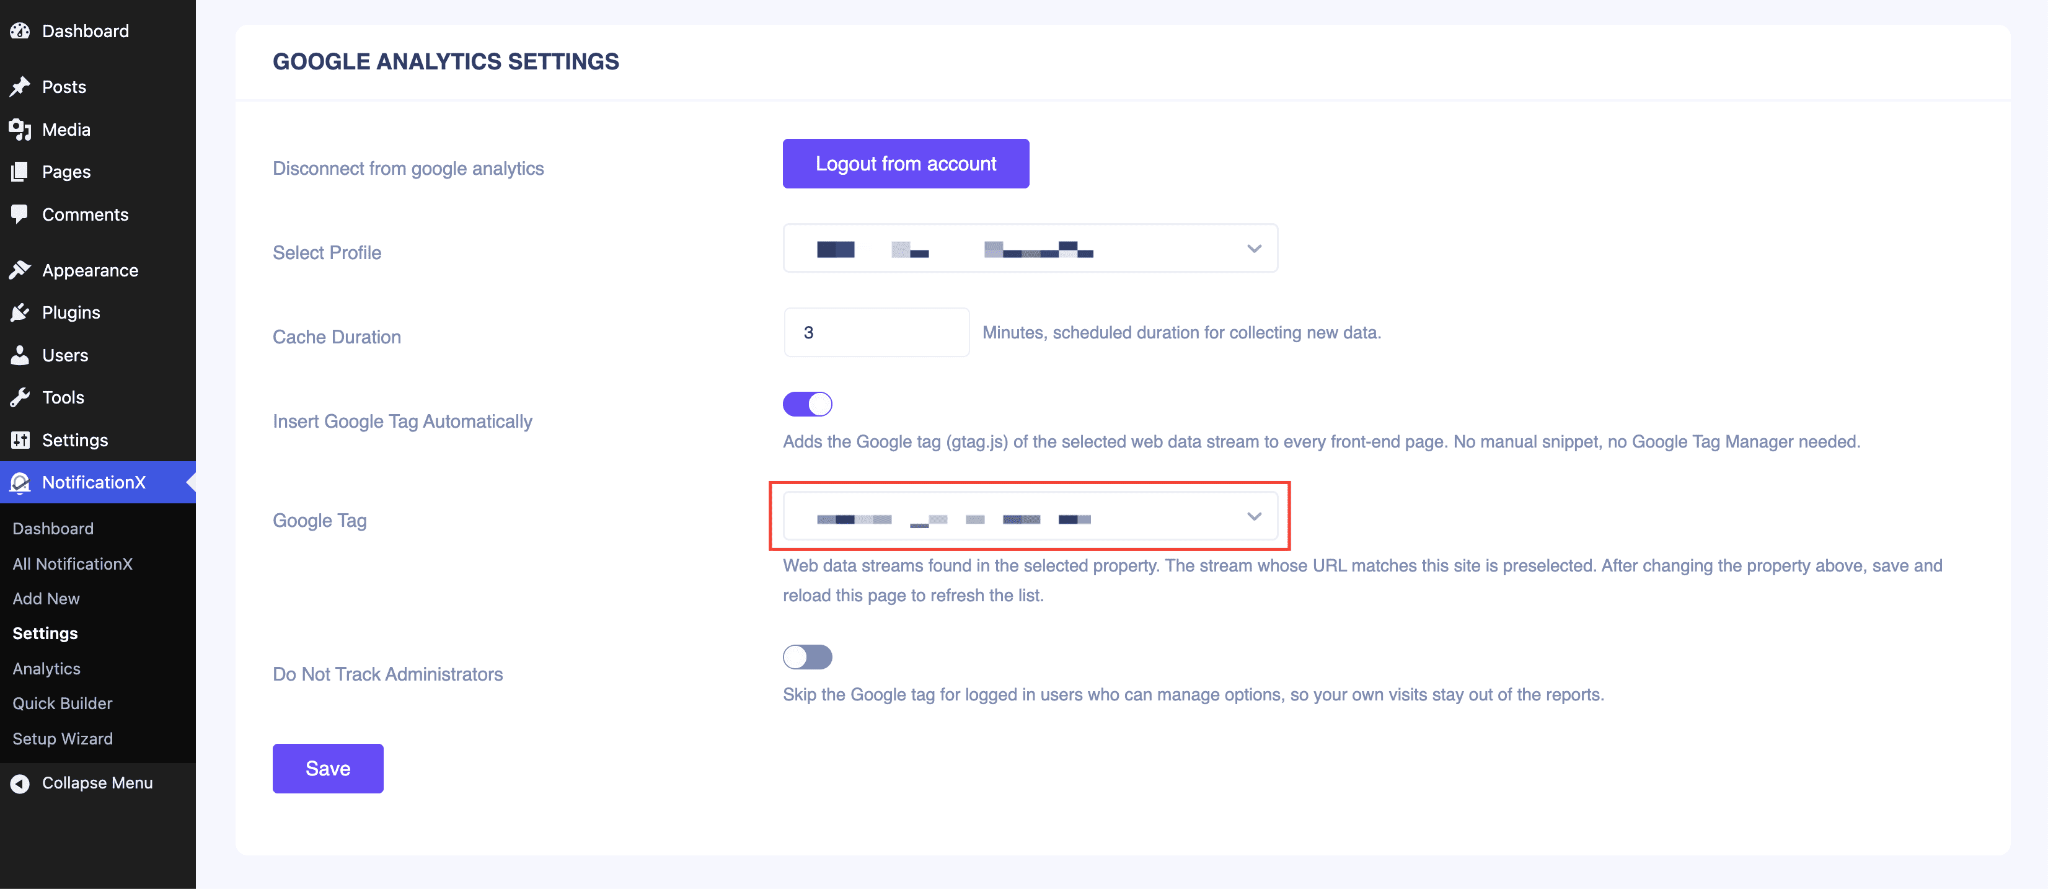
Your Google account has been connected to NotificationX successfully. Now you’ll see an option called ‘Select Profile.’ Click on it and select the property from the dropdown you built in Google Analytics to fetch all the data.
Speaking of selecting a profile, the next section is to make you understand how you can create the profile in Google Analytics.
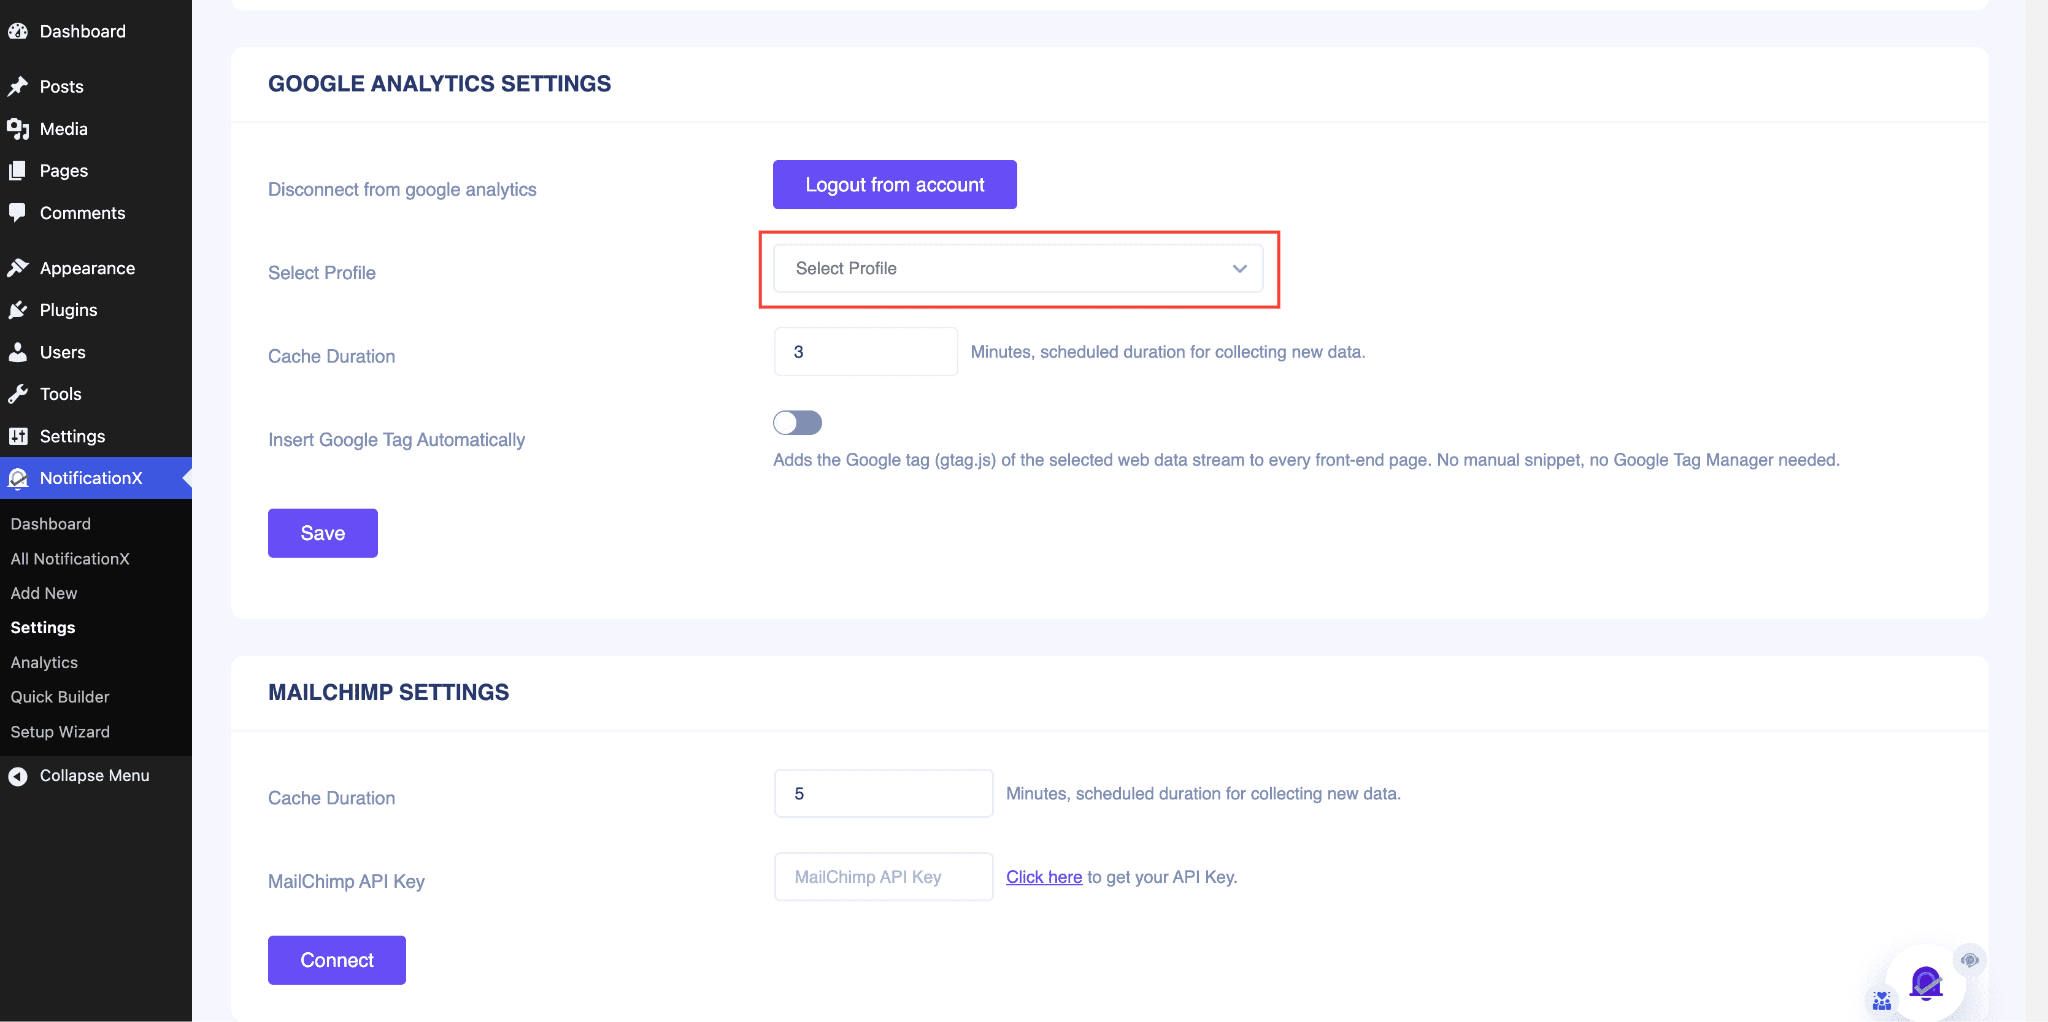
Based on your profile, you’ll automatically have ‘Google Tag’ selected as shown below. And you’re done. You’ve successfully connected your Google Analytics with NotificationX.
How to Create a Profile in Google Analytics #
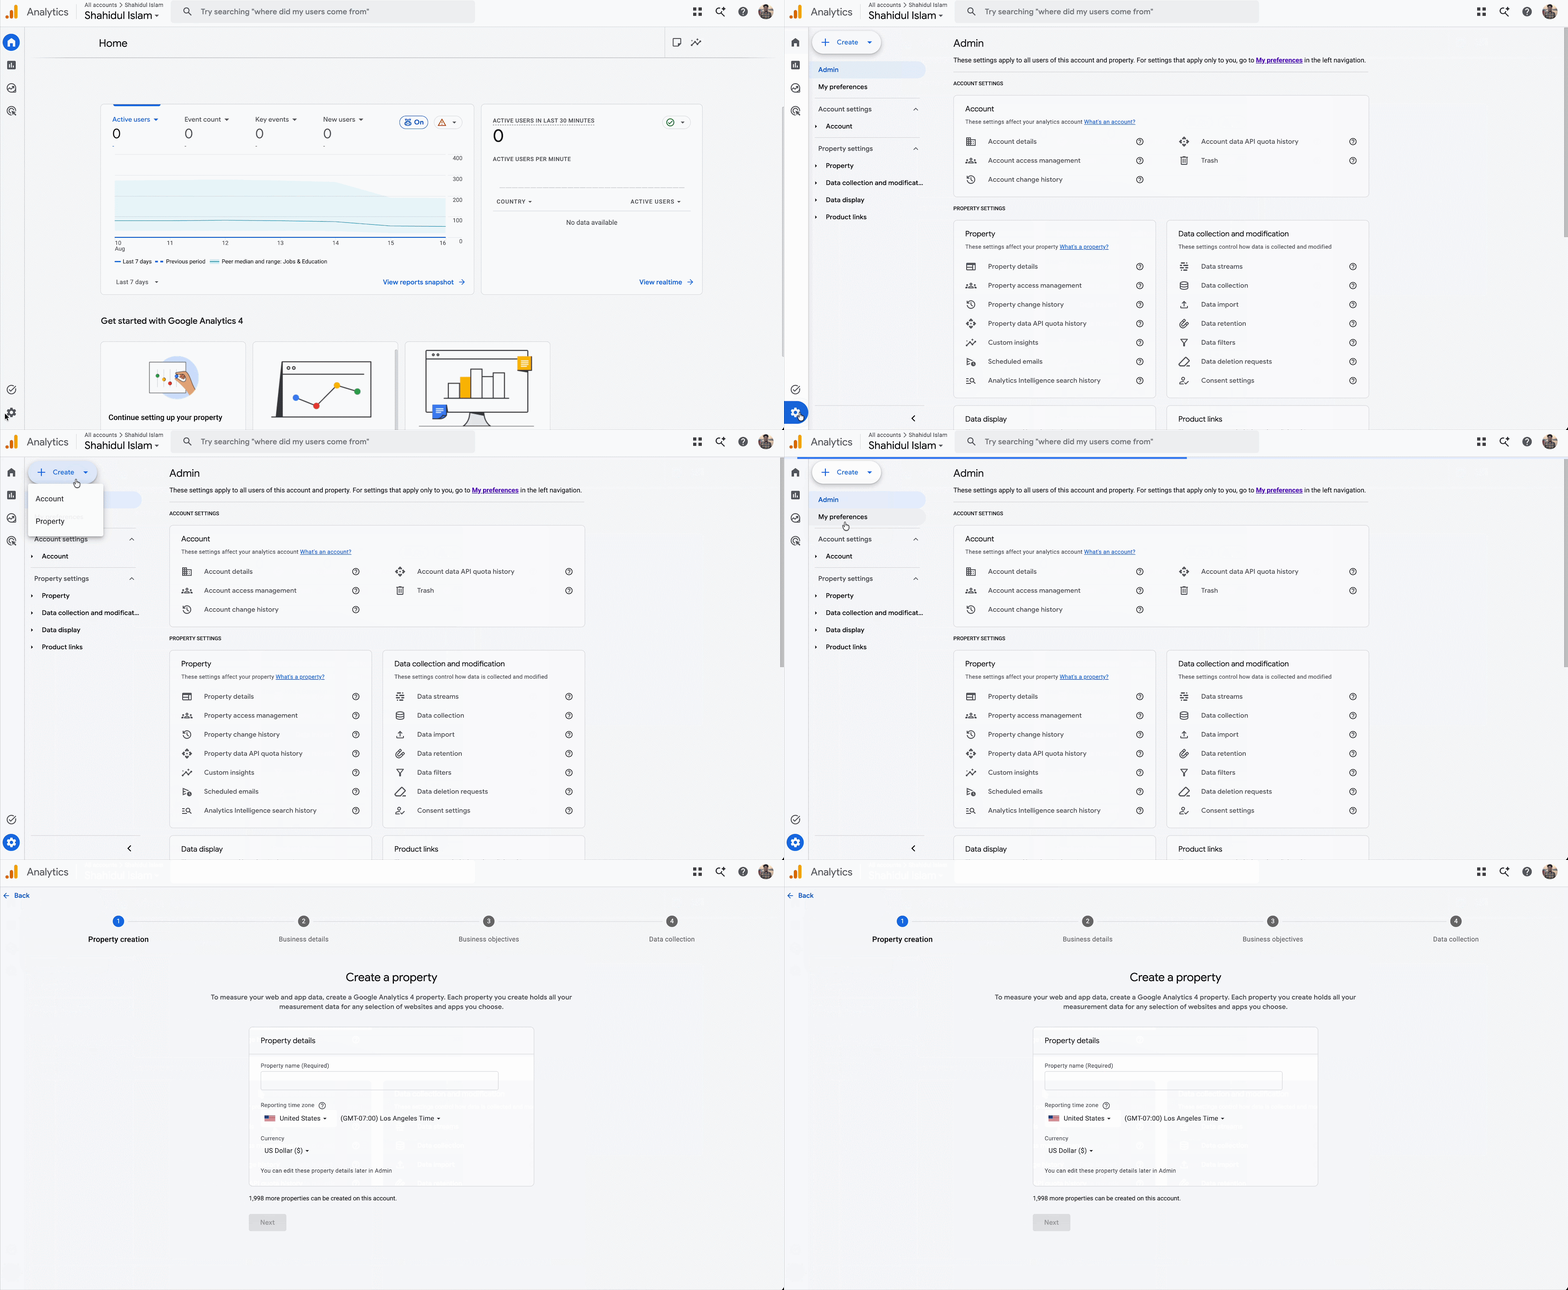
To create a profile, log in to your Google Analytics account & click on the Settings icon in the bottom left to go to the Admin panel. Now navigate to Create → Property to open a profile under your account.
Fill in all the information & you’ll get your profile Data Streams you need to get connected with NotificationX.
After you are done with the previous steps, simply follow the guidelines below to display the Google Analytics Visitor Count alert using NotificationX.
How to Configure Google Analytics Visitor Count Alert with NotificationX #
Follow the step-by-step instructions below to show Google Analytics visitor count alert on your WordPress website.
Step 1: Create a Google Analytics Notification Campaign #
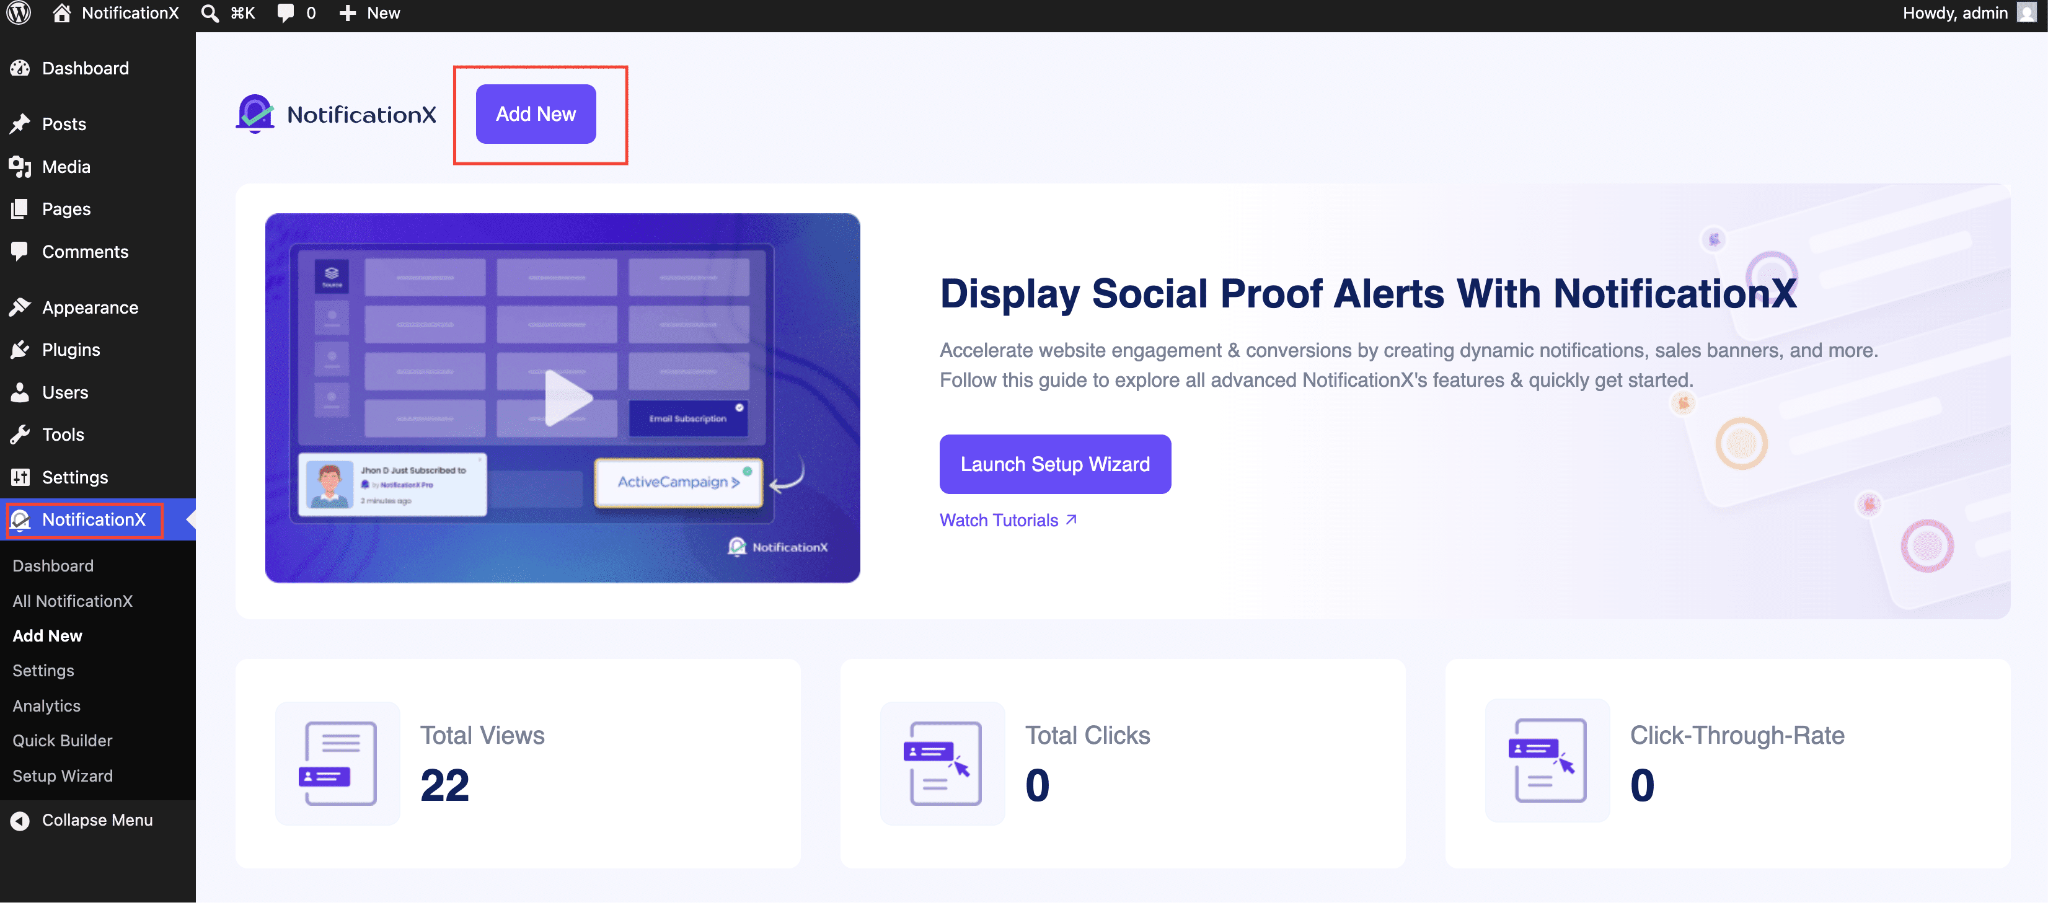
Go to your WordPress Dashboard and navigate to wp-admin → NotificationX. Then, right at the top, click on Add New.
Step 2: Select ‘Google Analytics’ as Source #
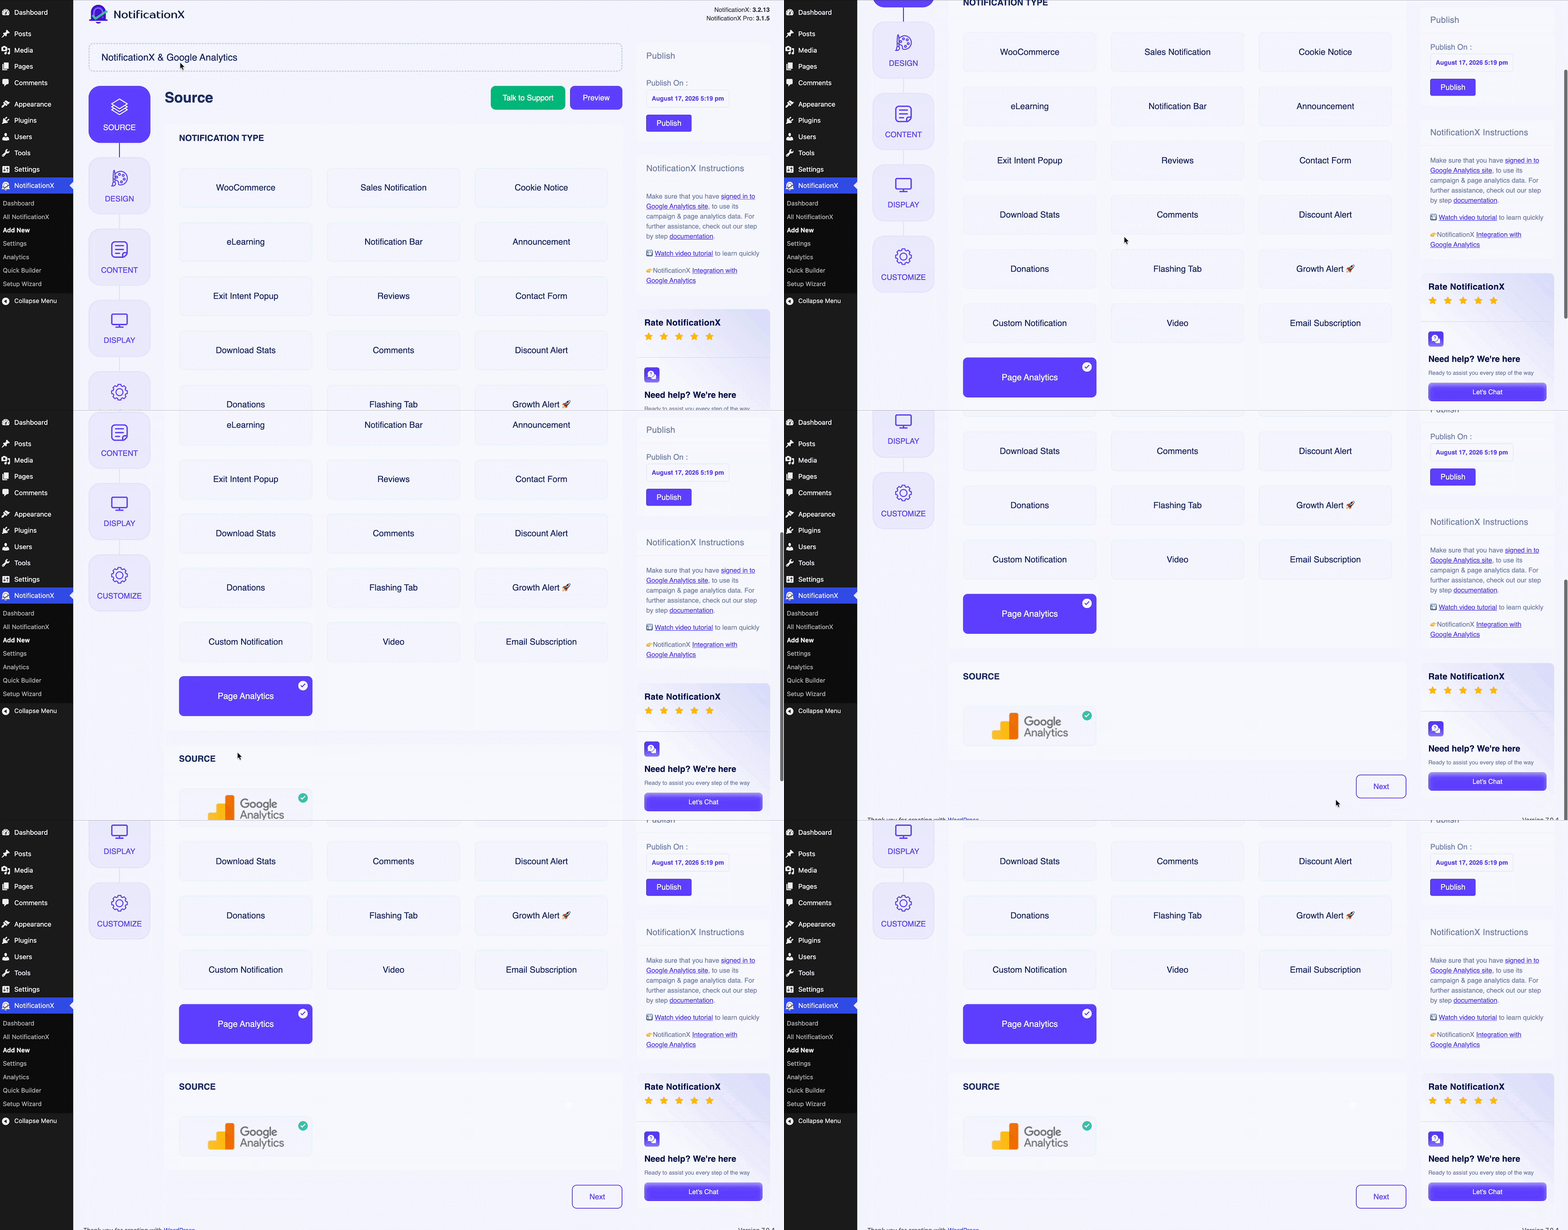
After you are done with step 1, you will be redirected to the ‘Source’ Tab page of your NotificationX. Simply put a Title and pick ‘Page Analytics’ as your Notification type. Afterward, simply pick ‘Google Analytics’ as your Source. Then, click on the ‘Next’ button.
Step 3: Choose a Design Theme #
From the ‘Design’ tab, you can choose a layout and also have the flexibility to use the ‘Advanced Design’ option to customize it as per your preference. From the ‘Themes’ section, the chosen layout is how the Google Analytics Visitor Count notification alert will be displayed on your website.
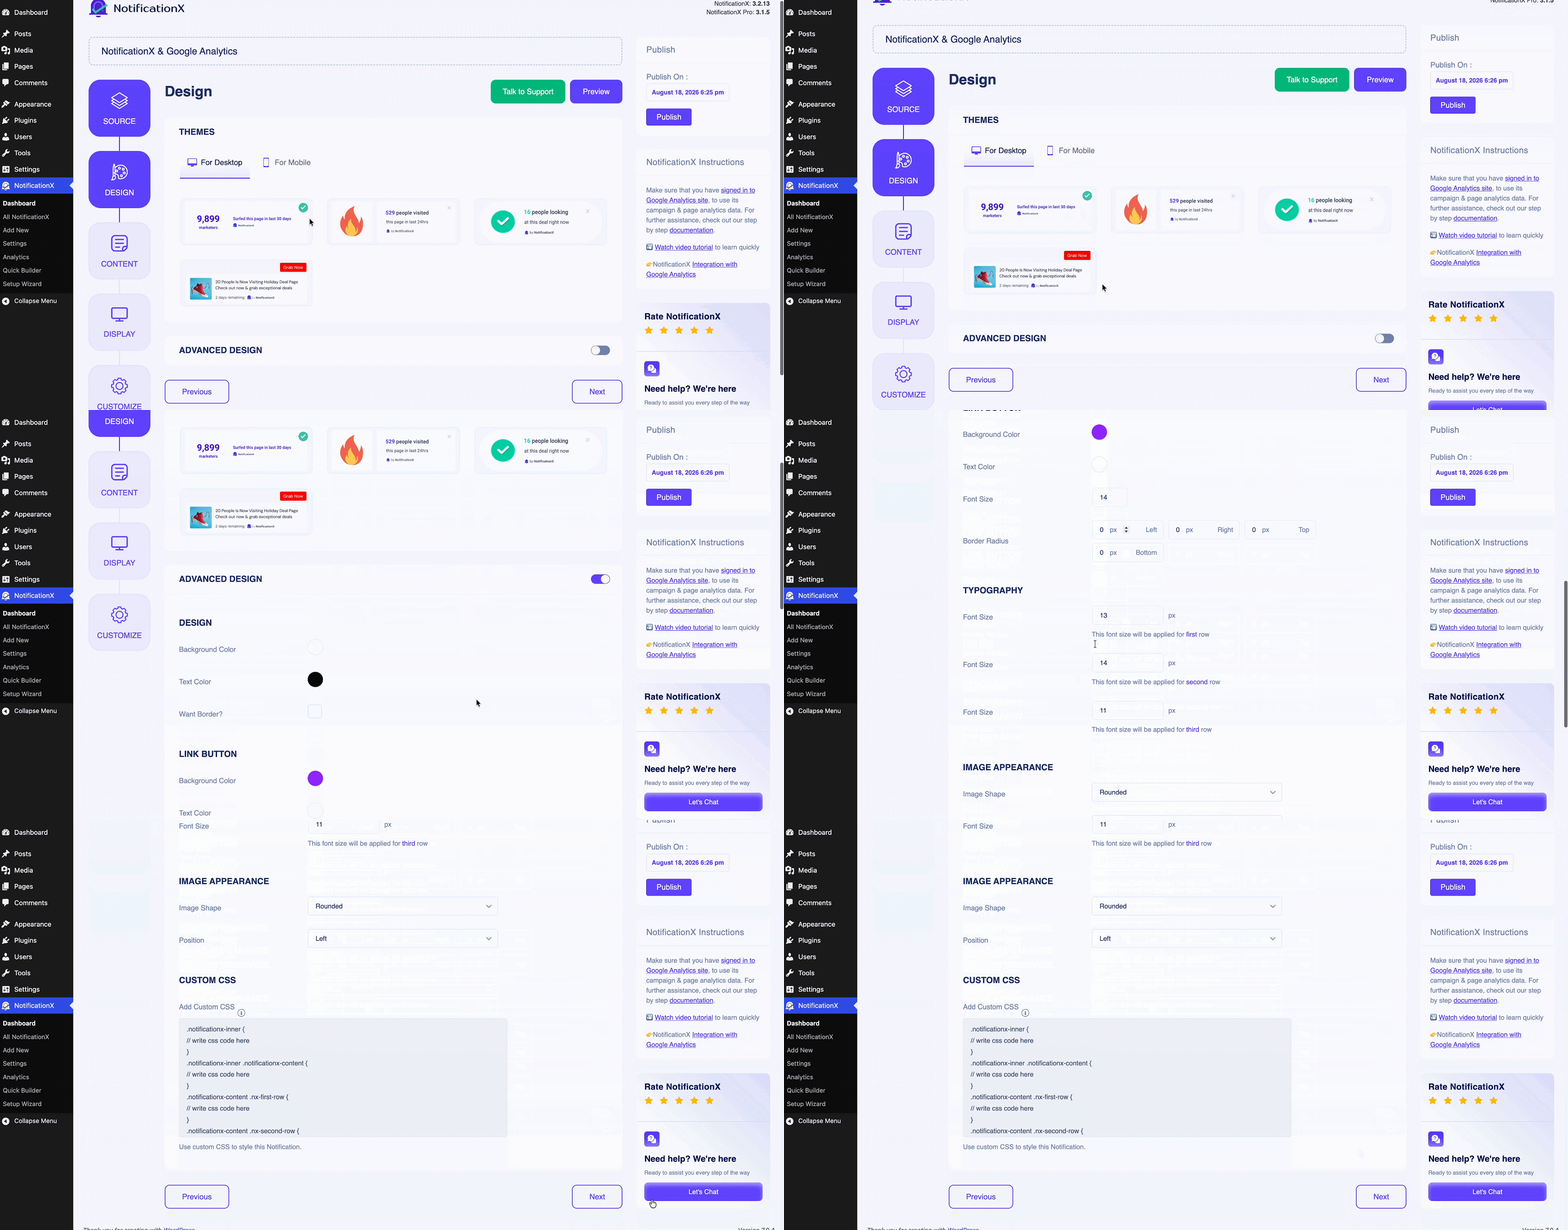
Additionally, you can modify your chosen Theme by using the ‘Advanced Design’ option. In this section, you can easily add styling to your design, image appearance, and typography. You can add a background or Text color for the notification popup. Besides, you can also add a Border and add styling to it. From the ‘Typography’ section, you can change the Font Size for each row as well.
Step 4: Configure Template Content #
You will then be redirected to the ‘Content’ tab from where you can modify your ‘Notification Template’ and add your preferred content text. You can easily go ahead and choose your preferred variables. These variables help to display the count of the visitors who have visited your website over a certain period of days/months/years.
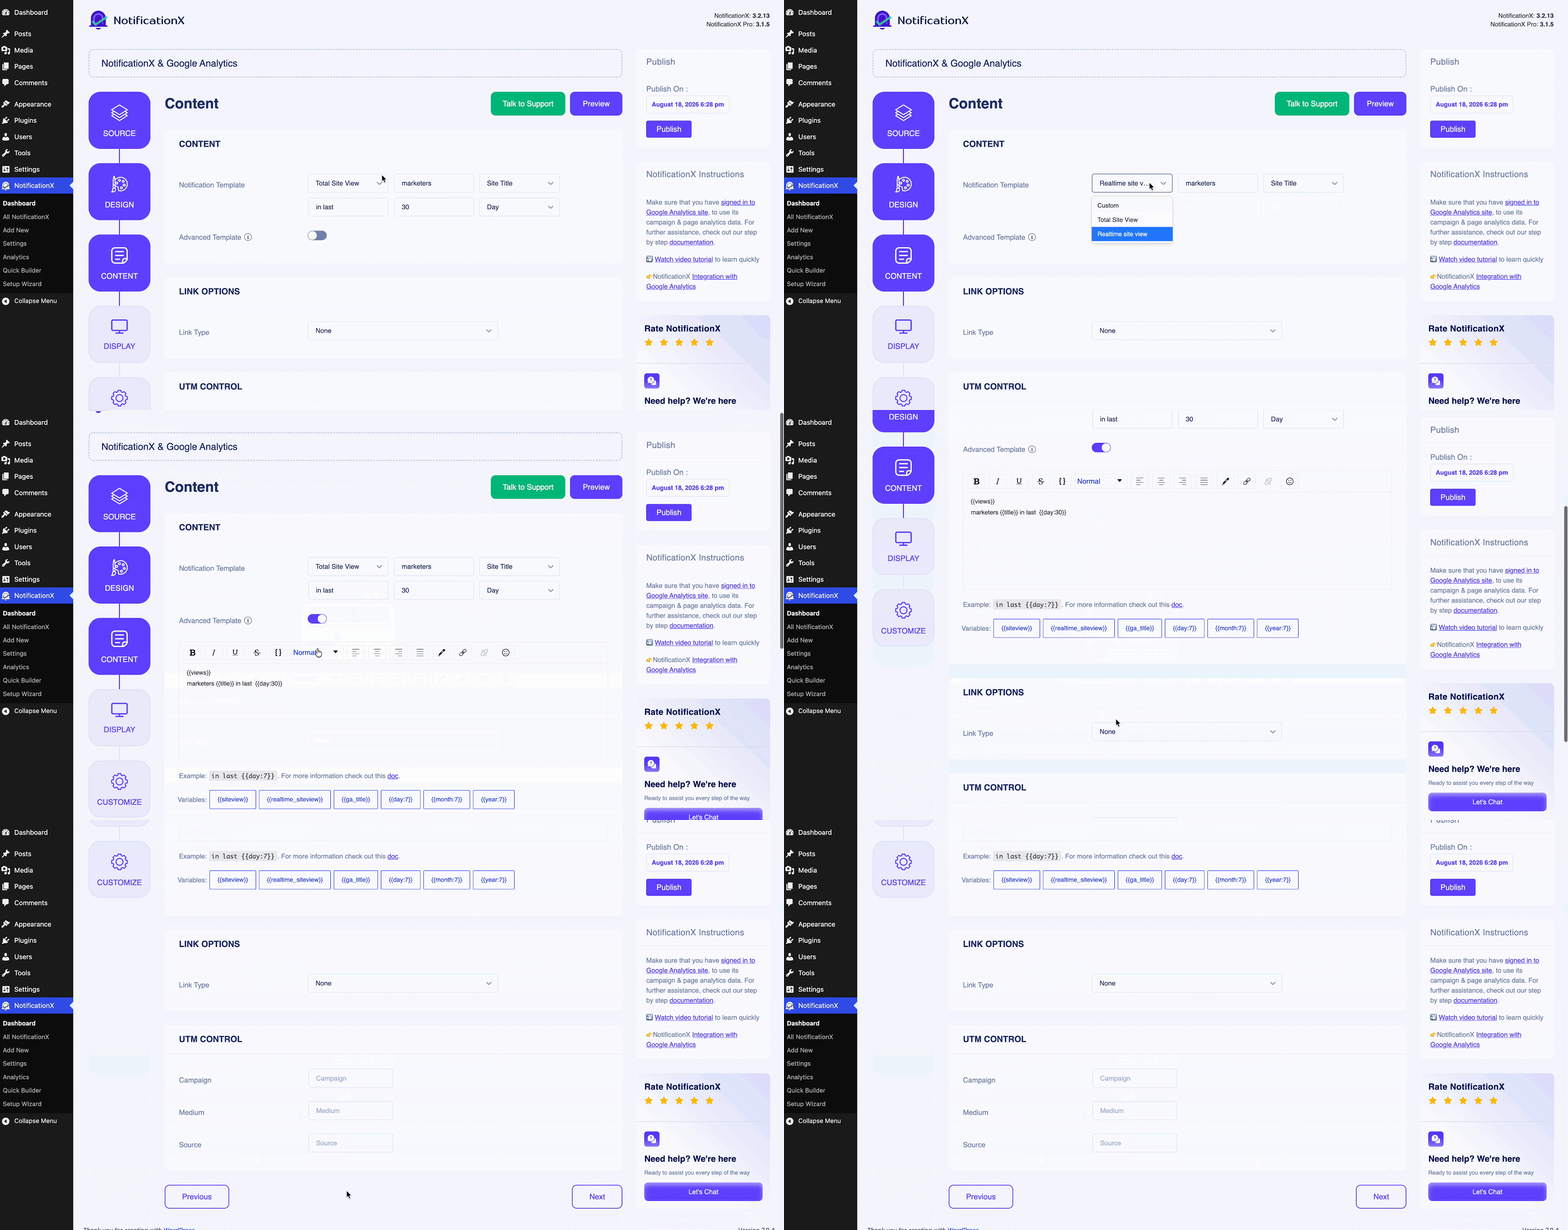
Moreover, you can even track the various types of campaigns through NotificationX as well. ‘UTM Control’ allows you to add ‘Campaign’, ‘Medium’ and ‘Source’ to your Google Analytics Visitor Count Alert.
Step 5: Customize Display Options #
In the ‘Display’ tab, there are two available sections: ‘Image’ & ‘Visibility’. From the ‘Image’ section, you can use the checkbox to display the default image or an avatar in the notification popup.
If the users don’t have any ‘Gravatar’ set in their profile, you can simply display the ‘Default’ image by selecting the ‘Default Image’ checkbox and by choosing one from some pre-defined images or uploading a default image.
From the ‘Visibility’ section, you can set the pages where you want to display the Google Analytics Visitor Count Alert. You also have the option to restrict the notification popup based on certain user roles: Always, Logged In & Logged Out.
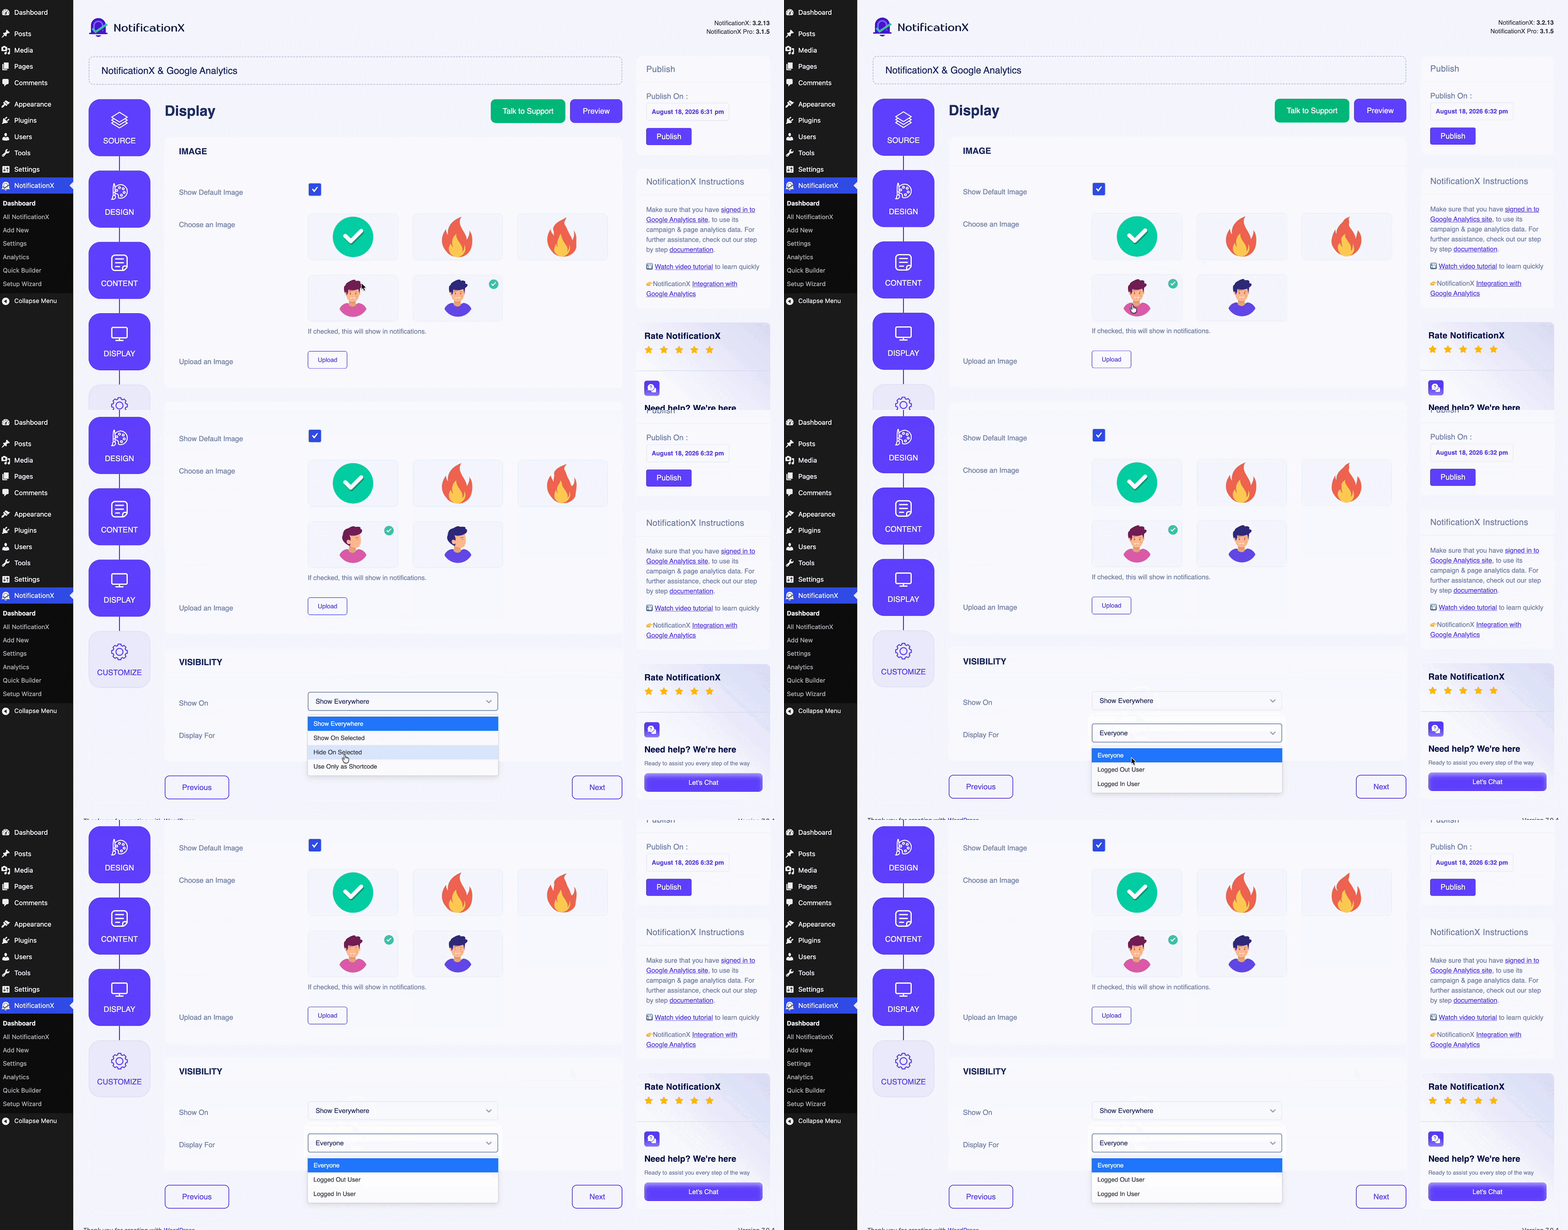
By default, ‘Show On’ is set to ‘Show Everywhere’; as a result, the Email Subscription popup will be displayed on every single page of your website. On the other hand, you can also specify the pages where you want to display or hide the ‘Google Analytics Visitor Count’ notification alert.
After you click on the ‘Next‘ button, you will be redirected to the ‘Customize’ Tab.
Step 6: Set Up Appearance #
Under the ‘Customize’ tab, you will find three separate sections: Appearance, Timing & Behavior. From the ‘Appearance’ section, you can set the position for the Google Analytics Visitor Count Alert to either at the Bottom Left or Bottom Right side of your website.
Besides, you can even set a max-width for your Notification Popup as well. You are also able to show a ‘Close Button’ which can be clicked to dismiss the Email Subscription alert.
Furthermore, you have the flexibility to hide the ‘Google Analytics Visitor Count Alert’ for mobile devices if you want to as well.
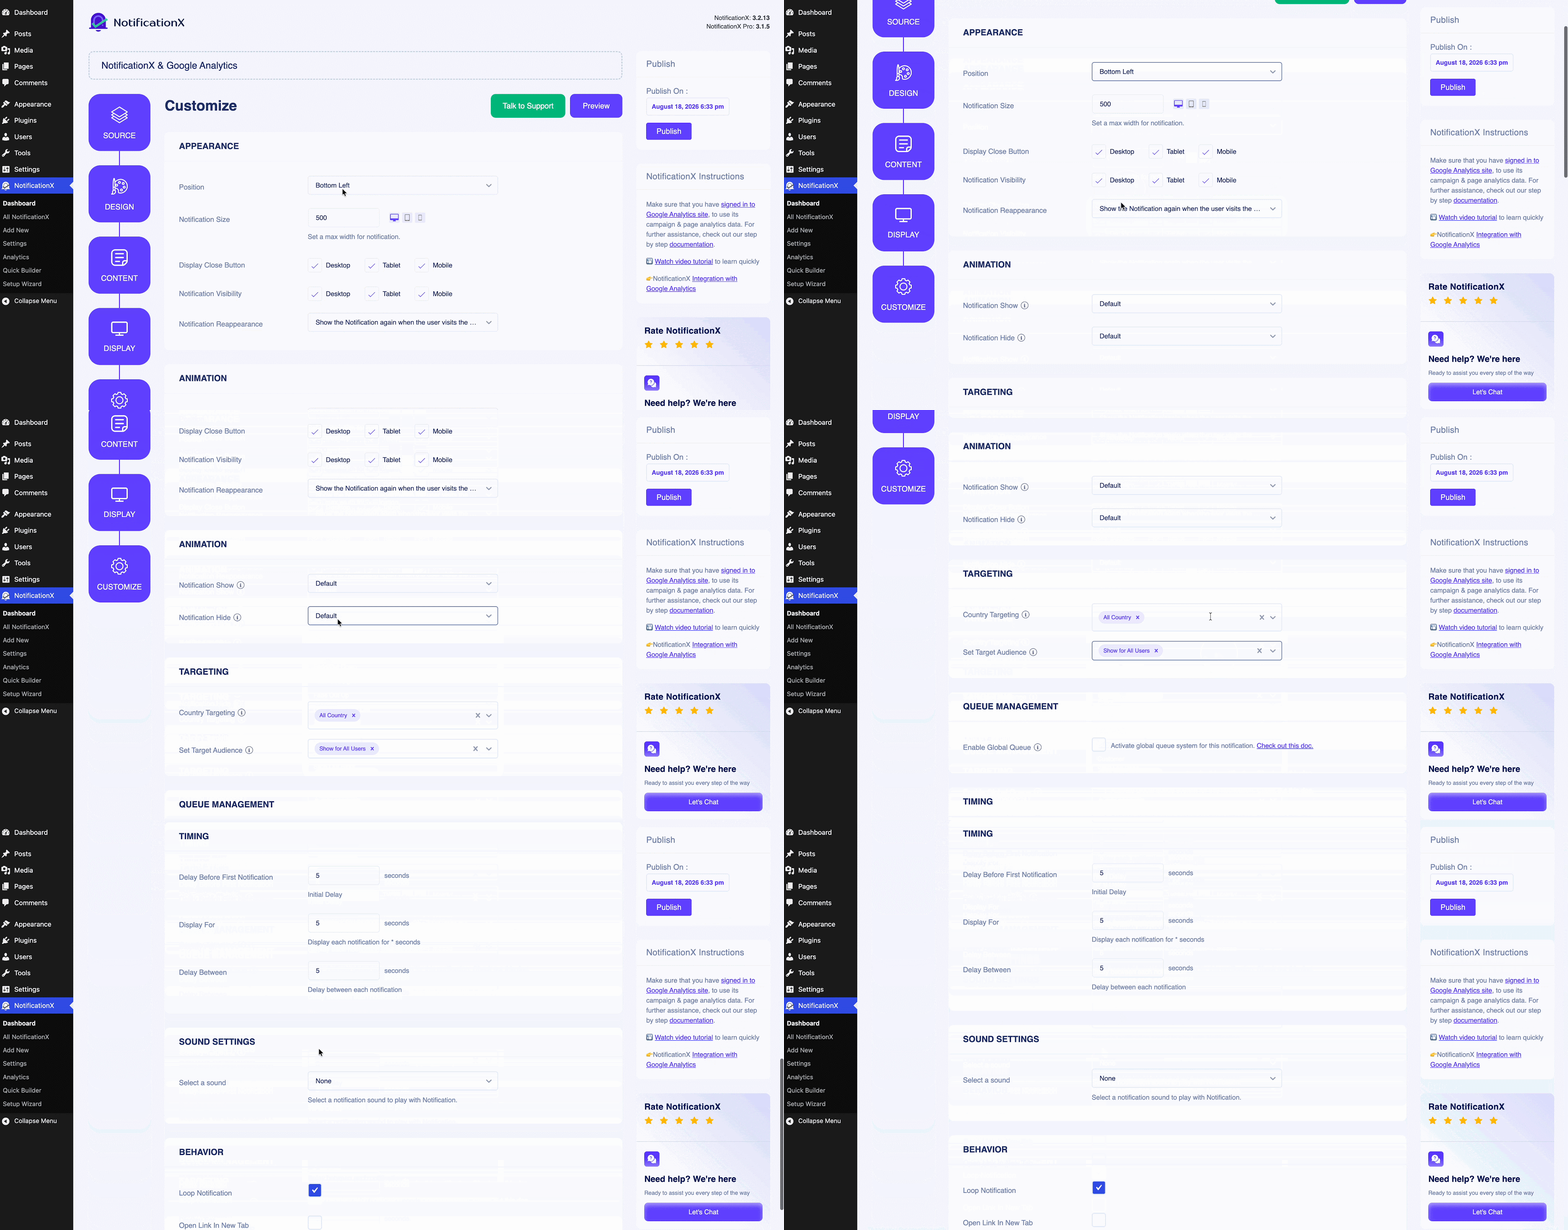
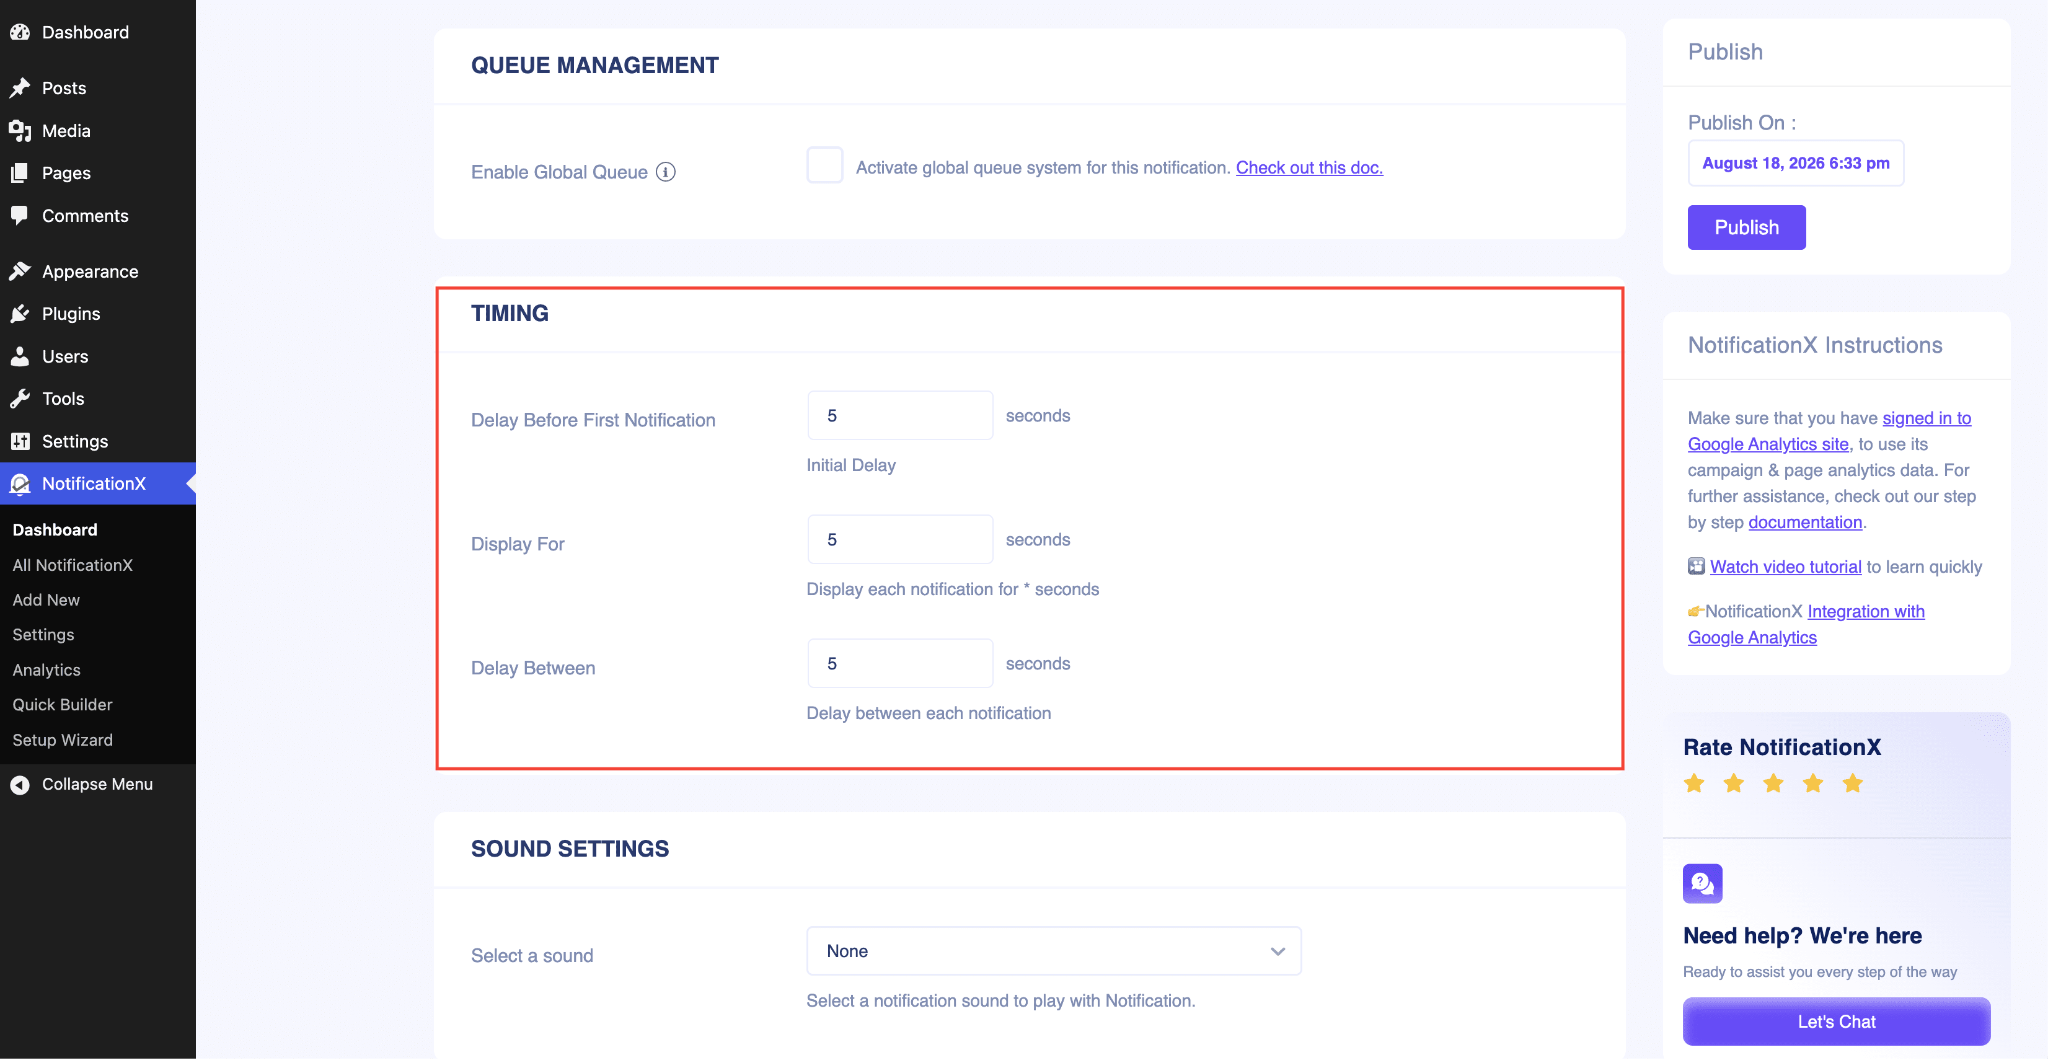
Besides, you also have the freedom to set the time for ‘Initial’, ‘Display For’ & ‘Delay Between’ options as per your preference from the ‘Timing’ section. You can set an initial time after which your ‘Google Analytics Visitor Count Alert’ notification will be popped up. By default, it is set to 5 seconds.
You can also set a time limit for how long you want each notification popup to be displayed by modifying the ‘Display For’ field. To choose a time interval between two notifications of Google Analytics Visitor Count Alert, simply set the time in the ‘Display Between’ field.
From the ‘Behaviour’ section, by checking the ‘Loop Notification’ box, the notification popup will keep on displaying. You can disable this as well. When a visitor clicks on the notification popup, you can control whether you want the link to open in a new window or a new tab from the ‘Open link in new tab’ checkbox.
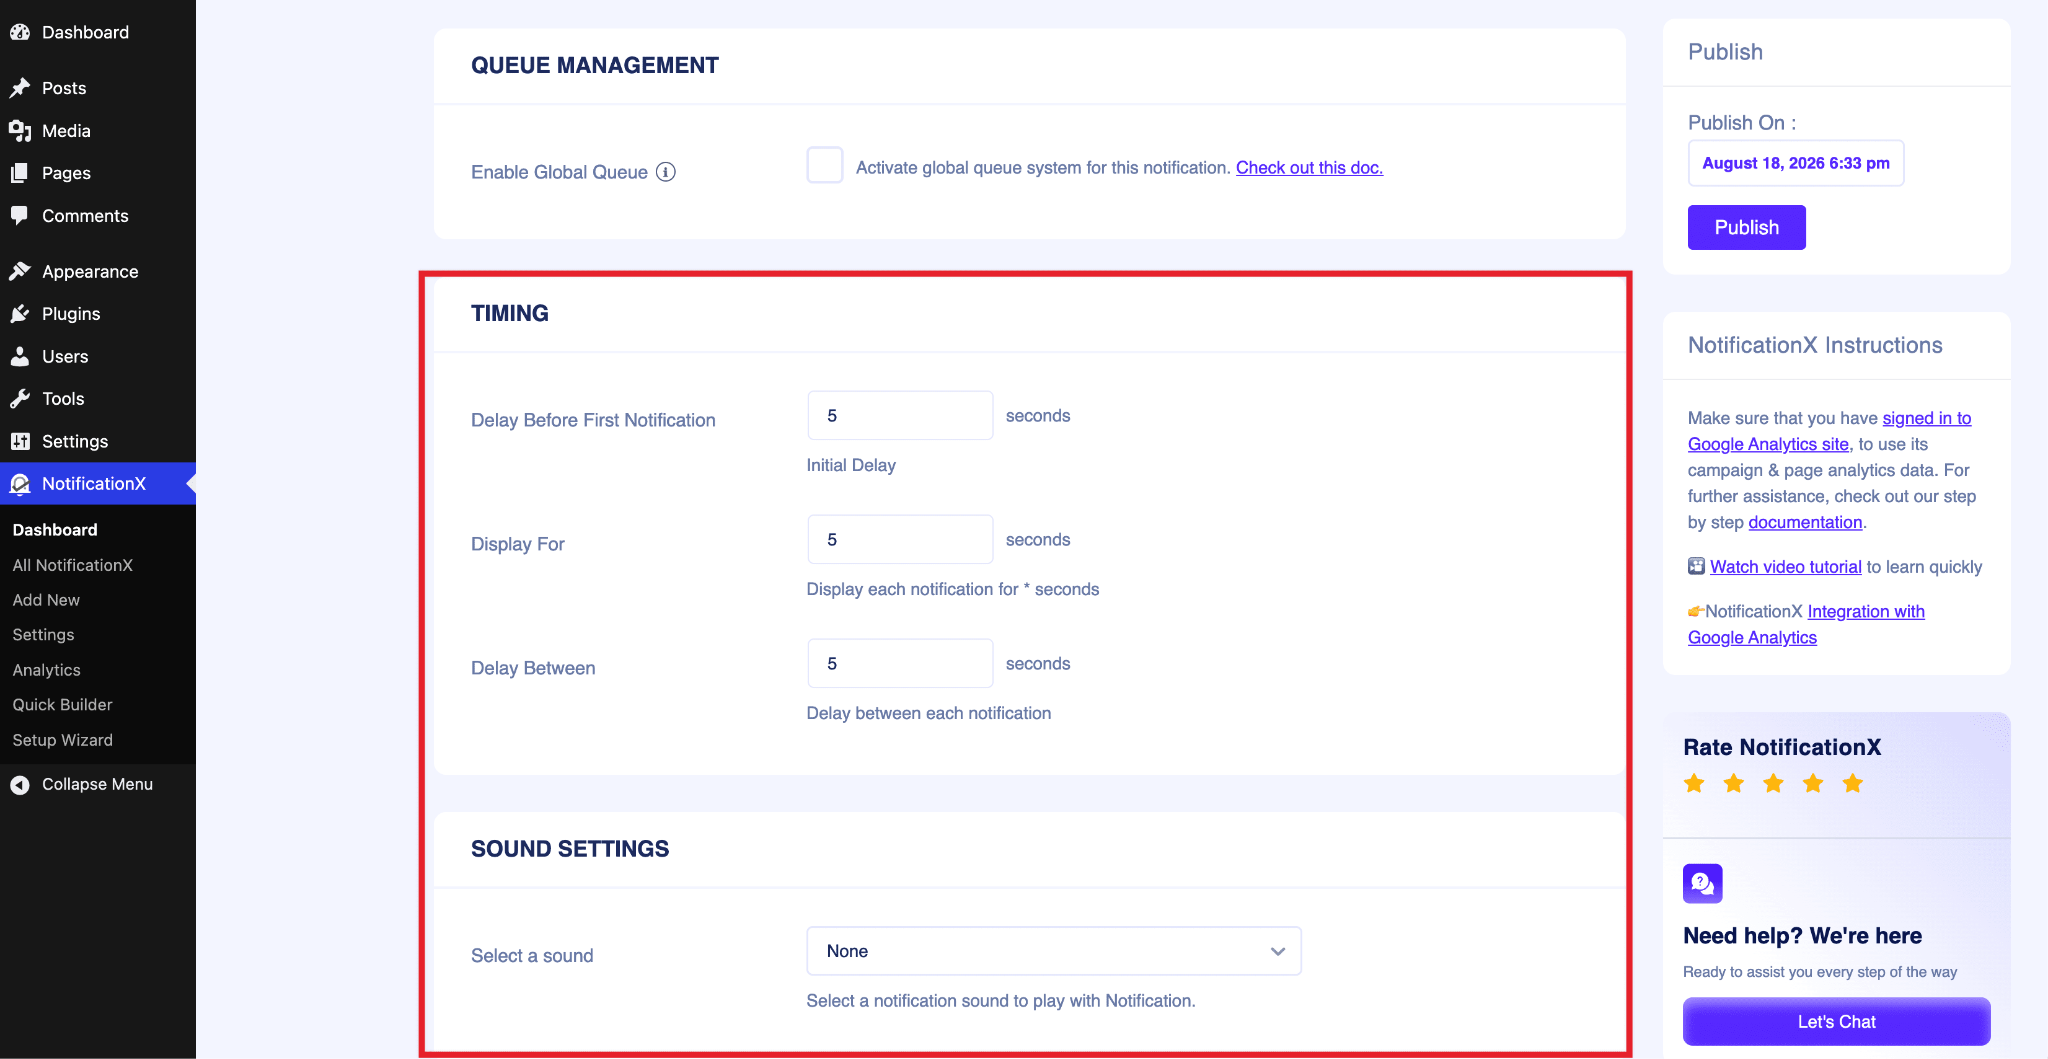
On the other hand, the ‘Sound Settings’ section allows you to pick a Sound Alert for your Google Analytics Visitor Count popup. You can control its Volume as well.
Step 7: Publish Your Notification #
After you have completed step 6, click on the ‘Publish’ button. As a result, the ‘Google Analytics Visitor Count Alert’ will be successfully created. By following these mentioned steps and a bit more modifying & styling, your final outcome would look something like this.
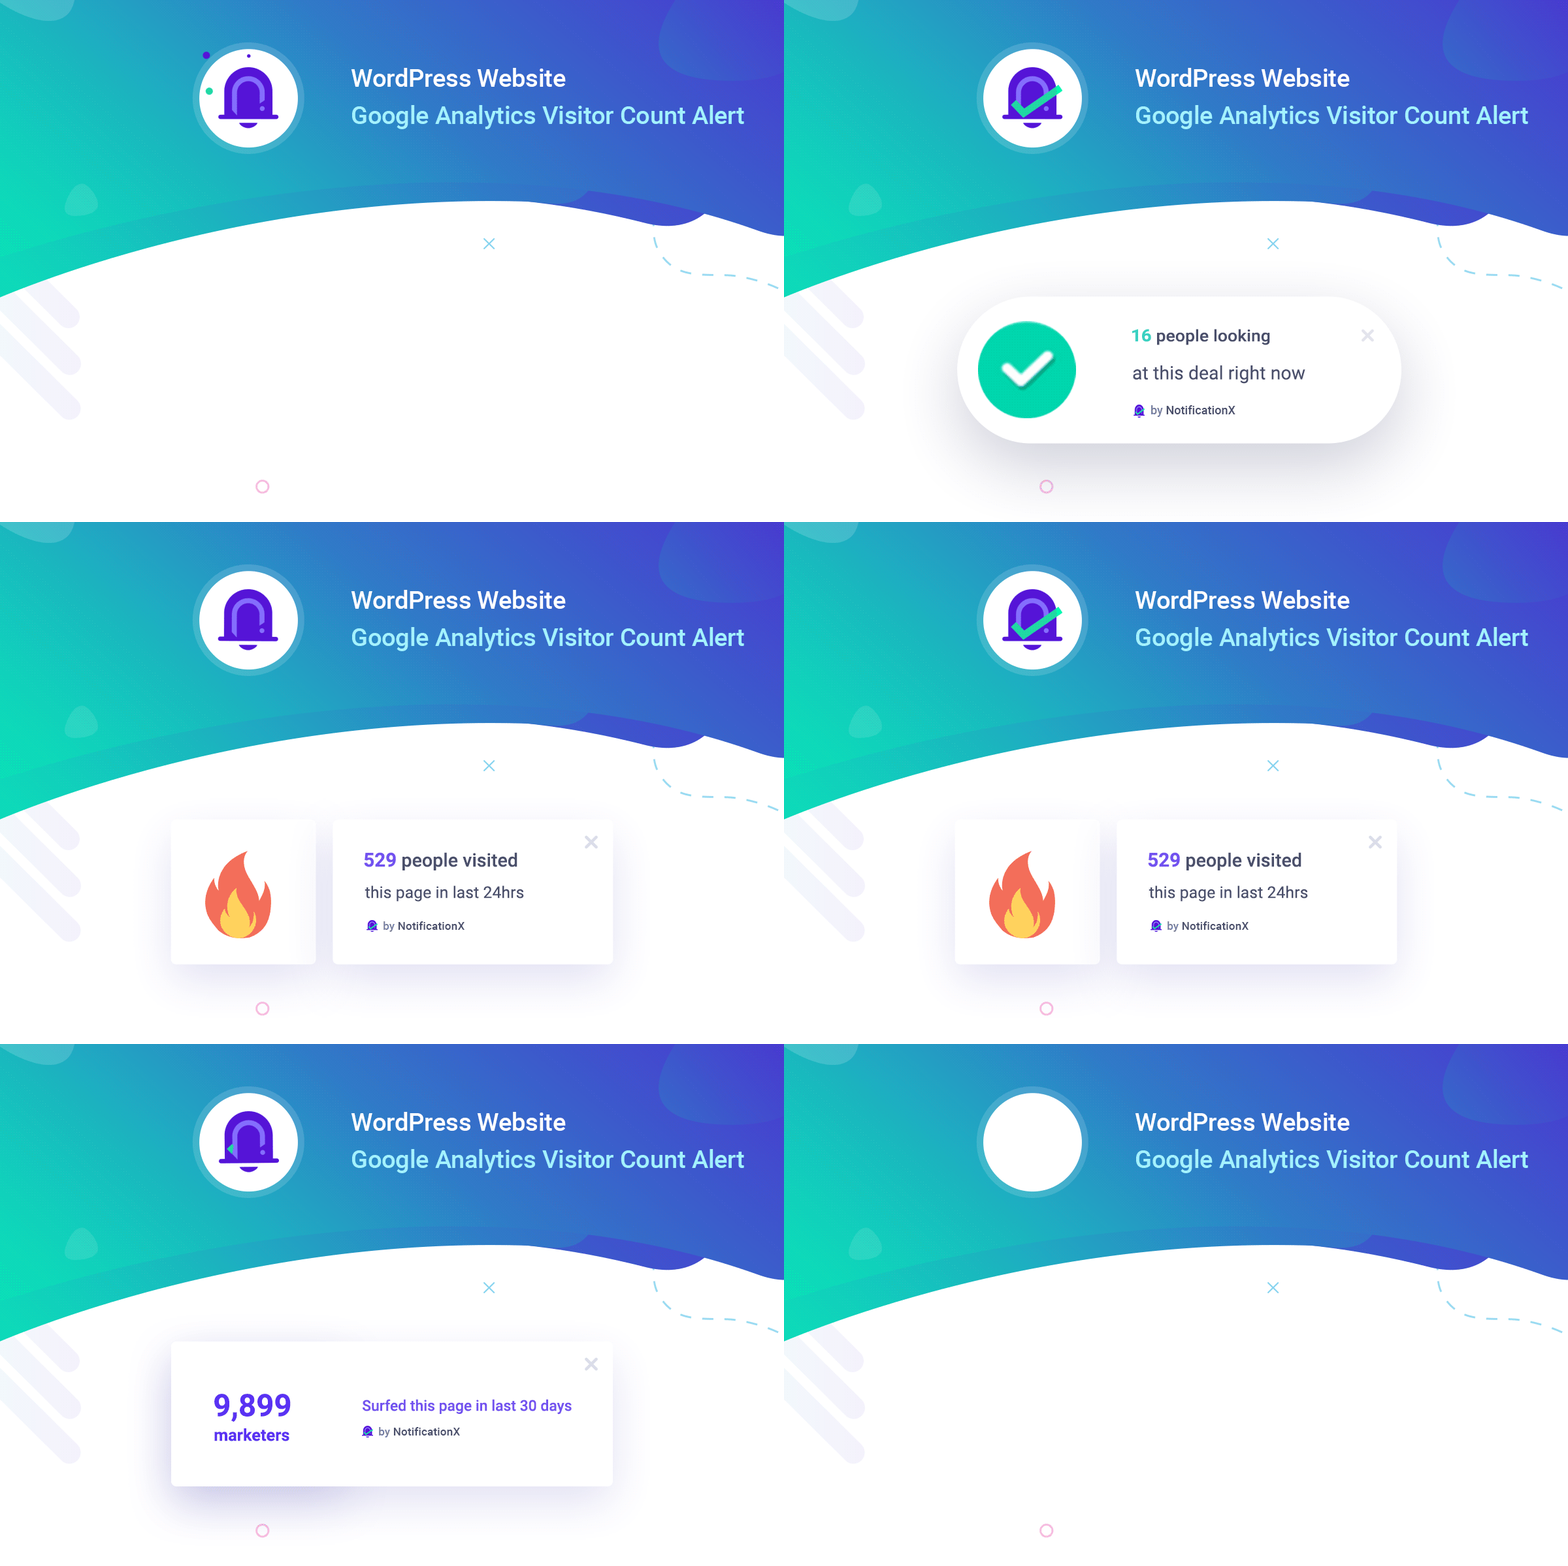
This is how you can easily design and display an attractive ‘Google Analytics Visitor Count’ alert on your WordPress website using NotificationX.
If you face any issues, you can contact our Support Team here.
 English
  Arabic
  Indonesian
  Spanish
  Portuguese
  German
  Dutch
Dutch  Russian
  Hindi
Hindi  French
  Japanese
  Chinese
  Vietnamese
  Malay
Malay