

WARNINGThis tutorial assumes your have access to a compatible Intel TDX Server ready to be configured with dstack. Check the Hardware Requirements for more information or skip setting everything up from scratch and Sign-up for Phala Cloud Account.
For the latest information, please refer to the dstack README.
dstack
dstack is a developer friendly and security first SDK to simplify the deployment of arbitrary Docker-based apps into TEE. Main features:- 🔒 Deploy containerized apps securely in TEE in minutes
- 🛠️ Use familiar tools - just write a docker-compose.yaml
- 🔑 Safely manage secrets and sensitive data
- 📡 Expose services via built-in TLS termination
Overview
Components in dstack:dstack-vmm: A service running in bare TDX host to manage CVMsdstack-gateway: A reverse proxy to forward TLS connections to CVMsdstack-kms: A KMS server to generate keys for CVMsdstack-guest-agent: A service running in CVM to serve containers’ key derivation and attestation requestsmeta-dstack: A Yocto meta layer to build CVM guest images
Directory structure
Build and play locally
Prerequisites
- A bare metal TDX server setup following canonical/tdx
- Public IPv4 address assigned to the machine
- At least 16GB RAM, 100GB free disk space.
- A domain with DNS access if you want to set up
dstack-gatewayfor Zero Trust HTTPS
Install dependencies
Build and run
build-config.sh configuration file according to your environment requirements. The file contains network ports, domain settings, and other important parameters. Once configured, run the build script again to generate the necessary artifacts:
Download guest image or build guest image from source
- Run
./dstack-kms -c kms.toml - Run
sudo ./dstack-gateway -c gateway.toml - Run
./dstack-vmm -c vmm.toml
Deploy an App
Open the dstack-vmm webpage http://localhost:9080(change the port according to your configuration) on your local machine to deploy adocker-compose.yaml file:
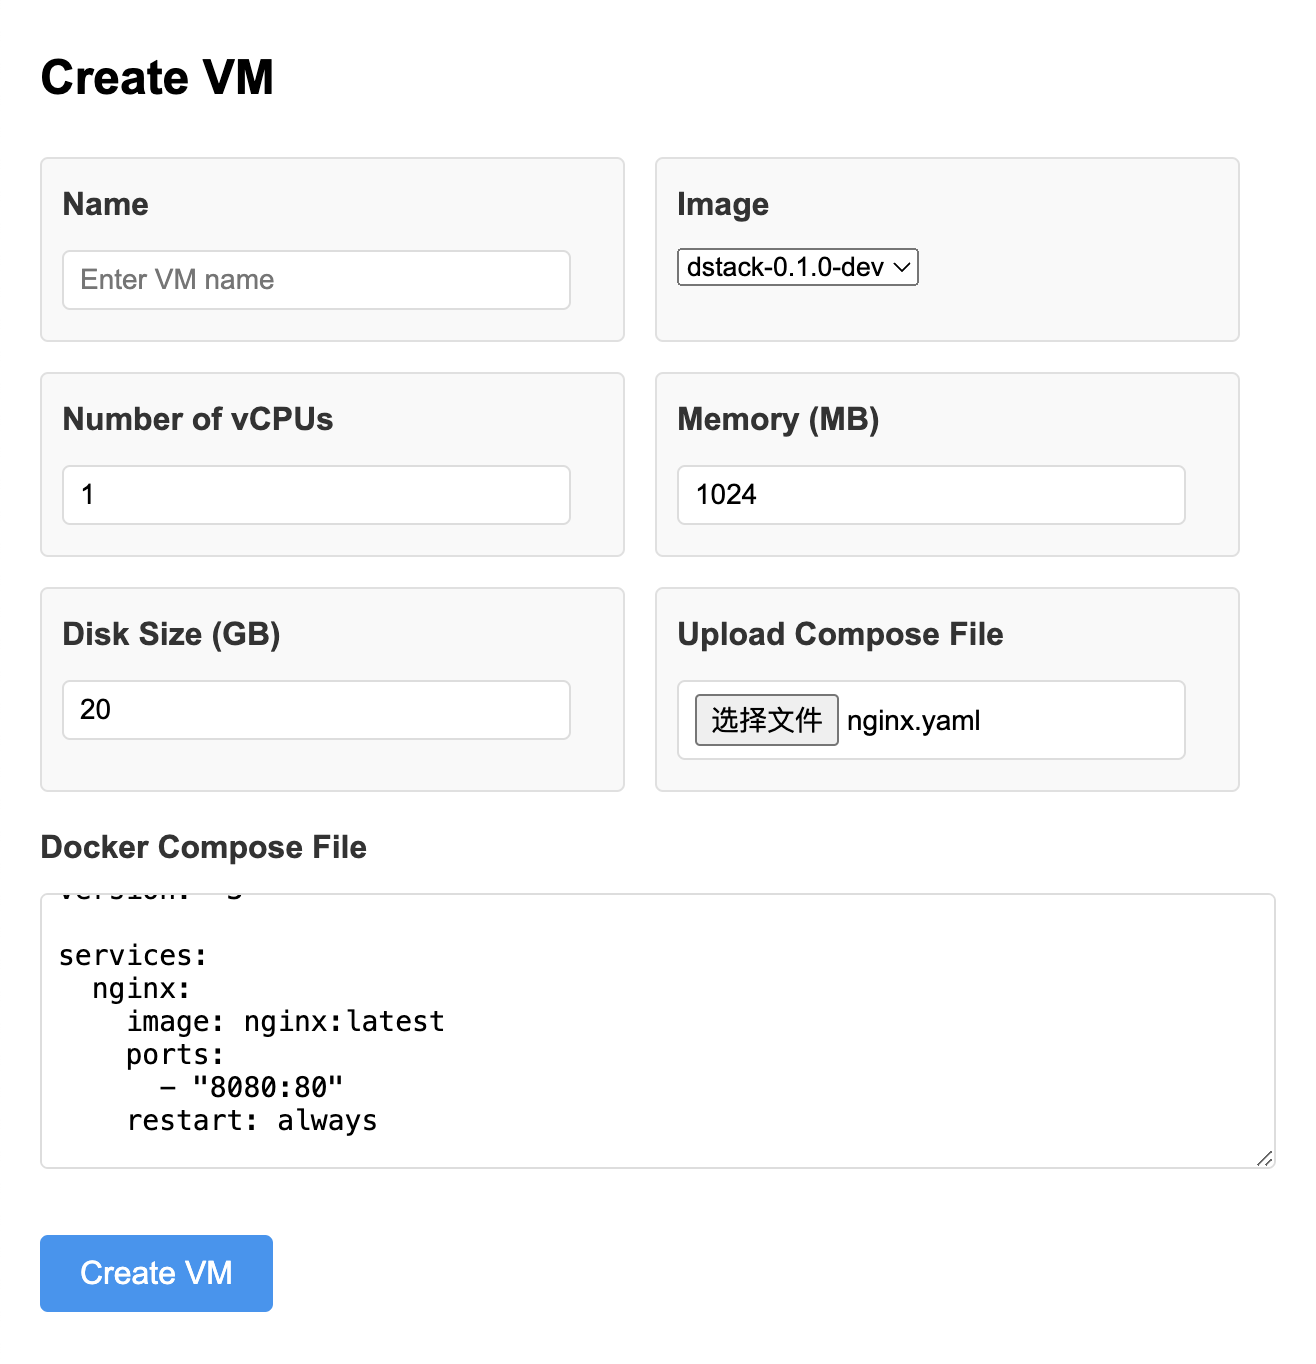
dstack-vmm web interface
- Click the [Logs] button to see the logs of the CVM, you can see if the container is finished starting there.
-
Once the container is running, you can click the [Dashboard] button to see some information of the container. And the logs of the containers can be seen in the [Dashboard] page.
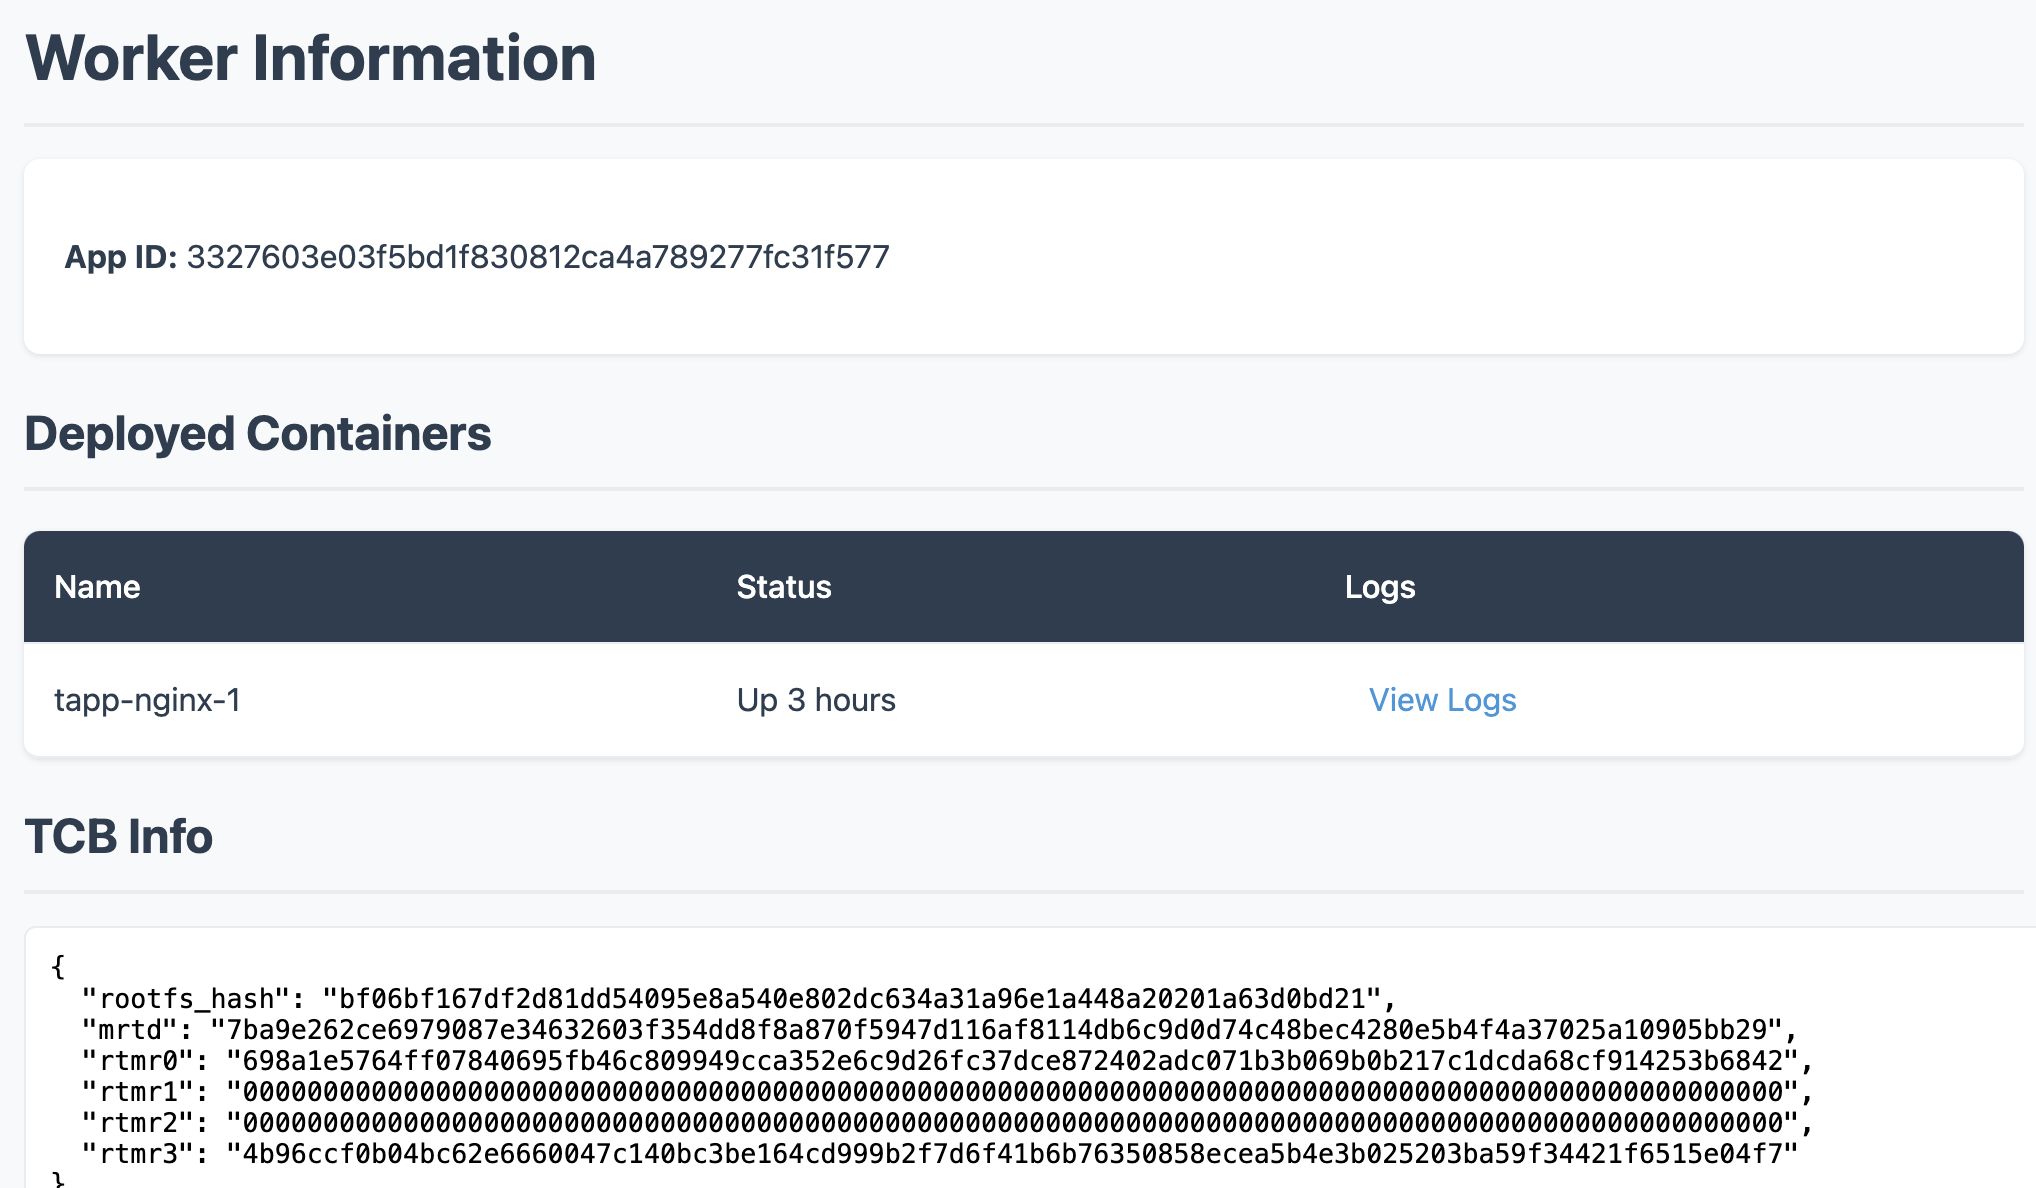
dstack guest agent status
-
You can open dstack-gateway’s dashboard at https://localhost:9070 to see the CVM’s wireguard ip address, as shown below:

dstack gateway dashboard
Pass Secrets to Apps
When deploying a new App, you can pass private data via Encrypted Environment Variables. These variables can be referenced in the docker-compose.yaml file as shown below: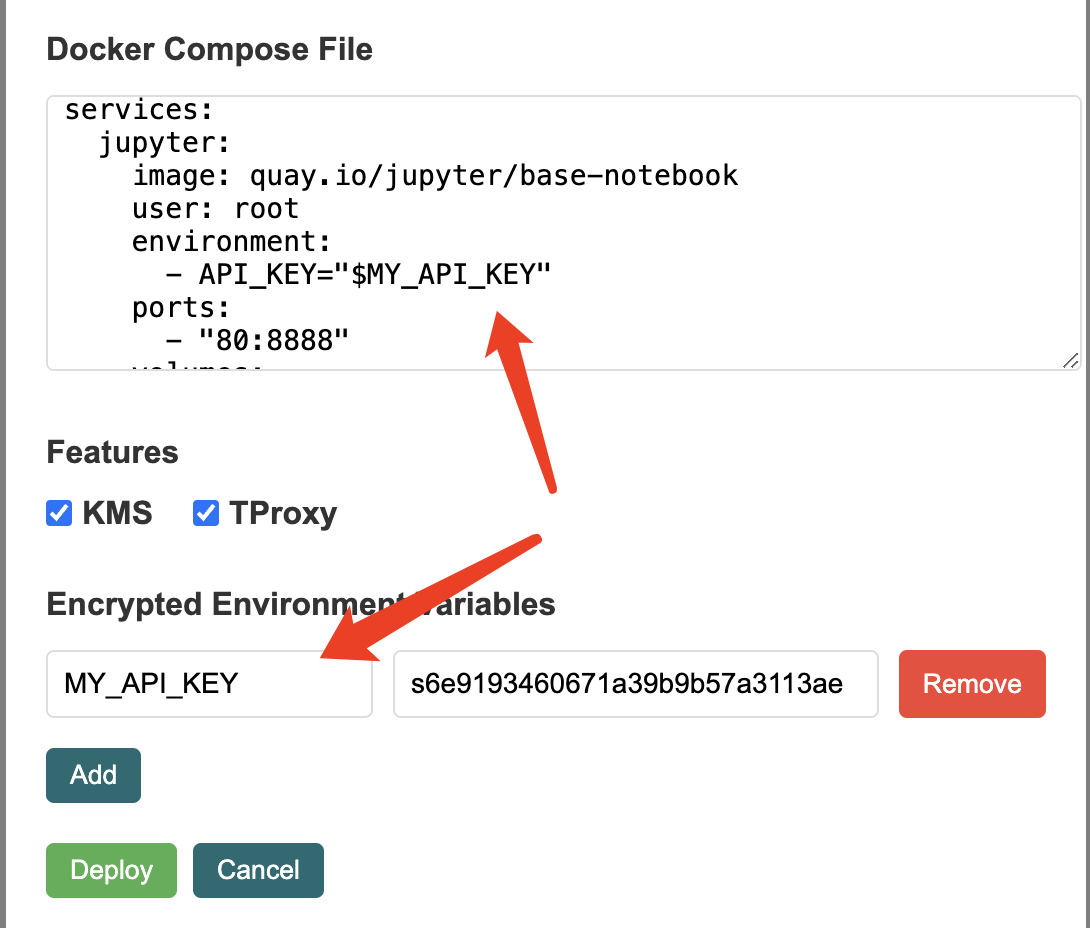
dstack secret management
Access the App
Once the app is deployed and listening on an HTTP port, you can access the HTTP service via tproxy’s public domain. The ingress mapping rules are:<id>[s].<base_domain>maps to port80or443if withsin the CVM.<id>-<port>[s].<base_domain>maps to port<port>in the CVM.
3327603e03f5bd1f830812ca4a789277fc31f577-8080.app.kvin.wang maps to port 8080 in the CVM.
Where the <id> can be either the app id or the instance id. If the app id is used, one of the instances will be selected by the load balancer.If the
id-port part ends with s, it means the TLS connection will be passthrough to the app rather than terminating at dstack-gateway.
You can also ssh into the CVM to inspect more information, if your deployment uses the image dstack-x.x.x-dev:
Getting TDX quote in docker container
To get a TDX quote within app containers:-
Mount
/var/run/dstack.sockto the target container indocker-compose.yaml -
Execute the quote request command in the container.
Container logs
Container logs can be obtained from the CVM’sdashboard page or by curl:
<appid> and <container name> with actual values. Available parameters:
- since=0: Starting Unix timestamp for log retrieval
- until=0: Ending Unix timestamp for log retrieval
- follow: Enables continuous log streaming
- text: Returns human-readable text instead of base64 encoding
- timestamps: Adds timestamps to each log line
- bare: Returns the raw log lines without json format
TLS Passthrough with Custom Domain
dstack-gateway supports TLS passthrough for custom domains. See the example here for more details.Upgrade an App
Got to the dstack-vmm webpage, click the [Upgrade] button, select or paste the compose file you want to upgrade to, and click the [Upgrade] button again.The app id does not change after the upgrade. Stop and start the app to apply the upgrade.
HTTPS Certificate Transparency
In the tutorial above, we used a TLS certificate with a private key external to the TEE. To establish trust, we need to generate and maintain the certificate’s private key within the TEE and provide evidence that all TLS certificates for the domain were originate solely from dstack-gateway CVM. By combining Certificate Transparency Logs and CAA DNS records, we can make best effort to minimize security risks. Here’s our approach:- Set CAA records to allow only the account created in dstack-gateway CVM to request Certificates.
- Launch a program to monitor Certificate Transparency Log and give alarm once any certificate issued to a pubkey that isn’t generated by dstack-gateway CVM.
Configurations
To launch Certbot, you need to own a domain hosted on Cloudflare. Obtain an API token with DNS operation permissions from the Cloudflare dashboard. Configure it in thebuild-config.sh:
Launch certbot
Then run the certbot in thebuild/ and you will see the following log:
-
Registered to letsencrypt and got a new account
https://acme-staging-v02.api.letsencrypt.org/acme/acct/168601853 -
Auto set CAA records for the domain on cloudflare, you can open the CF dashboard to see the record:

certbot CAA record configuration
- Auto requested a new certificate from Let’s Encrypt. Automatically renews the certificate to maintain its validity
Launch dstack-gateway
Execute dstack-gateway withsudo ./dstack-gateway -c gateway.toml, then access the web portal to check the dstack-gateway CVM managed Let’s Encrypt account. The account’s private key remains securely sealed within the TEE.
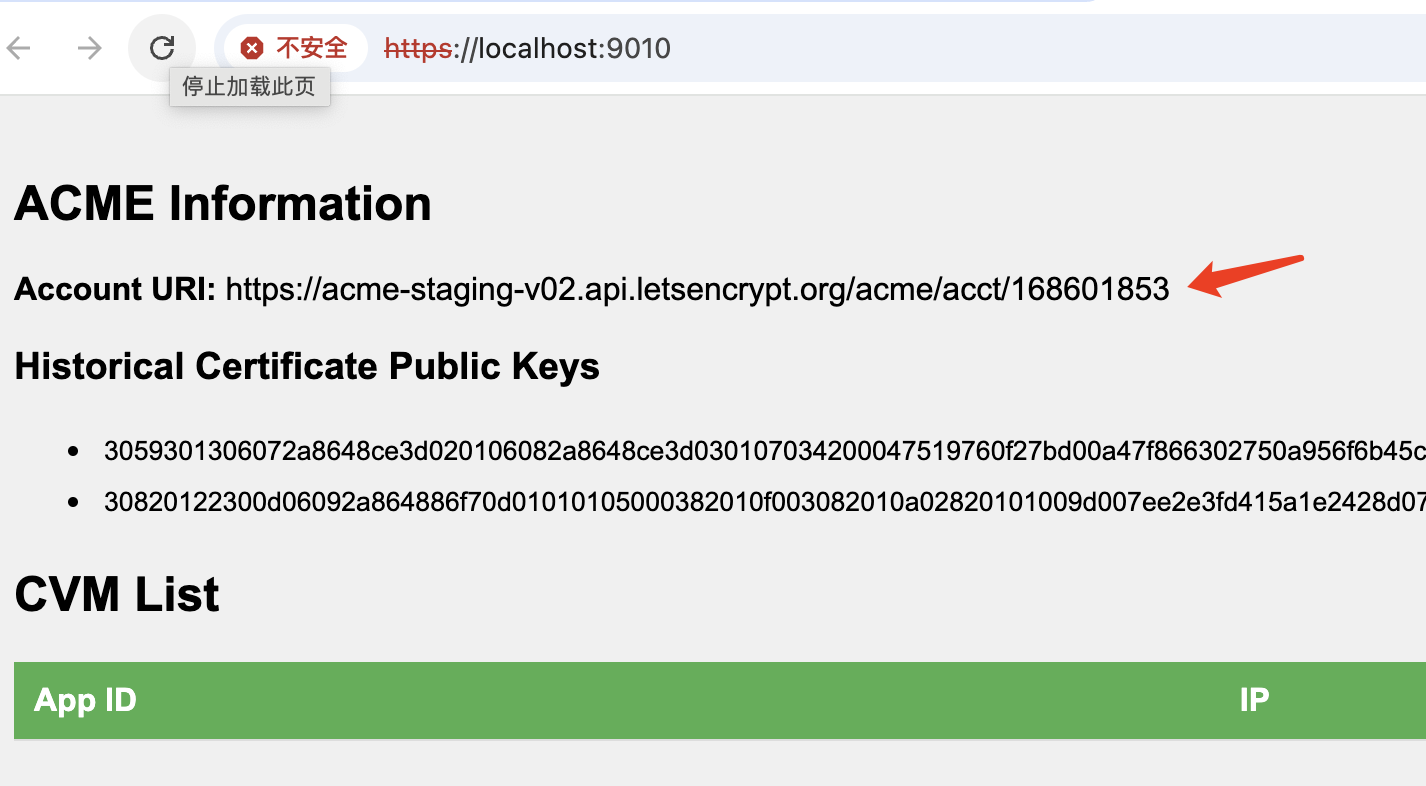
dstack gateway account ID
Certificate transparency log monitor
To enhance security, we’ve limited TLS certificate issuance to dstack-gateway via CAA records. However, since these records can be modified through Cloudflare’s domain management, we need to implement global CA certificate monitoring to maintain security oversight.ct_monitor tracks Certificate Transparency logs via https://crt.sh, comparing their public key with the ones got from dstack-gateway RPC. It immediately alerts when detecting unauthorized certificates not issued through dstack-gateway:
Troubleshooting
Error from dstack-vmm: qemu-system-x86_64: -device vhost-vsock-pci,guest-cid=: vhost-vsock: unable to set guest cid: Address already in use
dstack-vmm may throw this error when creating a new VM if the Unix Socket CID is occupied. To solve the problem, first, you should list the occupied CID:
build/vmm.toml file and restart dstack-vmm. This error should disappear. For example, you may find 33000-34000 free to use:
build-config.sh instead, because vmm.toml file is generated by build.sh. Its content is derived from build-config.sh.
You may encounter this problem when upgrading from an older version of dstack, because CID was introduced in build-config.sh in later versions. In such case, please follow the docs to add the missing entries in build-config.sh and rebuild dstack.
Error: Operation not permitted when building guest image
When running../build.sh guest, you might encounter this error:
Contributors
dstack is proudly built by open source and Pi-rateship contributors:- Phala Network: Kevin Wang, Shelven Zhou, Leechael
- Teleport: Andrew Miller, Sxy Sun
- Flashbots: Tina, Mateusz, Dmarz, Moe
- Ithaca: Georgios
- Fabric: @gaoist
- And many more…
