Image

Parchment Paper Paired With 3D-Printed Grid Gives A Nice Glow

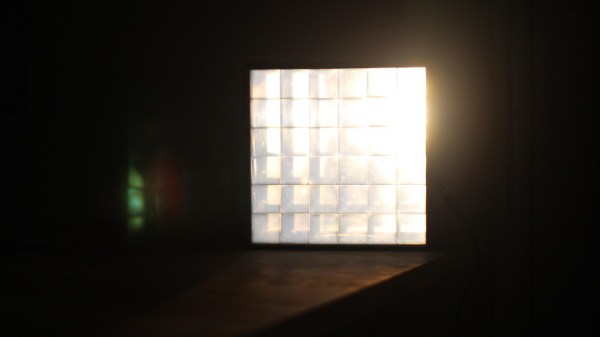
This custom enclosure for a 64×64 RGB LED matrix by [Davisan1001] not only provides a mount point for a Raspberry Pi, but presents a clean and smooth face with square pixels thanks to a 3D-printed grid, some parchment paper, and a sheet of clear plastic.

ImageThe first clever thing in this design is the way [Davisan1001] created the grid that acts as a light blocker for each LED in the matrix, preventing light from “spilling” over into its neighbors. Instead of designing the grid from scratch, the solution was just to leverage slicer settings. By printing a flat square with a grid pattern infill and zero solid top and bottom layers, the slicer creates the grid all by itself. A little trial and error was required to get the spacing just right, but it seems to have worked out fine. We’re not sure it’s better than designing a grid in CAD, but it was certainly a clever way to avoid having to do so.

[Davisan1001] also struggled to find an effective and economical solution for a diffuser. Certainly, high-quality diffuser films are available for sale, as are specialty acrylic sheets, but surely there was some household DIY option to do the trick. A sheet of plain white paper blocks too much light. Wax paper handles poorly, and off-angle viewing is poor. The sweet spot was parchment paper.

Parchment paper is commonly used in baking and is thin, easy to handle, flat and even in color, and just opaque enough to act as an effective diffuser while still transmitting enough light to not impede clarity. Cover the LED matrix with the 3D-printed grid, lay parchment paper over that, cover with a sheet of clear plastic, and the job is done.

Light diffusion can be tricky to get just right in a DIY project, and what works for one application won’t necessarily work for another. Our community had loads of suggestions on different solutions, so consider this one more idea to try the next time you have a project that calls for it.
Image

Architectural LED Install Shows How To Do It With Style

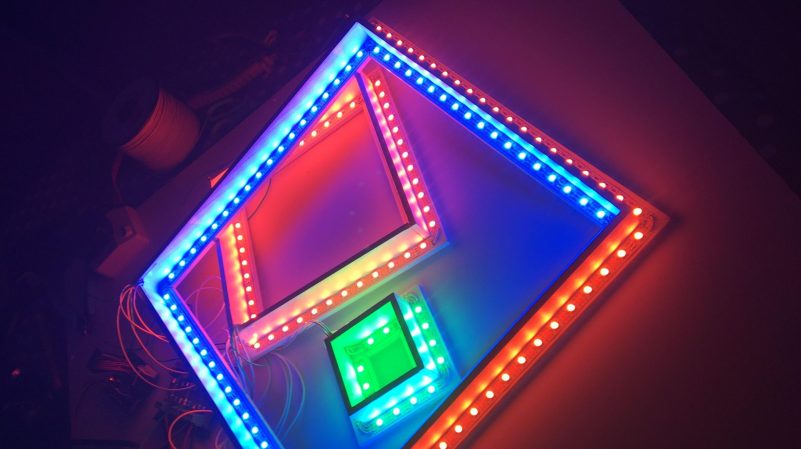
Anyone can string up some LED string lights in a space with mixed results. However, if you want to create a lighting environment that’s classy and stylish, it takes a little more finesse. [ipad.bendavid] has a great example of this, with a rather tidy architectural LED installation.

Image
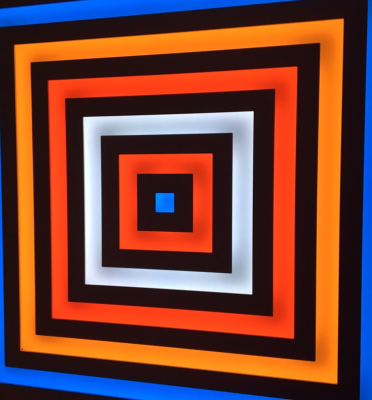
The final look is quite clean and evenly lit, without requiring the use of any diffuser material.

The electronic side of things is relatively straightforward. There’s an ESP32 running the show, commanding the colors for 928 individually-addressable WS2812 RGB LEDs. It uses the WebSocket API for real time control, integrates with Home Assistant, and even offers audio reactive lighting modes with the aid of an INMP441 I2S audio input module. A hefty 5 V, 60 A power supply ensures the LEDs are never short of juice. There was also careful attention paid to power distribution to avoid any dim spots or other issues.

Where it gets really cool, though, is the attention paid to the construction of the installation. The LED strips are installed in concentric square frames, which block light in specific areas to create a nice square pattern, with the LEDs facing the wall they’re installed on rather than projecting out to the viewer. This hides the strips themselves and eliminated the need for diffusers which can be a pain to get right.

Overall, the build is a pleasing one that plays with light and darkness and looks rather stylish in a way so many LED installs don’t. If you’re cooking up your own neat glowable projects, you know we’d love to see them on the tipsline.

Image

An Artificial Sun In A Manageable Size

The sun is our planet’s source of natural illumination, and though we’ve mastered making artificial light sources, it remains extremely difficult to copy our nearby star. As if matching the intensity wasn’t enough, its spectral quality, collimation, and atmospheric scattering make it an special challenge. [Victor Poughon] has given it a go though, using a bank of LEDs and an interesting lens system.

We’re used to lenses being something that can be bought off-the-shelf, but this design eschews that convenience by having the lenses manufactured and polished as an array, by JLC. The scattering is taken care of by a sheet of inkjet printer film, and the LEDs are mounted on a set of custom PCBs.

The result is certainly a very bright light, and one whose collimation delivers a sun-like effect of coming from a great distance. It may not be as bright as the real thing, but it’s certainly something close. If you’d like something to compare it to, it’s not the first such light we’ve featured.

Image

Build Yourself A Beautiful Interactive Light Toy

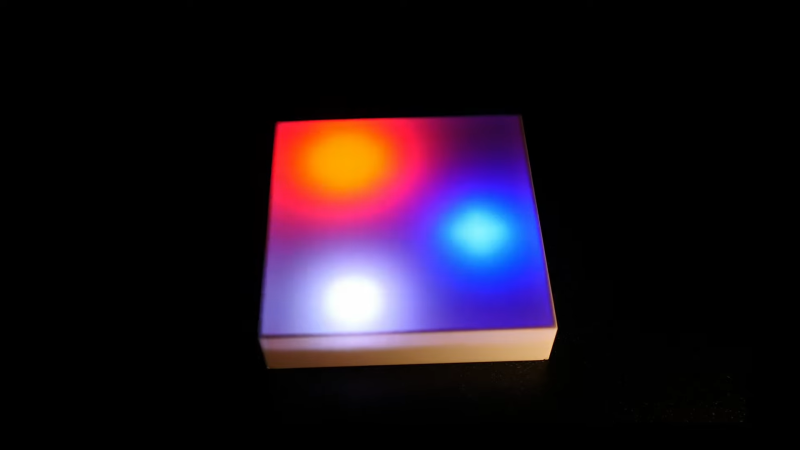
Sometimes, we build things with LEDs as indicator lamps or to illuminate something important. Sometimes, we build things with LEDs purely to glow and be beautiful. This interactive light toy from [Jens] falls into the latter category.

The build uses a 16×16 addressable LED matrix.  [Jens] then ported some “Bouncy Bubbles” Processing code from Keith Peters to the Arduino Mega, and set it up to display on the matrix. An accelerometer was used to control the bouncing ball animations, while a second Arduino was then tapped to act as a musical synthesizer to add more vibes. The whole kit was then built into a 3D-printed housing with a nice hazy diffuser to give the LEDs a smoother, even look. [Jens] steps through how he got the diffuser just right, including a support structure that made all the difference to the aesthetic of the finished product. Getting diffusion right is key to making a nice LED project, and [Jens] got it very right here.

It’s a nice little art piece that looks kind of relaxing to play with in a dark room. We love a good glowable project here at Hackaday, so if you’ve built your own—don’t hesitate to let us know! Video after the break.

Continue reading “Build Yourself A Beautiful Interactive Light Toy”

Screenshot from the video showing comparisons between diffused light pictures at different brightnesses and diffusers applied

LED Diffusers Confusing? Organize A Practical Contest

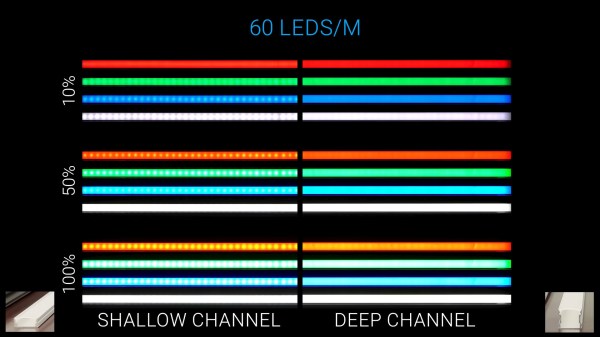
We all want a nice and shiny LED strip that doesn’t actually look like it consists of individual LEDs – a bar of uniform light is just that much more attractive. There’s all kinds of diffusion options available out there, but they can be confusing – sometimes you’d just like to know, which one is better? If there’s one thing that could easily settle this, it’s a practical test, and that’s what [The Hook Up] has devised for us to learn from.

First off, he talks about LED strips available – between 30, 60 and 144 LED per meter variations, the latter is going to be easier to diffuse than the former. From there, there’s a few different kinds of diffuser covers and aluminum profiles you can get, and [The Hook Up] pairs them in combinations, filming them from a distance and giving us concise visuals of how each combination works at different duty cycles, as well as making brightness measurements every now and then to evaluate losses of different diffuser layers. He proposes a simple rule – when picking a diffuser, distance between the LEDs and the diffuser has to be larger than the between-LED distance, and experiments confirm that. In the end, one of the takeaways is that the differences between 60LED/m and 144LED/m strips are not significant enough that they can’t be compensated for with a decent diffuser.

Continue reading “LED Diffusers Confusing? Organize A Practical Contest”

Image

Circuit-less PCB Featured As Faceplate For A Digital Clock

If there’s no circuitry on a printed circuit board, does it cease being a “PCB” and perhaps instead become just a “PB”?

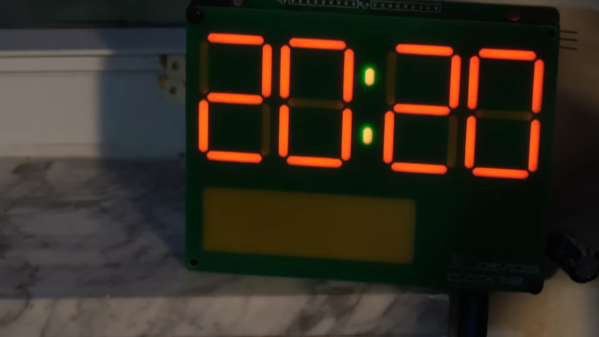
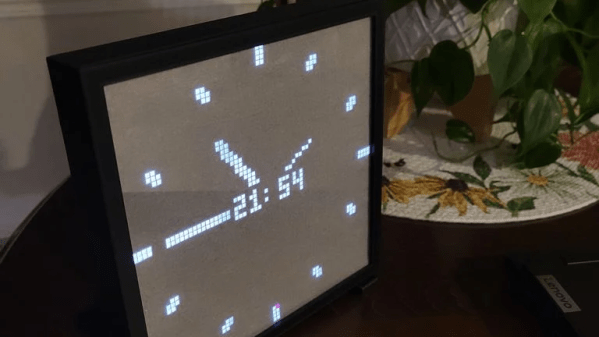
Call them what you will, the fact that PCBs have become so cheap and easy to design and fabricate lends them to more creative uses than just acting as the wiring for a project. In this case, [Jeremy Cook] put one to work as the faceplate for his “742 Clock,” a name that plays on the fact that his seven-segment display is 42 mm tall, plus it’s “24/7” backward.

In addition to the actual circuit board that holds the Wemos ESP32 module and the LEDs, a circuit-less board was designed with gaps in the solder mask to act as light pipes. Sandwiched between the boards is a 3D printed mask, to control the light and direct it only through the light pipes. [Jeremy] went through a couple of iterations of diffuser and mask designs, finally coming up with a combination that works well and looks good. He mentions a possible redesign of the faceplate board to include a copper backplane for better opacity, which we think is a good idea. We’d also like to see how different substrates work; would boards of different thickness or using FR-4 with different glass transition temperatures work better? Check out the video below and see what you think.

We’re seeing more and more PCBs turn up as structural elements, from enclosures to control panels and even tools, and we approve of this trend. But what we really approve of is what [Jeremy] did here by making this clock just a dumb display that gets network time over NTP. Would that all three digital clocks in our kitchen did the same thing — maybe then they wouldn’t each be an infuriating minute out of sync with the others.

Continue reading “Circuit-less PCB Featured As Faceplate For A Digital Clock”

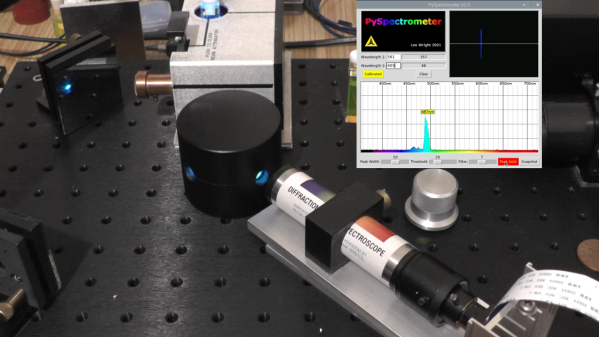
Integrating sphere test setup

Cannonball Mold Makes A Dandy Integrating Sphere For Laser Measurements

It’s an age-old riddle: if you have a perfect sphere with a perfectly reflective inner surface, will light bounce around inside it forever? The answer is pretty obvious when you think it through, but that doesn’t mean that you can’t put the principle to use, as we see with this homemade Ulbricht sphere for optical measurements.

If you’ve never heard of an Ulbricht sphere, don’t worry — it’s also known as an integrating sphere, and that makes its function a little more apparent. As [Les Wright] explains, an integrating sphere is an optical element with a hollow spherical cavity that’s coated with a diffusely reflective coating. There are two ports in the sphere, one for admitting light — usually from a laser — and one for light to exit. The light bounces around inside the sphere and becomes perfectly diffuse, and creates a uniform beam at the exit port.

[Les]’ need for an integrating sphere comes from the desire to measure the output of some of his lasers with his Raspberry Pi-based PySpectrometer. Rather than shell out for an expensive commercial integrating sphere, or turn one on a lathe, [Les] turned to an unlikely source: cannonball molds. The inside of the mold was painted with an equally unlikely ultra-white paint concocted from barium sulfate and PVA glue. With a few ports machined into the mold, it works perfectly to diffuse the light from his dye lasers for proper measurements.

Lasers can be an expensive hobby, but [Les] always seems to find a way to make things more affordable and just as good. Whether it’s homemade doorknob caps for high-voltage power supplies or blasting the Bayer filter off a cheap CCD camera, he always seems to find a way.

Continue reading “Cannonball Mold Makes A Dandy Integrating Sphere For Laser Measurements”