Getting Started is Easy
Choose your install path and configure your first Unraid server in minutes. Free to try for 30 days, no strings attached.

Choose How you Want to Install Unraid
For most users, the Unraid USB Creator is the fastest and easiest way to get started.
If you need to install directly to internal storage or deploy through a remote or virtual console, use the Unraid Installer instead.
Once Unraid is installed, you can start a free 30-day trial or activate a license.
Recommended: Download the Unraid USB Creator
Prepare your USB flash drive on a Windows, macOS, or Linux computer, then follow the Initial Setup steps below to boot Unraid and complete onboarding.
Using the Unraid Installer instead?
The Installer runs directly on the server and requires a connected display or remote console. Follow the Installer guide to select an image and create a USB flash or supported internal boot device. After Unraid starts, continue at step 3: Initial Setup.
Next, install Unraid
- An assembled server that's connected to ethernet and is capable of booting from a USB device. Unraid works with most hardware.
- An attached monitor and keyboard for the initial configuration, and for altering configuration settings in your BIOS.
- A high-quality, named-brand USB flash device that is at least 4 GB in size with a unique GUID (Globally Unique Identifier). This is required to get started but once Unraid boots, the onboarding wizard can help you switch to booting to internal storage if preferred.
Unraid is extremely hardware agnostic. For hardware or system build advice, see our docs.
- Insert your USB flash device into your Mac or PC.
- Download the USB Flash Creator for Mac or PC and use it to install Unraid OS onto your USB flash device (recommended). Or, you can use the manual install method.
- Remove the flash device from your PC and plug it into your server.
- Boot into your server's BIOS settings and make the following changes:
- Configure the system to boot from the USB flash device.
- Enable hardware virtualization-specific features (including IOMMU), if applicable.
You can find more details on BIOS configuration in the Advanced BIOS configuration guide.
- Save your BIOS configuration changes and exit to boot Unraid OS.
Once Unraid OS has booted, open the WebGUI (our browser-based management utility), and complete your system configuration.
- Open a web browser from your Mac or PC and navigate to http://tower.local.
- When prompted, set a strong root password.
Register and install your free Trial license key, or activate your license.
Want to boot from internal storage?
The onboarding wizard launches automatically on first boot and includes a boot method step where you can switch from your flash drive to an internal NVMe, SSD, or eMMC device right during initial setup with no separate migration needed afterward. If your hardware supports it, this is the easiest time to make the switch.
For more details, see our quick install guide documentation.
Now you’re ready to assign devices for Unraid to manage.
- Assign devices in the “Main” tab of the Unraid WebGUI. On this page, you’ll see a list of Array device and Pool device assignments, as well as any unassigned devices and the boot device.
- Use the dropdowns to select disks for your array (parity and non-parity drives) and pool devices. Learn more about storage management.
- Once you have assigned all your devices, select the “Start” button under “Array Operation.” This will mount your devices and start the array.
- Once you have started the array, plan and create shares to simplify how you store data across multiple disks. Learn more about shares.
For more details and recommendations for assigning disks, see our product documentation.
Now that you’ve completed basic installation and set-up for your Unraid server, it’s time for the fun part: customizing everything to your needs.
We recommend exploring the following steps:
- Install the Community Apps plugin, so you can run popular applications like AdGuard, Pi-hole, Home Assistant, and Plex right from your Unraid server.
- Install the Unraid Connect plugin for remote access and flash backup.
- Install virtual machines to run other operating systems like Windows or Linux.
- Join the discussion on our forums, where you can find answers to most of your troubleshooting questions.
- Get Multi-lingual support: download, install, and use the Unraid OS in a multitude of other languages.
- Sign up for our newsletter to get monthly product updates.
- Want to move off your flash drive? If you didn't switch during setup, you can migrate to internal boot anytime via Tools → Onboarding Wizard. See the Internal Boot FAQ for requirements and steps to move to Internal Boot.
Join Thousands of Happy Customers
Unraid Guides

Unraid Set Up and Configuration Deep Dive
Explore Unraid's unique storage features, how to easily get started with Unraid, and some of it's new features.
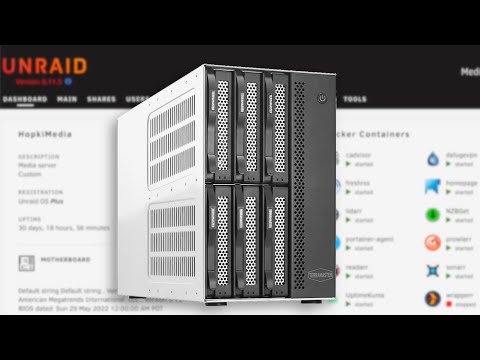
DITCHING my Homelab software for UNRAID
In this video, we overview some of the general layouts and features of the UNRAID NAS software.

Guide: Unraid Gaming VM
This guide takes you through the required steps of configuring a gaming VM in Unraid, while covering what is being done and why.
Unraid Docs
Explore extensive documentation of our product. You’ll never have to wonder what to do next.
Most popular
-
Getting started
In this guide, we cover how to prepare your flash device, boot the system, and configure your first array. The entire process should take less than 15 minutes.
-
FAQs
Explore Unraid FAQs regarding the OS, installation, licensing, the Unraid.net Account, and more.
-
Unraid OS Release Notes
Read all about the latest and greatest Unraid OS releases.
