New to Rust? Grab our free Rust for Beginners eBook Get it free →
Top 10 Node.js Security Best Practices: Protecting Your Application


Node.js security starts at the point where an HTTP request becomes application data. The code below rejects malformed input, checks resource ownership, limits request volume, and sends browser-facing security headers. Its Node 24.18.0 test returns 400 for invalid input, 403 for an ownership violation, and 200 for an allowed update.
Start with the request boundary
Every request carries untrusted values, even when it comes from your own frontend, so a route must decide which fields it accepts, how large the body may be, and whether the caller may act on the requested object.
Validate shape, size, and allowed values
Validation belongs at the route boundary because downstream code should receive data with an expected shape, and a type check alone does not reject an empty, oversized, or unsupported value.
Set a JSON body limit before parsing input, then apply a schema with field-level rules for length, format, and allowed values.
Authorize every object lookup
Authentication answers who sent a request. Authorization decides whether that identity may read, change, or delete this object, and every protected lookup needs that decision.
A valid token must not grant access when someone changes an ID in the URL. If you are building token-based login, the JWT authentication API guide covers token issuance, while the route or data layer that loads a record must enforce object-level permission.
Add a small Express hardening baseline
This Express example combines schema validation with an ownership check, while Helmet adds HTTP response headers and express-rate-limit limits repeated requests to the process that handles them.
const express = require("express");
const helmet = require("helmet");
const { rateLimit } = require("express-rate-limit");
const { z } = require("zod");

const profileInput = z.object({
  displayName: z.string().trim().min(2).max(40),
});

function createApp() {
  const app = express();

  app.disable("x-powered-by");
  app.use(helmet());
  app.use(express.json({ limit: "16kb" }));
  app.use(rateLimit({
    windowMs: 60_000,
    limit: 100,
    standardHeaders: "draft-8",
    legacyHeaders: false,
  }));

  app.use((req, res, next) => {
    req.user = { id: "user-1" };
    next();
  });

  app.patch("/profiles/:id", (req, res) => {
    const parsed = profileInput.safeParse(req.body);
    if (!parsed.success) {
      return res.status(400).json({ error: "Invalid profile input" });
    }

    if (req.params.id !== req.user.id) {
      return res.status(403).json({ error: "Forbidden" });
    }

    return res.json({ id: req.user.id, displayName: parsed.data.displayName });
  });

  return app;
}
The example uses a fixed user only to keep the permission branch visible. Replace that middleware with your verified authentication layer, then load the requested record and compare its owner or permission set with the authenticated identity.
Run the checks
The test sends one malformed profile, one request for another user's profile, and one allowed update. It also checks that Helmet added the X-Content-Type-Options header.
const request = require("supertest");
const { createApp } = require("./app");

const app = createApp();

async function main() {
  const invalid = await request(app)
    .patch("/profiles/user-1")
    .send({ displayName: "x" });
  const forbidden = await request(app)
    .patch("/profiles/user-2")
    .send({ displayName: "Ada" });
  const success = await request(app)
    .patch("/profiles/user-1")
    .send({ displayName: "Ada" });

  if (invalid.status !== 400) throw new Error(`Expected 400, got ${invalid.status}`);
  if (forbidden.status !== 403) throw new Error(`Expected 403, got ${forbidden.status}`);
  if (success.status !== 200) throw new Error(`Expected 200, got ${success.status}`);
  if (!success.headers["x-content-type-options"]) throw new Error("Helmet header is missing");

  console.log(`invalid input: ${invalid.status}`);
  console.log(`ownership check: ${forbidden.status}`);
  console.log(`valid update: ${success.status} ${success.body.displayName}`);
  console.log(`security header: ${success.headers["x-content-type-options"]}`);
}

main().catch((error) => {
  console.error(error);
  process.exit(1);
});
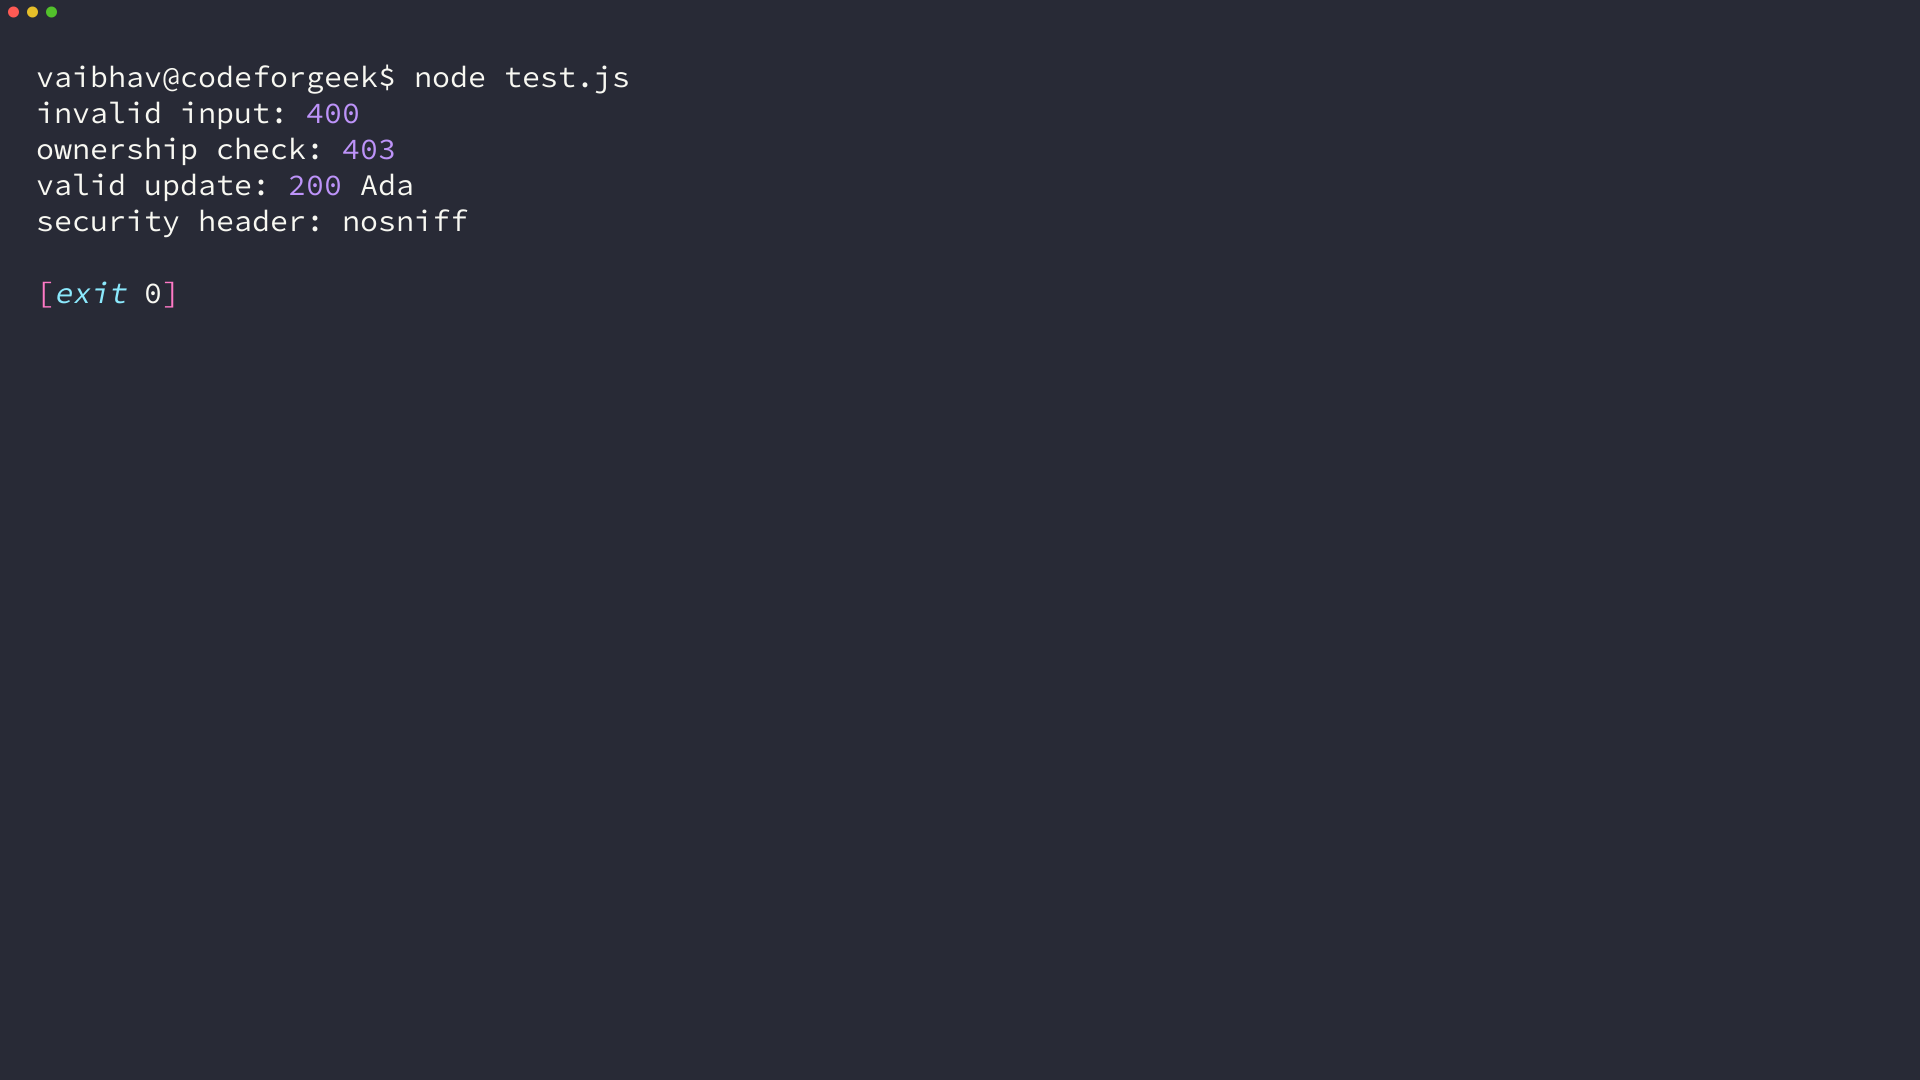
The output gives each branch a concrete result, so add equivalent tests for every route that accepts a body, changes state, or reads data by an identifier.
Cover the remaining security work
The Express code handles a narrow request boundary, and a production service also needs controls around transport, secrets, dependencies, browser behavior, and incident response.
- Run Node.js on a supported release and update packages after reviewing their changelogs and advisories. Use npm audit as a signal, then decide whether an advisory reaches code you deploy.
- Terminate TLS at your edge or server, redirect plaintext HTTP, and set secure cookie attributes when cookies carry a session identifier.
- Store passwords with a purpose-built password hashing function. Do not encrypt or hash them with a fast general hash. The Node.js password hashing guide shows the storage workflow.
- Keep API keys, database passwords, and signing keys outside source control. Scope them to the service that needs them and rotate a credential when exposure is suspected.
- Use allowlists for cross-origin requests, methods, and headers. A permissive CORS response can expose an authenticated browser endpoint to another origin.
- Encode untrusted content for its output context. Validation protects the API boundary, while contextual encoding prevents browser markup and script injection when data reaches HTML.
- Log authentication failures, authorization denials, unusual error rates, and administrative changes without writing passwords, tokens, or full sensitive request bodies to logs.
- Use rate limits that match the endpoint. Login and password-reset routes need tighter limits than a public read endpoint.
An in-memory limiter gives each Node.js process its own counter, so use a shared store when requests can reach multiple instances and treat rate limiting as an abuse control rather than a substitute for capacity planning or upstream denial-of-service protection.
Keep secrets and dependencies under review
Security work continues after deployment because dependencies receive advisories and application behavior changes. The Node.js security guidance and the OWASP Node.js Security Cheat Sheet are useful review inputs when you add an endpoint or change an authentication flow.
Turn the checks into release criteria. A route should fail review when it lacks input validation, an authorization decision, a test for denied access, or a plan for secrets and observability.
FAQ
These answers separate controls that are often grouped together even though they solve different problems.
Is Helmet enough to secure an Express application?
Helmet sets HTTP response headers. You still need input validation, authentication, object-level authorization, secure secret handling, dependency review, and logging.
Does authentication prevent insecure direct object references?
Authentication identifies the caller. Each route must still check whether that identity may access the requested object before it returns or changes data.
When should an Express API use a shared rate-limit store?
Use a shared store when traffic can reach more than one application instance. An in-memory limiter counts requests only inside one process.
References
Use these sources when you turn the example into an application-specific review.
- Node.js security best practices
- Express production security best practices
- Helmet documentation
- OWASP Node.js Security Cheat Sheet