Gmail is a widely used email service that integrates with Google Drive, Calendar, and other tools your team already relies on. When new articles are published in your Document360 knowledge base, you may need to notify external vendors, stakeholders, or team members about the update. By connecting Document360 and Gmail through Zapier, you can automate this: whenever a new article is published in Document360, Zapier automatically sends a custom email via Gmail to the recipients you specify — keeping everyone informed without any manual effort.
When to use this integration
- You publish new knowledge base articles on a regular cadence and need to notify external stakeholders, clients, or vendors about updates without sending emails manually each time.
- You manage a documentation workflow where specific teams need to be alerted when new content goes live so they can act on it — for example, a support team, a training coordinator, or a content review group.
- You want a lightweight notification system that connects Document360 publish events to your email communications without requiring a dedicated newsletter tool.
Before you begin
- You must be logged into your Zapier account.
- You must have a Gmail account that Zapier can connect to for sending emails.
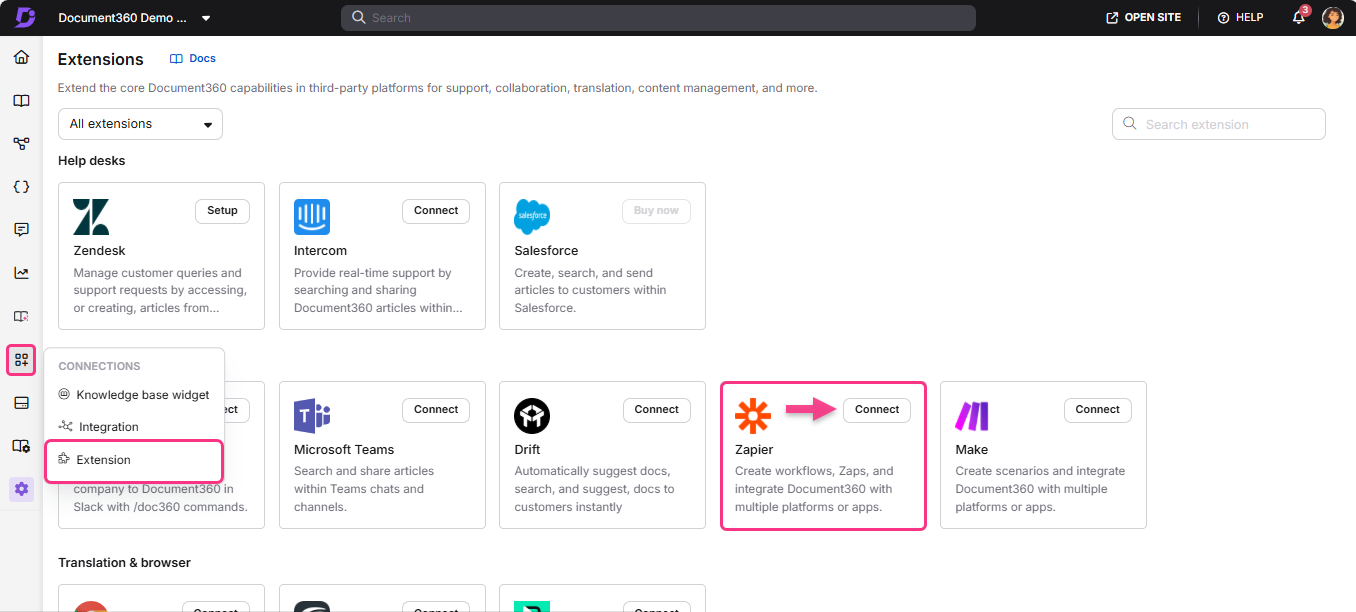
- You must have your Document360 API token ready. To generate one, navigate to Connections > Extensions , locate the Zapier tile, and click Connect to copy the token.
How to set up the Zap
Step 1 — Create a new Zap
- Log in to your Zapier account.
- From the left navigation menu, click Create then select Zaps.
- A new Zap is created with a Trigger and Action flow.

Step 2 — Connect Document360 as the trigger
Unlike most Zapier use cases for Document360, this Zap uses Document360 as the trigger and Gmail as the action — meaning a Document360 event (such as a new article being published) initiates the workflow.
- In the Trigger field, choose Document360.
- On the Setup panel, select the desired event in the Event field.
- Click the Account field — a Sign-in panel appears.
- Enter your sign-in credentials and click Allow.
To generate the API token from Document360:
- Navigate to Connections > Extensions in the left navigation bar of the Knowledge base portal.
- On the Zapier extension tile, click Connect.
- Click the Copy icon to copy the token.
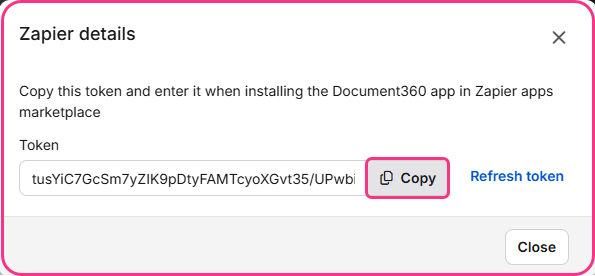
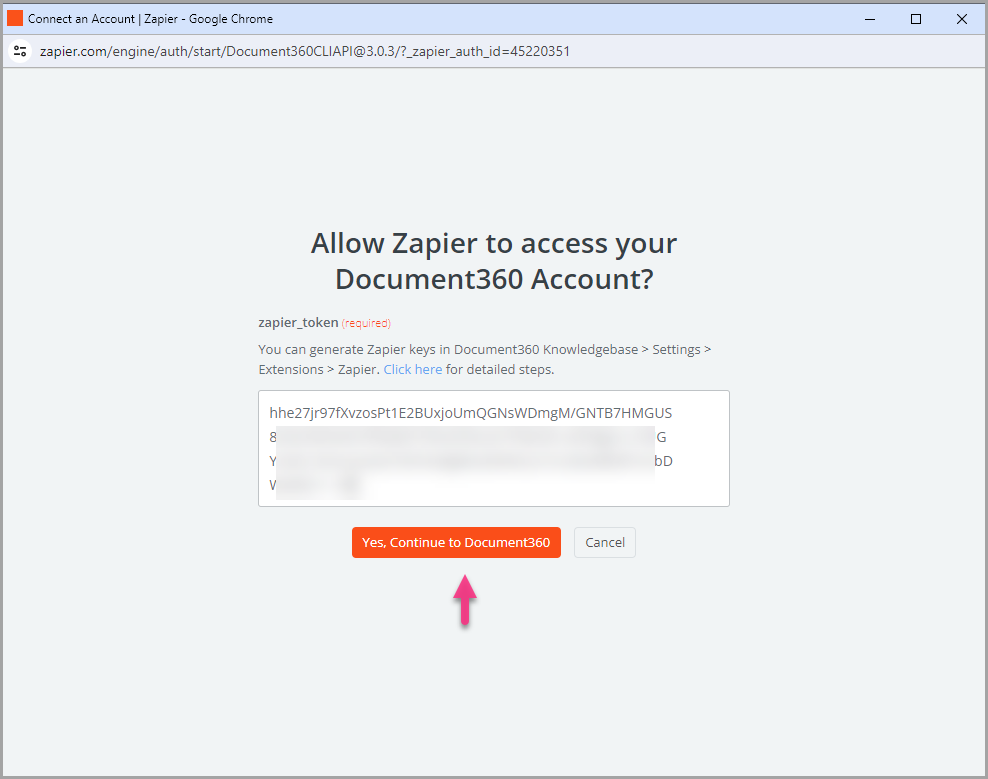
- Head back to the Zapier panel and paste the API token into the field.
- Click Yes, Continue to Document360.
- You can find the connected Document360 project on the Connect Document360 account page. To use a different account later, click Change.
- Click Continue.
Step 3 — Test the trigger
- Click Test trigger to confirm the correct account is connected and the trigger setup is correct.
- If no errors are found, click Continue. The Document360 trigger is now set up.
Step 4 — Connect Gmail as the action
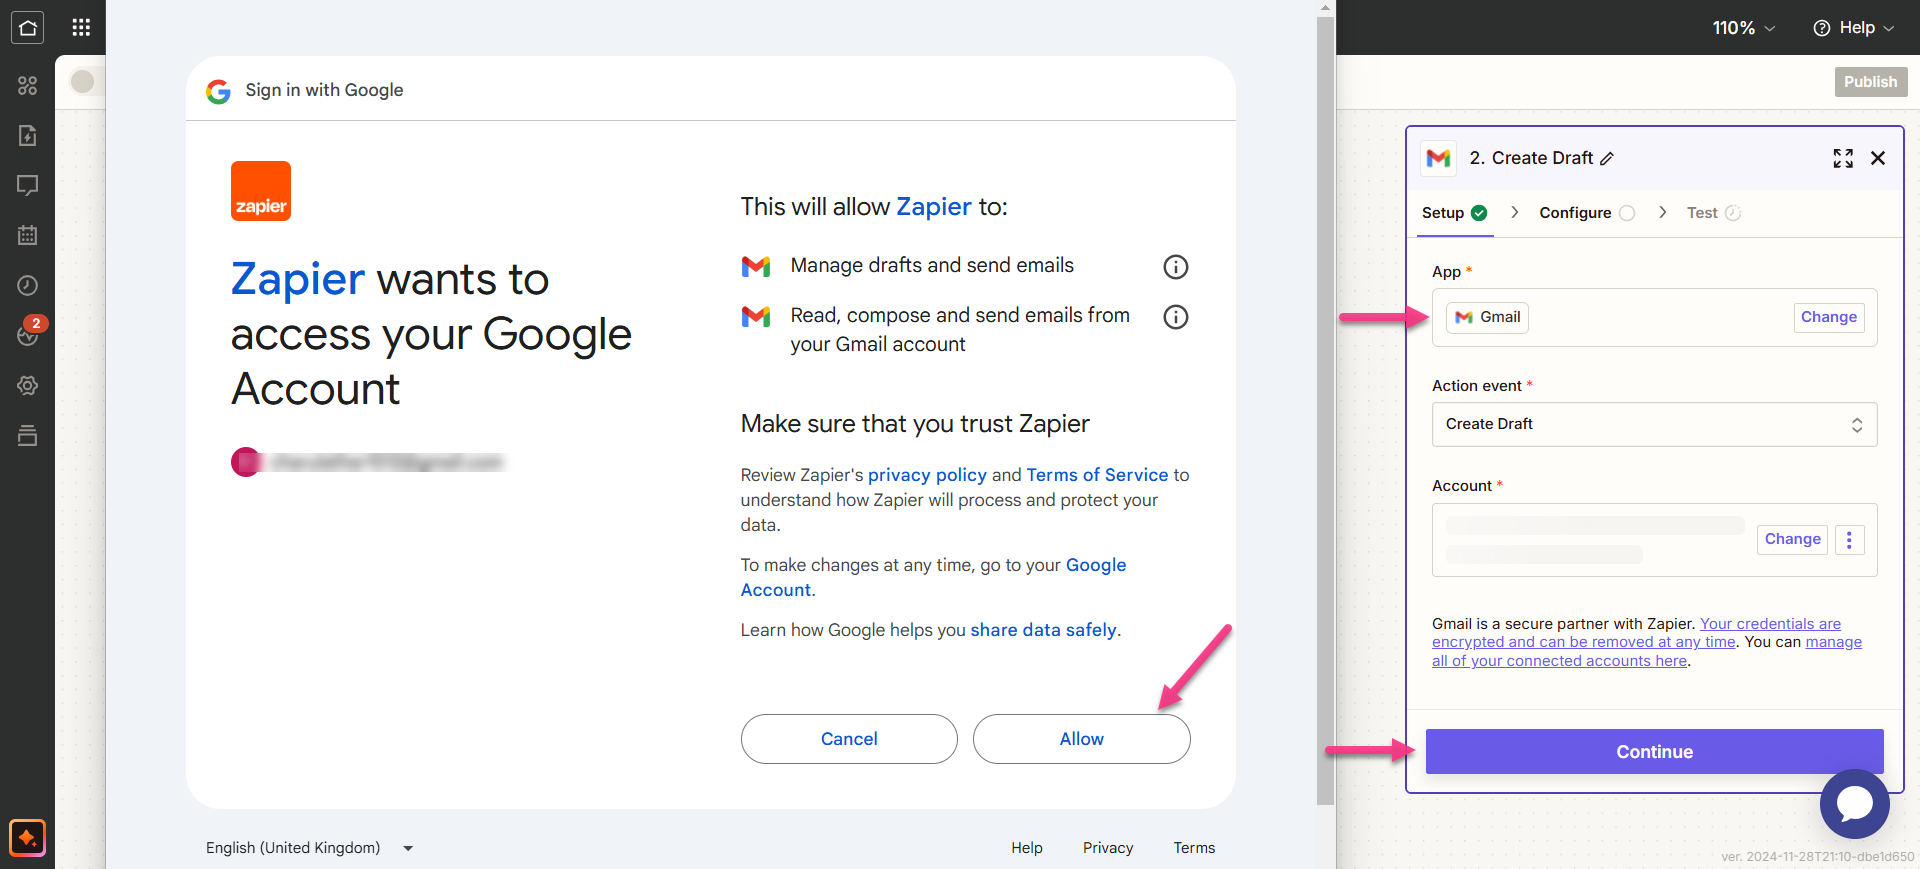
- In the Action field, choose Gmail.
- On the Setup panel, select the desired event in the Event field.
- Click the Account field — a Sign-in panel appears.
- Enter your Gmail credentials and click Allow.
- Click Continue.
Step 5 — Map the email fields
- Map the required fields to configure the email that Gmail will send:
| Field | Description |
|---|---|
| To | Enter the recipient's email address. Multiple addresses can be added individually or as a comma-separated list. |
| Cc | Add email addresses to copy on this email. Multiple addresses can be added individually or as a comma-separated list. |
| Bcc | Enter email addresses to blind-copy. Multiple addresses can be added in the same way. |
| Subject | Enter the subject line for the email. |
| From | Choose an email address or alias linked to your Gmail account. |
| From Name | Enter the sender's name (must be associated with the connected email address). |
| Body type | Select the email format: Plain Text or HTML. |
| Body | Write the main content of the email. |
| Add signature default | Optionally include a default signature in the email. |
| Label or mailbox | Select a value for label or mailbox. |
| Attachments | Attach files by selecting an actual file or providing a public URL. |
Fields marked as required (*) must be filled in before the Continue button is enabled.
- Click Continue.
Step 6 — Test and publish the Zap
- In the test section, click Test step.
- If successful, you will get the message A Draft was sent to Gmail.
- Head back to the Zapier setup panel and click Next, then click Publish.
- Review or edit the trigger and action settings as needed. You will see a success message: Your Zap is on. Click Manage your Zap to go to the Zap overview page.
Zap overview
Once active, you can view and manage the Zap from the Zapier dashboard. The overview page shows the trigger, action, and run history for the Zap.
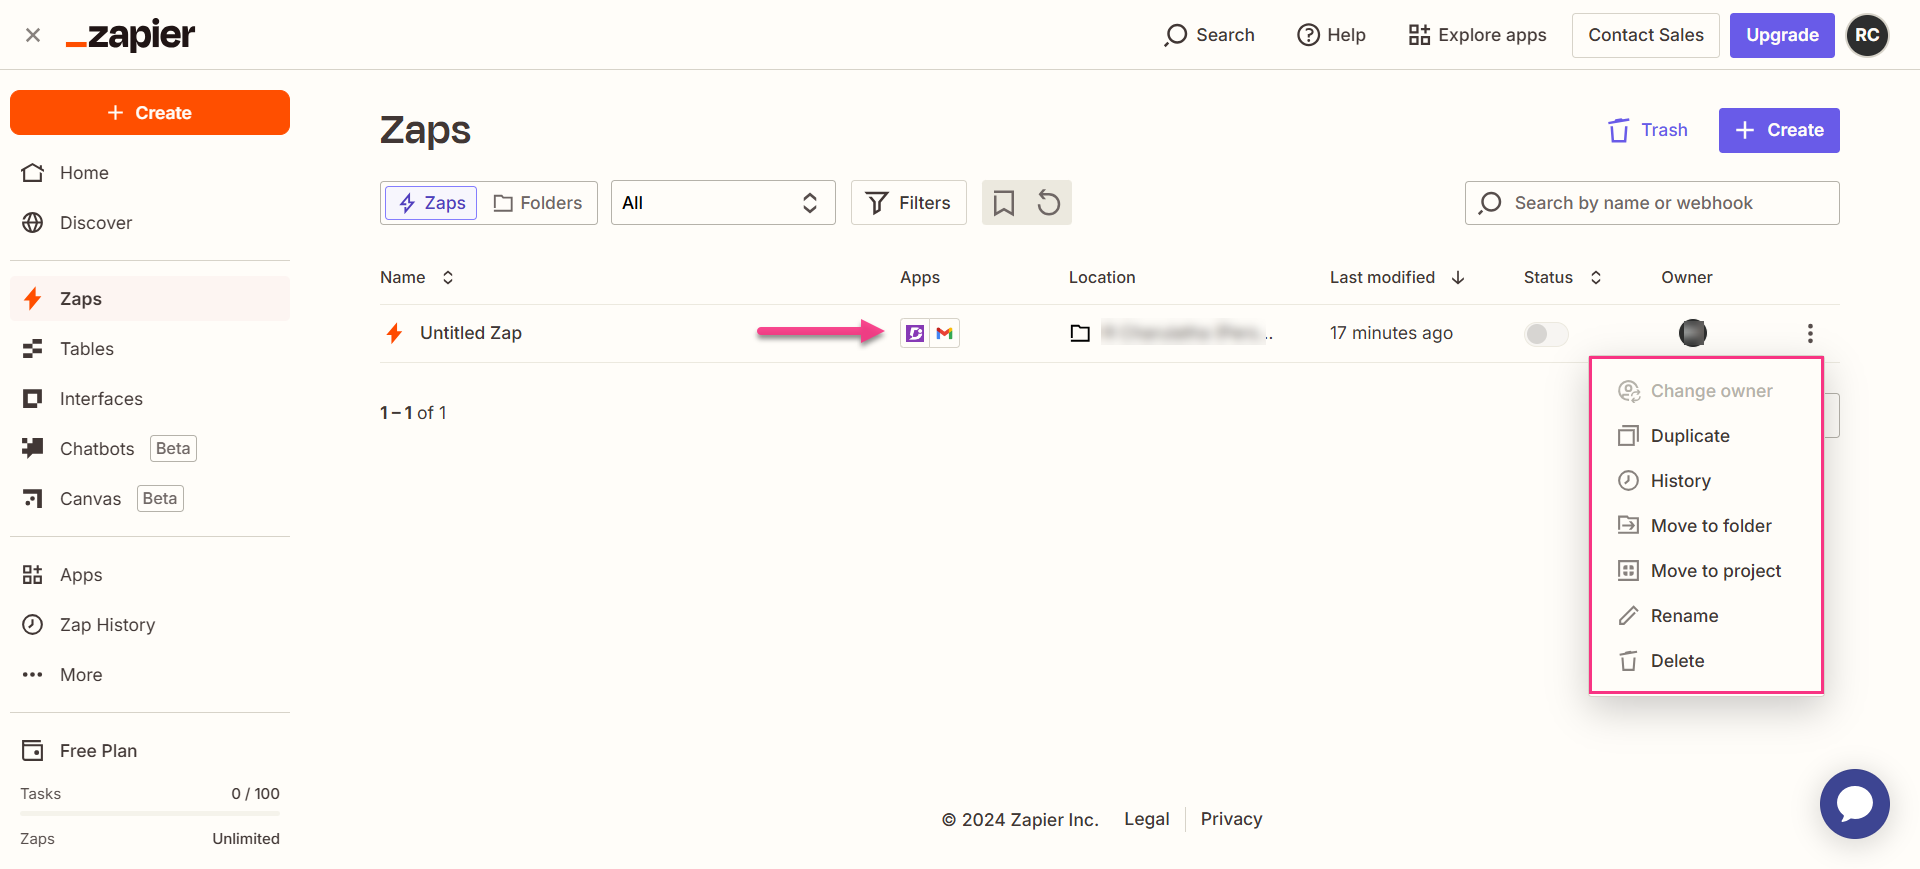
How to delete a Zap
- Navigate to the Zapier dashboard. A list of all existing Zaps is displayed on the overview page.
- Click the Zap actions () icon to the right of the Zap you want to remove and click Delete. The Zap is permanently deleted.
Best practices
- Include the article title and URL in the email body by mapping Document360 trigger data fields to the Body field. This gives recipients direct context and a link to the new content without having to search for it.
- Use the Cc or Bcc fields for stakeholder distribution lists rather than entering individual addresses in the To field each time. This makes the Zap easier to maintain — you only need to update the distribution list, not the Zap itself.
- Choose HTML as the Body type if you want to send formatted emails with headings, links, and styling. Plain text works well for simple notifications, but HTML gives you more control over how the email looks to recipients.