A drone is shown flying above some trees and a building. A pink cloud of dots appears above the drone, and a purple cloud below the drone. Grey crosshairs are to the right of the drone.

Seeing The World In Radio Waves With The QuadRF

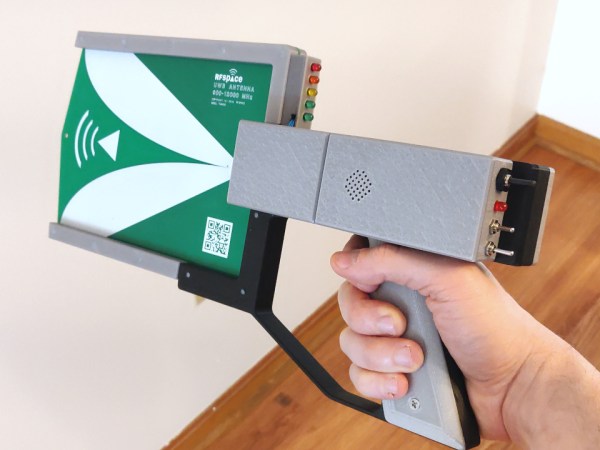
Although the basic principle of radio direction finding is easy to understand (measure the phase difference between different antennas, then calculate the angle of arrival from this difference), the radio hardware to actually implement this has historically been hard for hackers to access. The QuadRF project aims to change this by building a phase-coherent four-channel SDR which makes direction mapping easy (GitHub repository).

The QuadRF uses two boards: one to receive and pre-process radio waves, and a Raspberry Pi 5 for additional processing. The RF board has four patch antennas, each capable of either transmitting or receiving in the 4.9 GHz to 6.0 GHz range, with switchable right- or left-hand polarization. For on-device processing, it uses a Lattice ECP5 FPGA, which uses two MIPI cables to connect to the camera and display interfaces on the Raspberry Pi. These form a very high-speed data exchange, and after further processing, the Pi can pass data on over Ethernet or Wi-Fi. Individual QuadRF boards can connect together in a lattice grid to form larger phased arrays.

The QuadRF’s software shows off its real strength: it’s compatible with standard programs like GNU Radio, but it also hosts a few of its own programs. The most striking of these is an “RF camera” which scans its entire frequency range at 30 fps, tracking the direction of detected signals and visualizing them on a spatial plot. When overlaid on a camera feed, this plot lets one easily see the radio signals emitted from electronics; as an example, the creators tracked a drone in flight, even distinguishing the two radio transmitters on the drone.

This isn’t the first multi-antenna SDR we’ve seen, though this is the first that could transmit. It’s important to be careful, though: some applications of this kind of hardware run afoul of arms regulations.

Thanks to [Swake] for the tip!

radio direction finding

Where’s That Radio? A Brief History Of Direction Finding

We think of radio navigation and direction finding as something fairly modern. However, it might surprise you that direction finding is nearly as old as radio itself. In 1888, Heinrich Hertz noted that signals were strongest when in one orientation of a loop antenna and weakest 90 degrees rotated. By 1900, experimenters noted dipoles exhibit similar behavior and it wasn’t long before antennas were made to rotate to either maximize signal or locate the transmitter.

British radio direction finding truck from 1927; public domain

Of course, there is one problem. You can’t actually tell which side of the antenna is pointing to the signal with a loop or a dipole. So if the antenna is pointing north, the signal might be to the north but it could also be to the south. Still, in some cases that’s enough information.

John Stone patented a system like this in 1901. Well-known radio experimenter Lee De Forest also had a novel system in 1904. These systems all suffered from a variety of issues. At shortwave frequencies, multipath propagation can confuse the receiver and while longwave signals need very large antennas. Most of the antennas moved, but some — like one by Marconi — used multiple elements and a switch.

However, there are special cases where these limitations are acceptable. For example, when Pan Am needed to navigate airplanes over the ocean in the 1930s, Hugo Leuteritz who had worked at RCA before Pan Am, used a loop antenna at the airport to locate a transmitter on the plane. Since you knew which side of the antenna the airplane must be on, the bidirectional detection wasn’t a problem.

Continue reading “Where’s That Radio? A Brief History Of Direction Finding”

Image

Listen To The RF Around You

These days, we are spoiled for choice with regard to SDRs for RF analysis, but sometimes we’re more interested in the source of RF than the contents of the transmission. For this role, [Drew] created the RFListener, a wideband directional RF receiver that converts electromagnetic signal to audio.

The RF Listener is built around a AD8318 demodulator breakout board, which receives signals using a directional broadband (900 Mhz – 12 Ghz) PCB antenna, and outputs an analog signal. This signal is fed through a series of amplifiers and filters to create audio that can be fed to the onboard speaker. Everything is housed in a vaguely handgun shaped enclosure, with some switches on the back and a LED amplitude indicator. [Drew] demonstrates the RFListener around his house, pointing it at various devices like his router, baby monitor and microwave. In some cases, like with a toy drone, the modulation is too high frequency to generate audio, so the RF listener can also be switched to “tone mode”, which outputs audio tone proportional to the signal amplitude.

The circuit is completely analog, and the design was first done in Falstad Circuit Simulator, followed by some breadboard prototyping, and a custom PCB for the final version. As is, it’s already an interesting exploration device, but it would be even more so if it was possible to adjust the receiver bandwidth and frequency to turn it into a wideband foxhunting tool.

Image

Direction Finding And Passive Radar With RTL-SDR

To say that the RTL-SDR project revolutionized hacker’s capabilities in the RF spectrum would be something of an understatement. It used to be that the bar, in terms of both knowledge and hardware, was so high that only those truly dedicated were able to explore the radio spectrum. But today anyone with $20 can pick up an RTL-SDR device, combine it with a wide array of open source software, and gain access to a previously invisible world.

ImageThat being said, RTL-SDR is usually considered an “Economy Ticket” to the world of RF. It gets your foot in the door, but experienced RF hackers are quick to point out you’ll need higher-end hardware if you want to start doing more complex experiments. But the KerberosSDR may soon change the perception of RTL-SDR derived hardware. Combining four R820T2 SDRs on a custom designed board, it allows for low-cost access to high concept technologies such as radio direction finding, passive radar, and beam forming. If you get bored with that, you can always just use it as you would four separate RTL-SDR dongles, perfect for applications that require monitoring multiple frequencies such as receiving trunked radio.

KerberosSDR (which was previously known as HydraSDR) is a collaborative effort between the Othernet engineering team and the folks over at RTL-SDR.com, who earlier in the year put out a call for an experienced developer to come onboard specifically for this project. Tamás Peto, a PhD student at Budapest University of Technology and Economics, answered the call and has put together a system which the team plans on releasing as open source so the whole community can benefit from it. In the videos after the break, you can see demonstrations of the direction finding and passive radar capabilities using an in-development version of KerberosSDR.

As for the hardware, it’s a combination of the RTL-SDR radios with an onboard GPIO-controlled wide band noise source for calibration, as well as an integrated USB hub so it only takes up one port. Everything is wrapped up in a shielded metal enclosure, and the team is currently experimenting with a header on the KerberosSDR PCB that would let you plug it directly into a Raspberry Pi or Tinkerboard.

The team hopes to start final hardware production within the next few months, and in the meantime has set up a mailing list so interested parties can stay in the loop and be informed when preorders start.

If you can’t wait until then, we’ve got a detailed write-up on DIY experiments with passive radar using RTL-SDR hardware, and you can always use your browser if you want to get your radio direction finding fix.

Continue reading “Direction Finding And Passive Radar With RTL-SDR”

Image

Global Radio Direction Finding In Your Browser

Radio direction finding is one of those things that most Hackaday readers are likely to be familiar with at least on a conceptual level, but probably without much first-hand experience. After all it’s not everyday that you need to track down a rogue signal, let alone have access to the infrastructure necessary to triangulate its position. But thanks to the wonders of the Internet, at least the latter excuse is now a bit less valid.

Image
Triangulated location of “The Buzzer”

The RTL-SDR Blog has run a very interesting article wherein they describe how the global network of Internet-connected KiwiSDR radios can be used for worldwide radio direction finding. If you’ve got a target in mind, and the time to fiddle around with the web-based SDR user interface, you now have access to the kind of technology that’s usually reserved for world superpowers. Indeed, the blog post claims this is the first time such capability has been put in the hands of the unwashed masses. Let’s try not to mess this up.

To start with, you should have a rough idea of where the signal is originating from. It doesn’t have to be exact, but you want to at least know which country to look in. Then you pick one of the nearby public KiwiSDR stations and tune the frequency you’re after. Repeat the process for a few more stations. In theory the more stations you have the better, but technically three should be enough to get you pretty close.

With your receiving stations selected, the system will then start Time Difference of Arrival (TDoA) sampling. This technique compares the time the signal arrives at each station in relation to the KiwiSDR’s GPS synchronized clock. With enough of this data from multiple stations, it can estimate the origin of the signal based on how long it takes to reach different parts of the globe.

It’s not perfect, but it’s pretty impressive for a community run project. The blog post goes on to give examples of both known and unknown signals they were able to triangulate with surprising accuracy: from the US Navy’s VLF submarine transmitter in Seattle, Washington to the mysterious “Buzzer” number station hidden somewhere in Russia.

We’ve covered small-scale triangulation using Wi-Fi, and even a project that aimed to use drones to home in on rescue beacons, but the scale of the KiwiSDR TDoA system is really on a whole new level. Use it wisely.

Image

Flush Out Car Thieves With A Key Fob Jammer Locator

We all do it — park our cars, thumb the lock button on the key fob, and trust that our ride will be there when we get back. But there could be evildoers lurking in that parking lot, preventing you from locking up by using a powerful RF jammer. If you want to be sure your car is safe, you might want to scan the lot with a Raspberry Pi and SDR jammer range finder.

Inspired by a recent post featuring a simple jammer detector, [mikeh69] decide to build something that would provide more directional information. His jammer locator consists of an SDR dongle and a Raspberry Pi. The SDR is set to listen to the band used by key fobs for the continuous, strong emissions you’d expect from a jammer, and the Pi generates a tone that varies relative to signal strength. In theory you could walk through a parking lot until you get the strongest signal and locate the bad guys. We can’t say we’d recommend confronting anyone based on this information, but at least you’d know your car is at risk.

We’d venture a guess that a directional antenna would make the search much easier than the whip shown. In that case, brushing up on Yagi-Uda antenna basics might be a good idea.

Image

Simple Scanner Finds The Best WiFi Signal

Want to know which way to point your WiFi antenna to get the best signal? It’s a guessing game for most of us, but a quick build of a scanning WiFi antenna using mostly off-the-shelf components could point you in the right direction.

With saturation WiFi coverage in most places these days, optimizing your signal might seem like a pointless exercise. And indeed it seems [shawnhymel] built this more for fun than for practical reasons. Still, we can see applications where a scanning Yagi-Uda antenna would come in handy. The build started with a “WiFi divining rod” [shawnhymel] created from a simple homebrew Yagi-Uda and an ESP8266 to display the received signal strength indication (RSSI) from a specific access point. Tired of manually moving the popsicle stick and paperclip antenna, he built a two-axis scanner to swing the antenna through a complete hemisphere.

The RSSI for each point is recorded, and when the scan is complete, the antenna swings back to the strongest point. Given the antenna’s less-than-perfect directionality — [shawnhymel] traded narrow beam width for gain — we imagine the “strongest point” is somewhat subjective, but with a better antenna this could be a handy tool for site surveys, automated radio direction finding, or just mapping the RF environment of your neighborhood.

Yagi-Uda antennas and WiFi are no strangers to each other, whether it be a WiFi sniper rifle or another recycling bin Yagi.  Of course this scanner isn’t limited to WiFi. Maybe scanning a lightweight Yagi for the 2-meter band would be a great way to lock onto the local Ham repeater.

Continue reading “Simple Scanner Finds The Best WiFi Signal”