Its almost Hump Day and just 9 more days until Christmas!! So I thought I'd dig out these class instructions for this "Our Vacation" Travel Envelope Accordian Mini Album class that I originally taught at Scrap 'N Yap in Monrovia, CA this past summer to share with you all here.
If you have any questions, please feel free to leave a comment and I'd be glad to help you out. Enjoy!
Materials Needed:
• 5 envelopes or any odd number – any size will do, but the larger the better as the envelope size will determine the size of your work surface on each panel and how large your pocket will be, should you decide to use the pockets. NOTE: my envelopes measured 5.5 x 8 inches each.
• 1 Extra envelope to use as a pattern template (you’ll be using this to trace the inside pages as well as the inside of the cover flap. This extra envelope will NOT be incorporated into your envelope accordion album.
• A few sheets of coordinating patterned papers (I used a total of 5 12x12 Heidi Swapp World Traveller patterned papers as I was able to cut 2 qty of 5.5x8 panels from each sheet).
• A few sheets of coordinating solid cardstock (I used 1.5 sheets of 12x12 Bazzill cardstock.
• At least 1 yard of ¾ inch wide ribbon which will be used to tie your accordian album together.
• Various embellishments (I used the entire package of Heidi Swapp World Traveller chipboard accents, a few Creative Café chipboard frames and colored office tags, a handful of prima flowers, 1 Karen Foster large round rhinestone brad, stickles, MM tiny alphabet stickers, Heidi Swapp “Escape” acrylic stamp, and travel themed stickers from Blue Cardigan.)
Tools Needed:
• Exacto Knife to make slits to attach your ribbon.
• A really good adhesive. I used UHU glue stick. I swear by that stuff.
• Glue dots – I can’t live without these boogers as I used it to attach the bulkier embellishments like chipboard and ric rac ribbons, etc.
• Pencil or pen for tracing.
• Paper Trimmer
• Sharp scissors – I prefer the short handled yellow Cutterbee scissors.
• Distressing tool – I prefer my distresser from SU to distress the edges of all my papers and the Basic Grey Distressing Kit for all their various skinny sized files.
Instructions:
1. Glue the INSIDE of the FIRST envelope flap (the area that is usually gummed) to the bottom of the FRONT of the SECOND envelope (this is the area underneath where you would normally write the addressee information (vs. the return address which would be written at the top left).
Here’s a picture of a few of the envelopes lined up, so you can see what I’m talking about. Hope I didn’t confuse you.
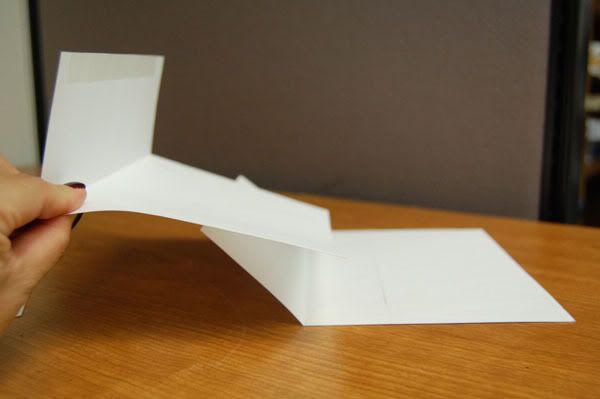
I stagnated the envelope flaps so you can see more clearly in this picture.
And here’s what they look like normally when the flaps are glued to another.
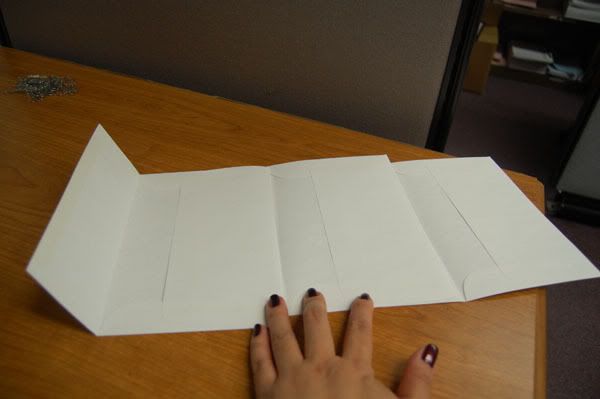
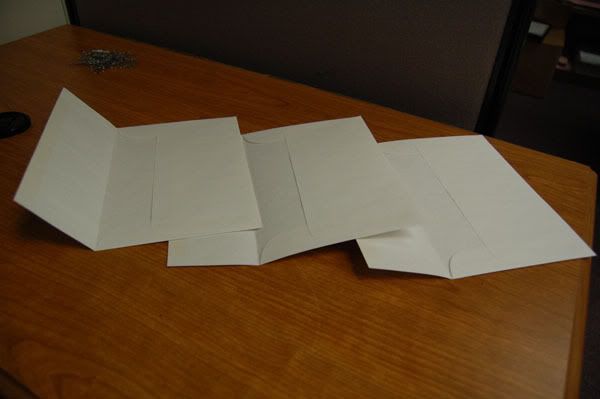
2. Now you have 2 envelopes glued together which are connected by just one of the envelope flaps. Continue to glue the envelope flaps together to connect all the 5 envelopes. In the end, you should have a chain of envelopes glued together. On one end, there is just ONE envelope flap which will serve as your cover for the entire album.
If you lay out the entire “chain,” all your pockets should be on the same side. For the rest of this class, we will refer to this side of the chain as “Pocket Side.”
Ditto for the other side, which should be the “front” of your envelope that would normally be the place you put the return and sending addresses. For the rest of this class, we will refer to this side of the chain as “FRONT Addressing Side.”
3. Take your EXTRA envelope that I had you set aside for your measuring template. Measure yours to determine the size of your panels. Cut 10 panels (in my case 10 qty of 5.5 x 8 panels) from your patterned paper stash.
4. Adhere each panel of patterned paper to each of the envelope panels on the FRONT ADDRESSING Side of your accordion chain. You will have used up 5 of the 10 patterned paper panels so far.
5. Now take the same EXTRA envelope that now serves as your template and use it to trace
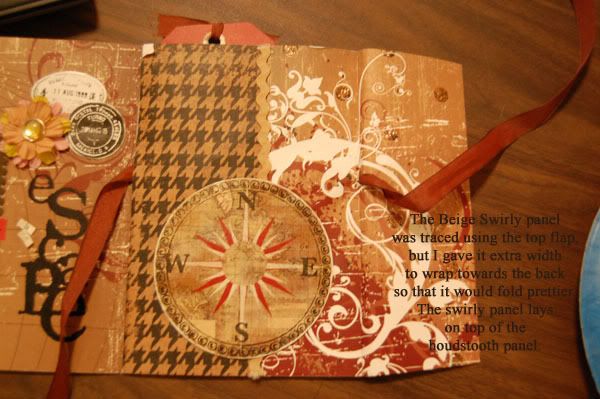
a) The envelope flap - For the envelope flap which will be the accordion album’s OUTSIDE top cover, I measured the entire flap and allowed a few extra inches so that it will wrap around partially on the other side (which is the FRONT ADDRESSING Side) so that when you open and close the flap on your finished book, its smooth. In my example, I used the the brown swirly HS patterned paper that overlays the houndstooth 5.5 x 8 panel.
b) The envelope flap – for the inside of the envelope flap which will be for the INSIDE album cover flap. In my example, I cut mine out of just black cardstock.
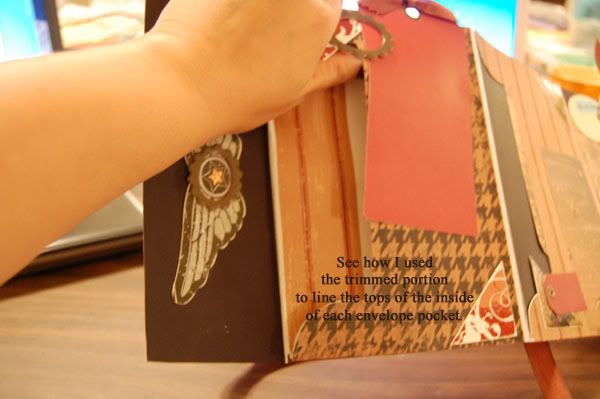
c) the lip of the pocket portion of the inside of the EXTRA envelope using the remainder of your 5 patterned paper panels. I used a pencil to trace onto the backside of the pp panels, and then used my cutterbee scissors to cut off the excess.
TIP: BE SURE to cut along your traced lines ALONE. Because the small remaining part can be used as LINERS for the top insides of each envelope pocket area.
6. Now that you have all your pieces traced and cut out, grab your accordion “chain” and lay it out so that the “Pocket Side” is facing up.
7. Adhere the larger patterned paper panels to the coordinating top side of your envelope pocket panels.
8. Adhere the remaining trimmed pieces to the TOPS of the inside of each envelope pocket so that they become liners. In effect, you have created an envelope accordion book with functional pockets.
9. Adhere both the top cover and the inner cover of the envelope flaps. Now all the surfaces of your envelopes are now covered with some sort of patterned paper or cardstock.
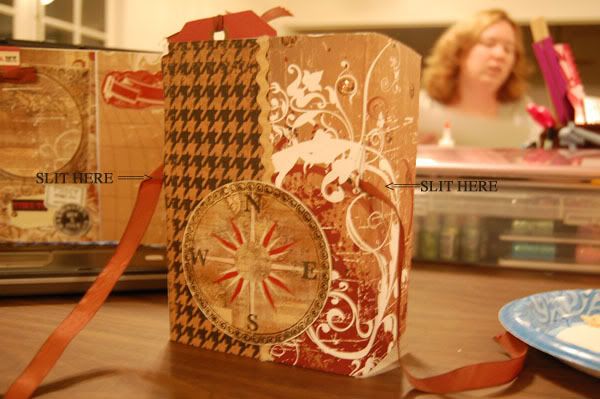
10. Grab your exacto knife and make slits to allow the width of your desired ribbon on both sides of your LAST envelope panel which still has the cover flap. See my picture. Thread your ribbon through. I glued my ribbon down so that it would not get loose as a result of regular handling of the accordion album.
11. Decorate/Embellish each panel and cover as desired. NOTE: I distressed all the edges of my patterned paper panels before adhering them.
12. My finished product, when laying “Pocket Side” face up with the envelope flap on the my left hand side, should fold into each other, one panel at a time beginning from the right side.
Here are pictures, panel by panel of my finished Envelope Accordian Album. I can’t wait to see yours!!!
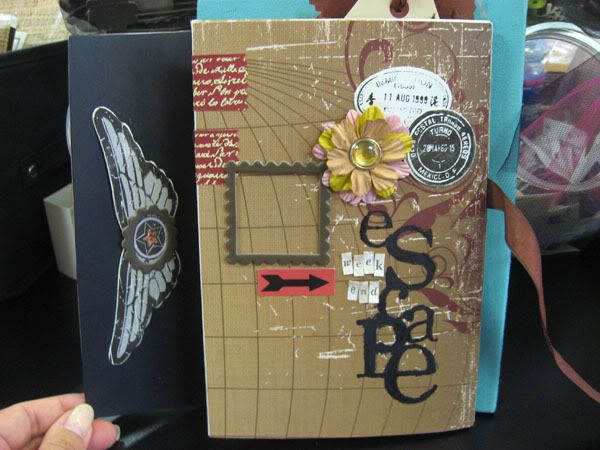
Cover:
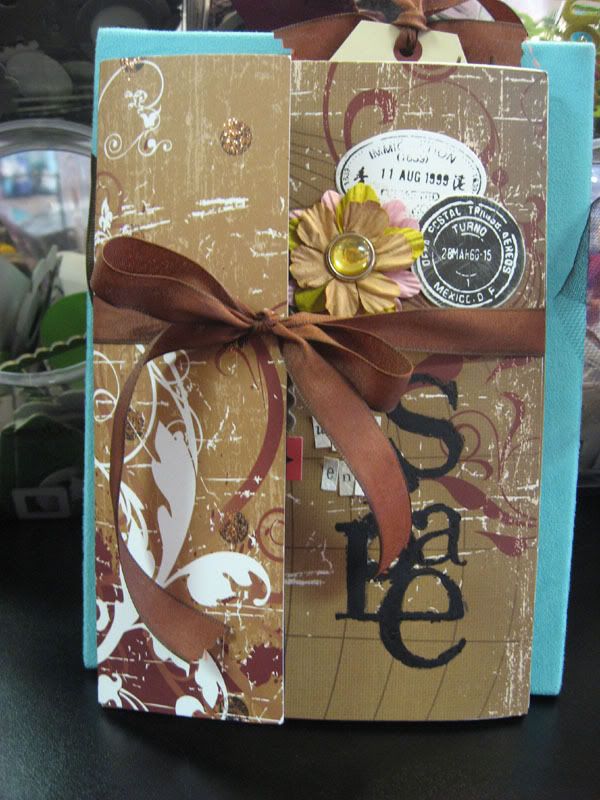 Cover Open with Flap Open:
Page 1 -2 (This is me unrolling the accordion pages AWAY from the envelope flap)
Cover Open with Flap Open:
Page 1 -2 (This is me unrolling the accordion pages AWAY from the envelope flap)
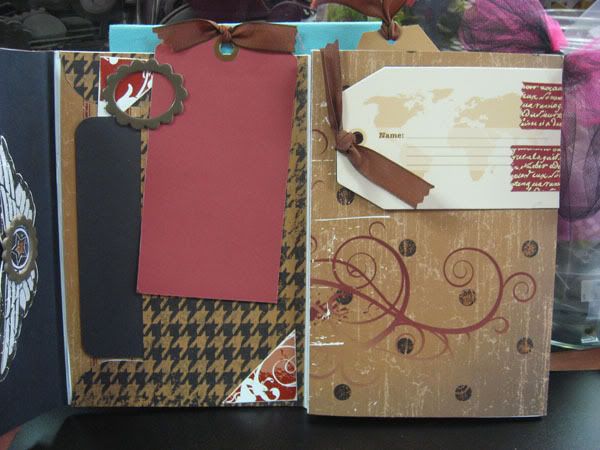 Page 1 -2 -3 (This is me unrolling the accordion pages AWAY from the envelope flap)
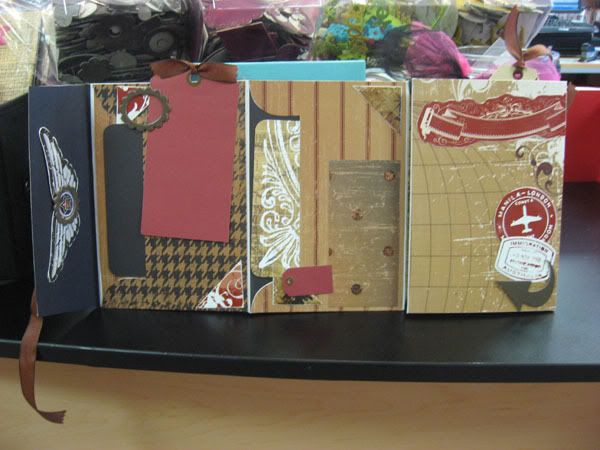 Page 1 -2-3-4 (This is me unrolling the accordion pages AWAY from the envelope flap)
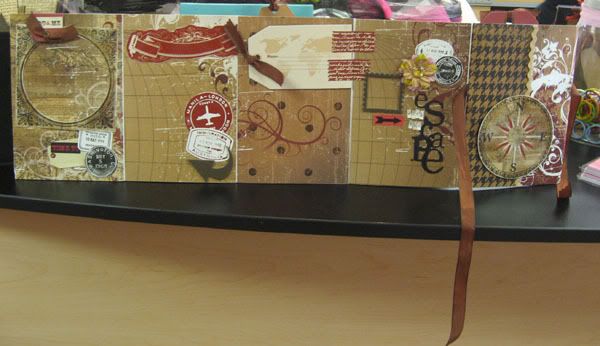
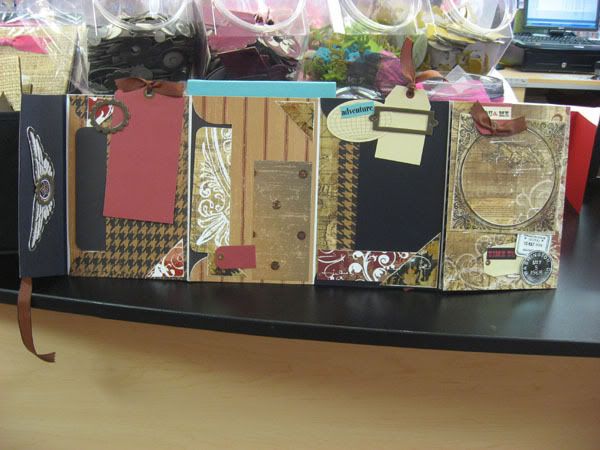 Page 1 -2 -3-4-5 (This is the ENTIRE ”Pocket Side” Pages all unfolded out..the entire accordion chain on display)
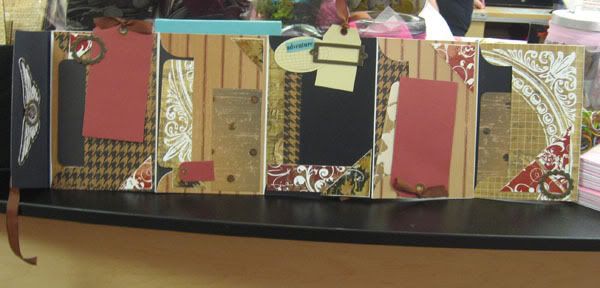 This is the ENTIRE “Front Addressing Side” accordion chain on display:
Thanks for looking! :)


.jpeg)