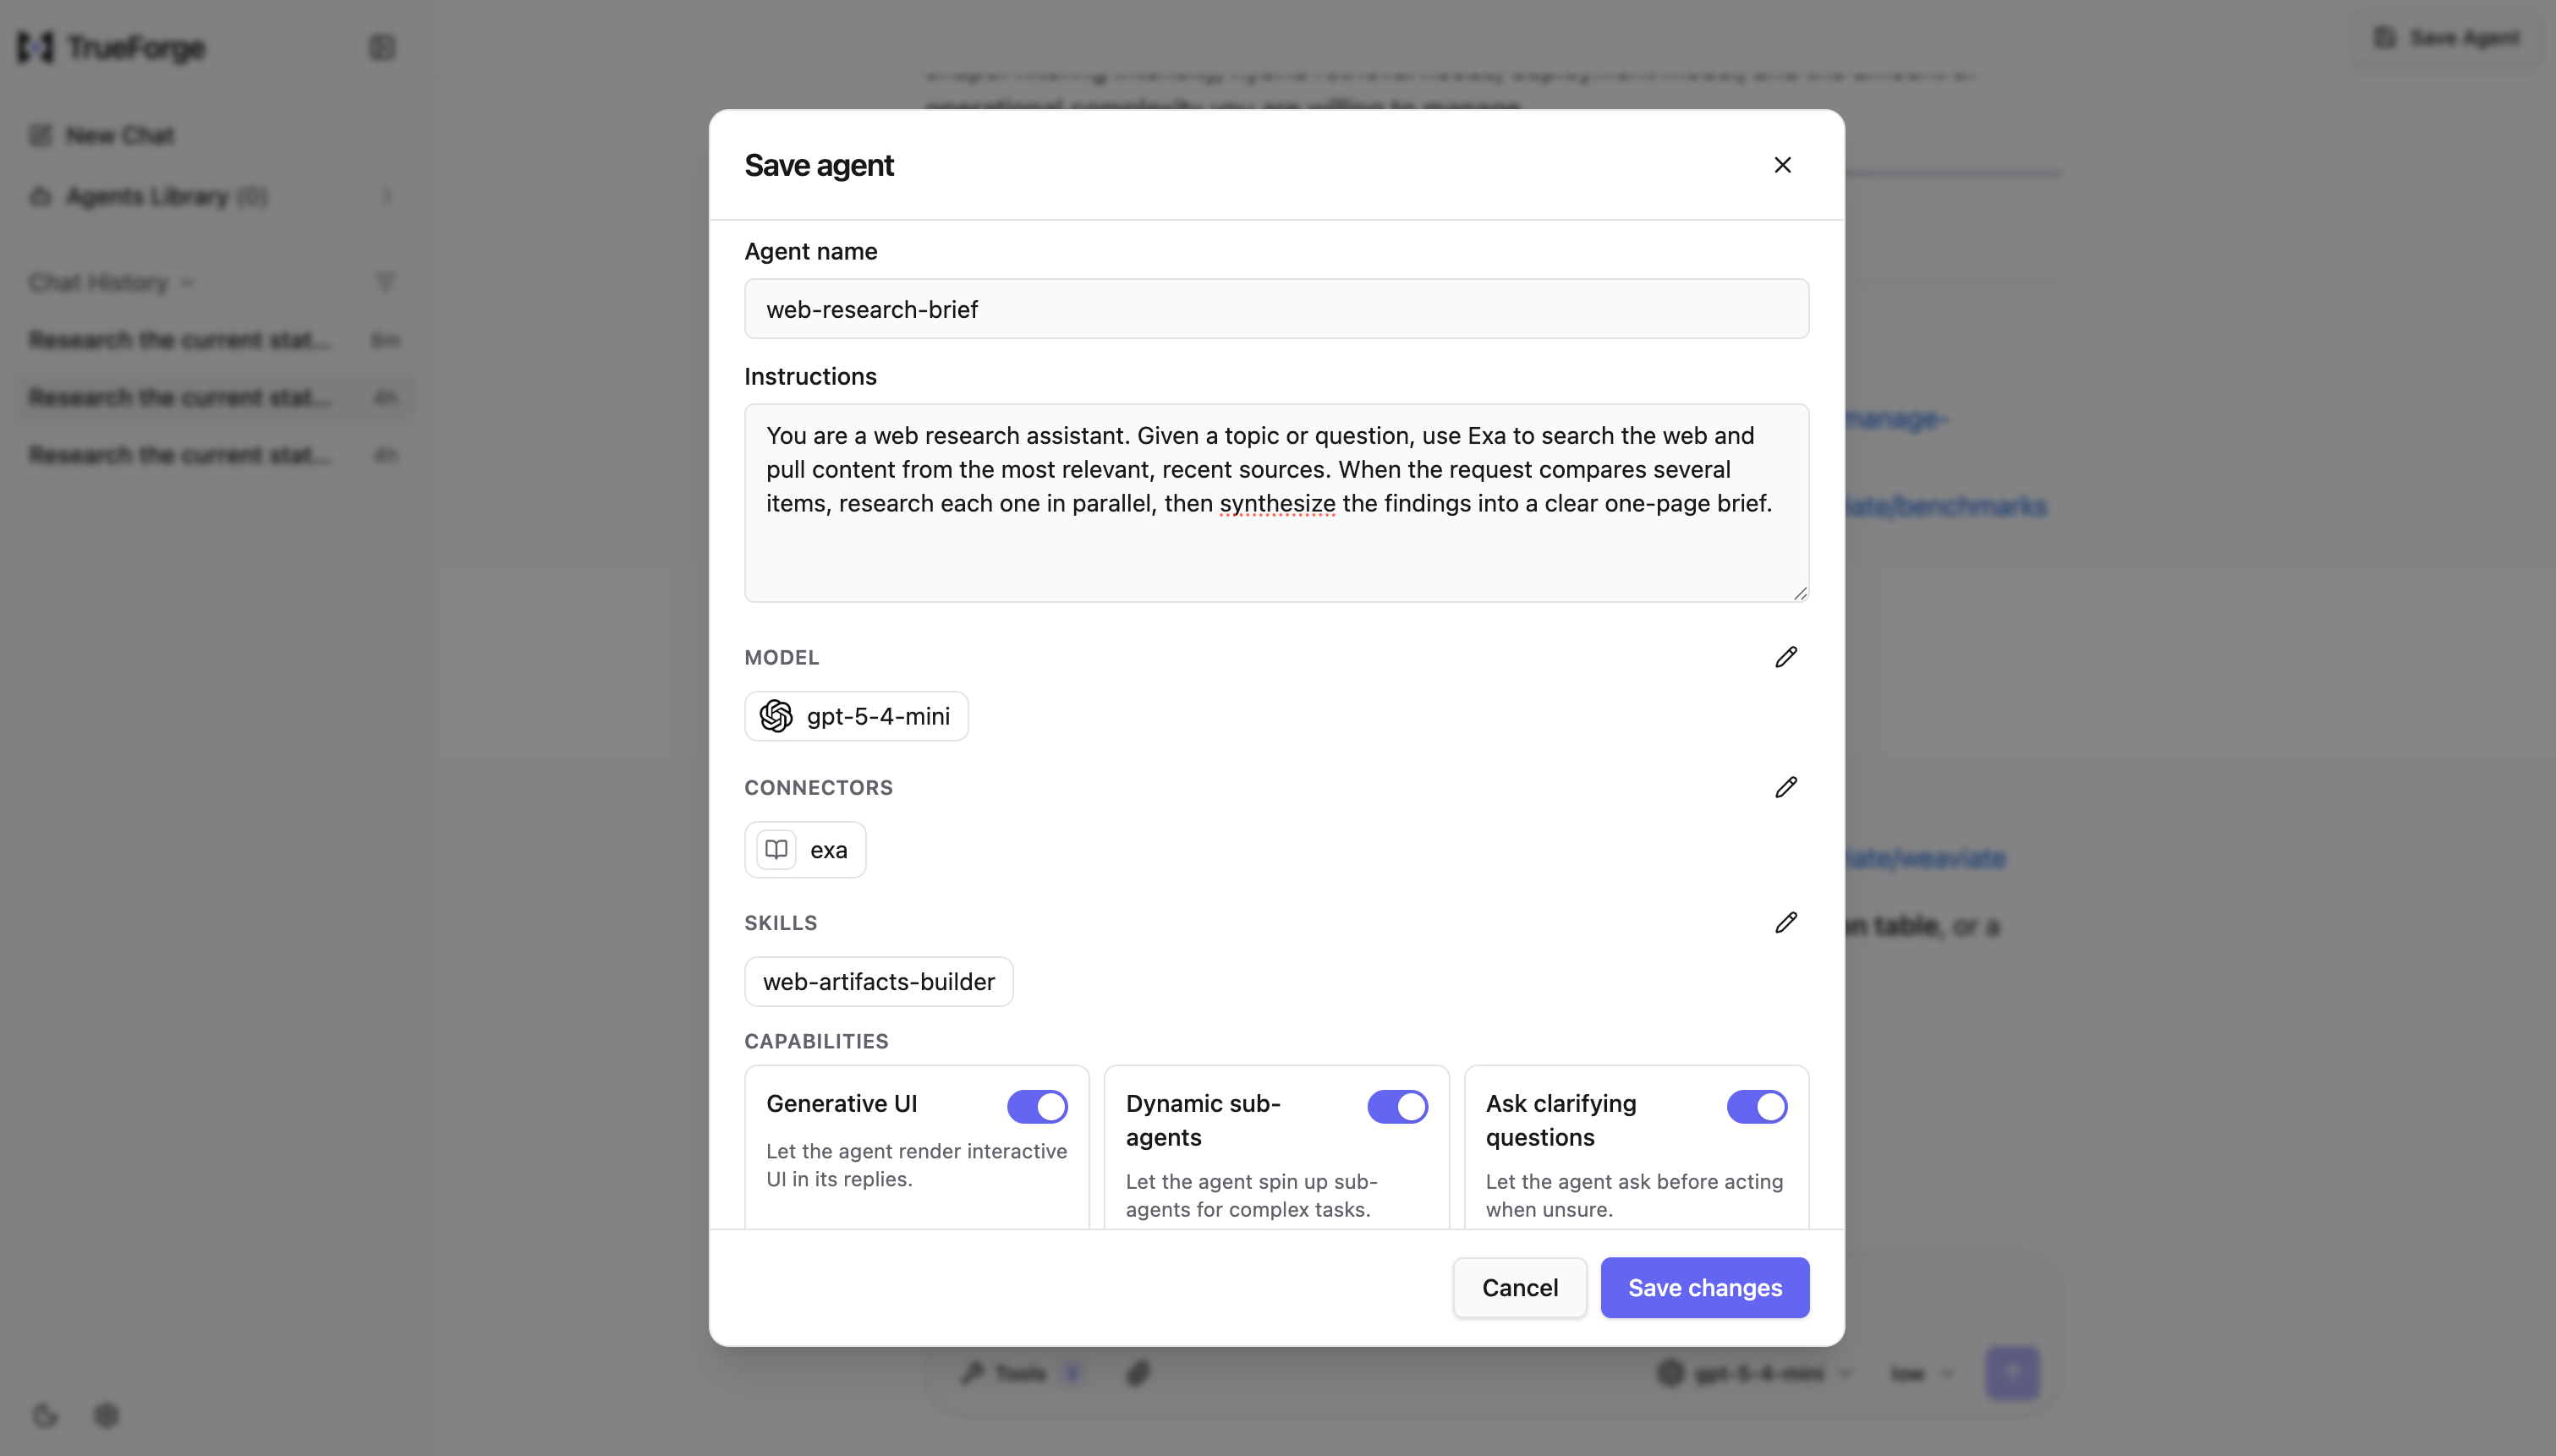
Every option on an agent, what the UI covers today, and how to set the rest via the API.
An agent is a saved, reusable definition: a model, instructions, the tools and skills it can use, and a set of runtime behaviors. You build one in the chat UI or via the SDK — either way, TrueForge stores the same agent spec, and any number of conversations can run against it.
Each option below is part of the agent definition. The Set in line on each shows where you can configure it today — the chat UI, the API, or both.
Model
The LLM that runs the agent loop. Pick any model from the providers you configured under Settings → Models; switching later is a one-click change, with no new API keys in the agent definition.Via the API you can also pass model parameters — temperature, max_tokens, top_p, top_k, reasoning_effort, and more — which are forwarded to the provider as-is.Set in: UI (which model) · API (model + parameters)
Instructions
The system prompt for this agent’s role — what it does, who it’s for, and how it should behave. The harness appends its own guidance for enabled capabilities (sandbox, subagents, and so on), so keep this focused on your agent and move long playbooks into skills instead of the prompt.Set in: UI + API
MCP servers (tools)
The MCP servers whose tools the agent can call, attached by name from Settings → Connectors. Credentials live in the connector, never in the agent. Prefer only the servers the agent actually needs.Per server you can further control (via the API):
Which tools are enabled or disabled — expose everything, only read-only tools, or a specific list.
Preload — load a server’s full tool definitions upfront, or (default) discover them on demand to keep context lean. See Deferred Tool Loading. The preload toggle is also in the UI.
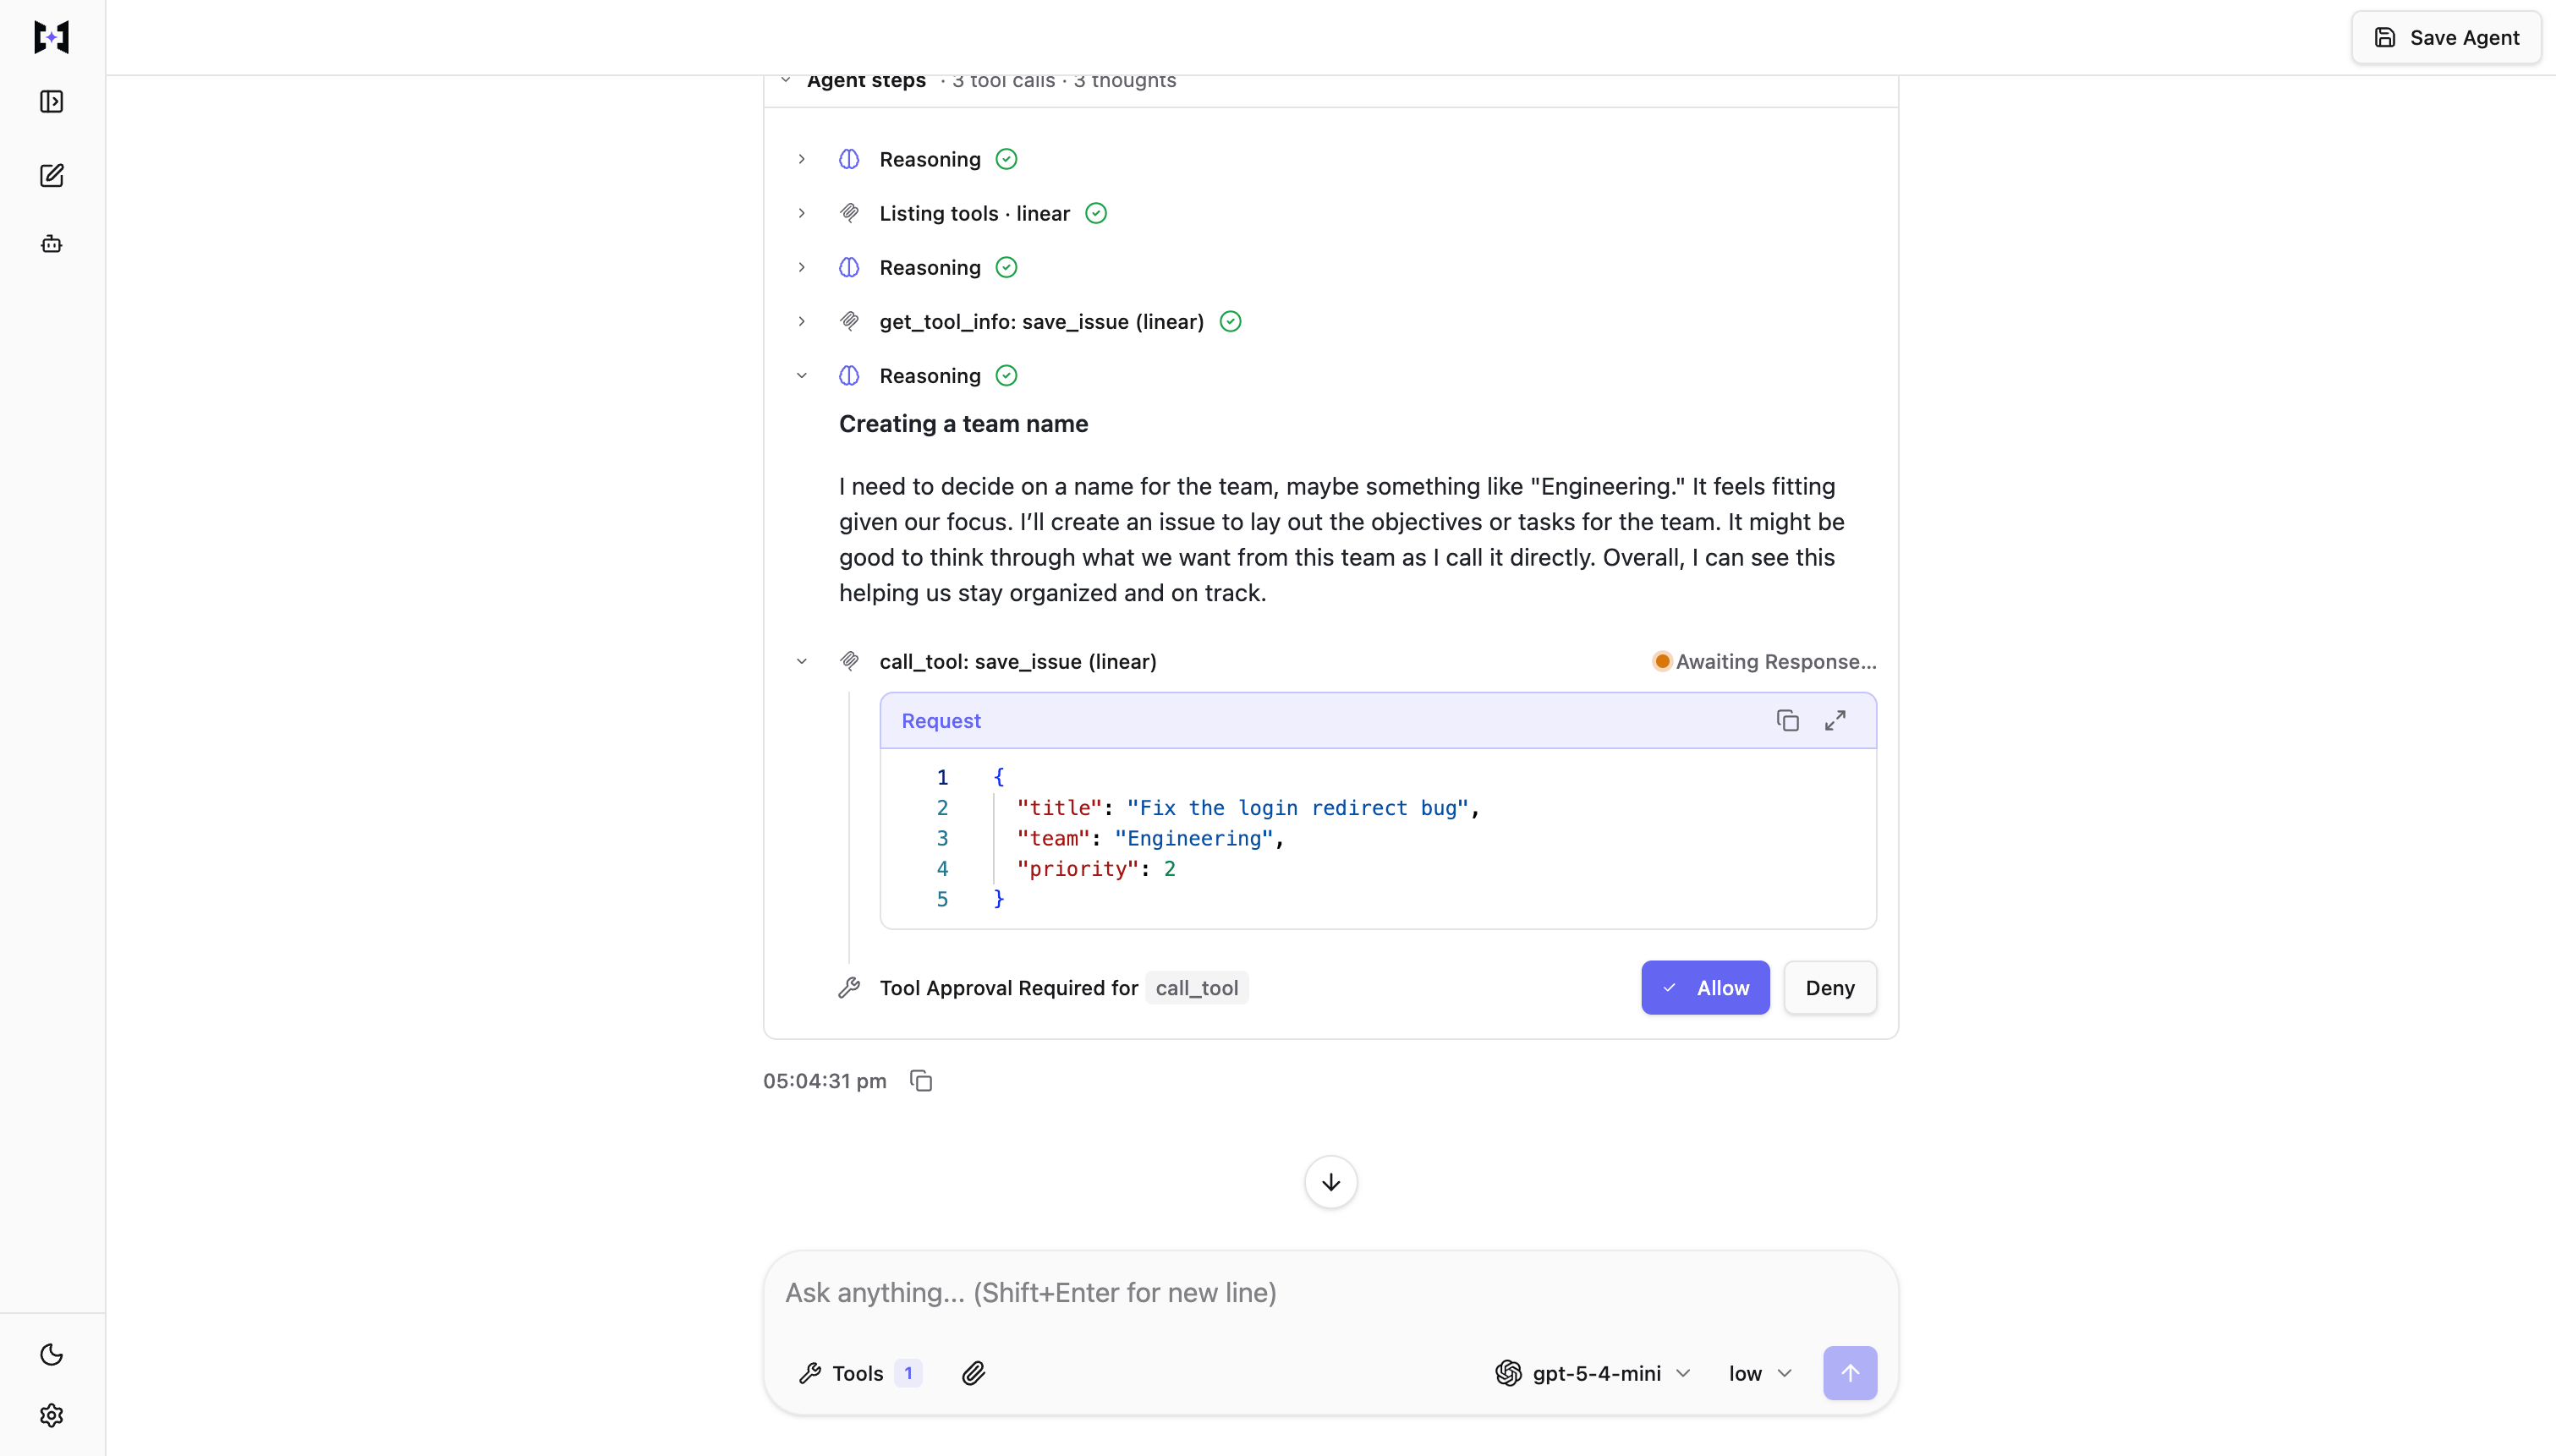
Tool approval — pause before sensitive tool calls until a human approves. See below.
Set in: UI (attach servers, preload toggle) · API (tool filters, approval policy)
Tool approval (API only)
Some tool calls shouldn’t run without a human’s sign-off. Tool approval pauses the agent before such a call, shows the tool name and arguments, and resumes only after the user chooses Allow or Deny in the chat UI.By default, the harness decides what to gate from the tool’s own MCP annotation: if the server marks a tool as write or destructive (the default ["@write", "@destructive"]), the agent pauses for approval before running it. Read-only tools run autonomously.
The chat UI pauses on a sensitive tool call with Allow / Deny.
You can override which tools require approval — gate a specific list, or every tool — but that is configured per MCP server via the API only (require_approval_for_tools).Set in: API
Skills
Skills are git-backed SKILL.md instruction packs that teach the agent specialized procedures — querying a database, following an escalation playbook, drafting release notes. Attach them by name; the agent loads the full skill only when it decides the skill is relevant.Attaching skills requires the agent’s sandbox to be enabled.Set in: UI + API
Sandbox
An isolated environment for running code, files, and shell commands, separate from the server. It’s off by default and provisioned only when the agent needs it. Required for skills and Code Mode.Optional extras (API): allow clients to download files the agent produces.Set in: UI (on/off) · API (on/off + file downloads)
Generative UI
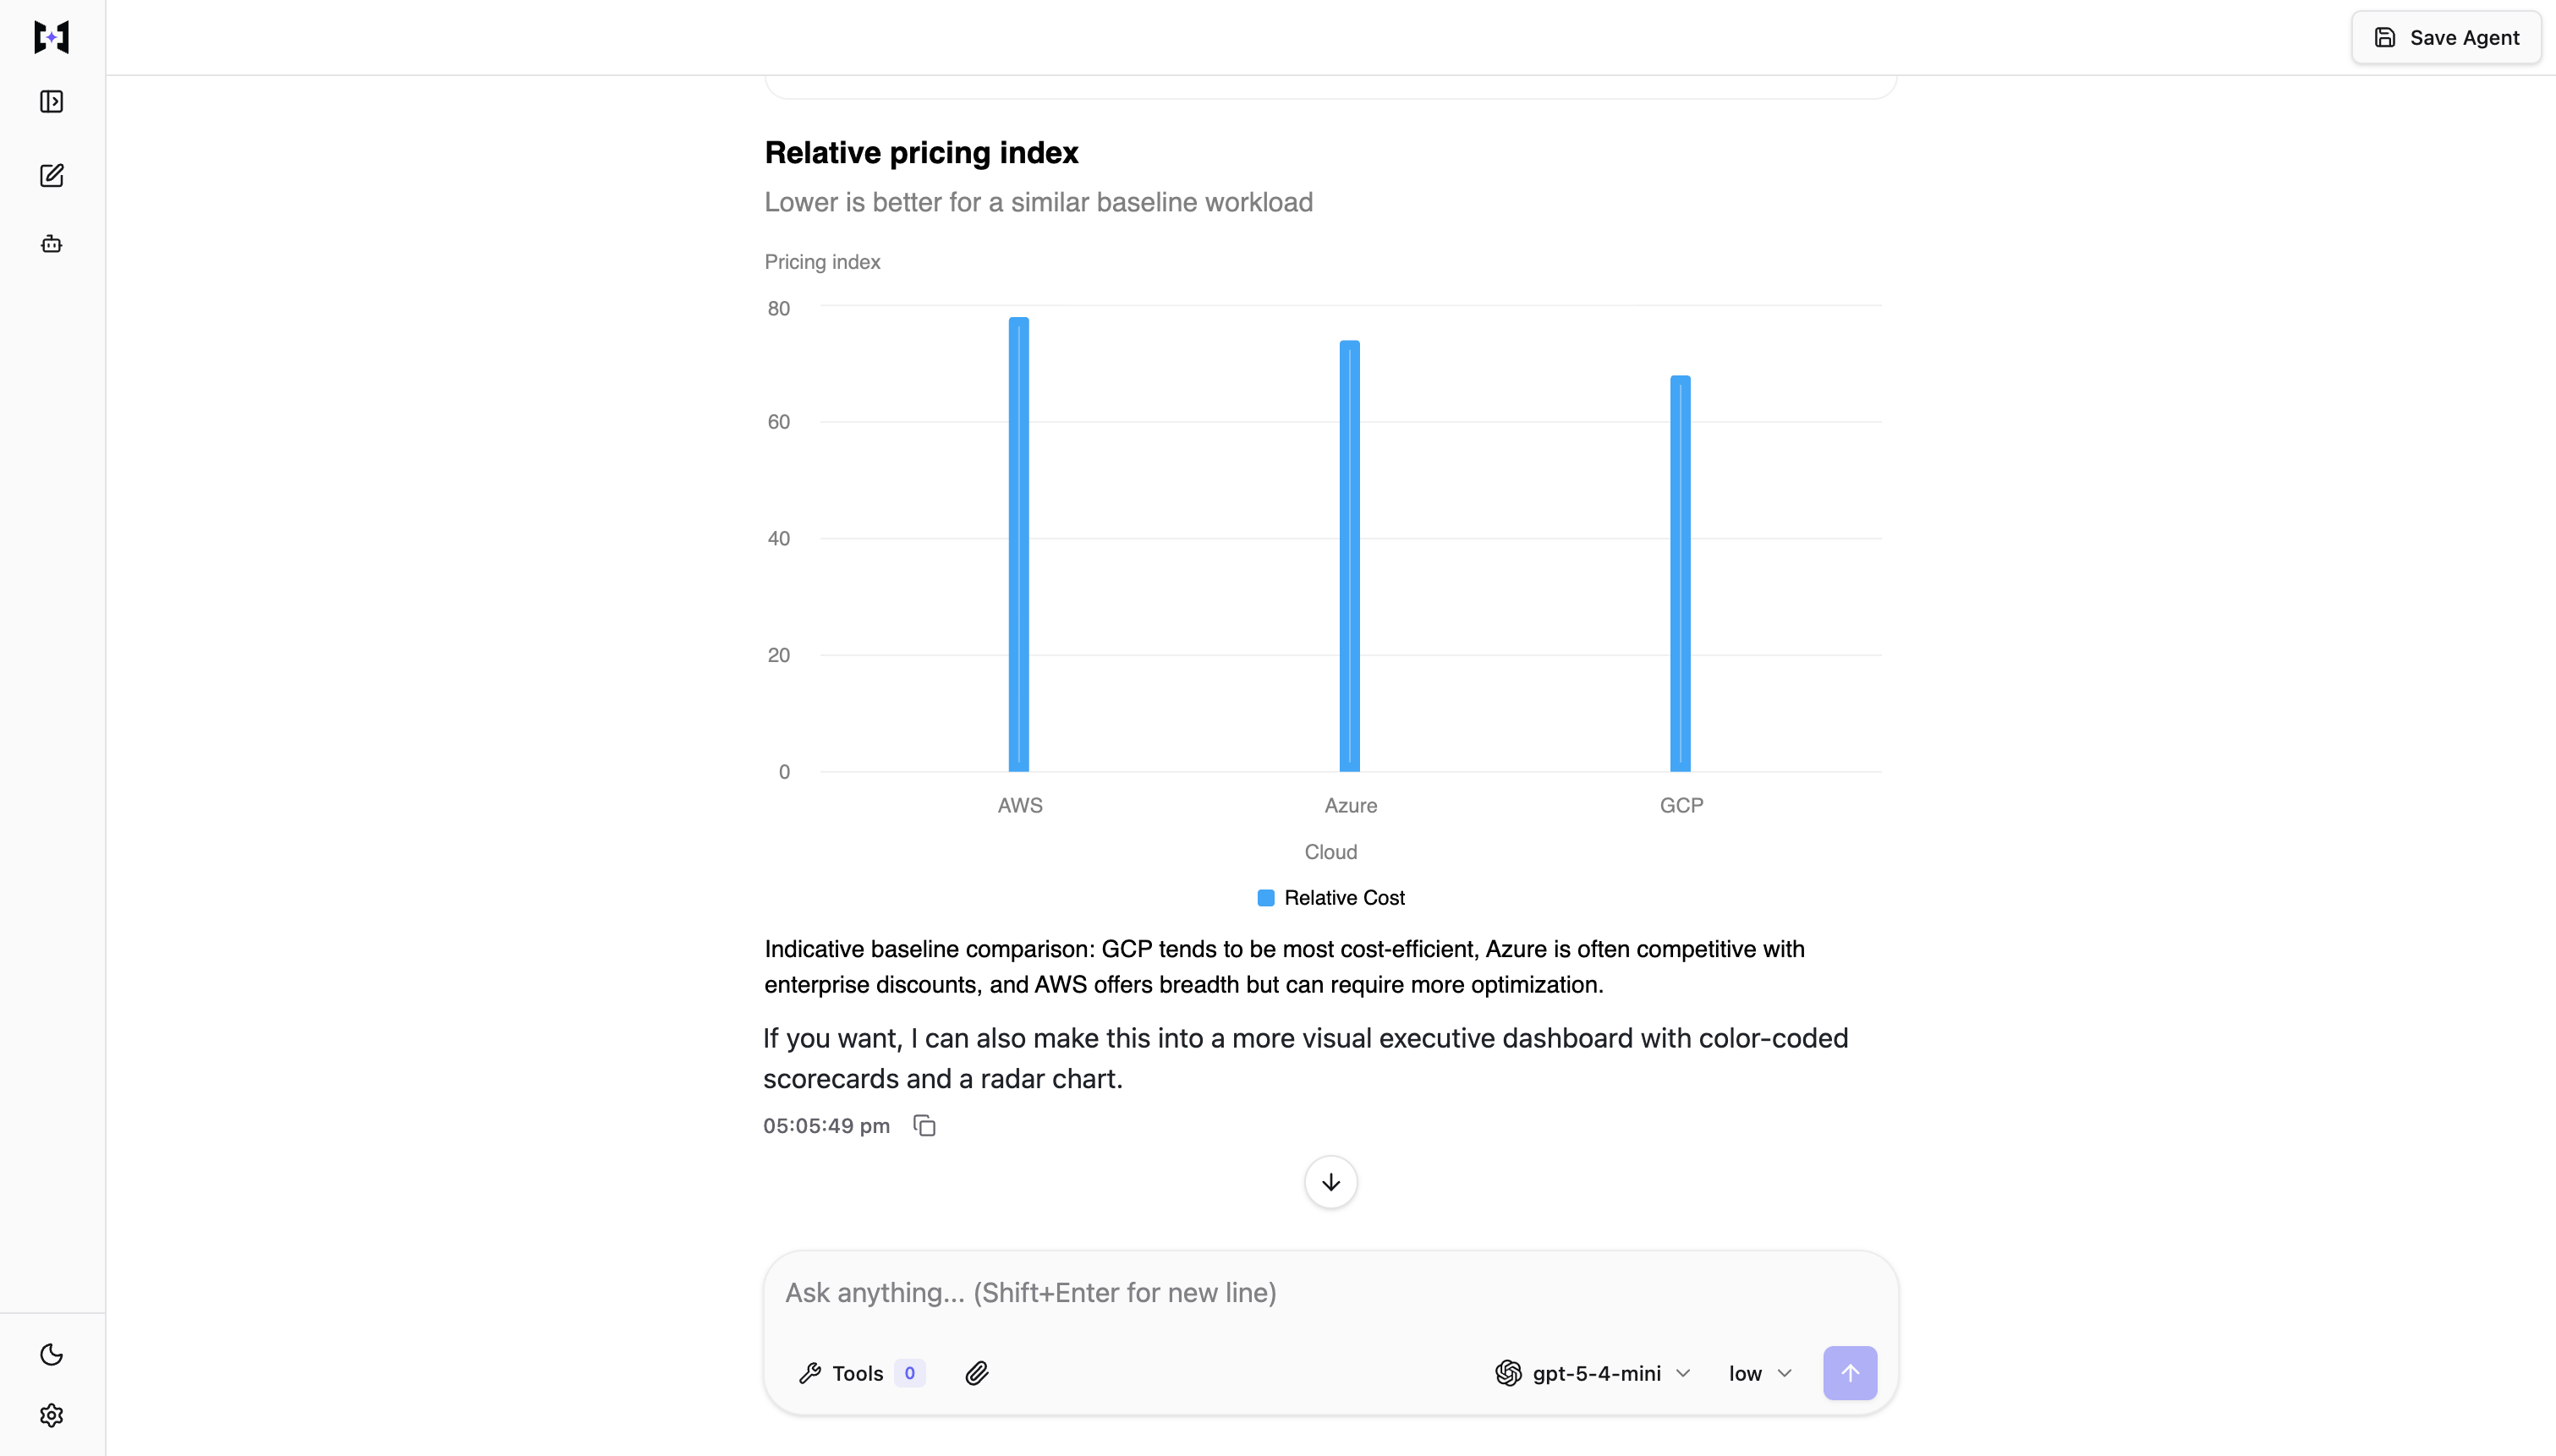
Lets the agent stream interactive components — charts, tables, cards, forms — that the chat UI renders as React. The agent embeds a small OpenUI snippet in its response; the client renders real, registered components as tokens stream in (no arbitrary code execution). On by default.
A Generative UI response with a chart rendered inline in chat.
Use case
What the agent renders
Dashboards
KPI cards, charts, comparison tables
Tables
Sortable logs, resources, result sets
Charts
Bar, line, pie patterns faster than prose
Forms
Guided inputs for the next action
Skip it for short explanations, bullet lists, or code where markdown is enough.Set in: UI + API
Ask clarifying questions
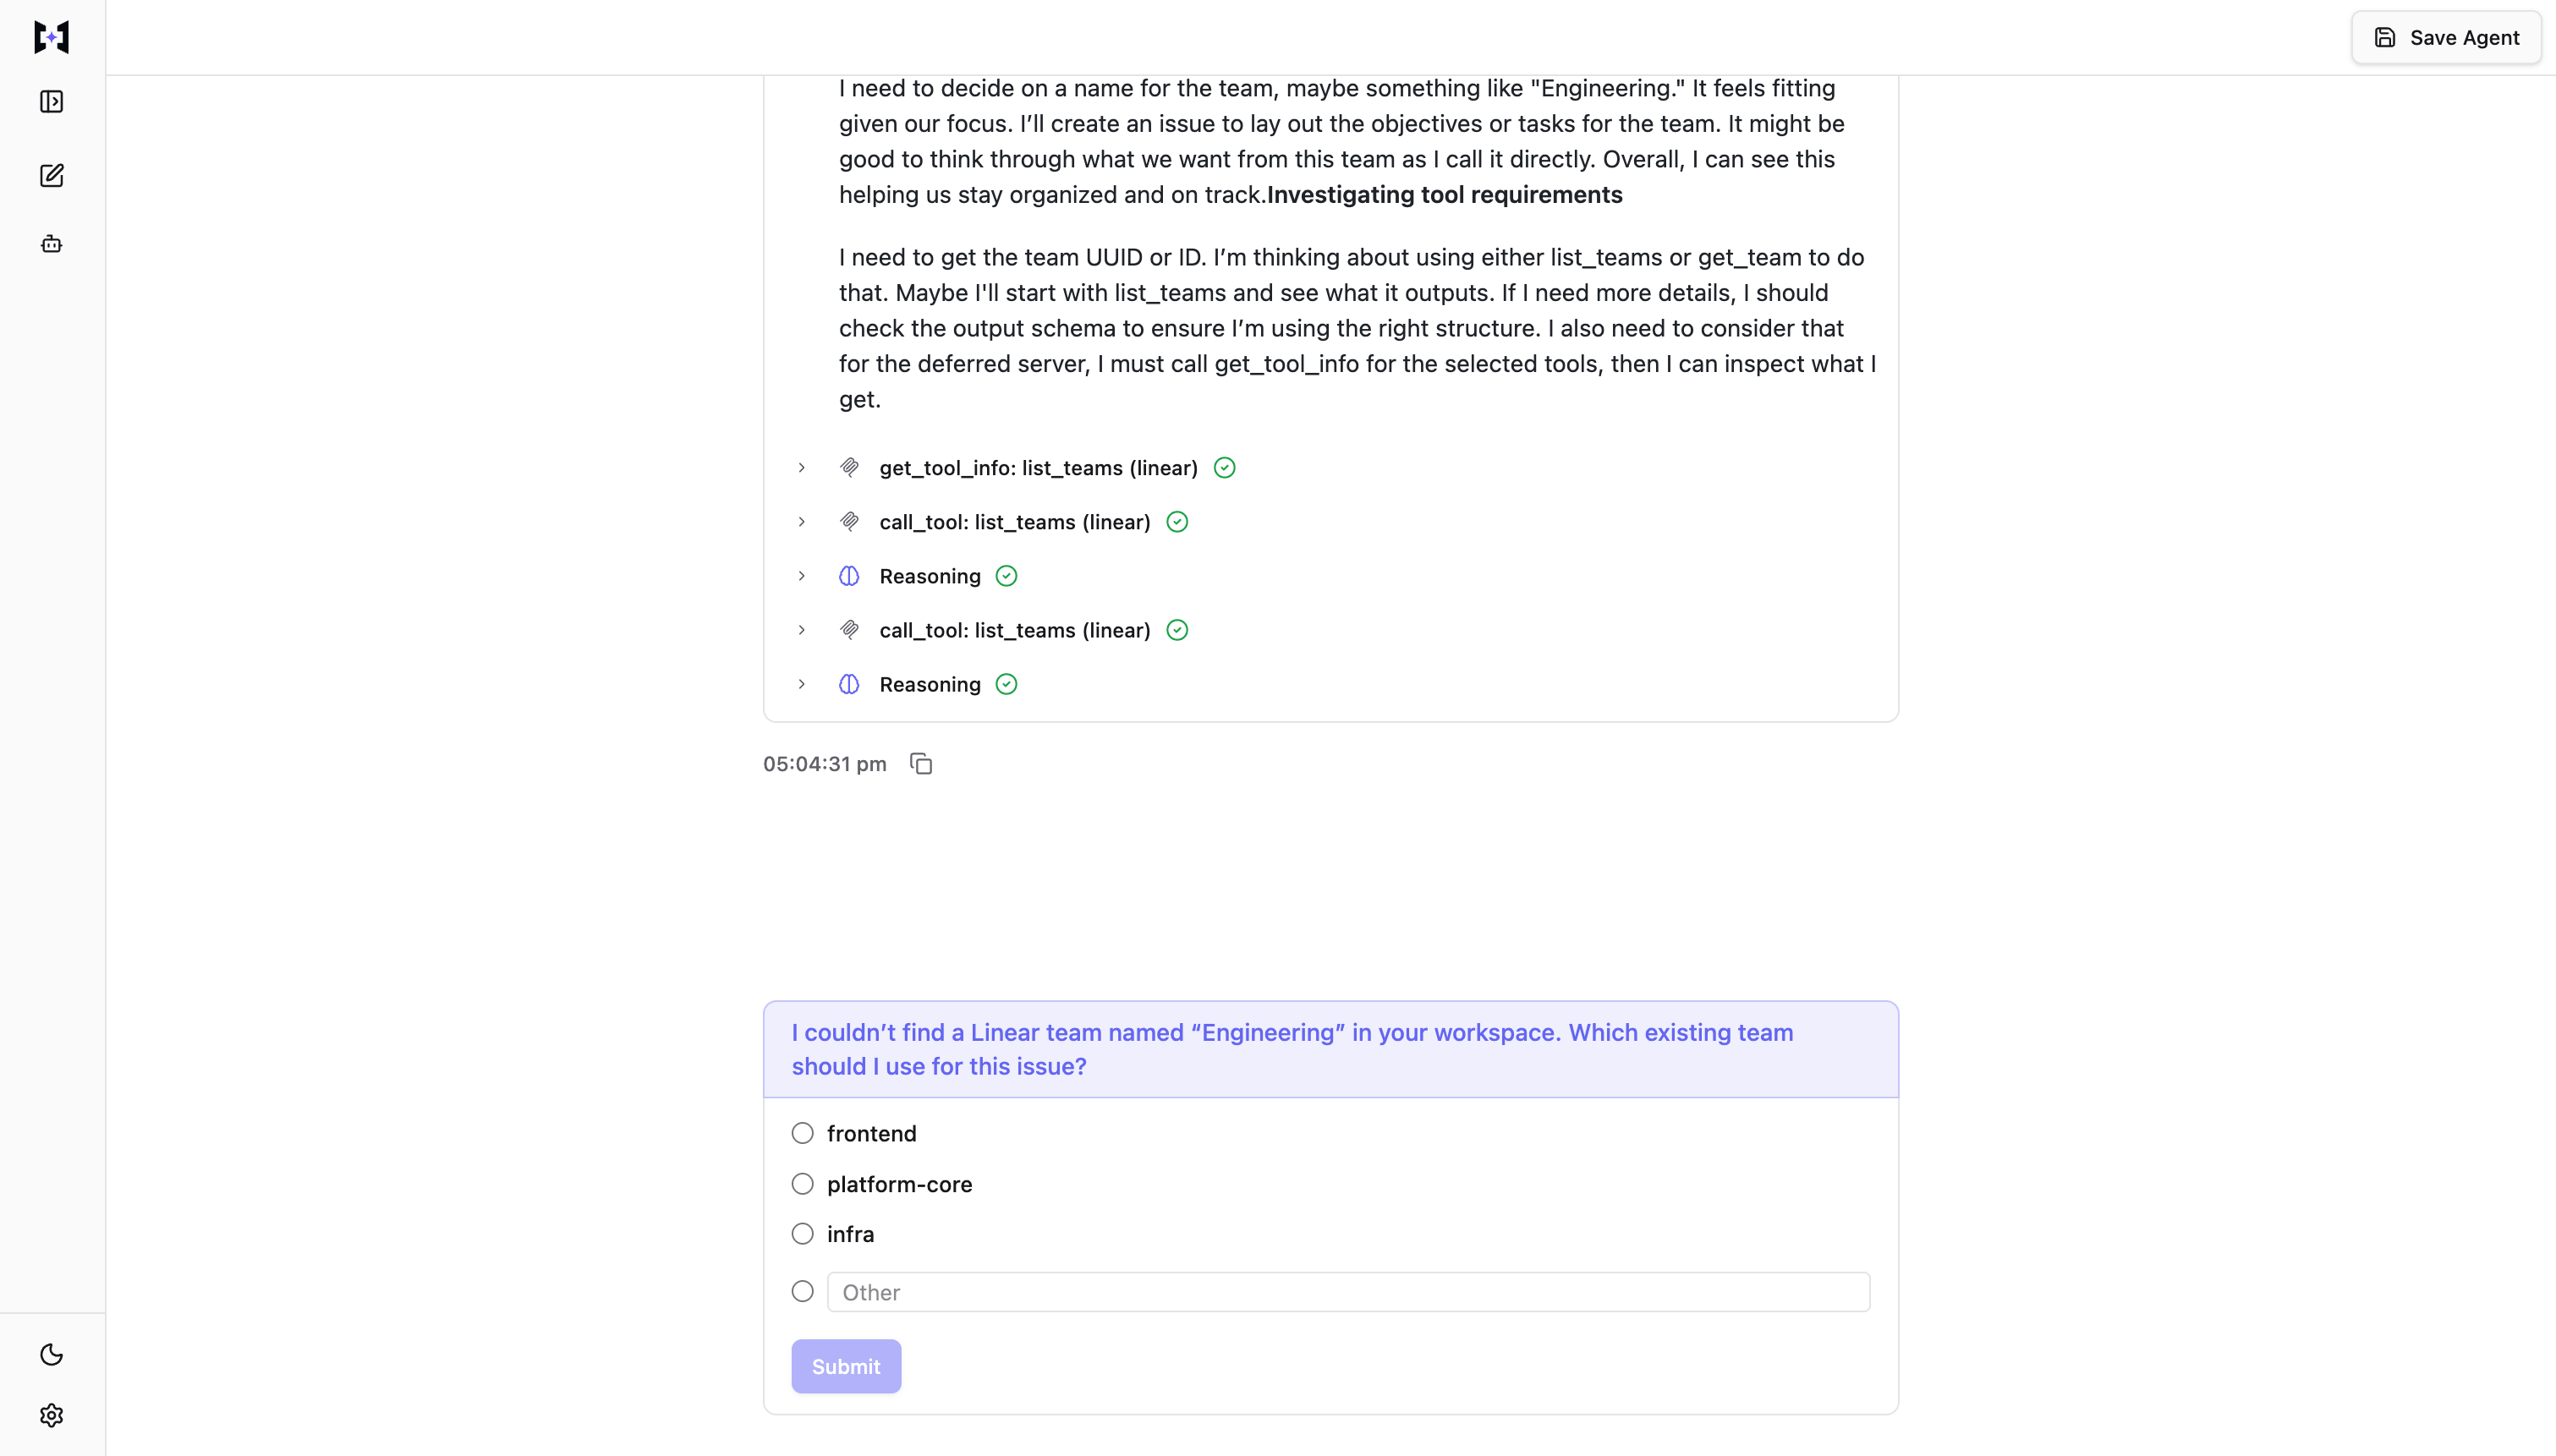
Lets the agent pause at a decision it shouldn’t guess — which environment to deploy to, which of several matches the user meant, an ambiguous required field — show a multiple-choice prompt, and resume with the chosen answer. On by default.
The chat UI renders the question and options as a selectable card.
Good for disambiguating matches, filling required fields the user didn’t specify, or picking a strategy before a destructive step. Skip it when the agent can confidently infer the answer — over-asking turns the agent into a form.Set in: UI + API
Dynamic sub-agents
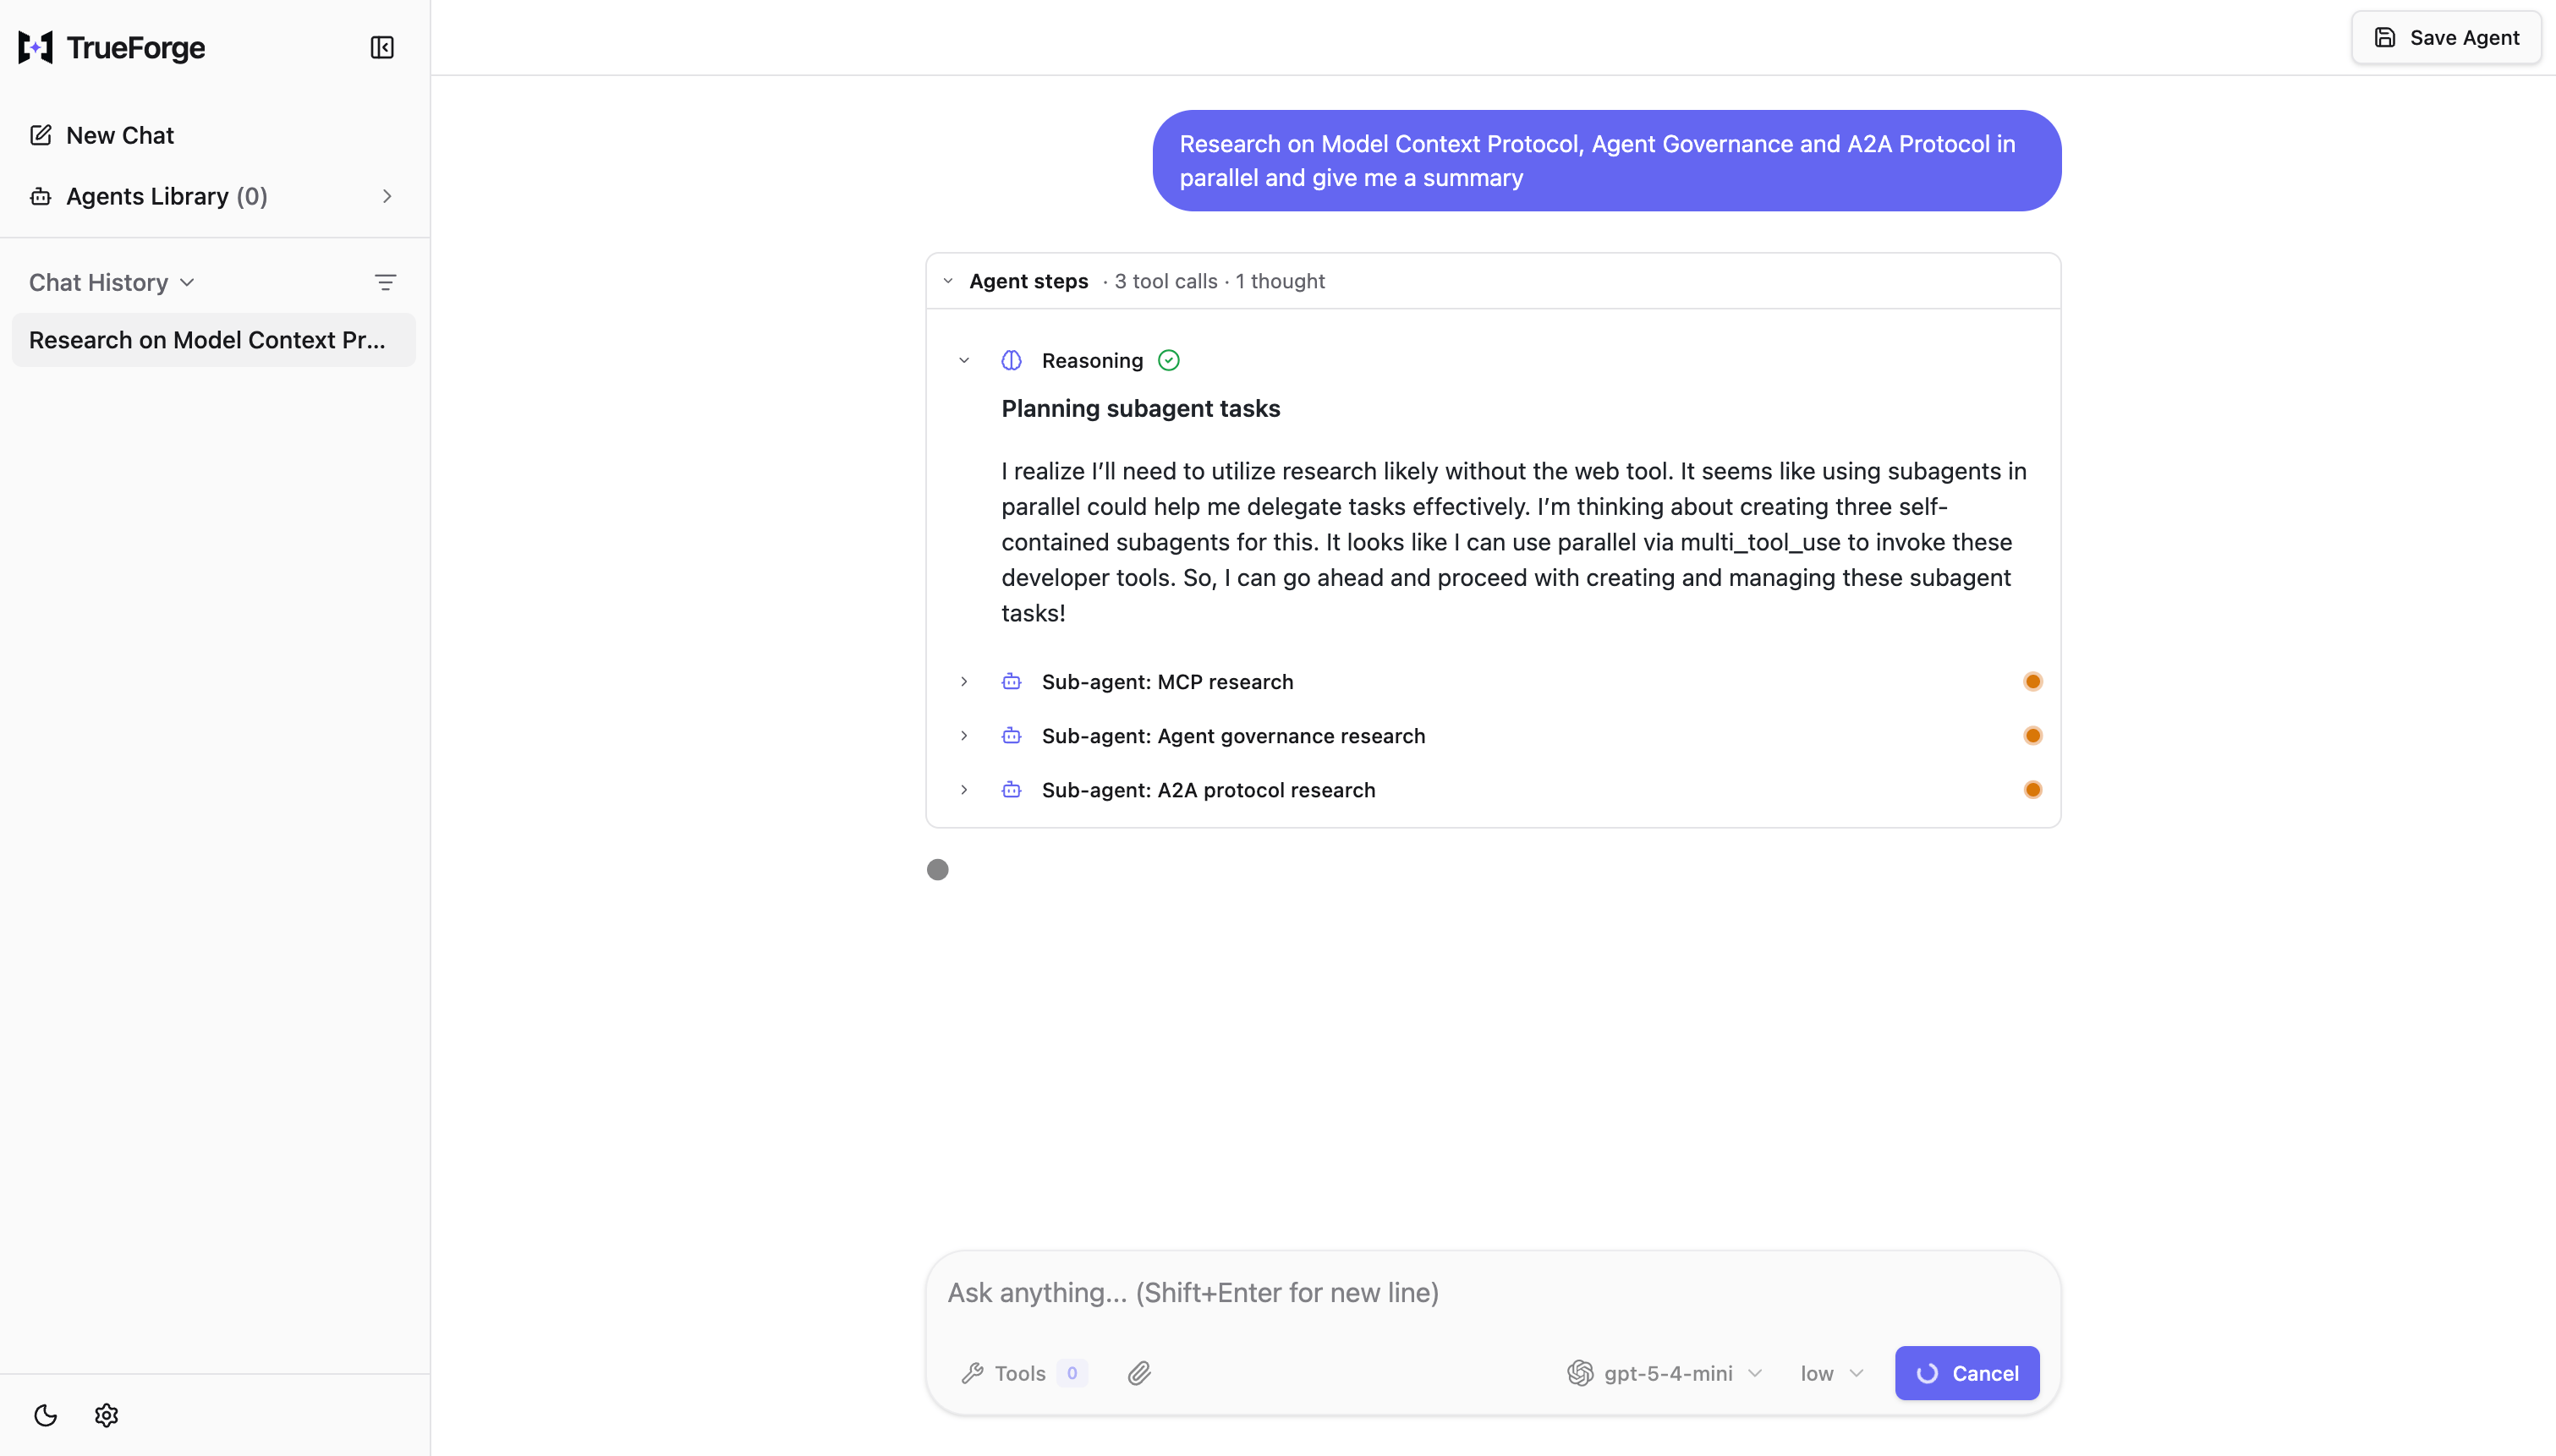
Enable the harness to spawn subagents. This lets the TrueForge harness solve complicated tasks by breaking them into smaller pieces and running them in parallel, then merging only their results — keeping the main agent’s context clean. On by default. See Subagents for how it works.
The agent fans out to parallel subagents, each shown as its own trace under Agent steps.
Set in: UI + API
Context management (API only)
Keeps long runs efficient. Compaction summarizes older history once the context crosses a token threshold, and large tool-response offloading writes oversized tool outputs to a sandbox file and leaves a short preview in context. Both are on by default. See Harness Capabilities and Large tool responses.Set in: API
Iteration limit (API only)
A safety stop for how many agent-loop steps a single turn can take (1–1024, default 100). It halts runaway loops; it isn’t a normal quality lever.Set in: API
Response format (API only)
Constrains the agent’s final output. The default is free-form text; you can require a JSON object, or a JSON value matching a schema you provide.Set in: API
Seed messages (API only)
Optional starter messages added to the top of every new conversation with this agent, before the user says anything. Use them to prime the agent each time — for example, an opening line it should greet with, or standing context every session should begin from. They apply at the start of each session, not just once.Set in: API
Options available in the UI today: model (selection), instructions, connectors (attach + preload), skills, sandbox on/off, and the Generative UI, Ask clarifying questions, and Dynamic sub-agents toggles.
Everything else — model parameters, per-server tool filters, tool approval policy, iteration limit, context management, response format, seed messages, and sandbox extras — is available via the API today. These are deliberately kept out of the UI for now to keep it simple, and will be added to the UI in the future.
The SDK and HTTP API expose every option through the agent spec. You either save the spec as a named, reusable agent and reference it by name, or pass it inline when you open a session. All fields are snake_case, and every field except model has a default.
import { TrueForge } from '@truefoundry/trueforge-sdk';const client = new TrueForge({ baseUrl: process.env.TRUEFORGE_BASE_URL ?? 'http://localhost:8790', // token: process.env.TRUEFORGE_TOKEN, // ID token when OIDC login is enabled});
agents.create (POST /api/v1/agents) stores the spec under a unique name and returns the agent with its server-generated id. The name is immutable and must be unique — a duplicate returns 409.
const { data: agent } = await client.agents.create({ name: 'support-bot', manifest: { model: { name: 'anthropic/claude-sonnet-4-6' }, instructions: 'You help customers with orders. Always confirm before processing refunds.', },});
3
Open a session and run turns
Reference the saved agent by name, then stream a turn. See Use an agent for the full loop, including approvals and questions.
Model FQN: provider/model, e.g. openai/gpt-5.2. See Models.
params
object
No
API
Model call parameters, passed through to the provider.
model.params recognizes max_tokens, temperature, top_p, top_k, parallel_tool_calls (boolean), and reasoning_effort (string). Extra keys are allowed and forwarded to the provider as-is.