
Database Authentication in Qdrant Managed Cloud
Qdrant Cloud uses three kinds of credentials. Each one protects a different surface:
| Credential | Protects | Created in | Sent as |
|---|---|---|---|
| Database API key | A cluster’s REST and gRPC APIs, plus its /metrics and /sys_metrics endpoints | API Keys on the Cluster Detail page | The api-key header, or Authorization: Bearer <key> |
| Cloud Management Key | The Cloud API, the qcloud CLI, and Terraform | Access Management > Cloud Management Keys | Authorization: apikey <key> |
| Console sign-in | The Cloud Console | Email, Google, GitHub, or SSO | A session. What a user can do is set by Cloud RBAC |
These credentials are independent: a key from one does not grant access to the others. SSO covers Console sign-in only.
This page covers Database API keys. Creating one needs the write:api_keys permission, and revoking one needs delete:api_keys. See the permission reference.
Create Database API Keys
- Go to the Cloud Dashboard.
- Go to the API Keys section of the Cluster Detail Page.
- Click Create.
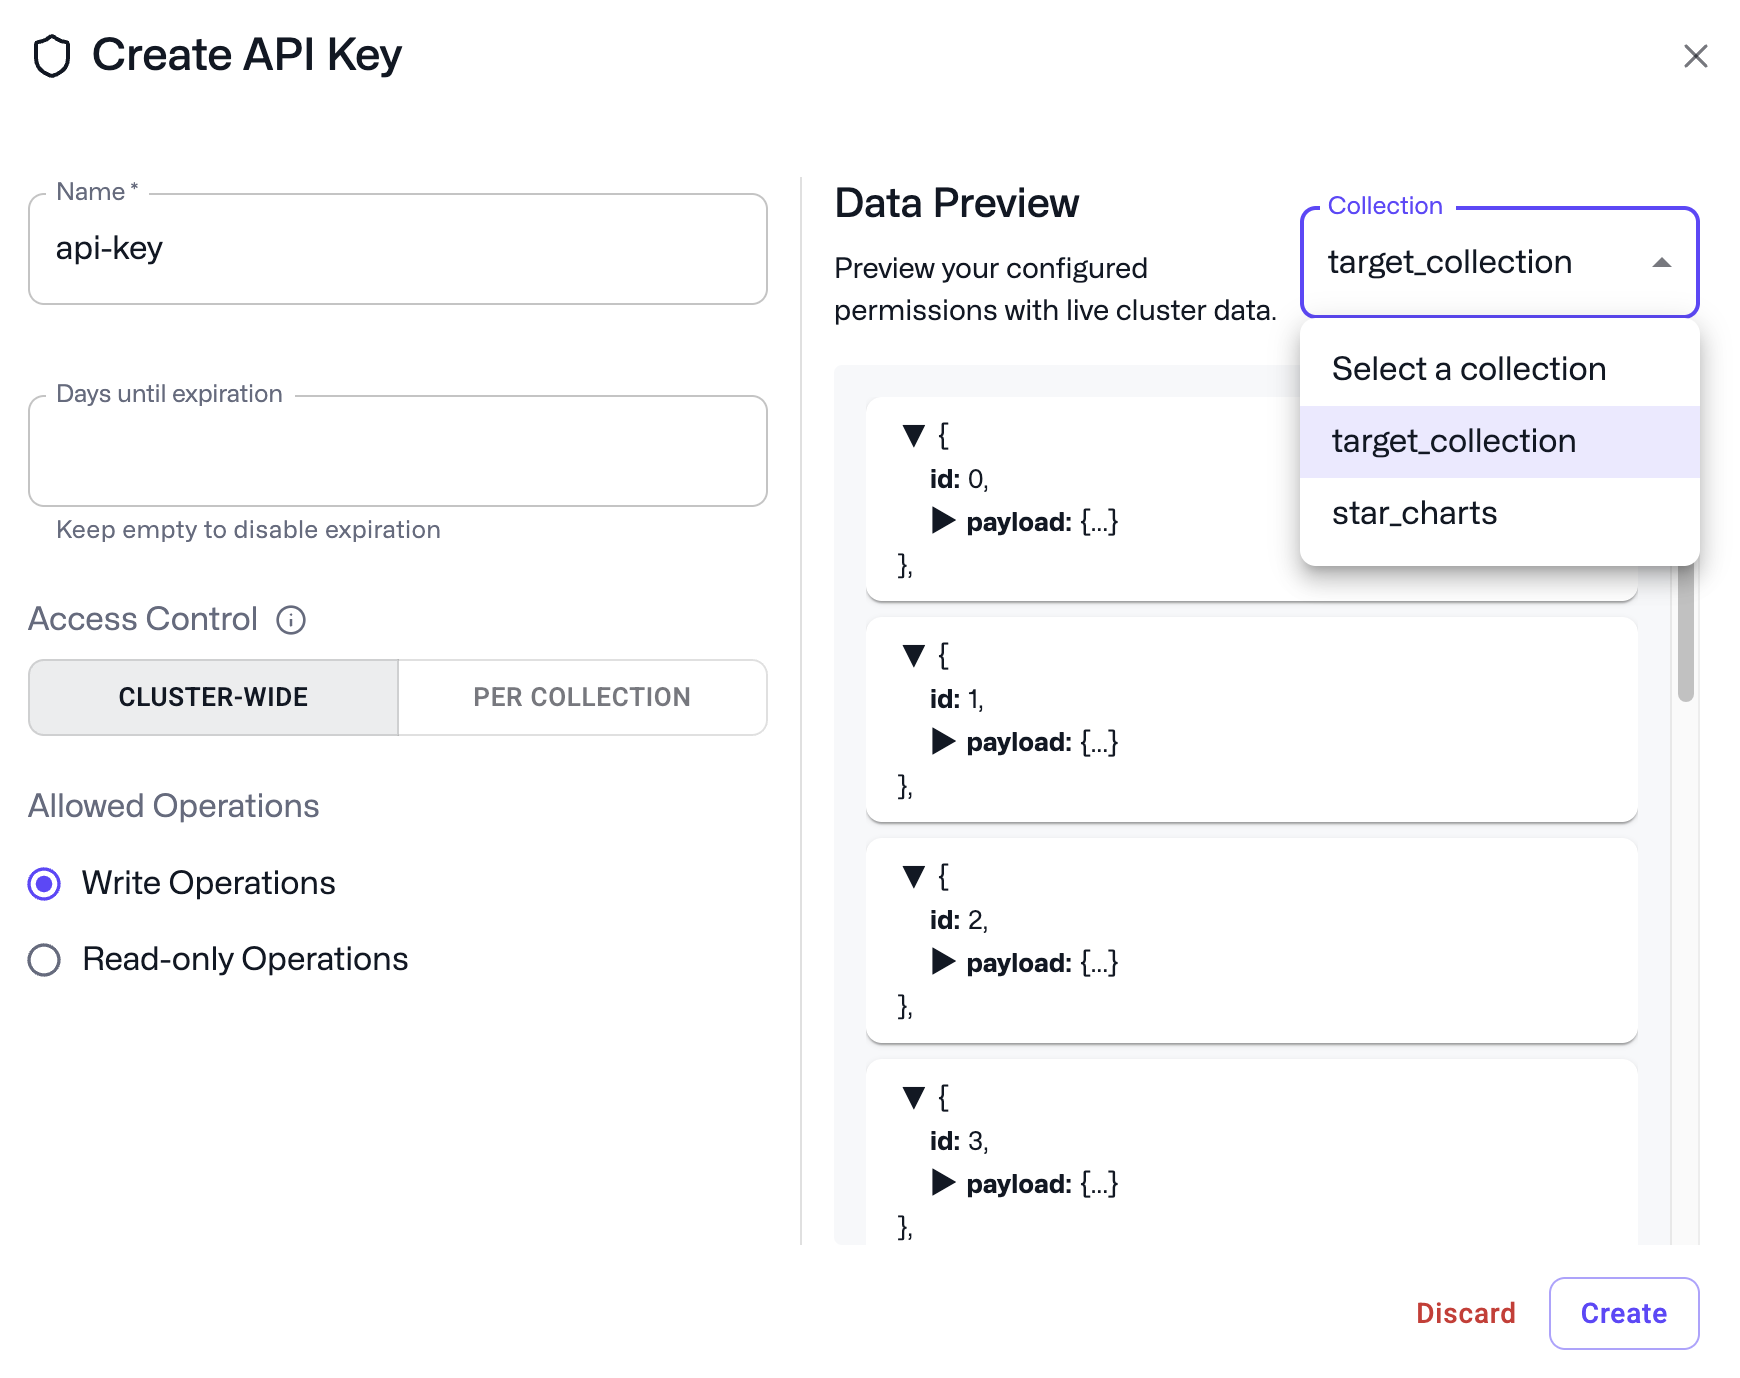
- Choose a name and an optional expiration (in days, the default is 90 days) for your API key. An empty expiration will result in no expiration.
- By default, tokens are given cluster-wide permissions, with a choice between manage/write permissions (default) or read-only.
To restrict a token to a subset of collections, you can select the Collections tab and choose from the collections available in your cluster. - Click Create and retrieve your API key.
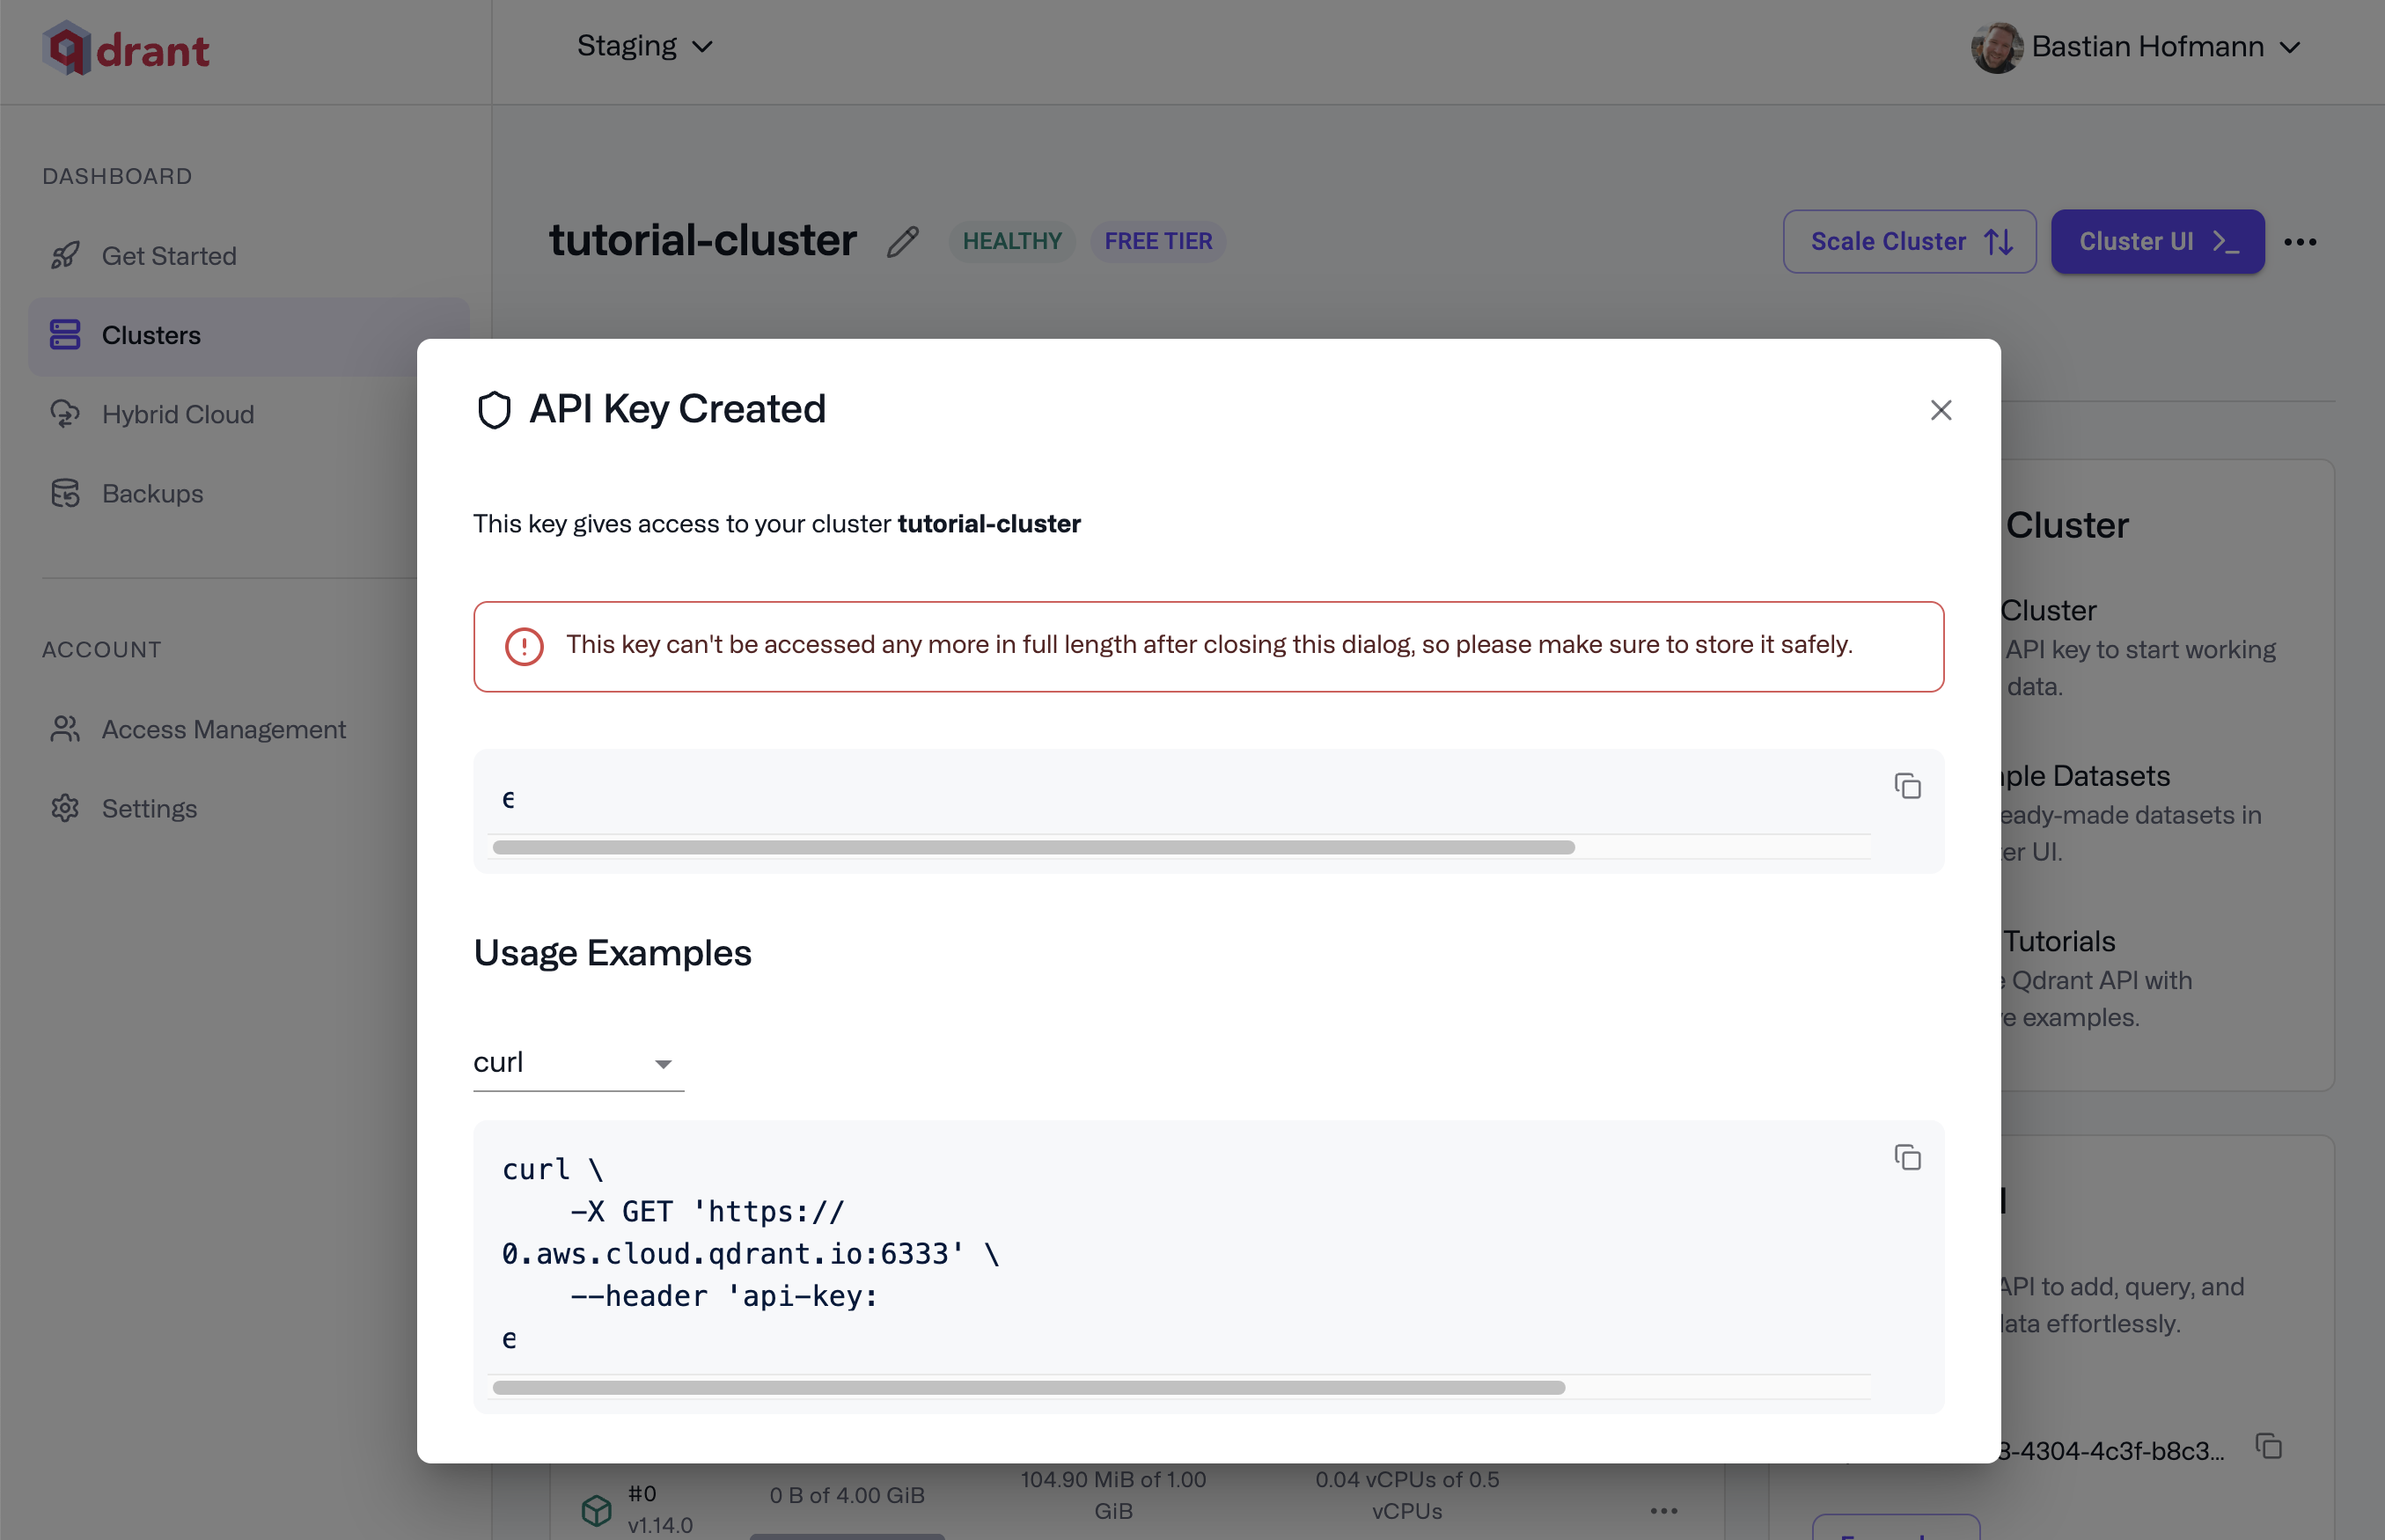
Database API keys with granular access control start with eyJhb and require cluster version v1.11.0 or later. See the Table of Access for the actions each permission level allows.
A new key can take a few seconds to become active. If the first request returns 403, retry. Once a key passes its expiration, requests with it also return 403.
Authenticate With a Key
Include the key in every request, over REST or gRPC. Use the api-key header or the client’s API key parameter:
curl -X GET https://xyz-example.eu-central.aws.cloud.qdrant.io:6333 \
  --header 'api-key: your_api_key_here'
from qdrant_client import QdrantClient

client = QdrantClient(
    url="https://xyz-example.eu-central.aws.cloud.qdrant.io:6333",
    api_key="your_api_key_here",
)
import { QdrantClient } from "@qdrant/js-client-rest";

const client = new QdrantClient({
  url: "https://xyz-example.eu-central.aws.cloud.qdrant.io",
  port: 6333,
  apiKey: "your_api_key_here",
});
use qdrant_client::Qdrant;

let client = Qdrant::from_url("https://xyz-example.eu-central.aws.cloud.qdrant.io:6334")
    .api_key("your_api_key_here")
    .build()?;
import io.qdrant.client.QdrantClient;
import io.qdrant.client.QdrantGrpcClient;

QdrantClient client = new QdrantClient(
    QdrantGrpcClient.newBuilder("xyz-example.eu-central.aws.cloud.qdrant.io", 6334, true)
        .withApiKey("your_api_key_here")
        .build());
using Qdrant.Client;

var client = new QdrantClient(
    host: "xyz-example.eu-central.aws.cloud.qdrant.io",
    port: 6334,
    https: true,
    apiKey: "your_api_key_here");
import (
	"github.com/qdrant/go-client/qdrant"
)

client, err := qdrant.NewClient(&qdrant.Config{
	Host:   "xyz-example.eu-central.aws.cloud.qdrant.io",
	Port:   6334,
	APIKey: "your_api_key_here",
	UseTLS: true,
})
Alternatively, send the key as a Bearer token in the Authorization header:
curl -X GET https://xyz-example.eu-central.aws.cloud.qdrant.io:6333 \
  --header 'Authorization: Bearer your_token_here'
from qdrant_client import QdrantClient

client = QdrantClient(
    url="https://xyz-example.eu-central.aws.cloud.qdrant.io:6333",
    auth_token_provider=lambda: "your_token_here",
)
import { QdrantClient } from "@qdrant/js-client-rest";

const client = new QdrantClient({
  url: "https://xyz-example.eu-central.aws.cloud.qdrant.io",
  port: 6333,
  headers: {
    authorization: "Bearer your_token_here",
  },
});
use qdrant_client::Qdrant;

let client = Qdrant::from_url("https://xyz-example.eu-central.aws.cloud.qdrant.io:6334")
    .header("authorization", "Bearer your_token_here")
    .build()?;
import io.qdrant.client.QdrantClient;
import io.qdrant.client.QdrantGrpcClient;
import java.util.Map;

QdrantClient client = new QdrantClient(
    QdrantGrpcClient.newBuilder("xyz-example.eu-central.aws.cloud.qdrant.io", 6334, true)
        .withHeaders(Map.of("authorization", "Bearer your_token_here"))
        .build());
using Qdrant.Client;

var client = new QdrantClient(
    host: "xyz-example.eu-central.aws.cloud.qdrant.io",
    port: 6334,
    https: true,
    apiKey: null,
    grpcTimeout: default,
    loggerFactory: null,
    headers: new Dictionary<string, string>
    {
        { "authorization", "Bearer your_token_here" }
    });
import (
	"github.com/qdrant/go-client/qdrant"
)

client, err := qdrant.NewClient(&qdrant.Config{
	Host:   "xyz-example.eu-central.aws.cloud.qdrant.io",
	Port:   6334,
	UseTLS: true,
	Headers: map[string]string{
		"authorization": "Bearer your_token_here",
	},
})
A successful request to the cluster root returns the server title, version, and commit:
{"title":"qdrant - vector search engine","version":"<version>","commit":"<commit-hash>"}
For the endpoint format, ports, and node-specific endpoints, see Connect to a Cluster. If a request fails with 401 or 403, see Troubleshooting.
Rotate and Revoke Keys
Set an expiration on every key, and replace keys before they expire:
- Create a new key with the same permissions.
- Deploy the new key to your application.
- Revoke the old key.
Use one key per application or environment, so that revoking one key interrupts only the application that uses it. Give each key the narrowest permission it needs: read-only for query-only services, and collection-restricted keys for tenants or teams.
When a User Leaves
Before or when you remove a user from an account:
- Revoke every Database API key that the user created, in the API Keys section of each cluster.
- Revoke every Cloud Management Key that the user created, in Access Management > Cloud Management Keys.
- Replace the revoked keys in the applications that used them.
- Remove the user.
Admin Database API Keys
The previous iteration of Database API keys, called Admin Database API keys, do not have granular access control. Clusters created before January 27, 2025 will still see the option to create Admin Database API keys. Older Admin Database API keys will continue to work, but we do recommend switching to Database API keys with granular access control to take advantage of better security controls.
To enable Database API keys with granular access control, click Enable on the API Keys section of the Cluster detail page.
After enabling Database API keys with granular access control for a cluster, existing Admin Database API keys will continue to work, but you will not be able to create new Admin Database API Keys.
 Ready to try Qdrant?
