
Getting started

How to Set Up WpStream: Install, Register, Go Live

Install the plugin. Create your account. Go live.

How to set up WpStream: install the free plugin, register with just your email, create a channel in the Quick Start wizard and go live from your browser or OBS.

Set up WpStream

Install, register and go live in three steps

01 · Install

Install the plugin

In wp-admin, go to Plugins > Add New, search for WpStream, then click Install and Activate. You can also upload the plugin zip with Upload Plugin. The plugin is free to install.

02 · Account

Register your WpStream account

On a site that isn't connected yet, activation opens the Quick Start page. Click Start the Guide and register with your email only: the password is generated and emailed to you. Starter hours are added to your account automatically.

03 · Go live

Create a channel and TURN ON

Name your first Free-To-View or Pay-Per-View channel in the wizard and click Create Channel. Publish it, click TURN ON and go live from your browser or from OBS.

Inside wp-admin

From wp-admin to a live channel

You set up WpStream without leaving wp-admin: register in Quick Start, create a Free-To-View or Pay-Per-View channel, click TURN ON and broadcast. Your viewers watch on your own site.

Five paths through the Quick Start wizard

After Start the Guide and the WpStream Account screen, the wizard asks two things: go live or build a Video-On-Demand, and charge for watching or not. That makes five screens to know. Once you create something, guided tour bubbles walk you through its edit screen.

New to the platform? See what WpStream does before you set up WpStream in the wizard.

Go LIVE! or create a VOD

The first screen asks "Welcome to WpStream! How would you like to start?" Click Go LIVE! for a live channel, or Create a Video-On-Demand (VOD) to publish a recorded video. The next screen asks "Do you want to charge a fee for watching?" Your two answers pick one of the four paths below.
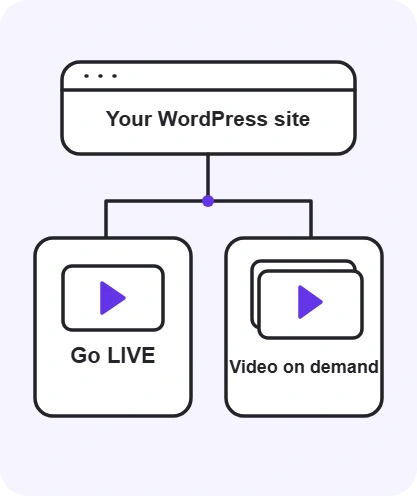
Illustration of choosing live streaming or video on demand
Free-To-View live channel

Pick Free-To-View (FTV), name your first channel (the field starts as "My first FTV channel") and click Create Channel. Free-To-View means your viewers don't pay to watch. It doesn't make streaming free: broadcasting and viewing still use hours from your account.
Creator recording a live broadcast with a camera and microphone
Pay-Per-View live channel

Pick Pay-Per-View (PPV), name the channel, set the Pay-Per-View Price ($) and click Create Channel. This path needs WooCommerce active. Without it, the wizard shows a "Pay-Per-View streaming requires WooCommerce" warning instead of the form.

Viewer paying for access through an online checkout
Free-To-View Video-On-Demand

Name your FTV Video-On-Demand, pick one of your existing recordings and click Create FTV VOD. No recordings yet? The wizard says a recording is needed and offers Upload Video. You can also record a live channel first and come back.
Creator preparing recorded video for on-demand playback
Pay-Per-View Video-On-Demand

Same as the free VOD path, with a Pay-Per-View Price added before you click Create PPV VOD. It also needs WooCommerce active, because a paid recording is sold as a WooCommerce product, just like a paid live channel.


Viewer watching recorded video on a tablet

Create a channel and go live

The wizard is the quick way in. This is the manual part of how to set up WpStream, and the one you'll repeat for every new channel: create it, decide on recording, TURN ON, then broadcast from your browser or from an encoder such as OBS.

Site owner preparing a website on a laptop

Create

Create the channel

Use Create Channel in the wizard, or go to WpStream > All Channels and click Add new Free-To-View Channel. Give it a title, description and featured image, then click Publish.
Creator reviewing recorded video on a laptop

Configure

Switch on Record Live Stream

Open Channel Settings and enable Record Live Stream before you TURN ON the channel, if you want this broadcast saved. Recording uses Recording Hours from your plan. Leave it off and nothing is recorded.

Presenter ready to broadcast through a webcam

TURN ON

Click TURN ON

Go back to the channel and click TURN ON. Once it's on, you choose how to broadcast: from the browser, or with a streaming app, where the channel shows the Server and Stream Key to copy.
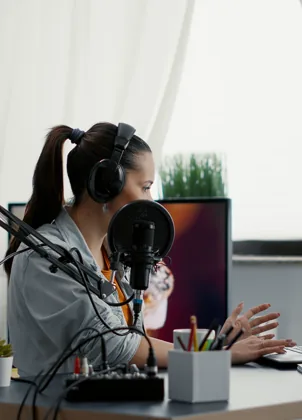
Creator broadcasting with a microphone, laptop and phone camera

Broadcast

Go live from the browser or OBS

Click Go Live With Your Webcam, choose camera, mic, bitrate and resolution, then Start Broadcast. For OBS, paste the Server and Stream Key under Settings > Stream and click Start Streaming.

Before you TURN ON

Recording is decided up front

Per WpStream support, the record setting can't change while a channel is running. Switch on Record Live Stream in Channel Settings before TURN ON.

The password comes by email

Registering in the Quick Start wizard asks only for your email. The plugin generates the password and sends it to that address.

Free-To-View still uses hours

Your viewers don't pay to watch, but the stream still draws broadcast and viewer hours from your account.

Pay-Per-View needs WooCommerce

A Pay-Per-View channel is a WooCommerce product, so WooCommerce has to be active before you create one.

Server and Stream Key sit on the channel

After TURN ON, pick your streaming app on the channel and copy both into OBS or any encoder with a custom RTMP destination.

How a stream ends

When you're done, click Stop Broadcasting in the browser broadcaster, or Stop Streaming in OBS.

Go live

Browser or OBS: which way should you go live?

Go Live With Your Webcam needs no extra software. The WpStream docs list all modern browsers, including Chrome, Safari, Firefox, Edge and Opera, on a desktop, laptop, tablet or phone. You pick the camera and mic, adjust bitrate and resolution in the same pop-up, then click Start Broadcast.

OBS is free, open source software for Windows, Mac and Linux. It takes a little longer: install it, add your video and audio sources, then paste the channel's Server and Stream Key under Settings > Stream. Other encoders with a custom RTMP destination, such as Wirecast or Larix, take the same two values.

Our view: go live from the browser for your first stream, and move to OBS when you need more sources than one camera and mic. The browser broadcaster is the WP streaming app you don't have to install.

QuestionBrowser broadcastOBS or other RTMP encoder
Question: What you needBrowser broadcast: A webcam, a mic and a modern browserOBS or other RTMP encoder: Encoder software plus the channel's Server and Stream Key
Question: Where you clickBrowser broadcast: Go Live With Your Webcam, pick camera, mic, bitrate and resolution, then Start BroadcastOBS or other RTMP encoder: In OBS: Settings > Stream, Service Custom, paste Server and Stream Key, then Start Streaming
Question: Setup timeBrowser broadcast: Three minutes or less for a basic webcam broadcast on an existing WordPress site, per the WordPress.org listingOBS or other RTMP encoder: Allow extra time to configure the encoder
Question: Works well forBrowser broadcast: A first stream with no extra softwareOBS or other RTMP encoder: Several video and audio sources and more control
Question: How you stopBrowser broadcast: Stop BroadcastingOBS or other RTMP encoder: Stop Streaming in OBS

After the stream

Record the live, publish the replay

With Record Live Stream on, each broadcast uses Recording Hours. After the stream ends, the file sits under WpStream > Recordings. It isn't a public video yet: click Create new Free-To-View VOD from this recording, or the Pay-Per-View version, then Publish.

Sold the live event as Pay-Per-View? Per WpStream support, switch that same product from Live stream to Video on demand and pick the recording. Buyers who already paid keep the replay at no extra charge.

Size your first stream in hours

Set up WpStream on the right plan: count broadcast, viewer and recording hours.

Lite

Lite, $24 monthly or $190 yearly: 100 broadcast and 500 viewer hours a month, 25 recording hours. By our math, a weekly 1-hour stream (four a month) watched in full by 40 people uses 4 broadcast and 160 viewer hours. Recording adds 4 stored hours monthly, so the 25-hour cap fills in about six months unless you delete old ones.

Plus

Plus, $59 monthly or $490 yearly: 250 broadcast and 2,000 viewer hours a month, 100 recording hours. Three 1-hour streams a week (about 13 a month) watched in full by 120 people use about 13 broadcast and 1,560 viewer hours. Recording all of them fills the 100-hour cap within eight months.

The trial

New WpStream accounts get starter broadcast, viewer and recording hours automatically. The free trial sign-up on the pricing page lets you test streaming before you pick a plan.

Once you're live,
here's where to go next

Try the Hello WpStream theme

Hello WpStream is a free, GPL WordPress video theme built for the plugin, with five one-click demos: Church, Believe, Streaming, eSports and Live Shopping. Import one, add your own images and go live from your site. See the theme
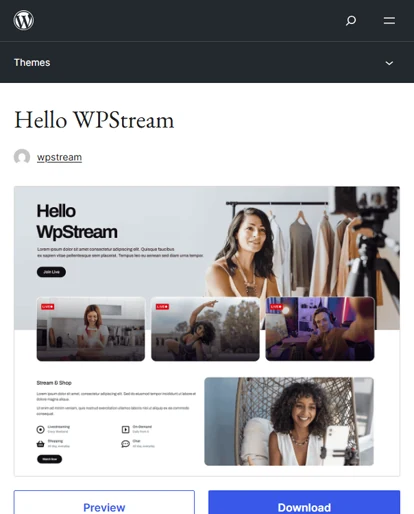
Hello WpStream streaming website demo

Sell access with WooCommerce

Pay-Per-View channels and Pay-Per-View VODs are WooCommerce products. Recurring access needs the separately purchased WooCommerce Subscriptions extension, with the channel set up as a Simple Subscription product.

Customer completing an online checkout

Choose a plan sized in hours

WpStream plans meter broadcast, viewer and recording hours. Count how often you stream, how long, and how many people watch, then compare plans.

Calendar and notebook used to plan broadcast sessions

What you need before you start

Six things to have ready before you set up WpStream in the Quick Start wizard. Still choosing a live streaming plugin? Read our complete guide to WordPress live streaming first.

A WordPress site

WordPress 5.8 or higher and PHP 7.1 or higher, per the plugin's WordPress.org listing.

Image

The WpStream plugin

Free to install from Plugins > Add New, or upload the zip with Upload Plugin.

Image

A WpStream account

Just an email address. The password is generated for you and sent to that email.

Image

An administrator login

The Quick Start wizard opens for WordPress administrators only.

Image

A camera and mic, or OBS

Your device's webcam and mic for a browser broadcast, or OBS or another encoder for more control.

Image

A decision on recording

Switch on Record Live Stream before you TURN ON if you want a replay.

Image

What users say about setup

Must have plug in

Last year our church started a new WordPress website and wanted to add our Livestream to a page. After considering several plug ins we chose WPStream and it was an excellent choice. Never an issue getting the stream up, never an unavailable or down time. Simply reliable! Truly a set it and forget piece of our website. Plus it is simple for novice WordPressers to use.

Gbrownmail

Read on WordPress.org

excellent

Review Title: Great Plugin with Minor IssuesRating: ★★★★☆

I recently started using this plugin for my WordPress site, and overall, my experience has been quite positive. The installation process was straightforward, and the setup was user-friendly, even for someone with limited technical skills.

One of the standout features is its ability to seamlessly integrate with existing themes and plugins, which saved me a significant amount of time. The customization options are plentiful, allowing me to tailor functionalities to suit my specific needs. I particularly appreciate the clean interface and how it doesn't slow down my website, which is a common issue with other plugins I've tried.

However, I did encounter a few minor issues. Occasionally, the plugin has a lag when loading on the admin panel, which can be frustrating. I also noticed some compatibility issues with a couple of my other plugins, which required additional troubleshooting to resolve.

Overall, I would recommend this plugin to others looking for a solid solution in this category. If the developers address the performance and compatibility issues in future updates, it would definitely earn that fifth star from me!

prasad1985

Read on WordPress.org

The most straightforward plugin for livestream direct in wp

★★★★★

I have a client with zero tech knowledge and with this plugin she can do livestreams every once a while for her audience. The easiest setup ever.

mhdisenadorgrafico

Read on WordPress.org

More setup resources

Questions

Getting started: FAQ

No. Go Live With Your Webcam broadcasts from a modern browser such as Chrome, Safari, Firefox or Edge, with no extra software. OBS, or another encoder with a custom RTMP destination, is the other route: paste the channel’s Server and Stream Key into it when you want more video and audio sources. WpStream documents both.

By our math, one 1-hour stream a week (four a month) watched in full by 40 people uses 4 broadcast and 160 viewer hours a month, inside Lite’s 100 and 500. Broadcast and viewer hours reset monthly. Recording hours count stored video: recording each stream adds 4 hours toward Lite’s 25-hour cap, which fills in about six months. Per WpStream support, deleting a recording frees its recording hours.

After the live stream ends, it appears under WpStream > Recordings. It isn’t public yet. Click Create new Free-To-View VOD from this recording, or the Pay-Per-View version, give the video a name and click Publish. You can also download the file from the same list.

The plugin alone works inside the theme you already have; you set up the pages and styling yourself. Hello WpStream is a free, GPL theme built for the plugin, with five one-click demos. Pick it if you want a ready-made video site rather than fitting streaming into your current design.

Yes, as long as WooCommerce is active. Answer yes to “Do you want to charge a fee for watching?” in the WpStream wizard, set a Pay-Per-View Price and click Create Channel: the channel becomes a WooCommerce product. Recurring access needs the separately purchased WooCommerce Subscriptions extension.

The WpStream plugin is free to install. Broadcasting needs an account, and a new account gets starter broadcast, viewer and recording hours automatically. After that, streaming runs on a plan metered in hours. Free-To-View means your viewers don’t pay to watch; it doesn’t make the streaming itself free.

Ready when you are

Start your free trial

Try live broadcasting and replays on your website.