Image

Get Your ESP32 Sunny Side Up With This Solar Dev Board

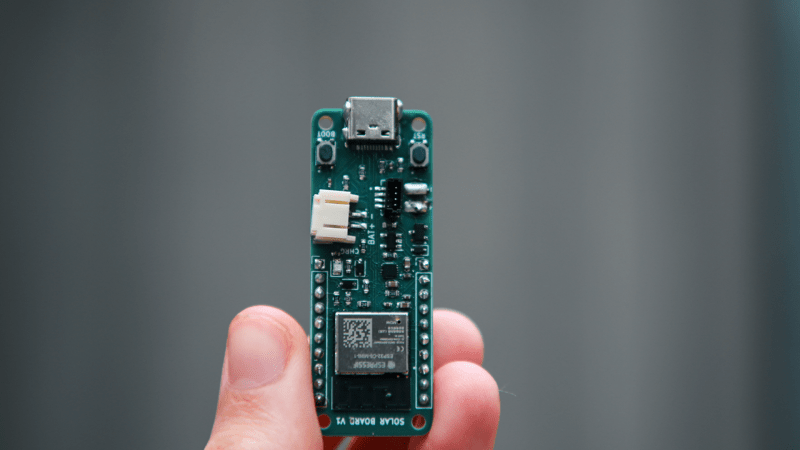
There are a lot of ESP32-based development boards out there– and why not? It’s a versatile chip that can be used in all sorts of situations, and people want boards to match them. Not finding one to his liking that was specifically built for solar powered IoT projects, [Narrow Studios] rolled his own. Well, designed it; like most these days, he’s outsourced the manufacturing to PCBWay, which is where you’ll need to go if you want one.

Why might you want one? Well, if you have similar goals in mind to [Narrow Studios]. He’s put an ESP32-C6 Mini on the board, which means it’s got most of the IoT communications protocols you might be interested in — bluetooth, wifi, Matter, Thread, and Zigbee, too. Ten 10 IO pins have been broken out, plus I2C on a QWIIC connector, which gets you a whole ecosystem of sensors to easily plug into. The “solar” part is justified by the inclusion of a BQ25186 linear battery charging IC from Texas Instruments, with the designated solar power input protected against reverse voltage in case you– like this author– have let magic smoke out by hooking things up backwards. Is it embarrassing? Yes. Does it happen? Also yes, so putting protection on the board is a nice feature. [Narrow Studios] released a video that we’ve embedded below discussing his design choices and demonstrating the device, but the project page can give you the gist.

Of course there’ve been plenty of solar-powered projects to feature the ESP32 here before– you can even use it for maximum power point tracking— but this dev board might be exactly what someone is looking for to build their next IoT project, so we’re thankful to [Narrow Studios] for the tip.

Continue reading “Get Your ESP32 Sunny Side Up With This Solar Dev Board”
Image

How To Use Those Cute But Slightly Odd 7-Segment LCDs

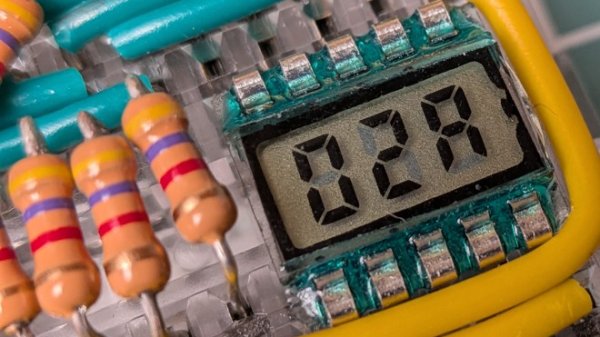
If you’re not aware, there is such a thing as adorable little three digit LCD 7-segment displays. They come in a ten-pin DIP package and are just begging to be integrated into a project. The catch is they are just a tiny bit weird. Luckily for us all, [Nagy Krisztián] spells out exactly how to use them.

The first odd thing about these ten-pin LCD displays is that they have a footprint that doesn’t quite mesh with standard 0.1 inch spacing, meaning they will not cleanly fit into a breadboard. Luckily, one can solve this with a bit of force. It’s a small part, and the pins don’t seem to mind.

Image
These little LCDs are adorable, but a bit unusual to interface with.

The second odd thing is wrapping one’s head around the pin mapping. Figuring out the table of which pins activate which segments in the digits is easier if one keeps in mind that each segment of each digit is the product of two different pins. For example, “2A” is digit two, segment A, and is the product of pins 3 and COM4.

That’s not all. Electrically speaking, driving this LCD isn’t nearly as straightforward as an LED.

With an LED display, the COM pins are either common anode or common cathode, which tells one whether lighting up a segment means holding the COM pin at GND with voltage applied to the segment pin, or the other way around. But in the case of this LCD display, the polarity applied is swapped every cycle. Oh, and inactive COM pins need to held at half-voltage. Neat!

[Nagy] drives the whole thing with little more than an ATtiny84 microcontroller and a few resistors. A switchable half-voltage signal is cleverly created by combining a simple voltage divider and taking advantage of the fact that the ATtiny84’s pins can be in one of three different states depending on how they are configured: high, low, or high-impedance (pin configured as an input). Each COM pin on the display gets connected to both an ATtiny84 pin, and to the supply voltage via two resistors forming a voltage divider. When the ATtiny drives the pin high, the LCD pin sees about 3 V. When the pin is driven LOW, the LCD pin sees 0 V. When the ATtiny configures the pin as an input, the LCD pin receives about 1.5 V.

The bulk of the software is defining which pins and states equal which digits, and cycling the LCD at a rate of vaguely 60 Hz which delivers flicker-free results.

We appreciate the clever combination of voltage divider with pin configuration to create three switchable voltage levels. If you liked that and want to see more serious leveraging of pin configuration on a microcontroller, check out how to drive seven LEDs with only two pins.

Image

A Super Cheap Desk Toy Becomes A Hackable Desktop Notifier

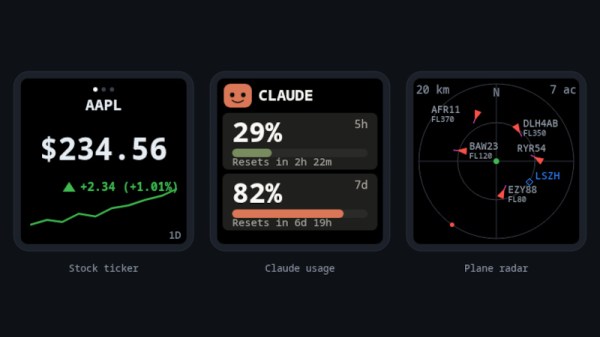
The GeekMagic SmallTV is as its name suggests, a tiny, vaguely TV-styled, device with a screen, that’s sold as a desktop notifier. Depending on the firmware running on the device it can display various pieces of information, ranging from the time and weather to the current price of Bitcoin. What makes it interesting is that it supports software updates over WiFi, so [Giovi321] has made a new firmware package for it.

A screenshot of AliExpress showing a range of the devices for sale.
These things are readily available from AliExpress.

It seems there are several versions of this device, something which appears to be reflected in the prices they sell for on AliExpress. The older version runs on the ESP8266, and there’s also a ESP32-C2 variant in the wild. The firmware supports both flavors, providing stock and crypto tickers, an ADS-B tracker, and a Claude AI token usage gauge.

What gives this potential is that the various functions are clearly split out in the code, and there’s nothing to stop you pointing it at a data source of your choosing. This makes it more than a bit of cheap e-waste novelty, and we hope that others will take up the baton and do interesting things with it.

The ESSP8266 is a chip we don’t see too much of these days, having been surpassed by its ESP32 siblings. Still, someone recently gave it a simple OS.

Image

This DIY Time Server Is More Accurate Than You Need

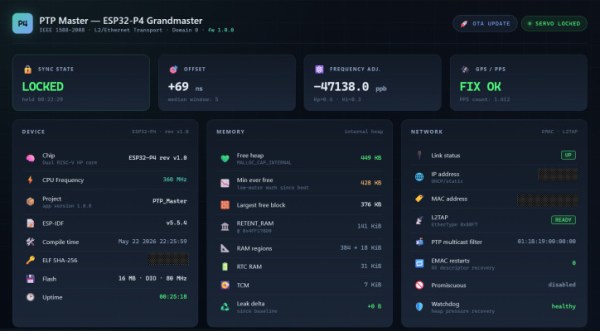
You almost certainly don’t have an application for the sort of accurate timekeeping that’s made possible by this enhanced version of [Cristiano Monteiro]’s satellite-backed time server. By his own admission, the vast majority of users will be more than happy to have their system’s time synchronized by the traditional Network Time Protocol (NTP). But if you’re really chasing those last few microseconds, that’s where the Precision Time Protocol (PTP) comes in.

With NTP, you can get within 10 milliseconds or so of your upstream time source — but PTP is accurate down to nanoseconds. Unless you’re performing some kind of scientific research, running a robotic assembly line, or perhaps doing high-speed financial trading, there’s no reason for this level of accuracy. In fact, PTP is such a niche technology that until the release of the ESP32-P4, [Cristiano] couldn’t even find an affordable enough chip that supported it.

ImageHardware-level support for PTP is important as there’s no way to achieve this level of accuracy with software alone, the capability needs to be baked into the Ethernet controller. As you might expect, it takes a highly accurate time source to make the most of PTP, and that’s where the navigation-grade Global Navigation Satellite System (GNSS) receiver comes in. All told the cost of the build is unsurprisingly higher than that of its predecessor, but [Cristiano] says it’s still a couple zeros shy of what a commercial offering would run.

As with his original time server from 2021, [Cristiano] made sure this build was as friendly as possible for hackers and makers. We especially like the 3D printed case designed in OpenSCAD, and his insistence that the gadget have a front panel with blinking status LEDs. Again, the vast majority of us don’t need our clocks to be accurate down to the nanosecond…but it’s nice to know we have the option.

Image

ESP32 Keeps Tabs On Your Local Airspace

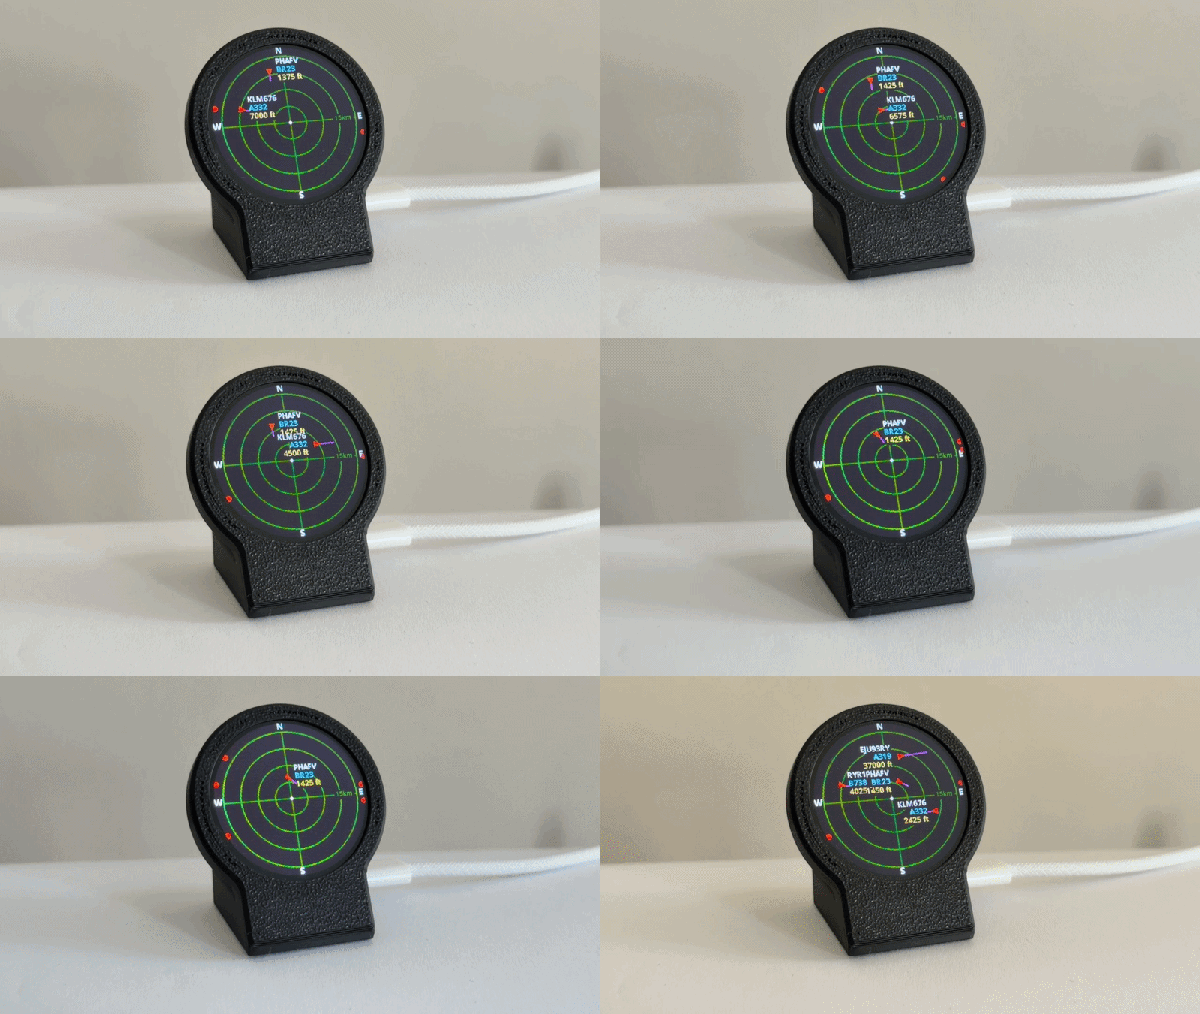
We know, we know. Despite being called ESP32-Plane-Radar, this project from [Mateusz Juszczyk] isn’t actually using radar. But thanks to the round LCD this desktop gadget does a fantastic job of recreating a classic radar display, and by pulling in Automatic Dependent Surveillance–Broadcast (ADS-B) data, the visuals even match nearby real-world aircraft.

ImagePerhaps the best part of this project is just how easy it is for others to get in on the action. Although the presentation certainly looks professional — and expensive, if we’re being honest — there’s nothing particularly exotic going on here. Specifically, there’s ESP32-C3 Super Mini behind the scenes cranking through the ADS-B data and pushing it out to a circular GC9A01 display. A minimalistic 3D printed enclosure holds both components, and while it’s undeniably slick as-is, we can’t help but think there’s potential here for more elaborate designs.

As you probably guessed from the lack of a radio in the parts list, the code [Mateusz] provides doesn’t actually sniff ADS-B out of the air. It connects to the local network over WiFi, and then hits adsb.fi to pull in crowdsourced flight data. Since the device has to connect to the network anyway, the code also offers up a web-based configuration interface which puts a little more polish on what’s already an impressive presentation.

We used a round GC9A01 display on the Vectorscope back in 2023, so if anyone ports this over to their old Supercon badge we’d love to see it in action.

Thanks to [Mauricio] for the tip.

Image

Gluing 8192 MCUs Together To Make A GPU

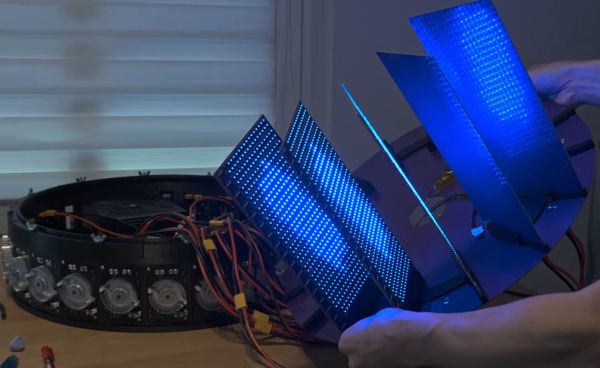
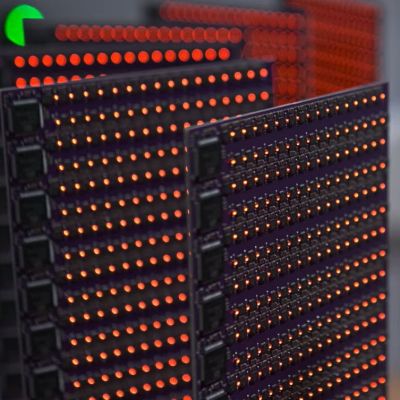
ImageWhat do you get when you take 8,192 CH570 MCUs, put them on custom PCBs, and write firmware for this interconnected gaggle of cores? In the case of [bitluni]’s project, you get something that’s decidedly cluster-shaped.
These cheap MCUs feature a QingKe 32-bit RISC-V core that’s clocked at a maximum of 100 MHz, with an RV32IMBC instruction set. This means that they support integers, integer multiplication and division, bit manipulation, and compressed instructions, but no atomic, vector, or floating-point instructions.

The basic concept was to use a single MCU per pixel, but once you start scaling up a measly 10 mA and ~$0.10 per MCU to literally tens of thousands of them, you’re suddenly talking about thousands of dollars in hardware as well as a cool 655.36A at 3.3V – or 2 kW –  for something close to QVGA resolution at 320×200. Clearly this would be a rather crazy project to implement, which is why each MCU also got its own RGB LED to immediately create the pixel.

Continue reading “Gluing 8192 MCUs Together To Make A GPU”

Image

This KVM Runs A P4 Instead Of A Pi.

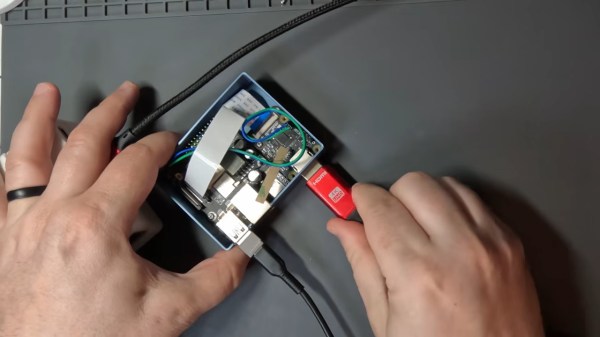
If you asked us to build you a KVM last week, we’d likely have reached for a Raspberry Pi. Now, thanks to [JonathanRowny], we’d seriously consider an ESP32-P4, because his IP KVM seems pretty capable.

He’s using the P4 hardware to its fullest, getting the supported 1080p graphics, and doing so in an interesting way– he’s got a commercial adapter board to try and translate HDMI signals to the camera input on his dev board. Conveniently enough, it’s the same ribbon-cable pinout as the RPi, which is not guaranteed by the CSI standard. Writing a driver to take that signal proved the hardest part– aside from the usual chip revision confusion that plagues this chip– and we can’t help but wonder if the client on the other side of the KVM-IP link might have an easier time doing the image processing that was required for a good image. Regardless, he’s got the code as it is now up on GitHub under the Apache license. 

As of this this writing, there’s no audio, and ironically for an ESP32 project networking is wired-only– but much more importantly, there is no security. So it’s a work in progress, but great to see the P4 in the wild doing something other than emulation. Not that we haven’t seen the P4 at work before–the Tanmatsu handheld also makes use of Expressif’s most powerful chip for a handy little terminal. Between the KVM and the handhelds, we cannot help but wonder how many of the projects that were once the provenance of a Pi will get squeezed into these overpowered microcontrollers. Sure, they can’t even match the original Pi in horsepower, never mind a modern Pi5, but how many times have you seen a Linux SBC seriously under-taxed in a project like this?

If you’re swapping Pi for P4– or doing anything else interesting– please let us know on the tips line.

Continue reading “This KVM Runs A P4 Instead Of A Pi.”