Image

Make A DIY E-ink Faceplate For Valve’s Steam Machine

Valve has always designed hacker-friendly hardware, and in that spirit, [NaKyle Wright] released Inkterface, a design for an E-ink faceplate to fit the recently released Steam Machine. As far as projects go, this one is meticulously documented, so give it a peek.

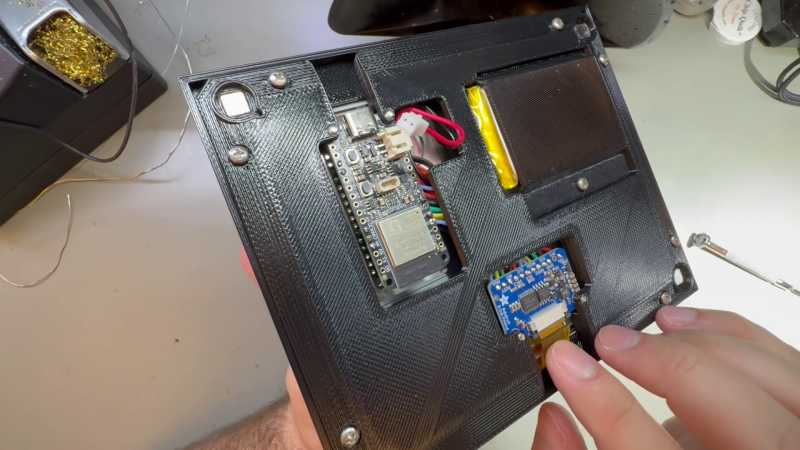
The system uses a selection of components that include a 5.83″ E-ink panel and driver board, a small lithium-polymer battery, and an ESP32-based controller board.  A cleverly-designed 3D printed frame and bezel hold everything just so, creating a snug assembly with minimal wiring hassles.

Image
A small service can be easily configured to control how the display updates.

The faceplate is wireless and self-contained, attaching with the help of four magnets. On the software side, the host machine communicates over Bluetooth, and a service takes care of pushing updates. An app for configuring and talking to the display will be available on Steam eventually, but in the meantime one can install that part manually.

[NaKyle]’s bill of materials calls for specific components, but the underlying design is very modular. Should one wish to make hardware or component changes, alterations to the 3D printed parts might be needed as well. Fortunately, [NaKyle] includes the .step files alongside the .stl models. We love to see that, because it makes tweaking or customizing so much more accessible. A homebrewed version of this E-ink panel might be just the thing to complement a homebrewed Steam machine.

Be sure to also check out the repository of Steam hardware, which contains drawings and 3D models of the Steam Deck and Steam Controller, useful for designing holders or custom brackets or whatever else one may need.
Image

Modern E-Ink Dashboards, Kindle And Otherwise

People have been attempting to turn Kindles into more than e-readers since the first devices came out nearly two decades ago. The e-ink displays are low-power and great for displaying information that doesn’t refresh too often, and with Amazon continuing their trend of bricking their older devices there will be more of these devices available. [Hemant] built a weather dashboard with one of his, but since then had requests for other types of e-reader dashboards and has a guide for making more general-purpose use of an old Kindle.

The first approaches outlined here involve the installation of a dashboard client on the Kindle and pointing it at a server that hosts a PNG image of whatever information needs to be displayed. The client simply displays that image and refreshes it at predetermined intervals. There are a number of options for creating that server as well, including using Home Assistant for those who already have a home automation system deployed. The benefit of using Home Assistant is that it’s much more straightforward to gather data for the dashboards from sensors and other peripherals that are already installed.

Installing a client like this might seem straightforward, and it can be, provided that the Kindle involved is jailbroken or capable of being jailbroken. An Amazon update recently broke many modern devices’ ability to execute the jailbreak, so not every Kindle can do this anymore. But [Hemant] goes into detail about this and also outlines some methods for using generic e-ink displays instead, and also dives into the hardware and software behind building a server to host the dashboard images for those without Home Assistant already running. It’s a great overview for those who have always wanted something like this but never knew where to start.

Image

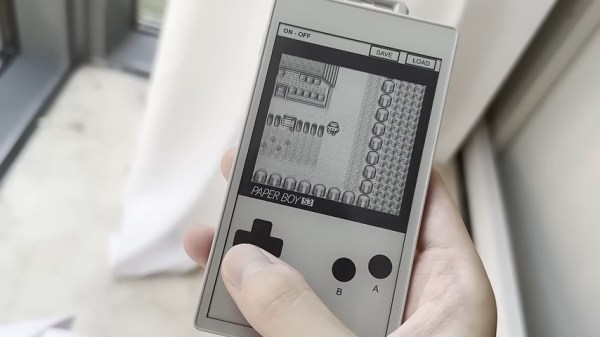
An EInk, ESP32-based Game Boy

This is one of those projects that was both inspired and made possible by the absolute embarrassment of dev boards available to the modern hacker. In this case, the dev board was the M5Stack PaperS3, which as the name implies combines an ESP32-S3 with an e-ink panel. [Wenting Zhang] picked one up and was immediately inspired to try and make an e-ink Game Boy.

The M5Stack PaperS3 made this project possible by exposing the display with row/column control — parallel, some would call it, as opposed to the usual serial interface of SPI. That allowed [Wenting] to work some of the same e-ink magic he perfected on his Modos monitors to allow partial refresh at up to 60 Hz. That the ESP32-S3 is capable of emulating a Game Boy while driving the screen should surprise no one, since it can emulate an MSX while outputting VGA or even Windows 95 on a 386. In this case, he’s basing the actual Game Boy emulation on Crank Boy.

Of course the e-ink screen on the M5Stack is far larger and has a much higher resolution than what the Game Boy shipped with, which lets him implement touch controls and scale the image up 3X so he can fake a couple of shades of grayscale while actually outputting black and white. Even better, if he was actually playing this thing on the regular, once the high-refresh portion of the screen starts to wear out, he can flip the orientation and keep gaming on the virtually-unrefreshed control portion of the screen — doubling the lifetime of the system, something many of you raised as a concern when we last looked at a his e-ink monitor project.

The only real shortcoming of this hack is the sound. With one-bit beeps coming out of the M5Stack buzzer, it’s got nothing on Nintendo’s hardware. Of course, that’s partially down to using the hardware as-is. With the addition of an I2S sound chip like the one used in the MOD player project we featured recently, you’d just need to squeeze out enough processor cycles to make this sound as good as it looks.

Continue reading “An EInk, ESP32-based Game Boy”

Image

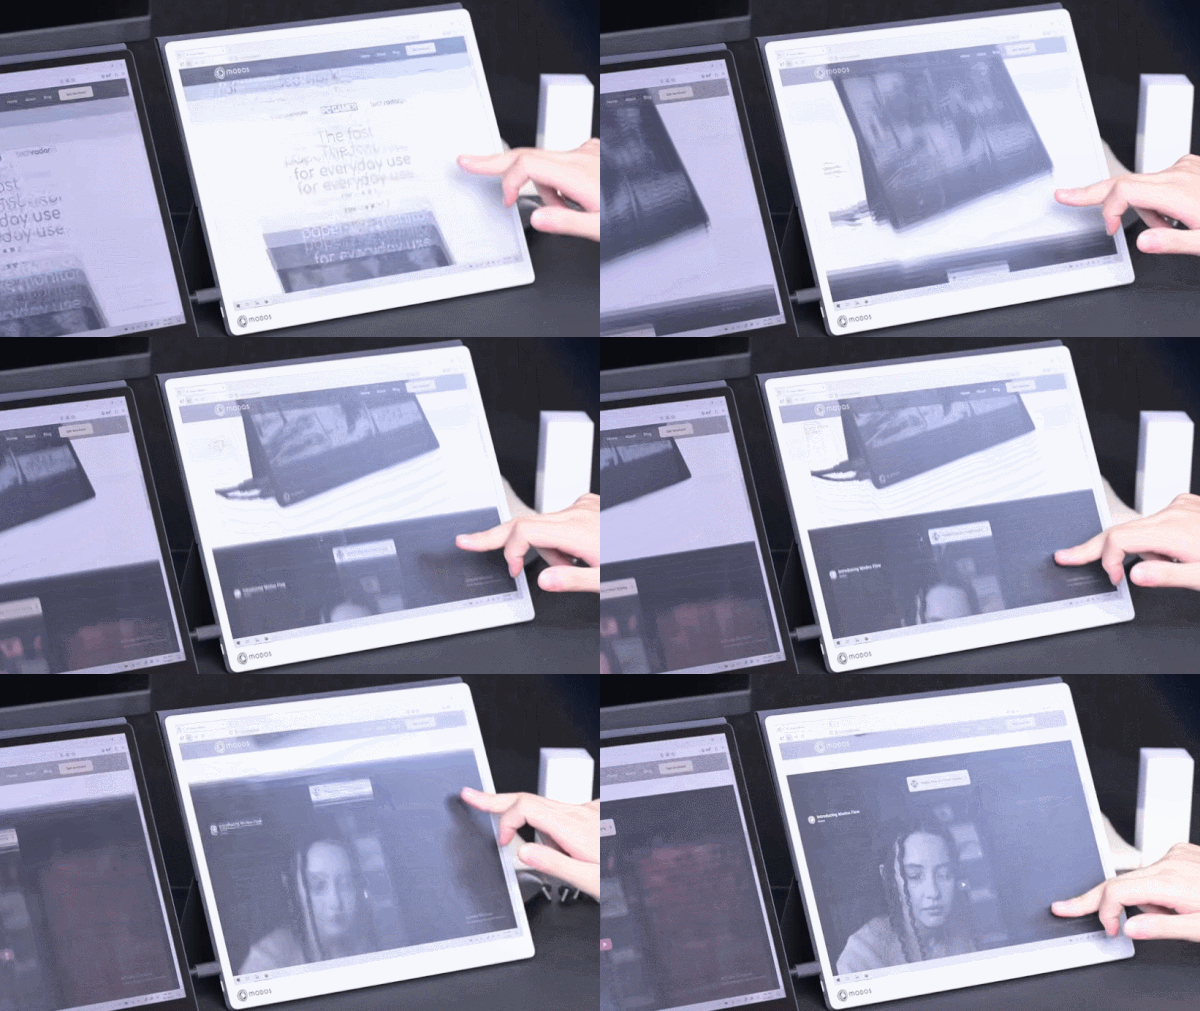
Behold A 60 Hz Refresh Rate E-ink Monitor

E-ink displays have a number of advantages over other display types, but their refresh rate isn’t one of them. But what exactly makes them slow? According to [Wenting Zhang], it’s not an inherent limitation of the technology. It’s mainly the controller, and this limitation can be overcome to create a high-resolution 60 Hz refresh rate E-ink display, totally suitable for use as a computer monitor.

ImageThe reason E-ink displays are so slow is simple. For a long time, they existed for only one purpose: to be screens for e-readers. They had to work on devices that were generally low power, with limited interfaces and slow processors. Accommodating these factors was the primary driver behind the high latency and slow refresh rates associated with these displays.

It was actually the limited interface options rather than the slow refresh that initially led to a custom controller, because [Wenting] wanted to use an E-ink display on a laptop build. But it quickly became apparent that a custom controller could do considerably more than E-ink was known for.

Initial tests with fast refresh rates were so positive that it led to a Hackaday Supercon 2024 talk on how to make E-ink go fast, and more recently has culminated in the Modos Flow, a fully open-source, user-repairable 13.3″ portable E-ink monitor.

The development path from proof of concept to finished product has been a long one for [Wenting]. Not only did a lot of optimization and feature work need to be crafted from scratch in order to effectively balance appearance with responsiveness in different display modes, but the usual hassles of development and bad timing were also in full force. On top of it were wasteful vendor shenanigans, as well.

Check out the story in the video, embedded just below. If you’d like to buy one, there are monochrome and color versions offered through Crowd Supply.

Continue reading “Behold A 60 Hz Refresh Rate E-ink Monitor”

Mimisbrunnur

Calculator Case To Scratch-Built Pocket E-Reader

E-readers are an awesome creation allowing you to display digital information in a way that requires little battery life. While there’s plenty of very impressive models to chose from on the commercial market, it’s also possible to build one yourself — which is exactly what [kaos-69] did in his Mimisbrunnur project, creating a truly unique e-reader from scratch.

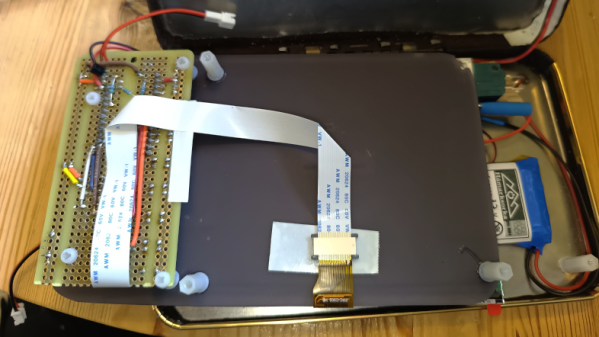
While looking through old junk at home, [kaos-69] came across a case that held a calculator and pen at one point in the distant past. The pen was gone and the calculator no longer functioned but the case held promise. He removed the calculator and got some parts on order. For the e-paper display he went with a 5.83-inch unit that just fit inside the spring-loaded case. The Mimisbrunnur is powered by a 2000 mAh LiPo battery, with a micro SD card reader for storing what will be displayed. The brains come from an RP2040 microcontroller on an Adafruit Feather breakout board, which worked out great as it already takes care of battery management and the 24-pin interface for the e-paper display.

There are also eight buttons that live below the display for user interface, and even some LEDs to aid in reading in the dark. The depth of the case allowed all this to be connected with the use of a perfboard and some risers to set the screen forward, allowing the battery to live behind it. Using the Mimisbrunnur is pretty straightforward with the eight buttons sitting below icons on the screen giving you clear guidance on how to turn the page, add a bookmark, or browse the SD card for another file to open.

We’ve seen some impressive DIY e-readers over the years, such as the dual-screen Diptyx and the Open Book. But this project is an excellent reminder that a device doesn’t have to be complex to get the job done.

Image

Cheap Writing Deck Eschews Distractions

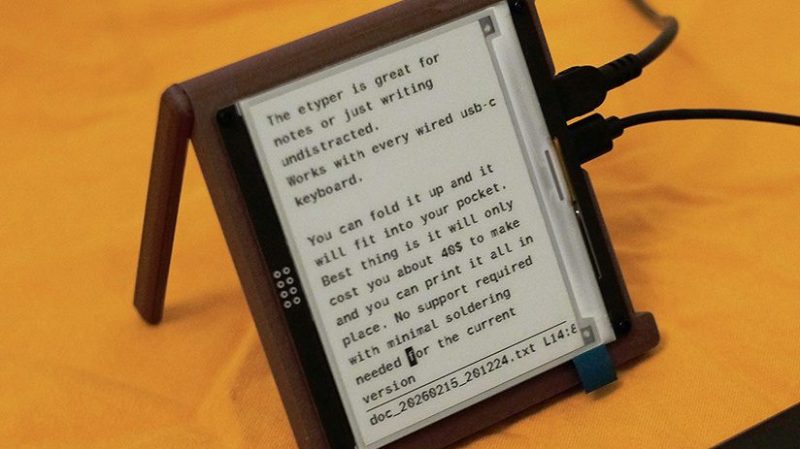
A modern computer can be a great productivity tool. It can also be a great source of distractions. To solve that issue, [Quackieduckie] built the e-typer—a device for writing without distraction.

[Quackieduckie] refers to the device as a “low-cost e-ink typewriter” which lays out the basic mode of operation. It consists of a 4.2 inch e-ink screen, combined with an Orange Pi Zero 2W running the Armbian operating system. It’s set up to boot straight into a document editor so there’s no messing around with other software that could get in the way of productivity. The components are all wrapped up in a tidy 3D printed housing, which includes a foldable stand so you can prop the screen up wherever you happen to be working. [Quackieduckie] built the device to work with any USB-C keyboard, probably figuring that those eager to maximize productivity will already have the typing device of their dreams on hand. Code for the project is available on GitHub for those eager to replicate the build.

We’ve featured similar builds in the past, often referred to as “writing decks.” They’re becoming increasingly popular as people look for distraction-free, ad-free tech experiences. A great example is this clamshell design with an integrated keyboard. If you’re building your own productivity aids in your home lab, don’t hesitate to notify the tipsline!

A photo of the cats and the generated image

The Cutest Weather Forecast On E-Ink And ESP32

There’s a famous book that starts: “It is a truth universally acknowledged that a man in possession of a good e-ink display, must be in want of a weather station.” — or something like that, anyway. We’re not English majors. We are, however, major fans of this feline-based e-ink weather display by [Jesse Ward-Bond]. It’s got everything: e-ink, cats, and AI.

Image
The generated image needs a little massaging to look nice on the Spectra6 e-ink display.

AI? Well, it might seem a bit gratuitous for a simple weather display, but [Jesse] wanted something a little more personalized and dynamic than just icons. With that in the design brief, he turned to Google’s Nano Banana API, feeding it the forecast and a description of his cats to automatically generate a cute scene to match the day’s weather.

That turned out to not be enough variety for the old monkey brain, so the superiority of silicon — specifically Gemini–was called upon to write unique daily prompts for Nano Banana using a random style from a list presumably generated by TinyLlama running on a C64. Okay, no, [Jesse] wrote the prompt for Gemini himself. It can’t be LLM’s all the way down, after all. Gemini is also picking the foreground, background, and activity the cats will be doing for maximum neophilia.

Aside from the parts that are obviously on Google servers, this is all integrated in [Jesse]’s Home Assistant server. That server stores the generated image until the ESP32 fetches it. He’s using a reTerminal board from SeedStudio that includes an ESP32-S3 and a Spectra6 colour e-ink display. That display leaves something to be desired in coloration, so on top of dithering the image to match the palette of the display, he’s also got a bit of color-correction in place to make it really pop.

If you’re interested in replicating this feline forecast, [Jesse] has shared the code on GitHub, but it comes with a warning: cuteness isn’t free. That is to say, the tokens for the API calls to generate these images aren’t free; [Jesse] estimates that when the sign-up bonus is used up, it should cost about fourteen cents a pop at current rates. Worth it? That’s a personal choice. Some might prefer saving their pennies and checking the forecast on something more physical, while others might prefer the retro touch only a CRT can provide.