This page goes over Omega Wind grids and weapons. They are called Tiamat after the farmable Wind aura summon Tiamat Omega . Additionally, they are often referred to as Magna after the JP name for them.
Wind Pages
Early Game (Magna 1)

In the early game, building for Omega grids follows the general format of 5-6 omega mods, 1-2 normal mods, 2-3 EX mods, and 1 seraphic. Below are a list of available weapons for these mod types.
Omega (5-6 per grid)
Weapons who skills are Omega mod. These skills are boosted by Tiamat Omega . They typically can be identied by either an Ω in english or M in Japanese.
Cyclonic Destruction |
Massive wind DMG to a foe (Inflict ATK Down.)
Additional effect at 4★: Increased to ATK Down. |
|---|
|
Stormwyrm’s Might
|
Medium boost to wind allies’ ATK |
|---|---|
|
Stormwyrm’s Enmity
|
Small boost to wind allies’ ATK based on how low HP is |
- Medium omega ATK and small omega enmity
- BiS omega weapon for M1 grids.
- The combo of attack and enmity overtakes the damage of Tiamat fists at ~85% HP which is very common during M1.
- Given free for story progress and during anniversary.
Cyclonic Destruction |
Massive wind DMG to a foe (Inflict ATK Down.)
Additional effect at 4★: Increased to ATK Down. |
|---|
|
Stormwyrm’s Might II
|
Big boost to wind allies’ ATK |
|---|
- Large omega attack.
- Alternative to Tiamat gun especially if you aren’t dropping HP like for burst setups.
Peridot Shot |
Massive wind DMG to a foe (All allies gain Refresh (Healing cap: 600).)
Additional effect at 4★: Effect increased to Refresh (10% of max HP Healing cap: 800, 3.5T) (Healing cap: 800). Additional effect at 5★: Also inflict Wind Lowered (Stackable) (10% (30% Max), 180s) to a foe. |
|---|
|
Stormwyrm’s Might III
|
Big boost to wind allies’ ATK |
|---|---|
|
Stormwyrm’s Progression II
|
Medium boost to wind allies’ wind ATK based on number of turns passed |
- Large omega attack and medium progression make this a good slot for your 6th omega mod.
- Good for longer battles as progression gains in strength with more turns passed.
- Uncap can be slow until Rank 120 but is doable. However at 120 it is a lot quicker.
Vayu-Isha |
Massive wind DMG to a foe (Inflict DEF Lowered.)
Additional effect at 4★: |
|---|
|
Stormwyrm’s Betrayal
|
Boost to wind allies’ ATK for first 8 turns of battle |
|---|---|
|
Stormwyrm’s Tyranny
|
Big boost to wind allies’ ATK / 10% cut to wind allies’ max HP |
- Big omega ATK as well as an additional big omega ATK for 8 turns.
- As a downside, it cuts max HP by 10%.
- Alternative 6th omega slot geared towards fights that last less than ten turns.
- You can buy 2/month in the Prestige Pendant shop.
- The showdown is relatively easy to farm .
- Comes in handy in burst grids later on.
Normal (1-2 per grid)
Weapons with skills that are normal mod. These skills typically boosted by Zephyrus but some like the Bahamut weapons can’t be boosted. Normal skills don’t have any special icons to indicate them.
| Massive dark DMG to a foe (Gain DA Up.) |
|---|
|
Human Animus Dominion
|
Boost to Humans’ ATK. (Also affects Primal and Other allies.) |
|---|
- Extremely strong normal mod that continues to get stronger with upgrades.
- A free copy can be obtained from the What Makes the Sky Blue sidestory.
- Choice of Bahamut weapon depends on your characters. Most players typically get Bahamut dagger first due to the large amount of Humans and Erunes.
- Typically the only normal mod in M1 grids.
Eastern Guardian Charge |
Massive wind DMG to a foe (Gain DA Up.) |
|---|
|
Ventosus’s Might
|
Weapon_Skills|Big boost (Normal 5% base, 1% per skill level, SL10 15%, SL15 18%) to wind allies’ ATK |
|---|
- Additional normal mod.
- Don’t need to rush Malus cipher until later since you are probably not capping in the first place.
- Fairly easy to uncap with the materials dropping commonly.
- Locked to Rise of the Beasts.
EX (2-3 per grid)
Weapons with skills that are EX mod. EX skills can not be boosted at all. These skills can be identified with an EX on them.
Impact Spitfire |
Massive wind DMG to a foe (Gain DA Up and TA Up.)
Additional effect at 4★: Also gain Bonus Wind DMG. Additional effect at 5★: DA Up, TA Up, and Bonus Wind DMG now affects all allies. |
|---|
|
Devicer
|
Big boost to Wind allies’ ATK |
|---|---|
|
Yes, My Lord!
|
When main weapon: Wind allies gain 30% boost to Skill DMG and 10% boost to Skill DMG Cap. |
- One of Wind’s best early-game Mainhands and EX Modifiers.
- Can be easily obtained from Shadowverse: Duelist of Eternity sidestory.
- Provides 30% skill damage and 10% skill-cap.
- Received a ULB that adds 15% bonus damage and 15/15 DATA team on CA making it highly valuable for weaker teams.
- Has a good amount of use in OTK and FA as mainhand for Relic Buster.
Silver Bolt |
Massive wind DMG to a foe (Slight chance for 1-turn cut to MC’s skill cooldowns.)
Additional effect at 4★: |
|---|
|
Forest Blessing
|
Big boost to wind allies’ ATK |
|---|---|
|
Forest Dweller’s Insight
|
When main weapon: All allies gain ATK Boosted (Stackable) (1T) when MC uses a skill (Max: 5). |
- Side Story EX option.
- Can be easily obtained from Code Geass: Lelouch of the Rebellion – The Blue Reckoning.
- Not worth using as a mainhand.
Astra Horizon |
Massive wind DMG to a foe (Remove 1 buff.) |
|---|
|
Horseman’s Supremacy
|
Massive boost to Wind allies’ ATK. |
|---|
- Large EX source as well as bonuses from AX skills.
- Upgrade option to side story weapons.
- Maintains a useful MH due to the Dispel
 Removes a buff from a foe.
and later double Dispel
 Removes a buff from a foe.
on CA.
Southern Dipper |
Massive wind DMG to a foe (All allies gain Charge Bar Sped Up.) |
|---|
|
Horseman’s Supremacy
|
Massive boost to Wind allies’ ATK. |
|---|
- Large EX source as well as bonuses from AX skills.
- Upgrade option to side story weapons.
- CA is ignorable.
Seraphic (1 per grid)
Seraphic skills amplify all damage fighting on element and are always must slots in that case. They can’t be boosted and have no special indicator.
Iudicium Windstorm |
Big Wind damage to a foe.All allies gain Wind ATK Up (3.5T). |
|---|
|
Raphael’s Blessing
|
Amplify Wind allies’ damage against Earth foes by 10%. |
|---|
- 10% seraphic mod that boosts all wind damage by 10% when fighting on element.
- SSR upgrade is rank gated so upgrading can be put on the backburner until then.
Example Grids
Below is a an example grid for most content. Here we have two EX weapons in the form of Xenos, a Normal in form of the Baha, and 6 Omega weapons that can be any mix of Bolts, Gaunlets, and up to one Nalakuvara. Ideally, you want to lean towards Bolts for any extended battle and Gaunlets for something that ends very quick.
Some gacha weapons can prove useful in Omega grids. For wind this takes the form of Piercing Galewing . Don’t worry about barring it. It is good at 0* and won’t recieve a major boost from barring them in M1 grids.
Magna 2

Moving into mid game, many new weapons become available resulting in many grid changes. At this stage, the concept of a general grid becomes dead with many specialized grids taking their place. This section will cover content between Rank 120 and 175.
New Weapons
List of the notable new weapons during these ranks.
Flash Ruination |
Massive wind DMG to a foe (Gain Mirror Image.) |
|---|
|
Stormwyrm’s Stamina
|
Medium boost to wind allies’ ATK based on how high HP is |
|---|---|
|
Stormwyrm’s Verity II
|
Big boost to wind allies’ critical hit rate |
- Medium Stamina and Big Crit.
- Core weapon to Tiamat crit setups.
- Double sided with use two usually.
- Single sided setups use 3-4 depending on M3 weapons available.
Unbridled Windbloom |
Massive wind DMG to a foe (Gain Dodge Rate Boosted (Stackable).) |
|---|
|
Stormwyrm’s Majesty
|
Small boost to wind allies’ ATK and max HP |
|---|---|
|
Stormwyrm’s Restraint II
|
Medium boost to wind allies’ double attack rate and critical hit rate |
- Small ATK, small HP, medium crit, and medium DA.
- Also known as Spoon.
- Best HP option for M2 as it pairs with the Harp with 100% crit.
- The need for multiple copies has been reduced with Settes, Celestials, and other HP sources.
Mawjat Mariqa |
Massive wind DMG to a foe (Chance to inflict Delay.)
Additional effect at 4★: Effect increased to 100% chance to inflict Delay. |
|---|
|
Tranquility’s Persistence
|
Supplement wind allies’ DMG based on how high their HP is |
|---|---|
|
Whirlwind’s Progression
|
Medium boost to wind allies’ wind ATK based on number of turns passed |
- 30k stamina supp and medium progression.
- Very useful for stamina setups focusing on normal attacks..
- Farmable Delay
 on CA weapon, making it useful for Belial solos.
 - The extra progression, despite being Optimus-boosted, is still nice to have and can replace the need for Peridot Crossbow
Setepenre |
Massive wind DMG to a foe (Inflict Wind Resistance Lowered.)
Additional effect at 4★: Also inflicts Debuff Resistance Lowered. |
|---|
|
Tranquility’s Fortitude
|
Supplement wind allies’ DMG based on how low HP is |
|---|---|
|
Preemptive Gale Blade
|
Boost to wind allies’ ATK for first 8 turns of battle |
- 60k enmity supp and big ATK for the first 8 turns.
- Great paired with Spartan setups as the HP reduction from them allows for high supp values.
- Solid choice of Lucha mainhand.
- Preemptive skill stacks with Ancient Nalakuvara.
|
Stormwyrm’s Majesty III
|
Big boost to Wind allies’ ATK and max HP |
|---|---|
|
Guiding Revelation
|
A symbol of apocalyptic corruption. Empowered by a chosen pendulum. |
|
Guiding Gospel
|
A symbol of evolution’s holy outcome. Empowered by a chosen pendulum. |
- Big normal ATK and HP, cap up of choice at FLB, and third skill of many powerful options at ULB.
- Starting at 230, it also gains Big damage amp.
- At FLB it is a solid slot for the free cap of choice, but due to the large quartz cost it should be lower priority until the rest of your grid is done.
- Once ULB it will be a must slot in every grid.
- Skill 3 will typically be Stamina to start.
- For burst, Falsehood or Extremity.
- For FA, Stamina, or Sagacity.
- For hard content, Glorification or Sagacity.
Zephyr Blade |
400% Wind damage to a foe. (All allies gain Skill DMG Boosted and Skill DMG Cap Boosted.)
Additional effect at 4★: Damage increased to 450%. (Also deal 300% bonus Wind damage to a foe (Damage cap: ~630,000).) |
|---|
|
Gale’s Might
|
Massive boost to wind allies’ ATK |
|---|---|
|
Emerald Covenant
|
Supplement Wind allies’ skill damage. |
- 33% normal ATK up and 100k skill damage supplemental.
- Stacks up to 200k.
- Excellent slot for skill damage setups.
Example Grids
Extreme
Our first goal for OTK is to reach the damage cap for CAs. The critical damage and stamina from Last Storm Harp are a great way to do that. After this point, we want try to raise our cap up while keeping in mind we need to reach cap in the first place. Last Storm Harps go a long way, but they will only go so far. We can push the raw damage a bit further with Ancient Nalakuvara
 .
.
Qinglong Spear Malus is the only general cap up sourse at this point.
If running characters who deal skill damage like Mirin , skill cap boosts like Ewiyar’s Beak
 or Daur da Blao
 are high value.
Wind lacks CA cap up options at this point. If your team has no skill damage, your only real option is CA key on your Dark Opus.
Full Auto
Relic Buster
First grid I’ll cover is a basic FA setup. Here the main component is the crit weapon Last Storm Harp . With double 4* Tiamat, three of them are required to reach 100% Crit. Spring’s Whisperings
 is an HP slot that can be subbed out if you don’t have HP issues.
The second example is one that assumes rank 150. Most notable, with rank 150 you can 5* Tiamat which then let’s you reach 100% crit with two harps and one Coruscant Crozier . We’ll also take this change to slot in two Ewiyar’s Beaks
 as they are very strong skill supp weapons.
If you have a Piercing Galewing , you can slot it in any of the prior setups even at 0*. This would replace a Mandjet as they serve similar function. Below is an example of doing so in the initial FA setup.
Burst
Relic Buster
One main weakness of wind at this point is it severly lacks a strong CA setup. Below is an example for Relic Buster bursting using its skill Limit Burst
![]() All allies gain Charge Bar, C.A. DMG Boosted (1 time), and C.A. DMG Cap Boosted (1 time) based on number of Machine Cell.
All allies gain Charge Bar, C.A. DMG Boosted (1 time), and C.A. DMG Cap Boosted (1 time) based on number of Machine Cell.
(Consumes all Machine Cell.)
. As you can see there really isn’t much opportunity to increase CA damage or cap. Instead, we will need to reply of skill damage dealers and skill CA to make up for the loss of CA damage.
Luchador
An alternative burst method is Luchador which will focus more on normal attacks. Before having a 5* opus, normal attacks will hit pretty weak. But wind’s M2 crit does have a higher raw damage that makes having good normal attacks a lot more managable. Here, four harps are slotted as you will typical be running this single sided. They won’t fully reach 100% crit unless you find a transcended Tiamat, but it is close enough to work fine.
Magna 3 to Late Game

Magna 3 introduces a lot of new strong weapons that provides a much needed boost to farmable setups. Additionally, this will go through the weapons introduced at Rank 200 which is the highest level requirement in the game presently.
New Weapons
List of the notable new weapons during these ranks.
Procella Populans |
Massive wind DMG to a foe / Hit to ATK / Chance of Delay effect
Additional effect at 4★: |
|---|
|
Omega Exalto Aeros
|
20% boost to Stormwyrm’s weapon skills |
|---|---|
|
Stormwyrm’s Might II
|
Big boost to wind allies’ ATK |
|
Storm’s Vivification
|
Boost to ATK and DMG cap based on how many weapons with Stormwyrm’s weapon skills are equipped |
- Big ATK, 20% boost to Omega weapon skills and 2% EX, and 1% cap up per weapon with an Omega skill slotted.
- Core weapon for M3.
- Very easy to reach 20% cap up with them.
- Exalto skill is great for reaching the aura boost needed for Dark Rapture Zero keys.
Falx Perfurens |
Massive wind DMG to a foe / Hit to ATK / Boost to all allies’ skill DMG
Additional effect at 4★: |
|---|
|
Stormwyrm’s Tempering III
|
Big boost to wind allies’ skill DMG cap / Big supplemental boost to skill DMG |
|---|---|
|
Stormwyrm’s Garrison
|
Small boost to wind allies’ DEF based on how low HP is |
- Big Skill Cap, big Skill Supp, and small Garrison.
- Great source of skill increase especially for longer fights where the garrison becomes use.
- Lacks attack mods.
Inexorabilis Calamitas |
Massive wind DMG to a foe / Hit to ATK / Boost to all allies’ DMG cap
Additional effect at 4★: |
|---|
|
Stormwyrm’s Bloodshed III
|
Big boost to wind allies’ ATK / Take DMG worth 20% of max HP at battle start |
|---|---|
|
Stormwyrm’s Might
|
Medium boost to wind allies’ ATK |
- Big ATK taking 20% max HP at battle start and medium ATK.
- Great for activating low HP values with minimal input.
- Typically weaker slotting these over enmity mods for Spartan setups.
Lama dell’Accoglienza |
Massive wind DMG to a foe (All allies gain ATK Up.)
Additional effect at 4★: MC also gains Unchallenged (1 times, 2.5T). |
|---|
|
Sword’s Wrath
|
Boost to ATK, max HP, and multiattack rate based on how many sabres are equipped |
|---|---|
|
Sword’s Charge
|
Boost to C.A. DMG, C.A. DMG cap, and special C.A. DMG cap based on how many sabres are equipped |
- 2% EX ATK, 1% HP, 1% MA, 5% CA damage, 3% CA cap, and 1% special CA cap per Sabre equipped in grid.
- Excellent for HL content as it provides much desires MA and HP on top of boosting the dominate CA setups in Wind.
- MKII copies have strong use in normal attack OTK setups for the strong ATK mod from awakening and MA to help everyone hit 100% TA.
Example Grids
Extreme+
1B0C
A Dark Opus with Chain of Falsehood provides teamwide double strike on CA. This can be easily done with any class with Splitting Spirit![]() Convert caster’s HP to charge bar (3% charge bar for every 250 HP consumed, up to 100% charge bar).
Convert caster’s HP to charge bar (3% charge bar for every 250 HP consumed, up to 100% charge bar).
(Consumes up to 50% of current HP.)
. Pairing this with GTA characters allows for a lot of damage from a single button.
The only non GTA character of this bunch is Anila (Summer) . She provides bonus damage to ally triple attacks. For her, we’ll need to compensate for her lack of TA. In the below, this is done via Covenant-Ruin Fist
 , the Strife key on Ultima Claw
 , and Halluel and Malluel
 . Alternatively, Tiamat (Summer)
 can be used to give her or any character GTA.
As for the grid itself, its works to quickly maximize cap up and raw damage from a mix of Tiamat Bolt Aura and Last Storm Harp
 . Mandjet
 are then used to provide a bit more cap break via its supplemental damage.
0B0C
Moving towards 0B1C, we will need a stronger grid. This will require bringing in the premium option Piercing Galewings for more supplemental damage.
Iatromantis is chosen because it has GTA with two spears. Galleon (Summer)
 and Grimnir
 are among the strongest 0B charaters in wind. Estarriola
 is one of the best EX+ characters because he deals lots of free hard hitting skill damage at the end of turn.
With our character and class selection, they are all Staff prof. This makes them pair both with Worldvexing Angelos and Altruism-Soul Staff
 to further push damage output.
Burst
Spartan
Spartan burst uses the Falsehood chain on the Dark Opus to provide teamwide double strike. In addition, its ultimate mastery skill Molon Labe
![]() All allies gain Bonus DMG (20%, 3T), Jammed (30%-90%, 8T), Lethal Attack Dodged (1 times), and Shielded (3000).
All allies gain Bonus DMG (20%, 3T), Jammed (30%-90%, 8T), Lethal Attack Dodged (1 times), and Shielded (3000).
(Consumes 40% of each ally’s current HP.)
both provides teamwide bonus damage and push the team further into enmity.
Between Molon Labe and Demonbream , Spartan setups are pushed far into enmity territory. This works great with the strong enmity mod from Tiamat Bolt Omega
 and the strong enemity supp weapons Abu Simbels
 and Indra’s Edge Militis
 . Tiamat Arc Aura
 come with bloodshed and can help lower HP if needed. Generally, they are used much as Spartan and Demonbream lower HP enough already.
Sumaibito
On the other hand, Sumaibito setups lean towards Stamina. Depending on the sitation, you can stack a mix between Tiamat Bolt Aura
 and Last Storm Harp
 . In the Extremity example, we want to activate the Narmaya’s bonus damage on crits passive so we go for three harps. In the Falsehood example, we don’t need the crits so we just stack Bolts instead.
The Sumaibito CCW Iron Fist of Severed Chains is a strong mainhand as it upgrades Ultimate Palm Strike
![]() 700% Elemental damage to a foe (Damage cap: ~635,000).
700% Elemental damage to a foe (Damage cap: ~635,000).
Inflict DEF Down 2 (25%, 2T) and DMG Taken Amplified 1 (30%, 6 times, 1T).
to give MC a 1 hit assassin.. Galgalim of Gales is the main alternative MH. It grants MC double strike, 30% echo, and 10% normal cap up upon using their first slot skill. After normal attacks, allies also gain 10% (30% max) stackable ATK up, 15%/10% (45%/30% max) stackable DATA, ad 10k (30k max) stackable supp on normal attacks. That double strike is provides makes it a lot more valuable for those without Bastet (like me).
Full Auto
Manadiver
For Full Auto, Manadiver is a typical choice for MC class thanks to the damage output from both skill damage after MC normal attacks and the teamwide bonus damage via Secret Triad
![]() Fill 3 charge diamonds on all foes.All allies gain Bonus DMG (20%, 3T), Charge Boost (30%), and 1 Elemental Crest (Hellfire CrestDeluge CrestWasteland CrestTyphoon CrestAurora CrestOblivion Crest).(Crest gained based on caster’s element.)
it provides.
Fill 3 charge diamonds on all foes.All allies gain Bonus DMG (20%, 3T), Charge Boost (30%), and 1 Elemental Crest (Hellfire CrestDeluge CrestWasteland CrestTyphoon CrestAurora CrestOblivion Crest).(Crest gained based on caster’s element.)
it provides.
Below are two slightly different examples of it. The first being against NM150 and the latter against Galleon. For both, there is a more aggressive character selection due to the lower HP of the first and the second not attacking. Chain of Temptation is used primarily for the Veil and Dispel Cancel to protect against omens. Outside UnF, Pendulum of Strength or Extremity can be used instead.
For both cases, Ouroboros is the best manatura. Leviathan can work for both. However, for the Galleon example, you won’t be able to clear the 5m skill like that. Replace Noire with someone with skill damage every turn like Grimnir (Valentine) or skill damage on normal attacks like Izuku Midoriya
 .
.
Thanks to the aura boost from Tiamat Bolt Aura as well as the upgraded boost from transcended Tiamat, you can hit 100% crit with three harps on single sided setups and two with double sided setups. They provide a lot of additional raw damage mod and hitting 100% crit also let’s you activate the passive bonus damage from Narmaya (Grand)
 .
.
Siegfried
For both Siegfried and Virtuosic Mastery Trial, the raids require mitigating large amounts of damage. Shieldsworn is an excellent way to do so thanks to its strong first slot skill Shield of Valor
![]() Deploy Shield of Valor (1T).
Deploy Shield of Valor (1T).
Level 30:
Also gain Undying (Can’t be removed) 1 (1 times, 1T).
which subs, caps damage, and grants guts to easily deal with any omen. It has lots of heals, dispels, and additional defense to deal with anything.
For both raids, there will be a lot of need for guarding. As a result, skill damage skill nukers are valuable to make up for those turns. There is a high flexibily with Cassius (Summer) , Lich (Halloween)
 , Galleon (Summer)
 , Estarriola
 , Enyo
 , Aliza (Summer)
 , Vane (Grand)
 , and Niyon
 as options among others.
The grid leans more defensive adding in Coruscant Croziers for HP and leaning more on Tiamat Edge Aura
 for the garrison. Lucifer
 adds a lot of additional healing.
Pendulum of Strength or Strength of Sagacity can be used.
Fight Suppressor (Wind)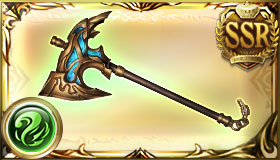 is a great CCW especially since it offers a free full heal on MC when below 25% HP. Since MC is taking the brunt of the damage, its a great safety net. An upgrade would be using the gacha weapoon Swan
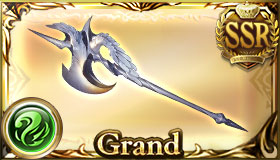 instead for free skill nukes on dispels as well as lots of free healing for the team.
Hard Content
Rising Force
Now for an end game raid setup. The one below in particular is a Rising Force for Dark Rapture Zero.
Daur da Blao is the ideal mainhand for Rising Force setups thanks to its teamwide 10% charge as well as dealing a skill nuke on CA.
Here, we slot in Sette di Spades for both the CA cap as well as the large amount of defense. They also provide a lot of MA to help clearing the omens that require TAs in both Faa and Hexa. You can replace the ATK ones with additional defense if more HP is required.
Either Ewiyar’s Beak or Tiamat Edge Aura
 work for skill supp slots, but the later does offer a lot more survivability. Worldbreaking Tauros
 also adds to the skill damage as it covers Rising Force, Catura, and Katzelia.
The ideal 3rd slot on the Dark Opus is the Pendulum of Sagacity. Before you unlock it, Pendulum of Strength can be used instead. It may require additional clicks for damage omens but otherwise it plays the same with lower damage.
Weapons
These are the notable weapons for Tiamat setups. They are categorized by what they are used for to make replacing easier to understand.
Universal Grid Pieces
List of the grid pieces that exist in almost every grid.
|
Stormwyrm’s Majesty III
|
Big boost to Wind allies’ ATK and max HP |
|---|---|
|
Guiding Revelation
|
A symbol of apocalyptic corruption. Empowered by a chosen pendulum. |
|
Guiding Gospel
|
A symbol of evolution’s holy outcome. Empowered by a chosen pendulum. |
- Big normal ATK and HP, cap up of choice at FLB, and third skill of many powerful options at ULB.
- Starting at 230, it also gains Big damage amp.
- At FLB it is a solid slot for the free cap of choice, but due to the large quartz cost it should be lower priority until the rest of your grid is done.
- Once ULB it will be a must slot in every grid.
- Skill 3 will typically be Stamina to start.
- For burst, Falsehood or Extremity.
- For FA, Stamina, or Sagacity.
- For hard content, Glorification or Sagacity.
Roaming Gale |
Massive Wind damage to a foe. All allies gain Wind ATK Boosted (20%, 3.5t) and Earth DMG Lowered (20%, 3.5t). |
|---|
|
Raphael’s Blessing III
|
Amplify Wind allies’ damage against Earth foes by 23%. |
|---|---|
|
Wind’s Majesty
|
Small boost to wind allies’ ATK and max HP |
- 20-23% seraphic mod that boosts all wind damage by when fighting on element.
- Core to on element raids.
- Upgrade from SSR can be delayed while upgrading other grid pieces, but with 3% additional seraphic mod and the weapon almost never leaving your grid it’s important to upgrade it.
Damage Mods
Weapons used for as a source of raw damage.
Procella Populans |
Massive wind DMG to a foe / Hit to ATK / Chance of Delay effect
Additional effect at 4★: |
|---|
|
Omega Exalto Aeros
|
20% boost to Stormwyrm’s weapon skills |
|---|---|
|
Stormwyrm’s Might II
|
Big boost to wind allies’ ATK |
|
Storm’s Vivification
|
Boost to ATK and DMG cap based on how many weapons with Stormwyrm’s weapon skills are equipped |
- Big ATK, 20% boost to Omega weapon skills and 2% EX, and 1% cap up per weapon with an Omega skill slotted.
- Core weapon for M3.
- Very easy to reach 20% cap up with them.
- Exalto skill is great for reaching the aura boost needed for Dark Rapture Zero keys.
Cyclonic Destruction |
Massive wind DMG to a foe (Inflict ATK Down.)
Additional effect at 4★: Increased to ATK Down. |
|---|
|
Stormwyrm’s Might
|
Medium boost to wind allies’ ATK |
|---|---|
|
Stormwyrm’s Enmity
|
Small boost to wind allies’ ATK based on how low HP is |
- Medium ATK and small Enmity.
- Spartan setups push HP into low values making the enmity mod on Bolts very strong at present.
Inexorabilis Calamitas |
Massive wind DMG to a foe / Hit to ATK / Boost to all allies’ DMG cap
Additional effect at 4★: |
|---|
|
Stormwyrm’s Bloodshed III
|
Big boost to wind allies’ ATK / Take DMG worth 20% of max HP at battle start |
|---|---|
|
Stormwyrm’s Might
|
Medium boost to wind allies’ ATK |
- Big ATK taking 20% max HP at battle start and medium ATK.
- Great for activating low HP values with minimal input.
- Typically weaker slotting these over enmity mods for Spartan setups.
Vayu-Isha |
Massive wind DMG to a foe (Inflict DEF Lowered.)
Additional effect at 4★: |
|---|
|
Stormwyrm’s Betrayal
|
Boost to wind allies’ ATK for first 8 turns of battle |
|---|---|
|
Stormwyrm’s Tyranny
|
Big boost to wind allies’ ATK / 10% cut to wind allies’ max HP |
- Big ATK and big ATK for the first 8 turns but reduces max HP by 10%.
- Strong mod slot in short fights.
Cyclonic Destruction |
Massive wind DMG to a foe (Inflict ATK Down.)
Additional effect at 4★: Increased to ATK Down. |
|---|
|
Stormwyrm’s Might II
|
Big boost to wind allies’ ATK |
|---|
- Big ATK.
- Alternative MH for lucha.
Peridot Shot |
Massive wind DMG to a foe (All allies gain Refresh (Healing cap: 600).)
Additional effect at 4★: Effect increased to Refresh (10% of max HP Healing cap: 800, 3.5T) (Healing cap: 800). Additional effect at 5★: Also inflict Wind Lowered (Stackable) (10% (30% Max), 180s) to a foe. |
|---|
|
Stormwyrm’s Might III
|
Big boost to wind allies’ ATK |
|---|---|
|
Stormwyrm’s Progression II
|
Medium boost to wind allies’ wind ATK based on number of turns passed |
- Big ATK and Big Progression.
- Solid mod slot for extended battles.
Critical Hit Rate
Weapons that increase critical hit rate.
Flash Ruination |
Massive wind DMG to a foe (Gain Mirror Image.) |
|---|
|
Stormwyrm’s Stamina
|
Medium boost to wind allies’ ATK based on how high HP is |
|---|---|
|
Stormwyrm’s Verity II
|
Big boost to wind allies’ critical hit rate |
- Medium Stamina and Big Crit.
- Core weapon to Tiamat crit setups.
- Double sided with use two usually.
- Single sided setups use 3-4 depending on M3 weapons available.
Unbridled Windbloom |
Massive wind DMG to a foe (Gain Dodge Rate Boosted (Stackable).) |
|---|
|
Stormwyrm’s Majesty
|
Small boost to wind allies’ ATK and max HP |
|---|---|
|
Stormwyrm’s Restraint II
|
Medium boost to wind allies’ double attack rate and critical hit rate |
- Small ATK, small HP, medium crit, and medium DA.
- Also known as Spoon.
- Best HP option for M2 as it pairs with the Harp with 100% crit.
- The need for multiple copies has been reduced with Settes, Celestials, and other HP sources.
Cap Break
Weapons that break cap either via cap up or supplemental.
Procella Populans |
Massive wind DMG to a foe / Hit to ATK / Chance of Delay effect
Additional effect at 4★: |
|---|
|
Omega Exalto Aeros
|
20% boost to Stormwyrm’s weapon skills |
|---|---|
|
Stormwyrm’s Might II
|
Big boost to wind allies’ ATK |
|
Storm’s Vivification
|
Boost to ATK and DMG cap based on how many weapons with Stormwyrm’s weapon skills are equipped |
- Big ATK, 20% boost to Omega weapon skills and 2% EX, and 1% cap up per weapon with an Omega skill slotted.
- Core weapon for M3.
- Very easy to reach 20% cap up with them.
- Exalto skill is great for reaching the aura boost needed for Dark Rapture Zero keys.
Mawjat Mariqa |
Massive wind DMG to a foe (Chance to inflict Delay.)
Additional effect at 4★: Effect increased to 100% chance to inflict Delay. |
|---|
|
Tranquility’s Persistence
|
Supplement wind allies’ DMG based on how high their HP is |
|---|---|
|
Whirlwind’s Progression
|
Medium boost to wind allies’ wind ATK based on number of turns passed |
- 30k stamina supp and medium progression.
- Very useful for stamina setups focusing on normal attacks..
- Farmable Delay
 on CA weapon, making it useful for Belial solos.
 - The extra progression, despite being Optimus-boosted, is still nice to have and can replace the need for Peridot Crossbow
Setepenre |
Massive wind DMG to a foe (Inflict Wind Resistance Lowered.)
Additional effect at 4★: Also inflicts Debuff Resistance Lowered. |
|---|
|
Tranquility’s Fortitude
|
Supplement wind allies’ DMG based on how low HP is |
|---|---|
|
Preemptive Gale Blade
|
Boost to wind allies’ ATK for first 8 turns of battle |
- 60k enmity supp and big ATK for the first 8 turns.
- Great paired with Spartan setups as the HP reduction from them allows for high supp values.
- Solid choice of Lucha mainhand.
- Preemptive skill stacks with Ancient Nalakuvara.
Verdict Sphere |
Massive wind DMG to a foe (All allies gain Conquest Anthem. (Converts “Boost to DEF” effects to “Boost to ATK” [Cap: 100%].))
Additional effect at 4★: All allies also gain Armored. Additional effect at 5★: Conquest Anthem and Armored’s duration increased to Half Turns|4.5 turns. |
|---|
|
Emperor-Judgement’s Awakening
|
When main weapon: Massive boost to Wind allies’ ATK (Modifier: EX). Wind allies take 1% DMG (Based on max HP) every turn. 30% Earth DMG reduction. |
|---|---|
|
Sephira Maxi-Wind
|
20% boost to Wind allies’ DMG Cap in Arcarum. |
|
Wind’s Majesty
|
Small boost to wind allies’ ATK and max HP |
- Needs FLB to be useful.
- At FLB:
- A strong grid slot thanks to its mix of normal majesty and massive EX.
- Generally limited in usage outside of Extra grids.
- At ULB:
- An all around great slot thanks to both its mix of mads and the additional 5% cap up.
- Good option for many normal grids.
- Provides a strong 30% earth damage reduction which is great for both FA and GW burst strategies.
Yesohd |
Unworldly Wind damage to a foe (Damage cap: ~2,550,000). (MC can’t attack next turn.)
Additional effect at 4★: Effect increased to Bonus Wind DMG (1 time). Additional effect at 5★: Effect increased to Bonus Wind DMG (1 time). |
|---|
|
Hermit-Temperance’s Accord
|
When main weapon: Massive boost to Wind allies’ ATK (Modifier: EX). At end of turn: Wind allies who didn’t attack gain ATK Sharply Boosted (100%, 1 times, Multiplier: Assassin, 1T). |
|---|---|
|
Sephira Maxi-Wind
|
20% boost to Wind allies’ DMG Cap in Arcarum. |
|
Wind’s Majesty
|
Small boost to wind allies’ ATK and max HP |
- Needs FLB to be useful.
- At FLB:
- A strong grid slot thanks to its mix of normal majesty and massive EX.
- Generally limited in usage outside of Extra grids.
- At ULB:
- An all around great slot thanks to both its mix of mads and the additional 5% cap up.
- Good option for many normal grids.
- Has a strong place in V2 due to the assassin buff for not attacking, making this weapon great for SUBHL and Siegfried.
Eastern Guardian Charge |
Massive wind DMG to a foe (Gain DA Up.) |
|---|
|
Ventosus’s Might
|
Weapon_Skills|Big boost (Normal 5% base, 1% per skill level, SL10 15%, SL15 18%) to wind allies’ ATK |
|---|---|
|
Essence of the East
|
Boost to Wind allies’ damage cap. |
- Big II Normal mod and 10% cap up.
- Easiest source of cap up to obtain and the largest single source of it.
Normal Cap
Weapons that break normal cap either via cap up or bonus damage.
Golden Thorns |
Massive wind DMG to a foe (All Wind allies gain Critical Hit Rate Boosted (Wind).)
Additional effect at 4★: All Wind allies also gain Wind ATK Up. |
|---|
|
Verdant Sovereign
|
Unworldly boost to Wind allies’ ATK. |
|---|---|
|
Astral Echo
|
When main weapon: Boost to Wind allies’ one-foe attack damage cap based on their number of buffs. |
- Unworldly EX attack and 10% normal cap to allies with 10 buffs.
- Phased out thanks to various other weapons also providing EX as well as Ultima ULB.
Charge Attack Cap
Weapons that break Charge Attack cap either via cap up or supplemental.
Lama dell’Accoglienza |
Massive wind DMG to a foe (All allies gain ATK Up.)
Additional effect at 4★: MC also gains Unchallenged (1 times, 2.5T). |
|---|
|
Sword’s Wrath
|
Boost to ATK, max HP, and multiattack rate based on how many sabres are equipped |
|---|---|
|
Sword’s Charge
|
Boost to C.A. DMG, C.A. DMG cap, and special C.A. DMG cap based on how many sabres are equipped |
- 2% EX ATK, 1% HP, 1% MA, 5% CA damage, 3% CA cap, and 1% special CA cap per Sabre equipped in grid.
- Excellent for HL content as it provides much desires MA and HP on top of boosting the dominate CA setups in Wind.
- MKII copies have strong use in normal attack OTK setups for the strong ATK mod from awakening and MA to help everyone hit 100% TA.
Skill Cap
Weapons that break skill cap either via cap up or supplemental.
Falx Perfurens |
Massive wind DMG to a foe / Hit to ATK / Boost to all allies’ skill DMG
Additional effect at 4★: |
|---|
|
Stormwyrm’s Tempering III
|
Big boost to wind allies’ skill DMG cap / Big supplemental boost to skill DMG |
|---|---|
|
Stormwyrm’s Garrison
|
Small boost to wind allies’ DEF based on how low HP is |
- Big Skill Cap, big Skill Supp, and small Garrison.
- Great source of skill increase especially for longer fights where the garrison becomes use.
- Lacks attack mods.
Zephyr Blade |
400% Wind damage to a foe. (All allies gain Skill DMG Boosted and Skill DMG Cap Boosted.)
Additional effect at 4★: Damage increased to 450%. (Also deal 300% bonus Wind damage to a foe (Damage cap: ~630,000).) |
|---|
|
Gale’s Might
|
Massive boost to wind allies’ ATK |
|---|---|
|
Emerald Covenant
|
Supplement Wind allies’ skill damage. |
- 33% normal ATK up and 100k skill damage supplemental.
- Stacks up to 200k.
- Excellent slot for skill damage setups.
Clairseach |
Massive Wind damage to a foe. (300% Bonus Wind damage (Damage cap: 600,000).)
Additional effect at 4★: All allies also gain Charge Bar. |
|---|
|
Armed Gale
|
Big boost to wind allies’ ATK |
|---|---|
|
Jade Arts
|
Boost to wind allies’ skill DMG cap |
- Big EX ATK and 20% skill cap.
- Can get an additional 5% skill cap and 3% cap from SPC awakening.
- Best mainhand for Rising Force setups as it provides 10% bar to team on CA and deals a skill nuke.
Defensive
Weapons that provide HP. Generally HP is provided by spoon or settes, but these are other options if lacking either.
Lama dell’Accoglienza |
Massive wind DMG to a foe (All allies gain ATK Up.)
Additional effect at 4★: MC also gains Unchallenged (1 times, 2.5T). |
|---|
|
Sword’s Wrath
|
Boost to ATK, max HP, and multiattack rate based on how many sabres are equipped |
|---|---|
|
Sword’s Charge
|
Boost to C.A. DMG, C.A. DMG cap, and special C.A. DMG cap based on how many sabres are equipped |
- 2% EX ATK, 1% HP, 1% MA, 5% CA damage, 3% CA cap, and 1% special CA cap per Sabre equipped in grid.
- Excellent for HL content as it provides much desires MA and HP on top of boosting the dominate CA setups in Wind.
- MKII copies have strong use in normal attack OTK setups for the strong ATK mod from awakening and MA to help everyone hit 100% TA.
Falx Perfurens |
Massive wind DMG to a foe / Hit to ATK / Boost to all allies’ skill DMG
Additional effect at 4★: |
|---|
|
Stormwyrm’s Tempering III
|
Big boost to wind allies’ skill DMG cap / Big supplemental boost to skill DMG |
|---|---|
|
Stormwyrm’s Garrison
|
Small boost to wind allies’ DEF based on how low HP is |
- Big Skill Cap, big Skill Supp, and small Garrison.
- Great source of skill increase especially for longer fights where the garrison becomes use.
- Lacks attack mods.
Unbridled Windbloom |
Massive wind DMG to a foe (Gain Dodge Rate Boosted (Stackable).) |
|---|
|
Stormwyrm’s Majesty
|
Small boost to wind allies’ ATK and max HP |
|---|---|
|
Stormwyrm’s Restraint II
|
Medium boost to wind allies’ double attack rate and critical hit rate |
- Small ATK, small HP, medium crit, and medium DA.
- Also known as Spoon.
- Best HP option for M2 as it pairs with the Harp with 100% crit.
- The need for multiple copies has been reduced with Settes, Celestials, and other HP sources.
Cyclone Cage |
Massive wind DMG to a foe (All allies gain Shield.)
Additional effect at 5★: Also remove 1 debuff from all allies. |
|---|
|
Ewiyar’s Gale
|
Boost to Wind allies’ ATK0.1% per turn per skill level (Max: 25%)’”`UNIQ–ref-00000013-QINU`”‘”’Modifier:”’ EX based on number of turns passed. |
|---|---|
|
Four Orbs’ Judgment
|
Emblem of the four orbs bent on destroying the singular pigment. Empowered by a chosen teluma. |
|
Six Dragons’ Radiance
|
Emblem of the six colors in which the world is rendered. Empowered by a chosen teluma. |
- Big ATK, Big HP, and EX progression.
- Alternative opus that trades the more offenseive skills of opus for defensive ones in particular the 30% wind damage reduction or 20% DEF.
- Can’t be slotted with Opus which greatly kills it’s general usage but can still be useful for Revan tier raids or NM250 FAs.
Tempest Cage ++ |
Massive wind DMG to a foe (All allies gain Shield.) |
|---|
|
Ewiyar’s Gale
|
Boost to Wind allies’ ATK0.1% per turn per skill level (Max: 25%)’”`UNIQ–ref-00000013-QINU`”‘”’Modifier:”’ EX based on number of turns passed. |
|---|---|
|
Six Pillars’ Judgment
|
Emblem of the six orbs bent on destroying the singular pigment. Empowered by a chosen teluma. |
|
Six Dragons’ Radiance
|
Emblem of the six colors in which the world is rendered. Empowered by a chosen teluma. |
- Upgraded version of the Draconic Rod offering all the benefits of it while also allowing it to be slotted with opus and in extra slots.
- Offers new skill 2 keys most notably one that provides 10% seraphic mod against null foes.
Budding Orchestration |
Massive wind DMG to a foe (All allies gain DA Up and TA Up.)
Additional effect at 4★: Increased to DA Up and TA Up. |
|---|
|
Stormwyrm’s Might
|
Medium boost to wind allies’ ATK |
|---|---|
|
Stormwyrm’s Heroism II
|
Medium boost to wind allies’ max HP and double attack rate |
- Medium ATK, medium HP, and medium DA.
- Decent HP option when starting out but falls off for much better options very quickly.
Cyclonic Destruction |
Massive wind DMG to a foe (Inflict ATK Down.)
Additional effect at 4★: Increased to ATK Down. |
|---|
|
Stormwyrm’s Aegis II
|
Medium boost to wind allies’ max HP |
|---|
- Medium HP.
- Old school HP filter. Offers nothing but a lot of HP.
- Only used as a last resort if nothing else but even then it’s not reccomended.
Mainhands
Weapons that are strong as mainhands.
Clairseach |
Massive Wind damage to a foe. (300% Bonus Wind damage (Damage cap: 600,000).)
Additional effect at 4★: All allies also gain Charge Bar. |
|---|
|
Armed Gale
|
Big boost to wind allies’ ATK |
|---|---|
|
Jade Arts
|
Boost to wind allies’ skill DMG cap |
- Big EX ATK and 20% skill cap.
- Can get an additional 5% skill cap and 3% cap from SPC awakening.
- Best mainhand for Rising Force setups as it provides 10% bar to team on CA and deals a skill nuke.
Ektomi Kardias |
Massive wind DMG to a foe (All Wind allies gain DMG Amplified.)
Additional effect at 4★: All Wind allies also gain Double Attack Rate Boosted (Stackable) and Triple Attack Rate Boosted (Stackable). |
|---|
|
Horseman’s Supremacy
|
Massive boost to wind allies’ ATK |
|---|---|
|
Elysian Windrider’s Jurisdiction
|
”’When main weapon (MC only):”’ Gain effects in order based on how many sabres are equipped: Boost to critical hit rate / Boost to triple attack rate / Supplement DMG / Bonus Wind DMG effect / 1-turn cut to buff skill cooldowns |
- Massive EX ATK and 5% cap up.
- 100%/20% crit 5% TA, 30k supp, 20% bonus damage, and 1 cut to buff skill cooldowns in order based on number of sabers equipped.
- Strong Glorybring mainhand.
- Awaken – 30% superior bonus damage.
- Resonsance – Instant normal attack.
- Attack – 2 hit flurry.
- 10% cap up and 10% normal cap up as mainhand with ATK awakening.
Qaws Sagitta |
Massive wind DMG to a foe (1-turn cut to MC’s debuff skill cooldowns.)
Additional effect at 4★: Also gain Skill DMG Cap Boosted. |
|---|
|
Horseman’s Supremacy
|
Massive boost to Wind allies’ ATK. |
|---|---|
|
Elysian Windrider’s Sanctity
|
When main weapon (MC only): All allies gain Charge Bar (10%) upon a wind ally using a debuff skill |
- Massive EX ATK and 5% cap up.
- Strong ATK awakening for skill comps which makes it a solid mainhand but the second skill is generally ignorable.
- Also a solid gridpiece as SPC awakening, but easily replaced by better options.
Astra Horizon II |
Massive wind DMG to a foe (Remove 1 buff.)
Additional effect at 5★: Damage increased to 550%. Now removes 2 buffs and can gain up to Charge Bar. |
|---|
|
Horseman’s Supremacy
|
Massive boost to Wind allies’ ATK. |
|---|---|
|
Conviction Arc
|
When main weapon (MC only): Gain Horseman’s Arc every turn (Stackable / Resets upon taking DMG) |
- Massive EX ATK. Small EX HP.
- Double Dispel
 Removes a buff from a foe.
on CA is handy against buff heavy enemies..
Gale Stream |
Massive wind DMG to a foe (All allies gain Charge Boost.)
Additional effect at 4★: All allies also gain C.A. DMG Boosted and C.A. DMG Cap Boosted for Half Turns|0.5 turns. |
|---|
|
Armed Gale
|
Big boost to wind allies’ ATK |
|---|---|
|
Chain Force
|
Boost to chain burst DMG and chain burst DMG cap |
- Big EX ATK, 60% chain burst damage, and 40% chainburst cap up.
- Charge Bar (10%)
 Instantly boosts Charge Bar
on CA is great for providing bar to team for OTK setups or CA teams.
- Additionally provides C.A. DMG Boosted (30%)
 and C.A. DMG Cap Boosted (10%)
- Additionally provides C.A. DMG Boosted (30%)
Southern Dipper Beta |
Massive Wind damage to a foe. All allies gain Charge Bar Sped Up. 1-turn cut to MC’s skill cooldowns. Additional effect at 5★: All allies also gain Charge Bar. |
|---|
|
Horseman’s Supremacy
|
Massive boost to Wind allies’ ATK. |
|---|---|
|
Conviction’s Double Star
|
When main weapon (MC only): All allies gain Guaranteed TA (1T) after a chain burst activation of 4 or more chains. |
- Massive EX ATK. Small EX HP.
Premium
Weapons that come from the Gacha.
Quilling Dust Devil |
Massive wind DMG to a foe (Gain Dodge All 1.)
Additional effect at 4★: All allies also gain Charge Bar. |
|---|
|
Tranquility’s Pact
|
Supplement wind allies’ DMG |
|---|---|
|
Dagger Voltage II
|
Boost to ATK based on how many daggers are equipped. |
|
Tranquility’s Quintessence
|
Boost to wind allies’ DMG cap |
- 50k (100lk max) unconditional supp and 7% cap makes this a must slot for almost everywhere if you get it.
- FLB is highly important due to the cap up being locked to it.
Valiant Whirlwind |
Massive wind DMG to a foe (Gain Guaranteed TA.)
Additional effect at 4★: Also gain Flurry (2-hit). |
|---|
|
Ventosus’s Stamina II
|
Big boost to wind allies’ ATK based on how high HP is |
|---|---|
|
Through Tempest and Torrent
|
When main weapon (MC only): After normal attacks: All Wind allies gain ATK Boosted (Stackable) (10% (30% Max), Multiplier: Unique Stackable), Double Attack Rate Boosted (Stackable) (15% (45% Max)), Triple Attack Rate Boosted (Stackable) (10% (30% Max)), and Supplemental DMG (Stackable) (10,000 (30,000 Max)). |
|
Undaunted Cyclone
|
When main weapon (MC only): Upon using first-slot skill: Gain Double Strike (1T), Bonus Superior Elemental DMG (30%, 1T), and Normal Attack DMG Cap Up (10%, 1T). |
- Big II normal Stamina.
- Grants MC double strike, 30% echo, and 10% normal cap up upon using their first slot skil
- Ater normal attacks, allies also gain ATK Up (Stackable) (10%, 30% max)
 ATK is boosted (Stackable)
, DA Up (Stackable) (15%, 45% max)
 Double attack rate is boosted (Stackable)
, TA Up (Stackable) (10%, 30% max)
 Triple attack rate is boosted (Stackable)
, and Supplemental DMG (Stackable) (10k, 30k max)
 DMG dealt is supplemented (Stackable)
.
 - CA grants MC Flurry (2-hit)
 Normal attacks deal 2-hit DMG to random foes
and Guarenteed Triple Attacks
 Guaranteed triple attack regardless of Triple Attack Lowered debuffs
making it great to set up a larger burst turn.
Shamed Be Whoever Bears Evil |
Massive wind DMG to a foe (Gain Shielded and Unchallenged.)
Additional effect at 4★: Shielded now affects all allies. (Also remove 1 debuff from all allies.) |
|---|
|
Jade Valuables
|
When 15 or more weapon skill types are active: Boost to Wind allies’ ATK, DEF, and DMG cap. |
|---|---|
|
Wind’s Majesty
|
Small boost to wind allies’ ATK and max HP |
- 40% EX ATK, 25% DEF, and 7% cap up when 15 or more different weapon skill types are active, small normal ATK, and small normal HP.
- Can view current number of unique skills with count on the Boosts Label.
- FLB just adds small Majesty so its low priority.
Gold Moon
Weapons that cost Gold Moons to acquire.
Thunderous Edge |
Unworldly wind DMG to a foe (All Wind allies gain Bonus Wind DMG.)
Additional effect at 4★: All Wind allies also gain Critical Hit Rate Boosted and Keen. |
|---|
|
Cyclonic Strike
|
When main weapon (MC only): Guaranteed triple attacks, 35% hit to charge bar gain, and normal attacks deal 3-hit damage to random foes. |
|---|---|
|
Electrifying Onslaught
|
When main weapon: MC gains ATK Boosted (1 time) (Multiplier: Assassin, 1T) at end of turn when allies deal damage 40 or more times to the current target in 1 turn. |
|
Ventosus’s Majesty
|
Big boost to wind allies’ ATK and max HP |
- Grants MC Guarenteed Triple Attacks
 Guaranteed triple attack regardless of Triple Attack Lowered debuffs
and Flurry (3-hit)
 Normal attacks deal 2-hit DMG to random foes
.
 - If allies perform 40 hits in a turn, MC will also gain ATK Sharply Boosted (30%, 1 hit)
 .
. - CA provides Bonus DMG (15%)
 Deals bonus DMG for one-foe one-ally attacks
, Critical Hit Rate Boosted (100%/30%)
 and Keen
 to team
 - Rhomp stonks keep rising between a strong MC buffer in Galleon (Summer)
 and a way to grant near teamwide double strike via Bastet (Summer)
 .
.














































































2 responses to “Tiamat”
What about the new Tiamat weapons and premium grids for other purposes and with more than one Ewiyar dagger?
I will updating this page after GW.
For now you can refer to the wind section here. For burst you don’t run gales but can replace the bolts with clams. For FA you can replace mandjets in any setup with gales.
https://gbfguide.com/omega-rebirth-grid-changes/#wind