Showing posts with label minecraft. Show all posts

Tuesday, 20 September 2016

Microbit making Minecraft Earthquakes

In this tutorial you are going to connect your Microbit up to your Raspberry Pi and program them so that when your Microbit is shaken it creates an earthquake in Minecraft.

Image

This is part of a workshop I delivered at PyConUK 2016 - download the complete worksheet.

You are going to connect your micro:bit’s pins to the Raspberry Pi gpio pins using some cables and crocodile clips; programs on the micro@bit and Raspberry Pi will make Steve shake in Minecraft.

Install mu
To put you python program on your Micro:bit you will need the editor mu.

Open a Terminal (Menu > Accessories > Terminal) and type:
sudo apt-get update
sudo apt-get install mu
Angry micro:bit
The first task is to program your micro:bit so it gets angry when it's shaken.
  • Connect your micro:bit to the Raspberry Pi using the USB cable.
  • Open mu to create a new Python program for your micro:bit by clicking on Menu > Programming > mu.
  • Click New and type the following code into the editor.
from microbit import *
while True:
    if accelerometer.current_gesture() == "shake":
        display.show(Image.ANGRY)
    else:
        display.show(Image.HAPPY)
  • Click Flash to put your program on your micro:bit.
When the yellow light on the back of your micro:bit stops flashing your program will run.
You should see a happy face on your micro:bit - until it’s shaken!

Image

Any errors will be scrolled on your micro:bit’s leds; if you get an error check your code carefully.

Pins
Now you need to finish your micro:bit program so that it turns pin 0 on and off when it's shaken
  • Go back to Mu and modify your program so that it turns pins 0 on (1) and off (0) when shaken.
from microbit import *
while True:
    if accelerometer.current_gesture() == "shake":
        display.show(Image.ANGRY)
        pin0.write_digital(1)
    else:
        display.show(Image.HAPPY)
        pin0.write_digital(0)
  • Click Flash to put your program on your micro:bit.
Connect it up
Next you will use a jumper cable and a crocodile clip to connect your micro:bit to the Raspberry Pi.
  • Connect the jumper cable to GPIO17 on the Raspberry Pi
  • Clip the crocodile clip to the end of the jumper cable
  • Clip the other end of the crocodile clip to pin0 on the micro:bit
ImageImage

Shake Steve
You now need to create your Minecraft program to shake Steve when the micro:bit is shaken and pin0 is set to 1.
  • Click Menu > Games > Minecraft: Pi Edition to run the game.
  • Click Start Game, then click Create New (or choose an existing one) to enter a world:
  • Press ESC to go back to the Minecraft menu but leave the game playing.
  • Open Python IDLE by clicking Menu > Programming > Python 3.
  • Use File > New Window to create a new program and save it as ‘mc_micro.py’.
  • Type the following code into the program to import the modules you will need
from mcpi.minecraft import Minecraft
from gpiozero import DigitalInputDevice
from time import sleep
  • Create a connection to Minecraft using the code.
mc = Minecraft.create()
  • Post a message to the chat window.
mc.postToChat("Micromine bitcraft earthquake")
  • Run your program by clicking Run > Run Module.
You should see your message appear in the Minecraft chat window.

Any errors will be displayed in the Python Shell in red.

Update your program to shake Steve, by adding the following code at the bottom of your program.
  • Create a pin which is connected to Pi GPIO 17 and micro:bit pin 0.
pin0 = DigitalInputDevice(17)
  • Create a loop which constants gets Steve’s position.
while True:
    sleep(0.1)
    pos = mc.player.getPos()
  • If pin0 is on (1) it adds 0.5 to Steve’s height (y).
    if pin0.value == 1:
        pos.y = pos.y + 0.5
        mc.player.setPos(pos)
  • Run your program by clicking Run > Run Module.
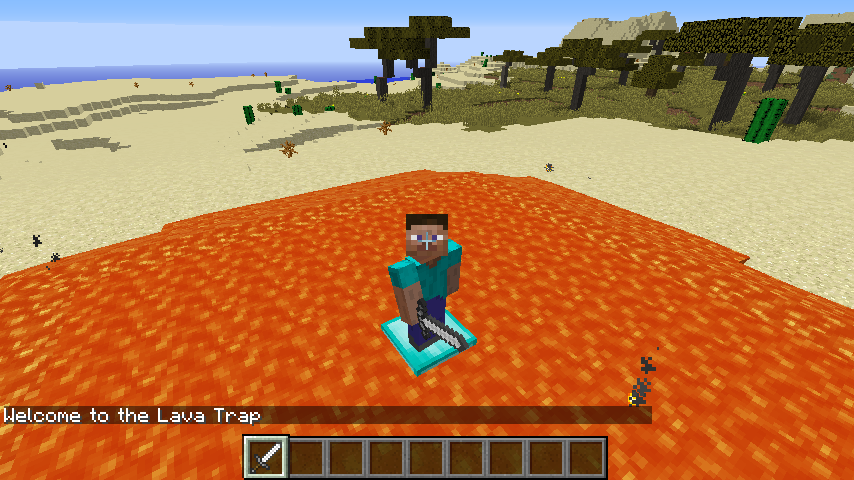
Shake your micro:bit and Steve will be shaken in Minecraft.

Challenges
Can you change the program so that it creates a more realistic earthquake by adding random values to the x, y, z values.

Complete the worksheet from PyConUK 2016 which includes using the micro:bit buttons to makes blocks disappear and appear.

Sunday, 27 March 2016

Raspberry Pi - Take screenshots of Minecraft

If you going to take a screenshot of Minecraft: Pi edition (or anything else for that matter), I really like a command line utility called raspi2png, its simple and screenshots images which have been created using the GPU (like games) as well.

Image

Download
Open a terminal and clone the repository from github:
cd ~
git clone https://github.com/AndrewFromMelbourne/raspi2png

Use
Change directory to raspi2png and run the program's help to show all the options:
cd ~/raspi2png
./raspi2png --help
Usage: raspi2png [--pngname name] [--width ] [--height ] [--compression ] 
[--delay ] [--display ] [--stdout] [--help]

    --pngname,-p - name of png file to create (default is snapshot.png)
    --height,-h - image height (default is screen height)
    --width,-w - image width (default is screen width)
    --compression,-c - PNG compression level (0 - 9)
    --delay,-d - delay in seconds (default 0)
    --display,-D - Raspberry Pi display number (default 0)
    --stdout,-s - write file to stdout
    --help,-H - print this usage information

To take screenshot you have to use the -p option and pass an image filename:
./raspi2png -p myscreenshot.png
Another really useful option is -d to delay when to take the picture, this enables you to get the screen ready for a shot - to take a picture delayed by 10 seconds:
./raspi2png -p mydelayedshot.png -d 10
The image files will be created in the ~/raspi2png directory - if you want them in a different directory use a full path:
./raspi2png -p /home/pi/mydir/myscreenshot.png
If you use a filename which already exists raspi2png will overwrite the file without warning and the old image will be lost.

Fyi - I wrote this blog post using a Raspberry Pi 3...  First time I've used a Pi to write about a Pi - thats progress!

Friday, 18 December 2015

Minecraft, a Microbit and an X-Wing

I was having a chat with David Whale, my co-author of Adventures in Minecraft and he remarked that wouldn't it be cool if you could control something in Minecraft using the Microbit. (Btw - you should definitely check out David's virtual Minecraft Microbit.)

I settled on the idea of using the Microbit's accelerometer to control an object flying through Minecraft. What object, well it had to be the X-Wing, from my previous Minecraft - Star Wars project.

Image

The A button starts and stops the X-Wing, by tilting the Microbit left and right you can turn and the B button drops blocks of TNT which create craters where they land.


There are 2 python programs:
  1. microbitreaddata.py - this runs on the Microbit and reads the status of the buttons and accelerometer 
  2. mcfly.py - this runs on your computer (I used a Windows PC running Raspberry Juice and full Minecraft, but it would work on a Raspberry Pi as well) which reads the data from the Microbit and makes all the calls to move the X-Wing in Minecraft.
You will find the full code and my other Microbit MicroPython examples at github.com/martinohanlon/microbit-micropython.

Tuesday, 22 September 2015

Minecraft Game Tutorial - LavaTrap - Pycon 2015

At Pycon UK 2015, I did a couple of workshop at its Education Track Kids day.

It was great fun and to make sure there was something fresh for the children to get their teeth into I came up with a new exercise called "LavaTrap" so I thought I would share it!

You can download the worksheet which is great printed as an A5 booklet on a single piece of A4 or you can follow the exercise below.

The Lava Trap

Using Python and Minecraft: Pi edition we can change the game to do amazing things.


You are going to create mini game - a Lava Pit will instantly appear and Steve will be put at the centre of it, soon through the block he is standing on will disappear so he will have to move, but hang on all the blocks keep disappearing!


2015-09-13_22.22.00.png

Welcome

The first task is to start your program and get “Welcome to the Lava Trap” to appear on the screen:
  1. Press ESC to go back to the Minecraft menu but leave the game playing.
  2. Open Python IDLE by clicking Menu > Programming > Python 3.
  3. Use File > New Window to create a new program and save it as ‘myprogram.py’.
  4. Type the following code into the program to import the modules you will need.
from mcpi.minecraft import Minecraft
from mcpi import block

from time import sleep

  1. Create a connection to Minecraft using the code.

mc = Minecraft.create()

  1. Post a message to the chat window.

mc.postToChat("Welcome to the Lava Trap")

  1. Run your program by clicking Run > Run Module.


You should see your message appear in the Minecraft chat window.

Tips

  • An errors will be displayed in the Python Shell in red.
  • If you get an error check your code carefully.
  • Capital letters are important Minecraft is different to minecraft.

Lava

Next you will use the api to create the pit where the game will be played - when your program runs it will instantly appear under Steve before the game starts.


First update your program so it creates a single block of lava under Steve, by adding the following code:
  1. Put a 3 second delay into your program so that you can see what going on.

sleep(3)

  1. Find out where Steve is in the world.

pos = mc.player.getTilePos()

  1. Create a block of lava under Steve.

mc.setBlock(pos.x, pos.y - 1, pos.z, block.LAVA.id)

  1. Run your program by clicking Run > Run Module or by pressing F5.


Your program will wait 3 seconds and then a block of Lava will appear under Steve - he’s going fall in and burn!

Tips

  • Walk somewhere different and run the program again - another Lava block will appear.
  • Try changing the code to use DIAMOND_BLOCK rather than LAVA and see what happens.
You need to create a lot more lava in order for the game to be a lot more fun - next you will program a large slab of STONE with LAVA on the top:
  1. Use setBlocks() to create an area of STONE 2 blocks below Steve for the LAVA to sit on.

mc.setBlocks(pos.x - 5, pos.y - 2, pos.z - 5,

            pos.x + 5, pos.y - 2, pos.z + 5,

            block.STONE.id)

  1. Then create the LAVA under Steve.

mc.setBlocks(pos.x - 5, pos.y - 1, pos.z - 5,

            pos.x + 5, pos.y - 1, pos.z + 5,

            block.LAVA.id)

  1. Run your program to see the Lava ‘pit’.


Make a DIAMOND_BLOCK platform in the middle for Steve to stand on:
  1. Create the diamond block.

mc.setBlock(pos.x, pos.y - 1, pos.z, block.DIAMOND_BLOCK.id)

  1. Run your program Steve will be stuck in the middle of the Lava pit.

Challenge 1 - Can you code yourself out of the Lava Pit?

At the moment unless Steve flies or lays blocks down he can’t get out without getting burned - update your program so he can get out.

Tips

  • Use more setBlocks() commands to make a bridge out of the Lava pit.
  • You can change Steve’s x,y,z position using mc.player.setTilePos(x, y, z).
  • If it’s too easy, make the Lava Pit really big - is it still easy?

Make a game

Update your program to make blocks under Steve disappear:
  1. Post messages to the chat screen to warn the player the game is about to start.

mc.postToChat("Get Ready")

mc.postToChat("Blocks under you will keep disappearing")

sleep(3)

mc.postToChat("Go")

  1. Create a variable called gameover and set it to False - it will be set to True at the end of the game.

gameover = False

  1. Create a loop which will continue until the game is over.

while gameover == False:

  1. Get Steve’s position.

   playpos = mc.player.getTilePos()

  1. Turn the block under Steve to OBSIDIAN as a warning and wait for 2 seconds.

   mc.setBlock(playpos.x, playpos.y - 1, playpos.z,block.OBSIDIAN.id)

   sleep(2)

  1. After the warning turn the block to AIR, if Steve is standing on it, he’s going to be in the Lava pit.

   mc.setBlock(playpos.x, playpos.y - 1, playpos.z, block.AIR.id)

   sleep(0.5)

  1. Run the program, the game will start and you will have to put blocks down in the Lava pit to escape because otherwise they are going to disappear and Steve will fall in.

Game over

The game is over if Steve falls into the Lava, you need to modify your program to check if he has fallen into the Lava and put a message on the screen:
  1. Use an if statement to see if Steve’s height (y) is not equal to where he started, if it is set the gameover variable to True.

   if playpos.y != pos.y:

       gameover = True

  1. Put a message on the screen to let the player know they have been caught in the lava trap.

       mc.postToChat("Game over.")

  1. Run your program and see how long you can stay out of the lava.

Challenge 2 - Make the game your own.

This game is just the start, can you finish it? Here are some challenges:
  1. Make the game harder?
  2. Make a better game arena, perhaps build a stadium or walls around it so Steve can get out.
  3. Add points to the game, each time Steve doesn’t fall in he gets a point.
  4. Change the game so it starts easy but gets harder the longer you play.
  5. Add a 2 player (or even multiplayer!) option.

Tips

  • If you make the sleeps shorter it’ll make the game quicker and harder.
  • Create a variable called points at the start of the game and add 1 to it each time your program goes around the loop.
  • There are lots of experienced Python developers all around you - perhaps you can teach them!

Find out more

If you have enjoyed this check out “Adventures in Minecraft” and learn how to program Minecraft using Python on your Raspberry Pi, Windows PC or Apple Mac and the Minecraft resources on the Raspberry Pi website www.raspberrypi.org/resources.

Wednesday, 20 May 2015

Interactive Minecraft Astro Pi

I have created what I think is a fun way to explore your new Astro Pi - its an interactive Astro Pi in Minecraft.

Image

All of the components on the board are 'hitable' so when you right click them while holding a sword, it will tell you about that component is or make it work e.g. if you hit the humidity sensor it will tell you the humidity value at that time, or if you hit the led matrix it will light that led on the board.


If you have got an Astro Pi board and haven't yet set it up take a look at my Astro Pi - Getting Started Tutorial.

Once your Astro Pi is up and running you can download the code from github.com/martinohanlon/MinecraftInteractiveAstroPi and run it by opening a terminal and using the following commands:
cd ~
git clone https://github.com/martinohanlon/MinecraftInteractiveAstroPi.git
cd MinecraftInteractiveAstroPi
sudo python mcinteractiveastropi.py
The Minecraft Astro Pi board will appear above the player, so fly up (double tap space) and have a look around. You interact with it by hitting it (right clicking) with a sword.

Someone let me know that they got an error while trying to use the program with Python 2 because AstroPi needs a module called PIL which wasn't installed. I didn't get this error but if you received the error "No module named PIL", run the following command to install it:
sudo pip install Pillow


Thursday, 2 April 2015

Autcraft - Autism Awareness Day

2nd April is Autism Awareness Day and on this day Start Duncan tries to get as many people talking about Autism and Bullying. You can read his call to arms on his blog.

Image

Stuart (or AutismFather) runs a really special Minecraft server called Autcraft which is for children with Autism and their families.

He started Autcraft because there were so many Autistic children who where bullied or were excluded on other Minecraft servers, which I really struggle with, so I wanted to create a Minecraft program and a video to support Stuart, Autcraft and Autism Awareness Day.


The animation is all written in Python and a lot of the code is borrowed from some of my other Minecraft projects.

The code to create the diamond block text was taken from my Minecraft twitter client and the leg and boot is created in the same way I create and move around the ships in the Minecraft Starwars animation.

The rest of it is just Monty Python inspire silliness with a very important message "don't stand for bullying".

If you want to take a look at the code or run it yourself - github.com/martinohanlon/minecraft-autismawarenessday

Monday, 2 March 2015

Minecraft - Star Wars

Myself and David Whale (my co-author on Adventures in Minecraft) were asked if we would do a talk on "Hacking Minecraft" at the Raspberry Pi 3rd Birthday Party. I wanted to do something fun to show you how you can do amazing things in Minecraft using the Pi API.

Image

After coding the Solar System in Minecraft I had the idea of creating the Death Star which would be able to 'fire' at the planets and destroy them.  I ended up coding an animation of the Death Star destroying Alderaan right up to Luke flying down the trench and successfully bombing the exhaust port with a block of TNT.


If you want to try it out yourself, all the code in at https://github.com/martinohanlon/minecraft-starwars. To download the code and run it on your raspberry pi, follow these instructions.

Run Minecraft: Pi Edition and open a world.

Open LX Terminal, and run the following commands to download the program and run the program

cd ~
git clone https://github.com/martinohanlon/minecraft-starwars
cd minecraft-starwars
python minecraft-starwars.py

The code relies heavily on the minecraftstuff module which is included in the mcpi directory of the repository, so if you copy the program anywhere else be sure to copy the mcpi directory too.

Saturday, 21 February 2015

Minecraft - Code a Solar System

Update - I took this further and created a DeathStar to blow up planets too, in a Minecraft Star Wars animation.

Every wondered how big the Sun is? Well check out the picture below.

Image

If the Earth was the size of 1 block in Minecraft the Sun would have a diameter of 109 blocks and if the distance was to scale 11728 blocks away!


What about the size and distance of the other planets in blocks?

PlanetDiameterDistance
Mercury0.384539.04
Venus0.958482.28
Earth1.011727.81
Mars0.5317866.1
Jupiter11.2161037.94
Saturn9.45112378.49
Uranus4.01225188.15
Neptune3.88352391.03
Pluto0.19460175.6

I didn't build this Solar System I coded it. I took information about the diameter and distance of the planets from Nasa's Planetary Fact Sheet and created a fairly simple program which created spheres of the right size based on a factor of Kilometers to Blocks.

The code is on github at github.com/martinohanlon/minecraft-solarsystem or you can download the Minecraft world.

You can change the ratio of the sun and planets by changing the constant KMTOBLOCK, which is the number of kilometers per block - be careful though, the sun will be VERY big if the value is too low. You might have to increase the height of your Minecraft world too.

#Minecraft - Code a solar system
#Martin O'Hanlon
#www.stuffaboutcode.com

#import minecraft api library
import mcpi.minecraft as minecraft
import mcpi.block as block

# draw hollow sphere
def drawHollowSphere(mc, x1, y1, z1, radius, blockType, blockData=0):
    # create sphere
    for x in range(radius*-1,radius):
        for y in range(radius*-1, radius):
            for z in range(radius*-1,radius):
                if (x**2 + y**2 + z**2 < radius**2) and (x**2 + y**2 + z**2 > (radius**2 - (radius * 2))):
                    mc.setBlock(x1 + x, y1 + y, z1 +z, blockType, blockData)

# draw sphere
def drawSphere(mc, x1, y1, z1, radius, blockType, blockData=0):
    # create sphere
    for x in range(radius*-1,radius):
        for y in range(radius*-1, radius):
            for z in range(radius*-1,radius):
                if (x**2 + y**2 + z**2 < radius**2):
                    mc.setBlock(x1 + x, y1 + y, z1 +z, blockType, blockData)

#setup constants (all values in kilometers)
SUN = 1391684
#name, diameter, distance, blockId, blockData
PLANETS = (("mercury", 4879, 57900000, block.WOOL.id, 7),
           ("venus", 12104, 108200000, block.WOOL.id, 0),
           ("earth", 12756, 149600000, block.WOOL.id, 11),
           ("mars", 6792, 227900000, block.WOOL.id, 14),
           ("jupiter", 142984, 778600000, block.WOOL.id, 4),
           ("saturn", 120536, 1433500000, block.WOOL.id, 8),
           ("uranus", 51118, 2872500000, block.WOOL.id, 3),
           ("neptune", 49528, 4495100000, block.WOOL.id, 10),
           ("pluto", 2390, 5870000000, block.WOOL.id, 6))

#how many km's to a block
# change this value to have different sizes in the solar system
KMTOBLOCK = 12756.0

#middle of the minecraft sky, where the centre of the planets will be
MCMIDDLE = 75

#program
print("Minecraft Planets")
print("1 block = {} kilometers".format(KMTOBLOCK))

#connect to minecraft
mc = minecraft.Minecraft.create()

#set the middle of the solar system
pos = minecraft.Vec3(0,MCMIDDLE,0)

#create the sun
sunDiameter = round(SUN / KMTOBLOCK, 2)
sunRadius = int(round(sunDiameter / 2))
print("Sun - Diameter = {} blocks".format(sunDiameter))
drawHollowSphere(mc, pos.x, pos.y, pos.z, sunRadius, block.WOOL.id, 1)
gapToLeave = (sunDiameter / 2) + 20
pos.z = pos.z + gapToLeave

#loop through the planets
for planet in PLANETS:
    name = planet[0]
    diameter = round(planet[1] / KMTOBLOCK, 2)
    radius = int(round(diameter / 2))
    distance = round(planet[2] / KMTOBLOCK, 2)
    print("{} - Diameter = {} blocks - Distance = {} blocks".format(name, diameter, distance))
    #if the diameter is less than 1.5 draw a single block
    if diameter < 1.5:
        mc.setBlock(pos.x, pos.y, pos.z, planet[3], planet[4])
        pass
    else:
        drawSphere(mc, pos.x, pos.y, pos.z, radius, planet[3], planet[4])
        pass
    
    gapToLeave = (diameter / 2) + 20
    pos.z = pos.z + gapToLeave

#move the player to the sun
mc.player.setPos(0,0,0)

Have fun.

Wednesday, 4 February 2015

Raspberry Pi 2 or 3 - Minecraft Server

The new Raspberry Pi 2 has got twice the RAM and a load more processing power, so will it make a better Minecraft server?  The old Pi made an adequate Minecraft server providing you only had a few players and you kept the view distance low.

Update - The Pi 3 takes it up a step and provides more stability and connectivity is a lot easier.

Image

I tried both the vanilla server and a spigot server, both similar results, both performed reasonably well, but Spigot seemed a little more stable (but this is only based on feeling).  I was only able to test with up to 3 players but it worked well under those conditions.


Setting up your own server is pretty simple.

You will need to download either the vanilla server from Mojang or build your own spigot server jar file.

Note - The instructions below, will take you through how to create a vanilla server, if you have built spigot the only difference will be the name of the 'jar file' you put into the start.sh file

1. Make a directory for your Minecraft server

mkdir ~/MinecraftServer
cd ~/MinecraftServer

2. Download the 1.8.1 vanilla Minecraft server jar file

wget https://s3.amazonaws.com/Minecraft.Download/versions/1.8.1/minecraft_server.1.8.1.jar

3. Create a script to run the server jar file

nano start.sh

Enter the following command which will run the server

java -Xmx1024M -Xms512M -jar minecraft_server.1.8.1.jar nogui

Ctrl X to exit & save

4. Make the script executable:

chmod +x start.sh

5. Run the server

./start.sh

You should receive a message asking you to accept the EULA.

Image


6. Accept the EULA (end user license agreement), open eula.txt

nano eula.txt

Change:

eula=false

To:

eula=true

Ctrl X to save and exit

7. Run the server

./start.sh

The first time the server runs it will take a while to start as it creates a new world.

Once you see the word "Done", the server is up and running and you should be able to connect to the server using Minecraft choosing Multiplayer, Direct Connect and entering the IP address of the Pi.

Image

You can shutdown the server by typing the command "stop" in the command window .

If you find the server is slow, particularly when generating chunks (i.e. creating new bits of the world when you get to the edge), you could try reducing the view distance.  I reduced it from 10 to 7 and this seemed to make the server more responsive.

8. Edit view-distance in server.properties

nano server.properties

Change:

view-distance=10

To:

view-distance=7

Ctrl X to save and exit

Restart the server for the change to take effect.

Tuesday, 13 January 2015

Minecraft API - Player's Direction

ImageOne of the questions I get asked a lot about the Minecraft: Pi edition APi is "how can I get the direction the player is facing?" and I have always had to say "sorry you can't do that".

While I can't change the API for Minecraft: Pi edition I can change RaspberryJuice - so I decided to add functions to allow you to find out where the player is looking.  You can download the RaspberryJuice plugin Canarymod and Bukkit.

I have also created a new Adventures in Minecraft starterkit which includes the new version of RapsberryJuice and everything you need to use the new api functions.


The 3 new functions in the api are:
  • player.getRotation() - return the angle of rotation between 0 and 360
  • player.getPitch() - returns the angle of pitch between -90 and 90
  • player.getDirection() - returns a unit-vector of x,y,z pointing in the direction the player is facing
The functions also work with the entities as well so you can use entity.getRotation(), entity.getPitch() and entity.getDirection()

Here are the couple of code examples I demo in the video.

Get the players rotation and pitch angles:
#import the minecraft module
import mcpi.minecraft as minecraft

#create a connection to minecraft
mc = minecraft.Minecraft.create()

while True:
    #get the players rotational angle
    angle = mc.player.getRotation()
    #get the player up and down angle
    pitch = mc.player.getPitch()
    mc.postToChat(str(angle) + " : " + str(pitch))

Create a block in front of the player using getDirection():
import mcpi.minecraft as minecraft
import mcpi.block as block
import time

#how far in front of the player the block will be
BLOCKDISTANCE = 5

mc = minecraft.Minecraft.create()

while True:
    #get the position
    pos = mc.player.getPos()
    #get the direction
    direction = mc.player.getDirection()
    #calc the position of the block in front of the player
    x = round(pos.x + (direction.x * BLOCKDISTANCE))
    y = round(pos.y + (direction.y * BLOCKDISTANCE) + 1)
    z = round(pos.z + (direction.z * BLOCKDISTANCE))
    mc.setBlock(x,y,z,block.DIAMOND_BLOCK)
    time.sleep(0.1)
    mc.setBlock(x,y,z,block.AIR)

I hope you find the new api functions useful.

Sunday, 21 December 2014

Minecraft - QR Codes

This isn't a particularly new idea and it has certainly been done before... but I like it.

Image
Point your phone at this...

I saw a tweet from @ImmersiveMind (aka Stephen Reid) linking to a new blog post about creating qr codes in Minecraft as a way of showing how to link the real world with the digital.

That afternoon I had 30 minutes to wait before I was picked up to be taken out for festive activities - could I code a Minecraft QR generator in time? It turns out I could:

Image

I used the fantastic python module qrcode to create the QR, which has a useful function, get_matrix(), to allow you to get the QR as a 2 dimensional list of True and False's.  I then used this matrix to create white and black wool - dead easy!

The qrcode module can be installed using pip and requires PIL (python imaging library) to work - the first step is to install pip and PIL and then use pip to install qrcode:
sudo apt-get install python-pip python-imaging
sudo pip install qrcode
You can get the code from github:
git clone https://github.com/martinohanlon/minecraft-qrcode
Run it:
python minecraft-qrcode/minecraft-qrcode.py
The code:
from qrcode import *
from mcpi.minecraft import *
from mcpi.block import *

def getQR(inputString):
    qr = QRCode(version=1,
                error_correction=ERROR_CORRECT_L,
                border=1)
    qr.add_data(inputString)
    qr.make()
    return qr.get_matrix()

mc = Minecraft.create()
pos = mc.player.getTilePos()

qrMatrix = getQR("http://www.stuffaboutcode.com")

rowNo = 0
for row in qrMatrix:
    rowNo -= 1
    columnNo = 0
    for column in row:
        columnNo -= 1
        if column:
            #black
            blockColour = 15
        else:
            #white
            blockColour = 0

        mc.setBlock(pos.x + rowNo, pos.y + columnNo, pos.z, WOOL.id, blockColour)