Search the Community
Showing results for tags 'mod'.
Found 20 results
-
Version 1.0.1
45 downloads
AdminRadar.cs Description : - This plugin provides a real-time radar system allowing instant tracking of Players, Cupboards, Patrol helicopters and Bradleys, with customizable display options. Display for the player : Player name - Health - Distance - Team Display for the cupboard : TC tag - Distance - List of authorized players Display for the patrol : Patrol tag - Health - Distance Display for the bradley : Bradley tag - Health - Distance Settings : - HUD colors (for the radar switch button) - Radar distance - Radar refresh - Player name color - Cupboard tag color - Patrol tag color - Bradley tag color - Distance color - Health >50hp color (for player/patrol/bradley) - Health <50hp color (for player/patrol/bradley) F1 Commands : - radar <all/player/tc/patrol/bradley> (on/off) Chat Commands : - /radar <all/player/tc/patrol/bradley> (on/off) Permissions : - oxide.grant user <steamID/user> adminradar.use WuyZar's Discord : https://discord.gg/NVwRcQwGwh Game interface :$7.50 -
Version 1.0.1
95 downloads
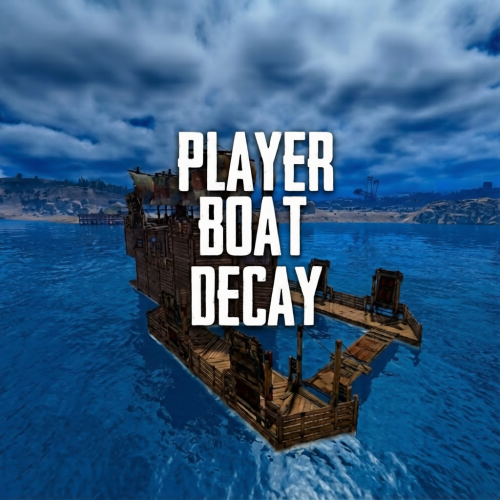
Player Boat Decay lets you tune player buildable boat global decay with straightforward configuration. Set how many minutes a boat takes to fully decay, and optionally add a “grace period” after last use before decay starts. Can easily reset back to vanilla and even apply updated settings without reloading plugin. Permissions playerboatdecay.admin Required to use the chat commands (if not server admin) Commands /boatdecay status Confirms current decay values /boatdecay reload Reloads the config, reapplies the global decay minutes immediately. Config notes Minutes to fully decay (-1 = vanilla): sets time to fully decay Minutes until decay starts (-1 = vanilla): sets how often after no interaction the decay starts Custom tick interval seconds: How often decay should tick when active Skip decay when indoors: optional ignor decay if boat is considered inside Log debug in console: prints decay details when enabled.$5.99 -

Version 1.0.4
23 downloads
The Last Siege, a massive city surrounded by great walls that protect it from outside threats. Dare to cross the wall and explore a world teeming with enemies; all of Rust official monuments are available in The Last Siege. FEATURES SIZE: 5000 OBJECTS: 44511 THE MAP CAN BE EDIT: Yes ONE PLUGIN, MULTIPLE FUNCTIONS... APARTMENT COMPLEX, 16 complexes · 992 rooms RENT KIOSK, 16 receptions with NPC clerks ROOM UPGRADES, 7 / 6 / 8 upgrades by room size GUEST SYSTEM, guests with full access NPC MUSIC BAND, 615 songs · 9 instruments ART MUSEUM, 63 exhibits · 150 scrap/day SATELLITE CRASH EVENT Tevery 1–3 h · 5 scientists CH47 CHINOOK CRASH EVENT, Tevery 2 h · 2 crates · 4 NPCs AIR RAID EVENT, Tevery 1–3 h · 2 F15 jets ZOMBIE HORDES, 25 horde spawn points SAFE ZONE PROTECTION, aircraft kept out of safe zones RAIDABLE BASES INTEGRATION, optional · first-hit ownership, automatic spawn points without configuration AUTOMATIC DOORS, lifts 10 s · hatches 60 s APARTMENT COMPLEX SMALL: 25 scrap, ROOMS: 256 MEDIUM: 150 scrap, ROOMS: 640 LARGE: 350 scrap, ROOMS: 96 NPC MUSIC BAND INSTRUMENTS, 9 (piano, drums, xylophone, tuba, trumpet, flute, bass, guitar, jerrycan guitar) DANCERS, Included, performing alongside the band TOTAL SONGS, 615 CROWD-PLEASERS, 250 flagged as well-known hits REPEATS, None until the full playlist has played UPTIME, Never goes silent — auto-recovers if playback ever stops SUPPORT: https://discord.badgyver.com$49.90- 6 comments
-
- 1
-

-
- #the last siege
- #siege
- (and 37 more)
-
Version 1.0.0
8 downloads
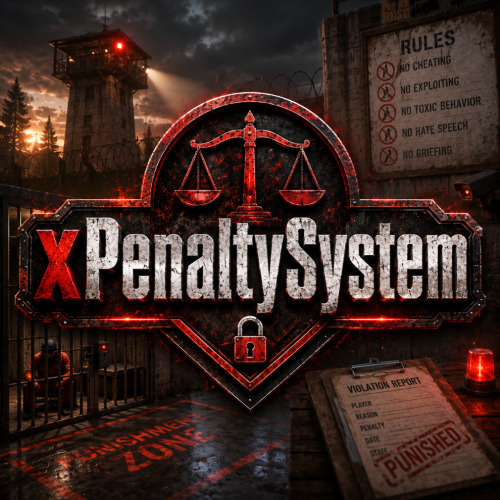
xPenaltySystem is a moderation system for Rust servers. Staff can manage online and offline players, assign warning points, apply mutes or bans, and review complete activity histories. Create penalty rules that automatically trigger at configurable point thresholds and durations. Optional Discord logging keeps every staff action recorded outside the game. Fully UI driven Manage penalties through an clean UI. Dynamic Penalty Rules Automatically trigger warnings, timed mutes, and bans at configurable point thresholds. Online & Offline Players Search, review, and moderate any recorded player. Activity History Track every penalty, reason, recipient, and responsible staff member. Discord Logging Send all administrative activity directly to Discord. Permission xpenaltysystem.admin - Required to use the penalty system Chat Commands /xps - Requires the permission | ChatCommand is configurable in the config.$19.99 -
Version 1.0.1
10 downloads
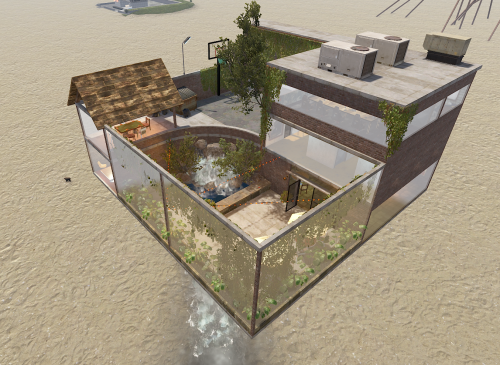
Large Mod/Staff Room The Ultimate Under-Map Sanctuary for Server Administration Provide your staff team with the security and luxury they deserve. The Large Mod/Staff Room is a comprehensive, high-detail prefab designed specifically for server administrators, moderators, and staff members. Built with a focus on both functionality and aesthetic appeal, this "under-the-map" facility serves as a secure logout zone, a private meeting hub, and a recreational space away from the prying eyes of players. ️ Security & Utility Designed to be placed beneath the map terrain, this prefab ensures that staff bodies remain 100% safe from player interaction or raiding during offline hours. It provides a centralized, "off-grid" location for your team to coordinate without interference. Key Features Administrative Wing: Staff Meeting Room: A formal space for team briefings and policy discussions. 2 Secure Holding Cells: Perfect for temporary player containment or roleplay scenarios. Interrogation Room: A dedicated, atmospheric space for staff inquiries. Living & Comfort: 8 Private Bedrooms: Individualized spaces for team members to safely log off. Large Modern Bar & Kitchen: A fully detailed social hub for staff relaxation. Full Bathroom: High-quality interior detailing to complete the "home base" feel. Recreation & Esthetics: Basketball Court Private Courtyard For any Assistance or questions Please contact me on Discord @ https://discord.gg/THf6dGN8eW$7.99 -
Version 1.0.7
140 downloads
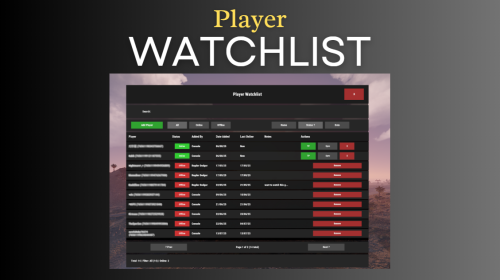
Watchlist is a lightweight but powerful tool that alerts admins when specific players connect to the server. Whether you're online or offline, you'll get real-time in-game notifications and Discord alerts with fully configurable message templates and role pings. The built-in UI makes managing the watchlist easy, with support for sorting, filtering, teleporting, and note-taking. Players can be added or removed manually or straight from RustAdmin with custom commands. Very useful tool to keep you and your staff one step ahead. Configuration { "Discord Webhook URL": "https://discord.com/api/webhooks/your/webhook/url", (Your Webhook URL) "Ping Role": false, (Whether to ping a role when player comes online on discord, e.g: @Admin) "Role ID": 0, (Discord Roll Id to ping) "Purge Watchlist on Wipe": false, "Purge Players List on Wipe": false, "Enable UI": true, "UI Color Scheme (Options: dark, light, rust)": "dark", "Custom Colors": { "PrimaryBackground": "0 0 0 0.95", "SecondaryBackground": "0.15 0.15 0.15 1", "HeaderBackground": "0.1 0.1 0.1 1", "ButtonPrimary": "0.2 0.7 0.2 0.9", "ButtonSecondary": "0.3 0.3 0.3 1", "ButtonDanger": "0.7 0.2 0.2 0.9", "TextPrimary": "1 1 1 1", "TextSecondary": "0.7 0.7 0.7 1", "OnlineIndicator": "0.2 0.8 0.2 1", "OfflineIndicator": "0.8 0.2 0.2 1", "RowEven": "0.12 0.12 0.12 0.95", "RowOdd": "0.15 0.15 0.15 0.95", "ActiveItem": "0.4 0.4 0.4 1", "AlertBackground": "0.8 0.2 0.2 0.95", "AlertText": "1 1 1 1", "AlertPanel": "0.11 0.11 0.12 0.98", "AlertHeader": "0.62 0.17 0.17 1", "AlertDivider": "0.25 0.25 0.27 1", "AlertLabel": "0.6 0.6 0.63 1" }, "Alert Position": { "AnchorMin": "0.775 0.60", "AnchorMax": "0.985 0.90" }, "Alert Cursor Enabled": false, "UI Scale": 1.0, "Main UI Position": { "AnchorMin": "0.2 0.1", "AnchorMax": "0.8 0.9" }, "UI Scale": 1.0, "Main UI Position": { "AnchorMin": "0.2 0.1", "AnchorMax": "0.8 0.9" }, "Font Size": { "Title": 20, "Header": 14, "Normal": 12, "Small": 10 }, "UI Animation": true, "Enable Sound Alert": true, "Alert Sound": "assets/bundled/prefabs/fx/notice/item.select.fx.prefab", "Alert Duration (seconds)": 10.0, "Show Visual Alert": true, "Send Discord Add/Remove Notifications": true, "Max Cached Players": 3000, "Player Cache Retention Days (0 = disabled)": 30, "Player Cache Save Delay Seconds": 60, "Alert Cooldown Seconds": 120, "Startup Alert Grace Seconds": 60, "Auto Expire Days (0 = disabled)": 0, "Send Prune Discord Notifications": true, "Prune Report Max Per Embed": 10, "Prune Report Include Notes": false, "Enable Diagnostics": false, "Max Audit Log Entries": 500 } COMMANDS Chat: /watchlist Opens the Watchlist UI (requires permission) /wl <steamid> "<note>" Adds a player to the watchlist with a note (requires watchlist.admin permission) /wlr <steamid> Removes a player from the watchlist (requires watchlist.admin permission) /wlist Lists all watched players in chat (requires watchlist.admin permission) Console: watchlist.add <steamid> "<note>" Adds a player to the watchlist Example: watchlist.add 76561198000000000 "Suspected Cheater" watchlist.remove <steamid> Removes a player from the watchlist watchlist.list Lists all watched players in the server console wl <steamid> "<note>" Adds a player to the watchlist with a note (can be used via rcon) wlr <steamid> Removes a player from the watchlist (can be used via rcon) wlist Lists all watched players in the server console (can be used via rcon) purgewl Clears the entire watchlist (requires watchlist.admin permission) watchlist.testalert fires the alert at yourself with sample data so you can position and colour it without waiting for someone to log in. You can also pass a Steam ID (watchlist.testalert 76561198000000000) to preview it with a real entry's details. PERMISSIONS watchlist.admin Full access to all commands and features watchlistui.toggle Allows UI toggle via `/watchlist` command RUSTADMIN INTEGRATION You can integrate Watchlist directly with **RustAdmin** to add or remove players with a single click. Add to Watchlist Command to Execute: wl ${playerSteamid} "From RustAdmin" Tick "Show Command Output in a Dialog" (optional) Remove from Watchlist Command to Execute: wlr ${playerSteamid} Tick "Show Command Output in a Dialog" (optional)$10.00 -
Version 1.1.0
51 downloads
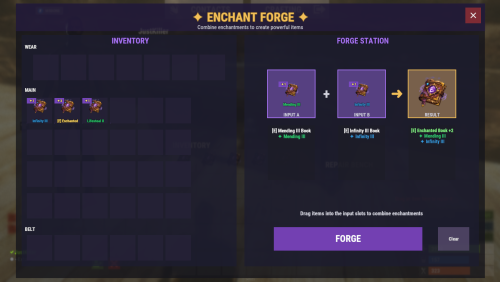
Introduction System Overview Installation (Oxide/uMod & Carbon) Configuration Guide Commands Reference Permissions System 1. Introduction Welcome to Weapon Enchantments Pack, a professional-grade weapon enchantment system designed for Rust servers that require full control over progression, balance, and monetization. What Is Weapon Enchantments Pack? Weapon Enchantments Pack is a fully configurable enchantment framework that stores all enchantment data directly on weapon items. This architecture removes the need for world entities, background scanning, or wipe-sensitive databases, making it ideal for long-term wipes and high-population servers. Key Features Complete weapon coverage (all Rust weapon categories). Physical enchant books (store- and kit-friendly). Custom Forge UI for player progression. Permission-driven VIP and tiered access. Store-safe, performance-focused design (no entity scanning / polling loops). Fully configurable — no fixed balance values locked behind code. Who Should Use This Pack? Monetized servers with web stores or donation systems. VIP-based progression servers. Long-term wipe servers (monthly or longer). PvP-focused servers. Vanilla+ servers seeking controlled progression. 2. System Overview Plugin Structure Weapon Enchantments Pack consists of two plugins that work together: EnchantCore.cs Core framework: registry, item storage, Forge UI, enchanting tables, and book handling. EnchantWeapons.cs Weapon-specific logic and default enchantments (requires EnchantCore) Data Storage Model All enchantment data is stored directly on the item instance. This ensures: No wipe-sensitive external databases are required. Enchantments persist through plugin reloads. No performance impact from entity scanning or polling loops. Enchanted items can be traded without losing enchantments. 3. Installation (Oxide/uMod & Carbon) Prerequisites Rust server running Oxide/uMod or Carbon. Access to server file system (FTP or panel). Ability to reload plugins or restart the server. Install Steps Upload both plugin files: EnchantCore.cs EnchantWeapons.cs Oxide/uMod: oxide/plugins/EnchantCore.cs oxide/plugins/EnchantWeapons.cs Carbon: carbon/plugins/EnchantCore.cs carbon/plugins/EnchantWeapons.cs Loading / Reloading Plugins compile automatically on upload. You can also load/reload manually: Oxide/uMod console: o.reload EnchantCore o.reload EnchantWeapons Carbon console: c.reload EnchantCore c.reload EnchantWeapons Verify Installation Check server console for successful load messages (version text may vary by build): Loaded plugin EnchantCore v1.0.0 by hionet.com Loaded plugin EnchantWeapons v1.0.0 by hionet.com Quick Test Commands Give yourself an Enchanting Table and a test book: enchantcore.givetable YourName 1 enchantcore.givebook YourName sharpness 1 1 Then as server admin (ownerid <YourSteamID> ) run: /forge 4. Configuration Guide Weapon Enchantments Pack uses two configuration files. Both Oxide/uMod and Carbon use the same JSON structure, but the config paths differ. Config File Paths Oxide/uMod: oxide/configs/EnchantCore.json oxide/configs/EnchantWeapons.json Carbon: carbon/configs/EnchantCore.json carbon/configs/EnchantWeapons.json EnchantCore.json config file explanation General Settings "Config Version": 1 - Internal version used for safe upgrades. Do not change this manually. "Command Prefix": "enchant" - Controls the admin chat command prefix. Useful if another plugin already uses /enchant Enchanting Table Settings "Enchanting Table": { "Entity Shortname": "box.repair.bench", "Skin ID": 3653802947, "Open Forge By Default": true } Entity Shortname - Base Rust entity used as the table, default: box.repair.bench Skin ID (IMPORTANT) - Required skin to identify the table. Prevents normal repair benches from becoming enchanting tables. Only benches with this skin will open the Forge. Open Forge By Default: true: Opening the table opens the Forge UI automatically (recommended) false: Players must manually use /forge while looting the table UI Settings (Forge Appearance) "UI Settings": { "Panel Background Color": "0.1 0.1 0.1 0.95", "Accent Color": "0.4 0.2 0.8 1.0", ... } These settings control visual appearance only. Rarity Colors (Hex) "Rarity Colors (Hex)": { "Common": "#B0B8C2", "Uncommon": "#2ECC71", "Rare": "#3498DB", "Epic": "#9B59B6", "Legendary": "#F39C12" } Used for: Forge UI Book display Weapon tooltip text If an enchant rarity has no color, it uses: "Default Rarity Color (Hex)": "#FFFFFF" Display Settings (Item Text) "Display Settings": { "Enchant Prefix": "[E]", "Enchant Suffix": "", "Separator": ", " } Controls how enchantments appear on weapons. Example output: [E] Sharpness III, Lifesteal II Prefix/Suffix are purely visual Separator controls spacing between enchants Performance Settings (IMPORTANT) "Performance Settings": { "Cache Permission Results": true, "Cache Item Applicability Results": true, "Max Enchantments Per Item (Default)": 3, "Purge Unknown Enchantments": true, "Purge Unknown Delay Seconds": 300 } These settings keep the plugin safe for high-pop servers. Cache Permission Results Caches permission checks per player Strongly recommended to keep true Cache Item Applicability Results Caches which enchants apply to which items Prevents repeated weapon-category checks Max Enchantments Per Item (Default) Base limit for players without VIP permissions Can be overridden by: VIP permissions Admin overrides Other plugins via hooks Purge Unknown Enchantments Automatically removes enchants that no longer exist in config Prevents broken items after config updates Purge Unknown Delay Seconds Delay before purge runs after server start Prevents race conditions during load Loot Books System (Optional LootTable Books inject system) "Loot Books": { "Enabled": false, ... } This system injects enchant books into loot containers. Loot Injection Controls "Max Container Capacity": 36, "Replace Random Item If Full": true Prevents loot overflow Allows replacement if container is full "Refresh Existing Containers On Load": true Refreshes already-spawned containers on server start Useful for long wipes Containers "Containers": { "crate_normal": { "Chance": 0.05, "Min": 0, "Max": 1, "Pool": "default" } } Explanation: Chance: Spawn probability (0.05 = 5%) Min / Max: Number of books spawned Pool: Which enchant pool to use Pools (Balance Control) "Pools": { "default": { "Rarity Weights": { "Common": 60.0, "Uncommon": 30.0, "Rare": 9.0, "Epic": 1.0 }, "Min Level": 1, "Max Level (0 = enchant max)": 0 } } Pools control what kind of books drop. Rarity Weights Higher value = more common Percentages do not need to total 100 Min / Max Level Controls enchant level range 0 = use the enchant’s configured max level This is your main anti-pay-to-win lever. Recommended Defaults (Best Practice) For monetized servers: Disable loot books Sell books via store Use Forge for progression For survival / grind servers: Enable loot books Low spawn chances (1–5%) Restrict high rarities to elite pools EnchantWeapons.json config file explanation This section explains the major sections of the EnchantWeapons configuration file and how it affects weapon balance, VIP tiers, book progression, and compatibility. EnchantCore handles UI + storing enchants on items. EnchantWeapons defines what the enchants actually do and which weapons they apply to. Global Settings "Global Settings": { "Default Book Item": "documents", "Default Book Skin": 3653712312, "Max Enchants Per Item (Default)": 3, "VIP Max Enchants": { "enchantweapons.vip": 4, "enchantweapons.elite": 5 }, "Combine Success Rates": { "1": 100, "2": 85, "3": 65, "4": 40, "5": 25 }, "Electric Hit Effect": "...", "Electric Chain Effect": "...", "AOE Center Effect": "...", "AOE Target Effect": "" } Default Book Item "Default Book Item": "documents" - The default Rust item used as enchant books. Most servers use documents because it’s common and visually “book-like”. "Default Book Skin": 3653712312 - Skin ID applied to enchant books. This is important for consistency and presentation (store / kits). "Max Enchants Per Item (Default)": 3 - Base maximum number of enchantments allowed on a weapon for players without VIP permissions. "VIP Max Enchants": { "enchantweapons.vip": 4, "enchantweapons.elite": 5, "enchantweapons.customname": 10 } This is how you create VIP tiers safely. If a player has enchantweapons.vip, they can have 4 enchants on a weapon If a player has enchantweapons.customname, they can have 10 enchants on a weapon Combine Success Rates "Combine Success Rates": { "1": 100, "2": 85, "3": 65, "4": 40, "5": 25 } Controls the success chance (%) when combining or upgrading books to produce the result level. Example: Level 3 result: 65% success chance Level 5 result: 25% success chance This is your main “progression speed” lever. Lower rates = grind + scarcity. Higher rates = casual / fast progression. Effect Prefabs (Visuals Only) "Electric Hit Effect": "assets/...", "Electric Chain Effect": "assets/...", "AOE Center Effect": "assets/...", "AOE Target Effect": "" These define the visual effects used for specific enchant types. Changing these does not change damage or mechanics — it only changes visuals. If AOE Target Effect is empty, no “target FX” will play. Enchantments "Enchantments": { "sharpness": { ... }, "lifesteal": { ... }, "critical": { ... } } This is the heart of the plugin. Each enchantment is a dictionary entry: Key = enchant ID (used in commands and internal logic) Example: sharpness Value = the enchant definition Enchantment Definition Fields Example structure: "sharpness": { "Name": "Sharpness", "Description": "Increases all damage dealt", "Max Level": 5, "Book Item": "documents", "Book Skin": 3653712312, "Permission": "", "Rarity": "Common", "Applies To": [ "all_weapons" ], "Conflicts With": [], "Target Types": [ "all" ], "Conditions": null, "Levels": [ ... ] } Name / Description Display-only text shown in UI and info commands. Max Level Maximum level this enchantment can reach. Also defines how far upgrades can go. Should match the number of entries you provide in Levels. Common mistake: setting Max Level to 5 but only defining 3 Levels. Book Item / Book Skin Overrides the global defaults for this enchant only. Use this when you want: Different book visuals by rarity Special store-only book appearances Permission (VIP/Store Lock) If empty: anyone can use it. If set: players must have that permission to use/apply/upgrade that enchant. Example: "Permission": "" "Permission": "enchantweapons.legendary" This is the cleanest way to create VIP-exclusive or store-tier enchantments without giving admin access. Rarity "Rarity": "Common" Used for: UI rarity colors (from EnchantCore UI settings) Loot book weighting (if EnchantCore Loot Books is enabled) Rarity does not automatically balance anything — it’s a classification. Applies To (Weapon Compatibility) "Applies To": [ "ranged", "bows" ] Controls which weapons can receive the enchant. Usually you reference categories from Weapon Categories: melee ranged snipers shotguns bows launchers all_weapons Conflicts With "Conflicts With": [ "frost" ] Prevents incompatible enchants from being placed on the same weapon. Example: fire_aspect conflicts with frost This is critical for balance and prevents “stack abuse”. Target Types "Target Types": [ "living" ] Defines what the enchant can affect. Common values: all player animal scientist npc living building vehicle helicopter bradley deployable Example use: Armor Piercing only targets player Looting only targets living entities Conditions (Optional Extra Rules) The Conditions block allows you to restrict when an enchant is allowed to activate. All conditions are optional — if a condition is not set (or set to zero / empty), it is ignored. Conditions are evaluated after TriggerChance succeeds. (check Levels for TriggerChance) "Conditions": { "HeadshotOnly": false, "TargetHealthBelow": 0.30, "TargetHealthAbove": 0.0, "DistanceBelow": 0.0, "DistanceAbove": 0.0, "TimeOfDay": "" } You can use one, multiple, or none of these conditions together. All enabled conditions must pass for the enchant to trigger. Examples: HeadshotOnly - The enchant will only trigger on headshots TargetHealthBelow - The enchant only triggers if the target’s current health percentage is below this value. (0.30 = target below 30% HP) TargetHealthAbove - The enchant only triggers if the target’s current health percentage is above this value. (0.50 = target above 50% HP) DistanceBelow - The enchant only triggers if the distance between attacker and target is below this value (in meters). DistanceAbove - The enchant only triggers if the attacker is farther than this distance from the target. TimeOfDay - Restricts the enchant to a specific time of day. ("day" , "night" ) Using TargetHealthBelow + TargetHealthAbove Together You can combine both to define a health window. "TargetHealthBelow": 0.60, "TargetHealthAbove": 0.30 Enchant only triggers when target is between 30% and 60% HP DistanceBelow + DistanceAbove Together You can define a distance band. "DistanceAbove": 10.0, "DistanceBelow": 50.0 Enchant triggers only between 10m and 50m Levels (How Enchant Power Is Defined) The Levels section defines what an enchant does and how strong it is at each level. "Levels": [ { "DamageMultiplier": 1.1 }, { "DamageMultiplier": 1.2 } ] How this works: First entry = Level 1 Second entry = Level 2 And so on The number of entries must match Max Level IMPORTANT If Max Level is 5, you must define 5 level entries. How Level Effects Work Each level is a list of effects Any effect you don’t define is ignored Any effect set to 0 is disabled Multiple effects can be combined in one level Effects only activate if: TriggerChance succeeds (if used) Conditions pass (if used) Most Common Effects and Examples Damage Bonus (Always On) { "DamageMultiplier": 1.20 } Increases all damage 1.20 = +20% damage Best for simple enchants Chance-Based Damage { "DamageMultiplier": 1.50, "TriggerChance": 0.25, "Cooldown": 2.0 } 25% chance to trigger Can’t trigger again for 2 seconds (per target) Prevents constant burst damage Critical Strike { "CritMultiplier": 1.75, "TriggerChance": 0.15, "Cooldown": 1.0 } Occasional high-damage hits Classic RPG “crit” behavior Lifesteal { "Lifesteal": 0.10, "TriggerChance": 0.30, "Cooldown": 2.0 } Heals for 10% of damage Cooldown prevents infinite sustain Lifesteal With Cooldown and 2 Levels "Levels": [ { "Lifesteal": 0.10, "TriggerChance": 0.30, "Cooldown": 2.0 // this is Level 1 }, { "Lifesteal": 0.15, "TriggerChance": 0.35, "Cooldown": 2.0 // this is Level 2 } ] DamageMultiplier Increases all damage dealt. Example: 1.20 = +20% damage. FlatDamage Adds a fixed amount of extra damage on hit. Useful for low-damage weapons. CritMultiplier Deals extra damage when the enchant triggers. Usually used with TriggerChance. ArmorPierce Deals extra damage that ignores armor. Example: 0.25 = 25% of damage bypasses armor. Lifesteal Heals the attacker for a percentage of damage dealt. Example: 0.10 = heal for 10% of damage. FlatHeal Heals a fixed amount on hit. Safer than lifesteal for PvP balance. RegenAmount Applies slow healing over time. Good for sustain builds. HealFromDamageMultiplier Turns damage into healing instead (no damage dealt). Example: 1.00 = heal for 100% of damage. BurnDamage Sets the target on fire, dealing damage over time. Uses Duration if set. PoisonDamage Applies poison damage instantly. Affects player metabolism or damage types. ColdDamage Applies cold damage instantly. Useful for exposure-style effects. BleedDamage Applies bleeding damage instantly. RadiationDamage Applies radiation poisoning (players only). KnockbackForce Pushes the target away from the attacker. Higher value = stronger push. NoSprintDuration Prevents the target from sprinting for a short time. Strong control effect. Radius Enables area-of-effect behavior. Applies effects to nearby targets. ElectricDamage Deals electric shock damage on hit. ChainRadius How far electric damage can jump to nearby targets. ChainMaxTargets Total number of targets hit by chain lightning (including the first target). DurabilityBonus Reduces weapon durability loss. Example: 2.0 = weapon loses durability twice as slowly. Mending Repairs weapon condition on hit. AmmoSave Chance to not consume ammo when firing. Any value above 0 enables it. LootBonus Increases loot dropped from killed enemies. Stacks additively with other LootBonus effects. TriggerChance Chance for the enchant to activate. Example: 0.25 = 25% chance. Cooldown Minimum time (seconds) before the enchant can trigger again on the same target. Duration How long time-based effects last (fire, some AOE effects). HydrationDrain Drains water from the target player. CaloriesDrain Drains food from the target player. WetnessAdd Adds wetness to the target player. ComfortReduce Reduces the target’s comfort level. Weapon Categories "Weapon Categories": { "melee": [ "salvaged.sword", "machete", ... ], "ranged": [ "rifle.ak", "pistol.python", ... ] } This section maps category names to Rust item shortnames. Why it exists: Makes configs clean and readable Lets you balance entire weapon groups easily Prevents copy/paste errors across enchants To add more weapons: Add their shortname into the correct category Or create your own category and reference it from Applies To Common mistake: spelling shortnames wrong → enchant will never apply. 5. Commands Reference Admin Chat Commands Admin command prefix is configurable (default: /enchant). These commands are restricted to BasePlayer.IsAdmin (not permission-based). /enchant (shows help) /enchant give /enchant apply /enchant remove /enchant list /enchant info /enchant inspect Console / RCON Commands enchantcore.givebook <player> <enchant_id> <level> [amount] enchantcore.givetable <player> [amount] [skinId] 6. Permissions System Core Permissions enchantcore.forge — Allows players to use the Forge UI (must give this permission if you want to allow players to combine books or to place an enchantment to an item) VIP Enchant Limits VIP enchant limits are configured in EnchantWeapons.json under "VIP Max Enchants". Example defaults: No permission: 3 enchants per weapon enchantweapons.vip: 4 enchants per weapon enchantweapons.elite: 5 enchants per weapon Per-Enchant Permissions Each enchant definition supports an optional Permission field. If set, a player must have that permission to use/apply/combine/upgrade that enchant. This is the recommended method for VIP-exclusive or store-tier enchantments.$29.99 -
Version 1.0.5
20 downloads
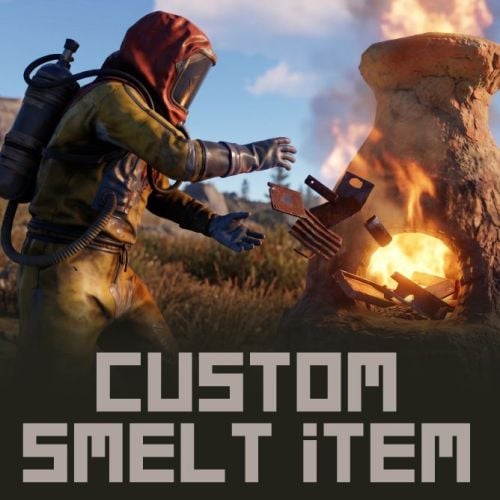
Custom Smelt Item Custom Smelt Item is an all-in-one plugin that allows you to add smeltable items, fuel items, and freely set the processing speed of each furnace. Create a unique gameplay experience with new smelting recipes, fuel items, and smelting speed adjustments! Compatible with Oxide. Installing this mod will change the smelting system from the vanilla version. Note This data includes "Custom Smelt Item" and "Custom Smelt Item Experimental." Please install only one of them. "Custom Smelt Item" functions as a stable version, while "Custom Smelt Item Experimental" functions as a Experimental version. "Custom Smelt Item Experimental" allows you to set additional foods, but please make sure you understand how to use this mod before using it. If there are many reports of bugs caused by incorrect use, we will discontinue releasing the Experimental version. Custom Smelt Item Experimental will turn off the visuals of food places in campfires, etc. Read below for instructions on how to use it. ■ Custom Smelting Items - Set any item to be smelted - Freely configure input/output items - Set processing time for each item - Set output amount per processing - Support for skinned items (SkinID) - Custom name settings for output items - Item type classification for each furnace type (ore, oil) ■ Custom Fuel System - Add any item as fuel - Set burn time for each fuel - Set by-product output (e.g., wood → charcoal) - Adjust by-product drop rate - Support for skinned fuel items ■ Furnace Speed Multiplier Individual speed settings for each furnace type(Custom Smelt Item) - Furnace - Legacy Furnace - Large Furnace - Electric Furnace - Small Oil Refinery Notice : The speed cannot be adjusted for any other types. The speed for all other types is set to 1. This setting is to adjust the interaction between fuel and cooking time. (Custom Smelt Item Only) You can fully customize the config, adding refined items, fuel items, refinement speed, and more. *Please do not delete default items from the settings. Custom Smelting Item { "Smelting Patterns": [ { "ItemType": "oil", ///ore" (for furnaces) or "oil" (for refineries) "InputItem": "crude.oil", ///Input item short name "InputItemSkinId": 0, ///Input item skin ID "OutputItem": "lowgradefuel", ///Output item short name "OutputItemSkinId": 0, ///Output item skin ID "OutputItemName": null, ///Custom display name for the output item (null for default) "RequiredTime": 30, ///Smelting time (seconds) "OutputAmountPerProcess": 3 ///Output amount per 1 }, { "ItemType": "oil", "InputItem": "diesel_barrel", "InputItemSkinId": 0, "OutputItem": "lowgradefuel", "OutputItemSkinId": 0, "OutputItemName": null, "RequiredTime": 180, "OutputAmountPerProcess": 150 }, { "ItemType": "ore", "InputItem": "metal.ore", "InputItemSkinId": 0, "OutputItem": "metal.fragments", "OutputItemSkinId": 0, "OutputItemName": null, "RequiredTime": 10, "OutputAmountPerProcess": 1 }, { "ItemType": "ore", "InputItem": "sulfur.ore", "InputItemSkinId": 0, "OutputItem": "sulfur", "OutputItemSkinId": 0, "OutputItemName": null, "RequiredTime": 7, "OutputAmountPerProcess": 1 }, { "ItemType": "ore", "InputItem": "hq.metal.ore", "InputItemSkinId": 0, "OutputItem": "metal.refined", "OutputItemSkinId": 0, "OutputItemName": null, "RequiredTime": 20, "OutputAmountPerProcess": 1 }, { "ItemType": "ore", "InputItem": "can.tuna.empty", "InputItemSkinId": 0, "OutputItem": "metal.fragments", "OutputItemSkinId": 0, "OutputItemName": null, "RequiredTime": 20, "OutputAmountPerProcess": 10 }, { "ItemType": "ore", "InputItem": "can.beans.empty", "InputItemSkinId": 0, "OutputItem": "metal.fragments", "OutputItemSkinId": 0, "OutputItemName": null, "RequiredTime": 25, "OutputAmountPerProcess": 15 }, { "ItemType": "ore", "InputItem": "honeycomb", "InputItemSkinId": 0, "OutputItem": "honey", "OutputItemSkinId": 0, "OutputItemName": null, "RequiredTime": 3, "OutputAmountPerProcess": 1 }, { "ItemType": "ore", "InputItem": "techparts", "InputItemSkinId": 0, "OutputItem": "metal.refined", "OutputItemSkinId": 0, "OutputItemName": null, "RequiredTime": 120, "OutputAmountPerProcess": 10 }, { "ItemType": "ore", "InputItem": "sheetmetal", "InputItemSkinId": 0, "OutputItem": "metal.fragments", "OutputItemSkinId": 0, "OutputItemName": null, "RequiredTime": 180, "OutputAmountPerProcess": 150 }, { "ItemType": "ore", "InputItem": "scrap", "InputItemSkinId": 0, "OutputItem": "metal.fragments", "OutputItemSkinId": 0, "OutputItemName": null, "RequiredTime": 15, "OutputAmountPerProcess": 10 } ], "Fuel Patterns": [ { "FuelInputItem": "wood", ///Fuel item short name "FuelInputItemSkinId": 0, ///Fuel item skin ID "FuelOutputItem": "charcoal", ///By-product item (null if none) "FuelOutputItemSkinId": 0, ///By-product skin ID (default is 0) "FuelOutputItemName": null, ///Custom by-product Display name "FuelOutputAmountPerProcess": 1, ///By-product amount per fuel consumed "FuelOutputChance": 0.7, ///By-product generation probability (0.0-1.0) "FuelBurnTime": 10 ///Burn time per fuel (seconds) }, { "FuelInputItem": "lowgradefuel", "FuelInputItemSkinId": 0, "FuelOutputItem": null, "FuelOutputItemSkinId": 0, "FuelOutputItemName": null, "FuelOutputAmountPerProcess": 0, "FuelOutputChance": 0.0, "FuelBurnTime": 80 }, { "FuelInputItem": "coal", "FuelInputItemSkinId": 0, "FuelOutputItem": null, "FuelOutputItemSkinId": 0, "FuelOutputItemName": null, "FuelOutputAmountPerProcess": 0, "FuelOutputChance": 0.0, "FuelBurnTime": 180 }, { "FuelInputItem": "charcoal", "FuelInputItemSkinId": 0, "FuelOutputItem": null, "FuelOutputItemSkinId": 0, "FuelOutputItemName": null, "FuelOutputAmountPerProcess": 0, "FuelOutputChance": 0.0, "FuelBurnTime": 60 }, { "FuelInputItem": "cloth", "FuelInputItemSkinId": 0, "FuelOutputItem": null, "FuelOutputItemSkinId": 0, "FuelOutputItemName": null, "FuelOutputAmountPerProcess": 0, "FuelOutputChance": 0.0, "FuelBurnTime": 30 }, { "FuelInputItem": "plantfiber", "FuelInputItemSkinId": 0, "FuelOutputItem": null, "FuelOutputItemSkinId": 0, "FuelOutputItemName": null, "FuelOutputAmountPerProcess": 0, "FuelOutputChance": 0.0, "FuelBurnTime": 120 } ], "Oven Speed Multipliers": { ///Furnace Smelt Speed "Furnace": 1.0, "Legacy Furnace": 1.0, "Large Furnace": 2.0, "Electric Furnace": 2.0, "Small Oil Refinery": 3.0 } } Custom Smelt Item Experimental { "Can Cook In Furnace": false, ///Can food be cooked in a furnace? "Smelting Patterns": [ { { "ItemType": "food", ///"ore" or "oil" or "food" "InputItem": "mushroom", "InputItemSkinId": 0, "OutputItem": "apple", "OutputItemSkinId": 3347673417, "OutputItemName": "Cooked Mushroom", "RequiredTime": 30, "OutputAmountPerProcess": 1 }, { "ItemType": "food", "InputItem": "seed.corn", "InputItemSkinId": 0, "OutputItem": "apple", "OutputItemSkinId": 3154577332, "OutputItemName": "Popcorn", "RequiredTime": 30, "OutputAmountPerProcess": 1 } ... ], "Fuel Patterns": [ { "FuelInputItem": "wood", "FuelInputItemSkinId": 0, "FuelOutputItem": "charcoal", "FuelOutputItemSkinId": 0, "FuelOutputItemName": null, "FuelOutputAmountPerProcess": 1, "FuelOutputChance": 0.7, "FuelBurnTime": 10 }, ... ], "Oven Speed Multipliers": { "Furnace": 1.0, "Legacy Furnace": 1.0, "Large Furnace": 2.0, "Camp Fire": 1.0, "Cursed Cauldron": 1.0, "Skull Fire Pit": 1.0, "Stone Fireplace": 1.0, "Hobo Barrel": 1.0, "Barbeque": 2.0, "Cooking Workbench": 2.0, "Electric Furnace": 2.0, "Small Oil Refinery": 3.0 } } ■ Configuration Option Details ItemType: Item type: "ore" (for furnaces) or "oil" (for refineries) InputItem: Input item short name InputItemSkinId: Input item skin ID OutputItem: Output item short name OutputItemSkinId: Output item skin ID OutputItemName: Custom display name for the output item (null for default) RequiredTime: Refining time (seconds) OutputAmountPerProcess: Output amount per unit ■ Fuel Pattern Settings FuelInputItem - Fuel item short name FuelInputItemSkinId - Fuel item skin ID FuelOutputItem - By-product item (null if none) FuelOutputItemSkinId - By-product skin ID (default is 0) FuelOutputItemName - Custom by-product name FuelOutputAmountPerProcess - By-product amount per fuel consumed FuelOutputChance - By-product generation probability (0.0-1.0) FuelBurnTime - Burn time per fuel (seconds) Important Notes - Food items (raw meat, fish, etc.) cannot be set as smelting items in Custom Smelt Items, as they maintain vanilla cooking behavior. - Custom Smelt Item Only : Furnace speed cannot be adjusted for other types. All other types have the speed set to 1. This setting is to adjust the interaction between fuel and cooking time. - The same item cannot be set as both a smelting item and a fuel item. - The same item cannot be assigned to multiple item types (ore + oil). - Fuel settings can only be used for smelting. Vehicle fuel consumption settings cannot be configured. - The fuel used for vehicles cannot be customized with this mod. - Please note that compatibility with other mods is not supported. Important: How to Use Custom Smelt Items (Experimental) To stop using this mod and keep the server running, you must remove all custom food items from the input slots of the cookable ovens. Before removing this mod, be sure to run the server console command (or reinstall the mod and then run the server console command again). Failure to perform this step will prevent the server from starting. Also, absolutely do not save the server in this state; it will corrupt the server save data. Target Type Campfire Cursed Cauldron Fireplace Hobo Barrel BBQ Cooking Workbench Console Command : removefood When you run the command, a confirmation message will appear. Enter "y" if you agree. Then, remove this mod. VOID / NINJA WORKS DISCORD : https://discord.gg/U8uxePjSyA MADE IN JAPAN$30.00 -
Version 1.0.6
35 downloads
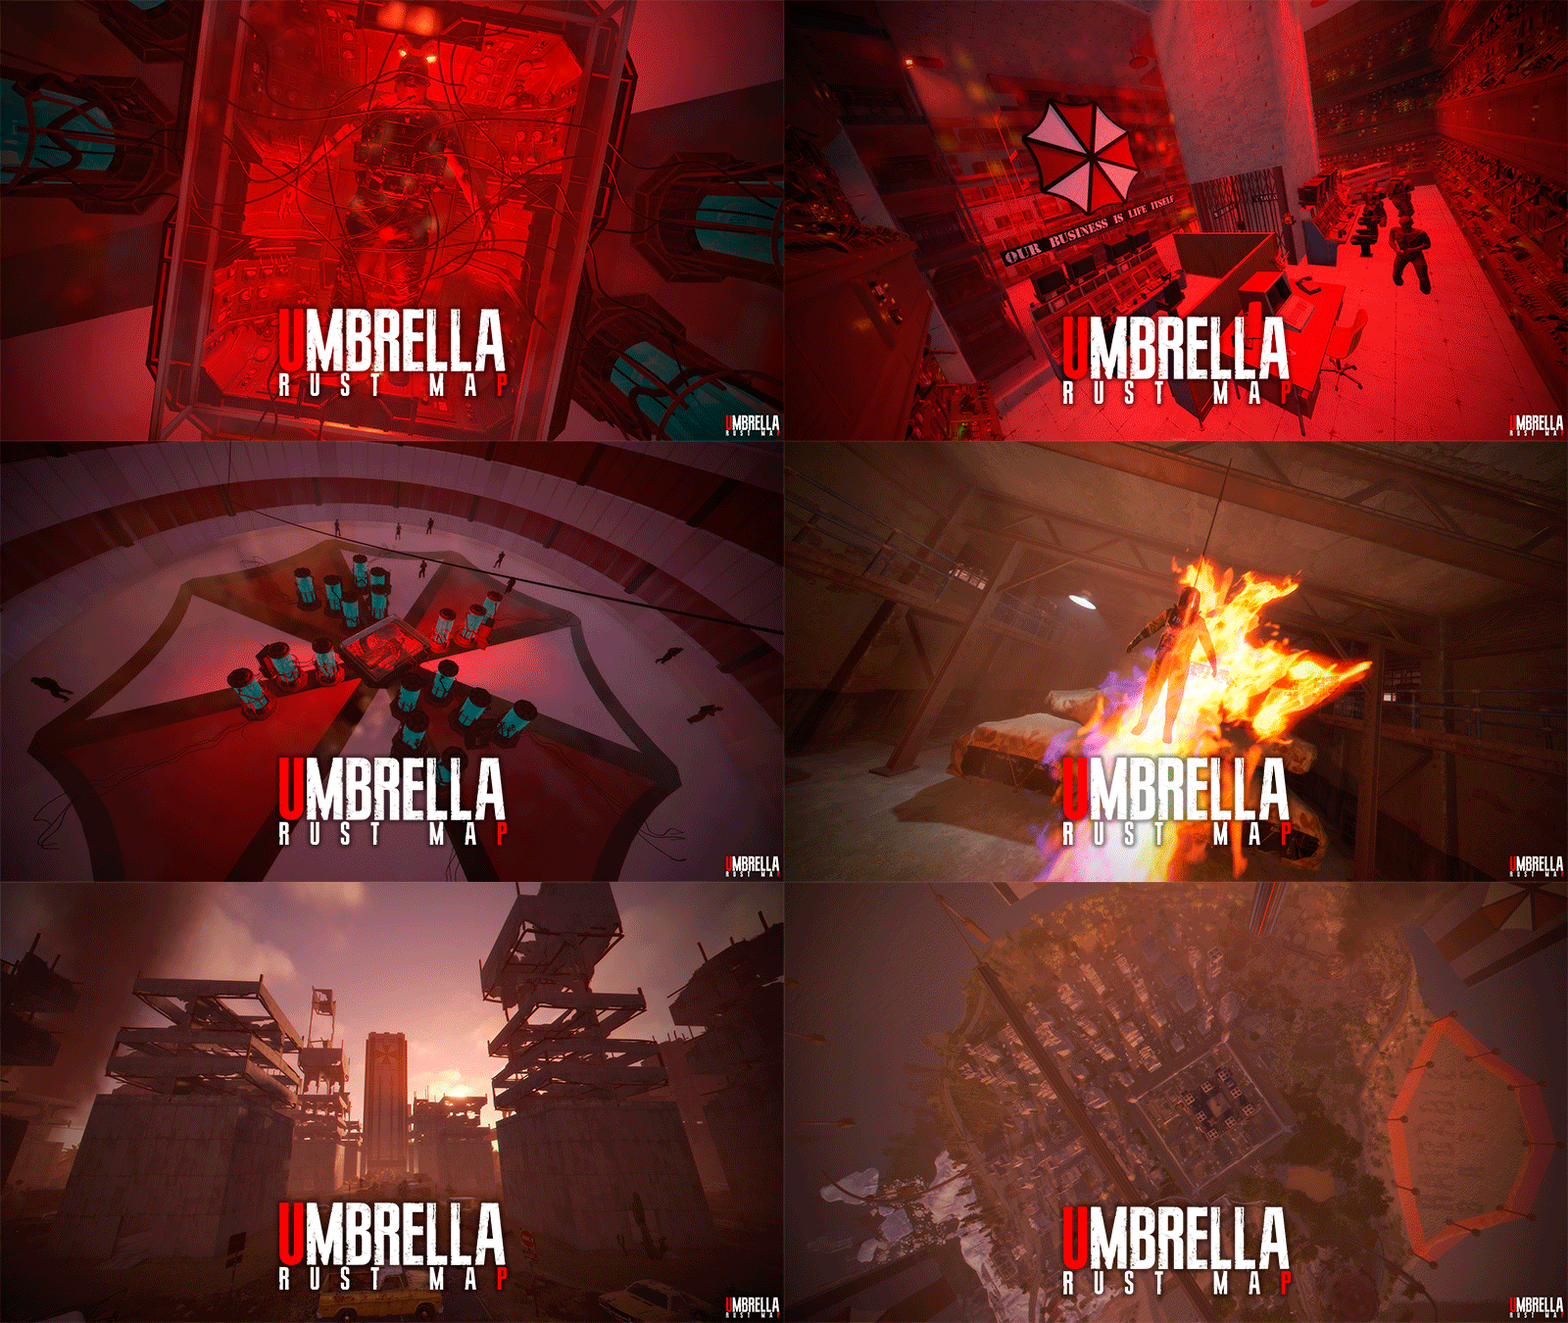
UMBRELLA is a post-apocalyptic 1K map inspired by the Resident Evil saga. This map is perfect for Wipes, Purges, server Events, or simply use this map if you want your players to interact more with other players. Don’t let the map’s size fool you!!! In Umbrella, you can build on Monuments and in custom building areas. This map features a design with an aggressive PVP focus. With the right configuration, this map can be used on PVE servers. The Umbrella map includes a wide variety of unique plugins designed to enhance the post-apocalyptic experience; all plugins are pre-configured so you can use them on your server. FEATURES Size: 1000. Objects: 35300. Map protection plugin included. The map can be edited: Yes. PLUGINS Fireworks: Endless fireworks respawn. Kamikaze: An explosive zombie that tracks random players. Umbrella Patrol: 20 armed soldiers patrolling the entire map, tracking players. Airplane Event: A large number of planes to support airdrops and encourage players to interact with the map. Parachute Respawn: Players appear in mid air with their parachutes deployed, carrying a starter “Kit” that includes a pistol, food, ammunition, medical supplies, and a skin. Zombies: A wide variety of zombies deployed across the map; zombies will appear in key areas and feature a variety of skins provided by the Rust game itself (these skins prevent lag); zombies also have an invisible weapon skin to make hitting a player more realistic. T-Virus: When a player is hit by a zombie, a countdown will appear on the screen indicating that the player will die from infection; the player can take pills to eliminate the infection. Cinema: Used to display the ranch’s cinema screen. F-15 Event: Two F-15s will be deployed across the map, launching an airstrike with explosions throughout the map for 3 minutes. Damage to player bases has been disabled; players will take damage if hit by a projectile. CH-47 Chinook Event: A CH-47 Chinook helicopter will crash and fall to the ground, dropping two Oil Rig crates; these crates are guarded by NPCs. Heli Tower Event: When a player enters “Heli Tower,” an event involving waves of attack helicopters will be triggered; the player must survive five waves to complete the event. Airfield Event Support: Support for the “Airfield Event” plugin. Raidable Bases Support: Support for the “Raidable Bases” plugin. OFFICIAL MONUMENTS Apartment complex 4 Oil Rigs Trains Lighthouse Fishing Village CUSTOM MONUMENTS Gas Station. Abandoned Supermarket. Bank. Outpost PVP. Laboratory. Heli Tower. Train Tool. Giant Excavator. Safe Zone. Raidable Bases Area. Crocodile Lake. The Dome. Ranch. Aifield with Build Areas. Bradley patchs across the map. Puzzles. Umbrella Center. TIPS Have fun SUPPORT: https://discord.badgyver.com$49.90-
- 1
-

-
- #umbrella
- #umbrella corps
- (and 55 more)
-
Version 1.0.0
174 downloads
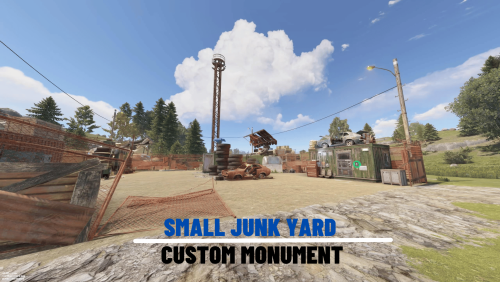
Custom small scrap yard with custom tunnels that you can put in your custom map. Features: Simple installing. Great detail. Optimized FPS. There is radiation. Loot: Oil barrels. Food box/crates. Barrels. Ordinary crates. Military crates. Elite crate. and 1 blue card. Other works.Free -
Version 1.0.2
18 downloads
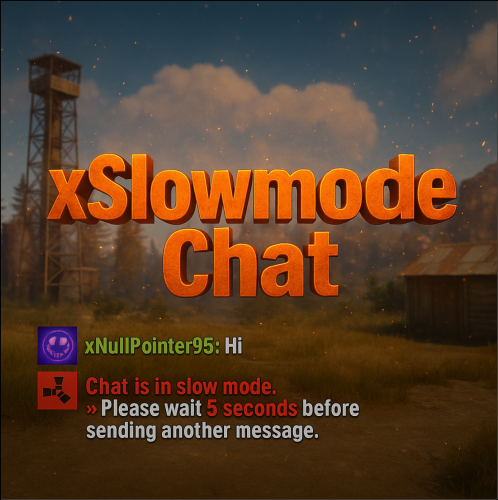
xSlowmodeChat xSlowmodeChat is a configurable chat-rate-limiting plugin for Rust servers. It allows server owners to control how frequently players can send messages, helping reduce spam, toxicity, and chat Flooding. Doesn't affect chat commands, only chat messages. Fully Configurable Slowmode Set custom cooldown between messages for normal- and vip players. Optional cumulative penalties for repeated spamming attempts. Adjustable penalty length for both, normal and VIP players. VIP Support Grant VIP players a separate cooldown & penalty system. VIP permission (xslowmodechat.vip). Lower intervals or completely remove slowmode for VIPs. Admin & Exclusion Options Easily toggle slowmode bypass for admins. Exclude specific SteamIDs from slowmode entirely. Informative Feedback Show a customizable slowmode warning message in chat. Optional on-screen UI timer showing remaining cooldown Console Commands xslowmode.enable - Enable slowmode xslowmode.disable - Disable slowmode xslowmode.setinterval <seconds> - Set default player cooldown xslowmode.setvipinterval <seconds> - Set VIP cooldown xslowmode.reloadconfig - Reload config from file Permission xslowmodechat.active - Only players with this permission will be affected by the slowmode chat if 'GlobalSlowmodeChat' is false. xslowmodechat.vip - Grants players the VIP slowmode settings. Config { "GlobalSlowmodeChat": true, "DisabledForAdmins": false, "ShowMessage": true, "MessageText": "<color=#e63939>Chat is in slow mode.\n»</color> Please wait <color=#e63939>{time} seconds</color> before sending another message.", "ShowSlowdownUi": true, "CumulativePenalty": true, "ChatMessageCooldown": 5.0, "CooldownPenalty": 5.0, "VipPermission": "xslowmodechat.vip", "VipChatMessageCooldown": 2.0, "VipCooldownPenalty": 2.0, "ExcludedSteamIds": [] }$8.99 -
Version 1.0.3
78 downloads
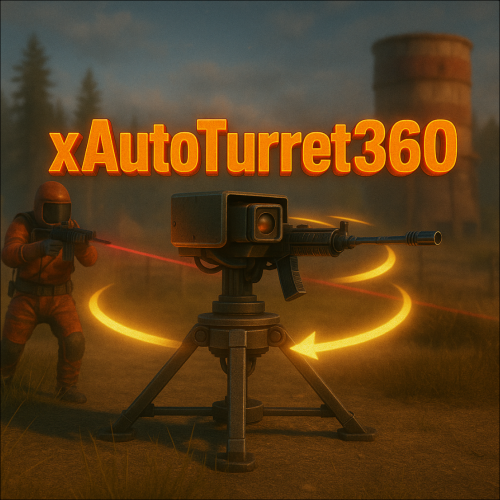
xAutoTurret360 xAutoTurret360 removes the default firing-arc limitations on auto turrets in Rust - Allowing them to instantly track and engage targets in a full 360° radius. This upgrade makes turret behavior more aggressive and responsive, ideal for heavy-defense bases, PvP arenas, PvE full-base protection or any custom game mode requiring all-round turret coverage. Performance optimized! The patch is executed only once when plugin is loaded/reloaded. Features 360° Targeting Turrets can engage targets from any direction. (360°) Visualize 360° Auto Turret will continuously rotate 360° Console Command xautoturret360.toggle // Toggles the 360° functionality on or off. Config { "Enabled": true, "Visual360Rotation": false }$6.99 -
Version 1.0.6
30 downloads
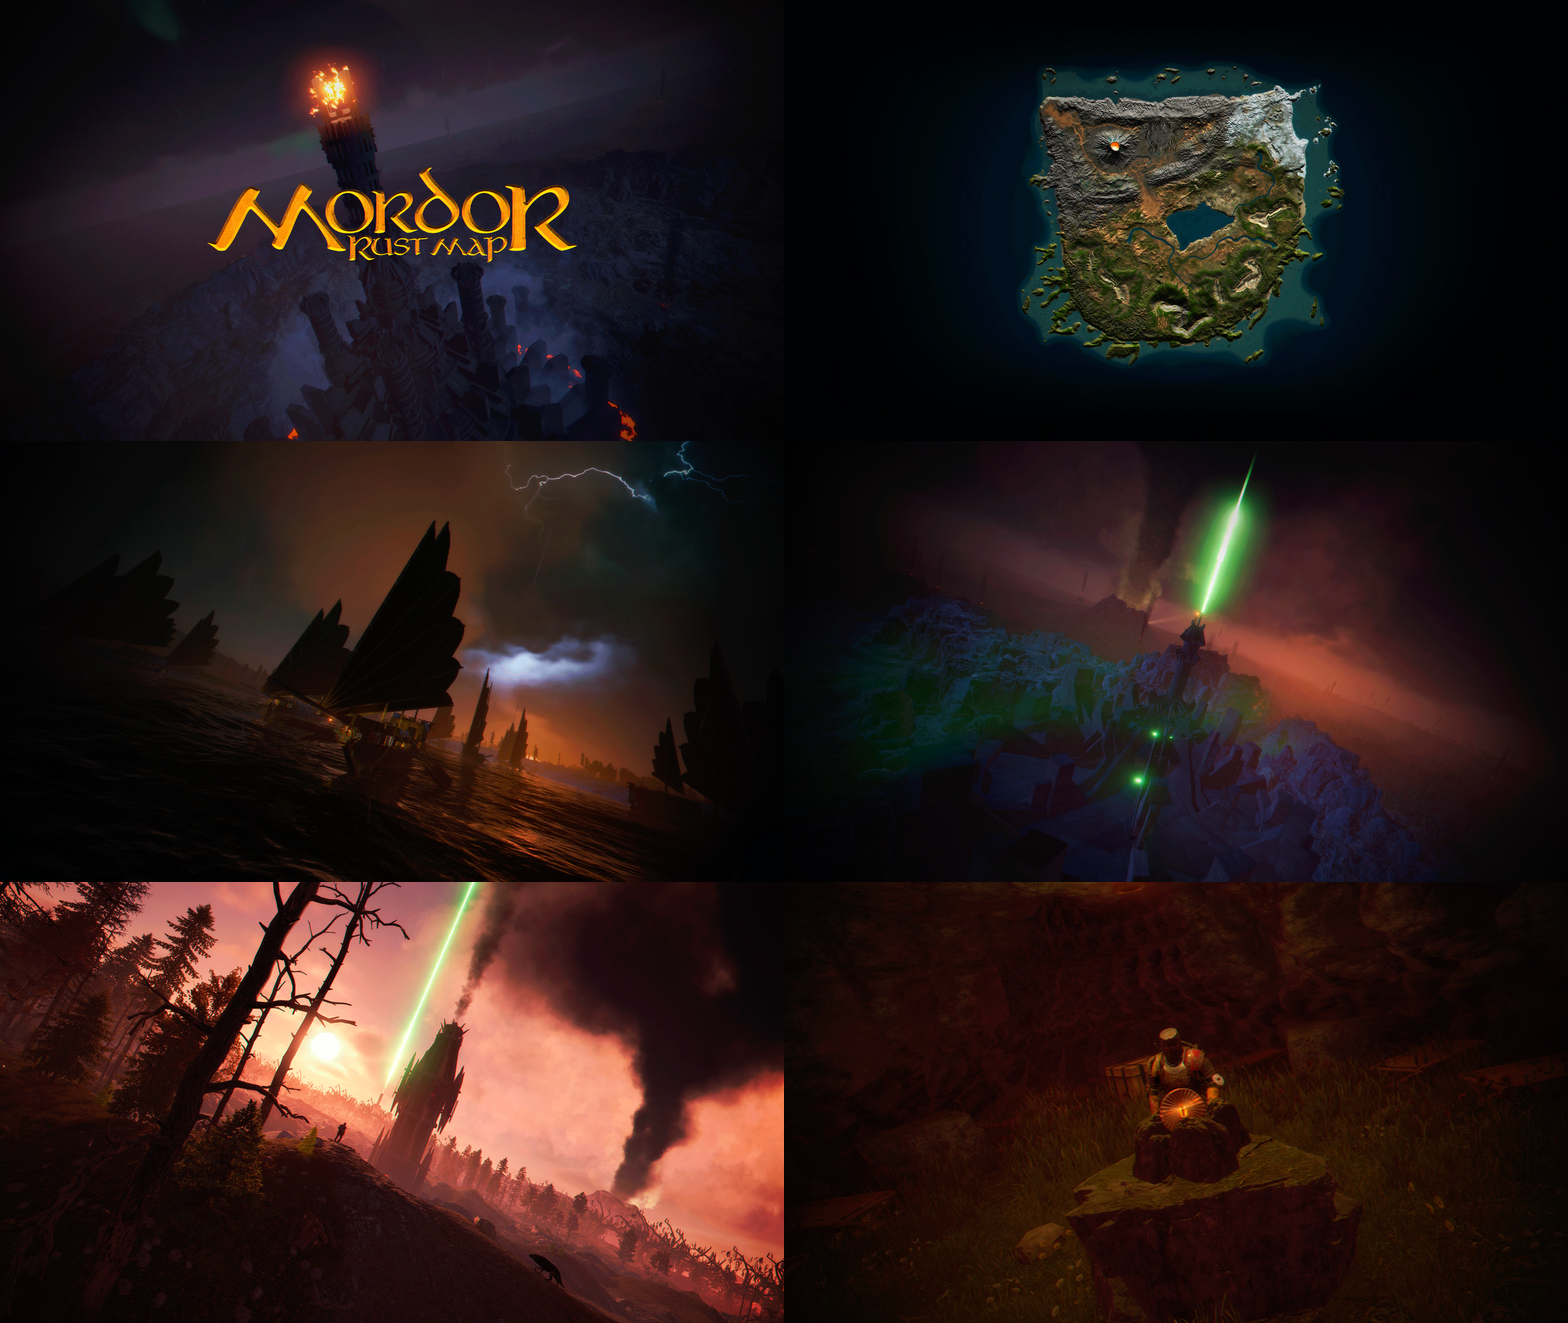
MORDOR is a medieval world designed and based on The Lord of the Rings saga. It features rocky and volcanic terrain, as well as flat areas for building. The Mordor map contains large custom-built construction zones, including a massive fortress with a vast flat area. This fortress is situated atop a cliff, which is guarded and surrounded by multiple flat construction zones for players. Two enormous flat areas have been provided for the Raidable Bases plugin; construction in these areas is blocked for players. FEATURES Size: 4000. Objects: 106378. Map protection plugin included. The map can be edited: Yes. PLAYER RESPAWN Players spawn in towers; these towers are scattered throughout the map and contain custom recyclers, workbenches, furnaces, a refinery, and a chimney. If you want players to spawn in the classic beach areas, you can edit the Mordor map using Rustedit by removing the “Spawn Point” volume. THE LOOT On the Mordor map, we’ve decided to set up the loot system a bit differently. We have created four loot tables: The first is based on all the primitive and medieval items provided by Rust. The second table contains Resources and Weapons. The third table contains Basic Blueprint Fragments. The fourth table contains Advanced Blueprint Fragments. These chests feature a wooden design, and we’ve also included the classic medicine and food chests. The Loot table files have been provided so you can edit them to suit your needs. ELECTRICITY AND PUZZLES Mordor is a map for players seeking a medieval style; there is no electricity on this map, nor does it include any puzzles involving electricity or security cards (Green Card, Blue Card, Red Card). This map contains location-based puzzles and parkour-style puzzles with traps and drops into the void. In Mordor, there are no markers for monument locations; Mordor is designed so that players explore and discover on their own places that will remind them of The Lord of the Rings saga. THE NPCS The NPC spawning system consists of two free plugins. One plugin spawns the NPCs, while the other plugin provides them with clothing, loot, and weapons. You can edit or modify the appearance or content of the NPCs to suit your needs. THE MONUMENTS Players must explore the map to find each Monument; Monuments are located both on the surface and beneath the map. List of Monuments: Towers. Dock. Black Ships. Lumberjack Huts. Orc Fortresses. Allied Fortress with a construction zone. Multiple construction zones. Orc Camps. Orc Villages. Caves. Caves with construction zones. Maze. Giant Arena Zone: This zone is designed for two events: “Death Match” and “Last Man Standing”. It is fully configured and ready for use; the Mordor map contains the configuration files for all necessary plugins. Torrech Ungol, the lair of the spider Shelob. Morgul Mines, stronghold of the Witch-King. The Black Gate. Barad-dûr, the great tower of the Eye of Sauron. Orodruin, Mount Doom, the volcano where Sauron’s Ring was destroyed. Secret locations. OFFICIAL MONUMENTS - Does not contain any Official Monuments. IMAGES FOR FLAGS • Flags of Gondor and Mordor included. TIPS • Set your server to Primitive mode. • Use a plugin to control the weather and create a spooky atmosphere with clouds, thunder, and a dark sky. • Have fun SUPPORT: https://discord.badgyver.com$49.90 -
I submitted my plugin on october. More than one month has now passed, yet I have received no progress whatsoever.
-
Version 1.0.3
2,571 downloads
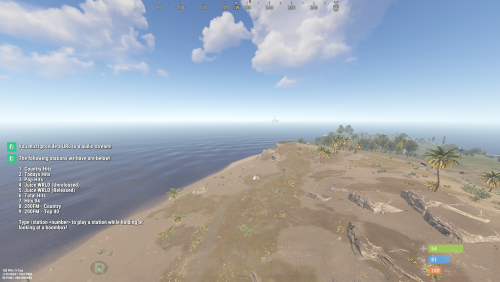
Allows you to change the station to any boombox via command. Commands /stations - Shows you a detailed list of stations to use with your BoomBox. /station <number> - Will play a selected station from the stations list. /boombox <url> - Will play a custom audio source on the BoomBox. /addstation "name" "URL" - Adds stations to the preset stations. /removestation "name" "URL" - Removes stations from the preset stations. Permissions boombox.stationsuse - (/stations, /station) boombox.customurluse - (/boombox) boombox.admin - Allows you to use any URL for /boombox and bypass the whitelist while also allowing you to use every command. Configuration { "Whitelist": true, "Whitelisted Domains": [ "stream.zeno.fm" ], "Boombox Deployed Require Power": true, "Preset Stations": { "Country Hits": "http://crystalout.surfernetwork.com:8001/KXBZ_MP3", "Todays Hits": "https://rfcmedia.streamguys1.com/MusicPulsePremium.mp3", "Pop Hits": "https://rfcmedia.streamguys1.com/newpophitspremium.mp3" }, "Deployed Boombox Never Decays": false, "Handheld Boombox Never Breaks": false, "Microphone Stand Never Breaks": false }Free -
Version 1.0.3
33 downloads
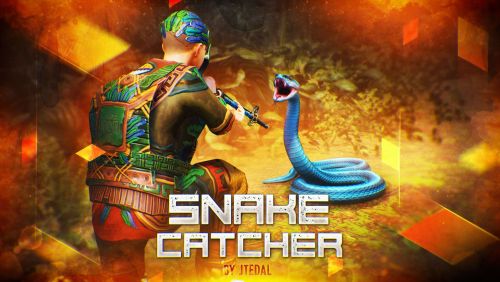
This plugin will allow your players to catch snakes on the server and then place them near or on their base to protect the territory. The plugin also adds some changeable parameters that you can edit for yourself (the damage of a pet snake, which dart you can catch it with, and whether the enemy will get the blindness effect when bitten). By the way, a pet snake does not attack its owner. The parameters that you can configure: The chance of catching a snake The kind of dart you can catch it with. Pet Snake's damage to enemies Will the enemy receive the blindness effect Plugin Config: { "The chance of catching a snake (0 - 100)": 100.0, "The name of the dart with which you can catch a snake": "dart.incapacitate", "Pet Snake Damage": 40.0, "Should there be a blindness effect when bitten by a pet snake": true, "Версия конфигурации": { "Major": 1, "Minor": 0, "Patch": 0 } } Console Command (RCON only) givesnake <Amount> <StemID|Player name> - gives the player a pet snake Check out more of my work here JTedal's library. Come see our whole teams work Mad Mapper Library. Come by the Mad Mapper Discord for support, feedback, or suggestions!$11.99- 10 comments
-
- 4
-
-
- #mad mappers
- #mad mapper
- (and 14 more)
-
Version 2.0.2
134 downloads
THIS PLUGIN IS CURRENTLY BROKEN! Face punch removed the dance. I attempted to use the new ones but the dances won't lock the player. I'll have another go a bit later to see what I can come up with. This plugin may break in the next rust update! Purchase with caution. I can't promise it will work after 7th of october Adds Boogie Bombs from Fornite into Rust, making use of a secret dance emote! 2.0 Update! Old Version How does it work? Allows you to turn specific F1 Grenades or All F1 Grenades into Boogie Bombs that can be thrown at players! There is also two command to manually play the dance emote What does the Boogie Bomb do? When thrown it will roll around making a funny noise. It will then explode and a Boom Box will spawn along with a fully fitted nightclub! All players hit by the explosion will be forced to dance uncontrollably. Once the dance has ended the Music Box will blow up along with the rest of the nightclub and everyone affected will return to normal. You can see this in the YouTube video above. Boogie bombs do no damage to players or buildings, they are harmless. How do I use it? Boogie bombs can be incorporated into your server in the following ways! Spawn then with /boogiebomb – requires the permission "BoogieBomb.use” Add an F1 Grenade with the skin id in your boogie bomb config file to add them to your loot table or add them to kits in the same way! Alternatively, you can set all F1 Grenades to act as boogie bombs in the config file – the settings are as follows: Config AllF1GrenadesAreBoogie | Sets this to true to make all F1 Grenades act as boogie bombs DanceFloorSize | Set the size of the dance floor, This increases the radius of the boogie bomb – Default value is 10 SkinForBoogieBomb | The skin Id to use for boogie bombs. This is ignored if AllF1GrenadesAreBoogie is set to true DanceDurationSeconds | The time in seconds for how long players should dance LegacyBoogieBomb | Use the old version of this plugin (Music Egg) RadioToUse | The radio to use when the boogie bomb spawns. Numbers from 0 -> 16. When the plugin loads it will state what radio you have selected. I suggest picking the 0,1 or 2 as these load immediately Commands Just want to use the dance emotes use the commands /dance – makes you dance. requires "BoogieBomb.me” perm /dancetarget username – makes the target dance, requires "BoogieBomb.target” perm I have a question about the plugin or need help! Message me on discord – mrcameron999#3378$11.99 -

Version 1.2.2
189 downloads
Nova Weather is a drop-in replacement for Rust’s native server-side weather system. It is very customizable with unique features such as timelined profiles with events, and exceptional features that make it stand out such as support for zone-specific weather systems. Please note: This mod has no required dependencies, and can work out of the box without Oxide. Only if you need zone support will you need Oxide and the ZoneManager plugin. Let’s list some of Nova Weather’s best features. Below you’ll find a description for every major feature found in the mod. First off, we have Profile Timelines. This allows you to carefully construct your weather system by introducing elements staggered instead of all at once. For example; you could make a heavy rain storm by first making some clouds, then 30 seconds later darkening them, and when they’re done, slowly start rain that increases over 5 minutes until it’s at full strength. You can play with about 20 weather properties ranging from cloud coverage to fogginess to windspeed, and even override temperatures. For the first time, you can now have several separate weather systems active in your world using Nova Weather’s support for the ZoneManager plugin. You could make it rain on one island, and make it tropical on another. You could create zones for bosses where the sky darkens with thunderclouds the closer you get, or you could make your admin crib always sunny while the rest of the world is experiencing heavy rain. The possibilities are endless. Want to give your VIPs a sunny start to their day? Want to slap tryhards with a permanent storm over their heads? This can now be accomplished by using permissions. Nova Weather supports permission-based overrides to give you maximum flexibility. Although this is a Harmony mod, Nova Weather will hook into Oxide's permission system to allow you to manage permissions like you're used to. If Oxide is not installed, it'll fire up its' own permissions instead, modelled after Oxide so you're able to work with commands you're used to. Please note: If you're using Nova Weather's native permissions, instead of "o.<command> <arguments>" you should use "nw.perm.<command> <arguments>". Not only are you able to use the Profile Timelines feature to create beautiful and realistic weather patterns, you can also make things happen based on whatever weather you have running. Using the timeline, you can create a property element or you can create a command element. If you create a command element and place it on the 30 second mark in your timeline, the command will execute when 30 seconds have elapsed in that profile. Want to spawn a boss when the thunder starts in a thunderstorm? Want to start an event when the rain stops? Want to give everyone some currency when you’ve had fog on for 10 minutes?! You can do that with scheduled commands! All weather systems work on a few simple concepts, and the most important of those are Profiles. Profiles determine what should be shown in the world. You’ll have a profile for Clear, Rain, Fog, etc. These profiles live in your configuration folder as separate files, and are completely interchangeable. Created a kickass weather profile but hate the hassle of having to mix and match your config files? Just drop ‘em your profile files. They can just drag-and-drop them into their profiles folder, and they’re immediately usable. Share away! With advanced features comes some advanced configuration. We’ve tried to make it as simple as possible though, and in the Configuration chapter below we explain what everything does. There’s all sorts of settings to make your weather look amazing, or to optimize the weather system’s performance for lower end machines. You can choose whether or not to use ZoneManager support, you can tweak the amount of times a second the system updates, etc. With a ton of RCON Commands included (20+!) you can even do most of it without ever looking at a JSON file. The mod installs with a very comprehensive default configuration, created to mimic the native weather system with a bit of a makeover on install so you can just install and forget about it. The default profiles have timelines, and tweaked load chances to bring back some good looking weather types. Nova Weather offers you a ton of commands to make your life as an admin easier, and to give you full control over your server’s weather. Don’t like a particular profile right now? Skip it! Wanna show off your profile but the fun only starts at the 1-minute mark? Skip to that moment in the timeline! All commands are to be executed from the RCON or Server Console, not from in-game! All commands must start with either ‘novaweather.’ Or ‘nw.’. The list below uses the former for clarity, but you can use ‘nw.’ As a substitute to shorten your commands. Arguments indicated with "<argument>” are mandatory for use with the command, while "(argument)” indicates an optional argument. Please note: To be able to use any of the zone-related commands you need to have Oxide installed and have loaded the ZoneManager plugin. Below you’ll find a list of all commands available with a short description. Basic commands novaweather.reload Reloads the mod and will reload all profiles from disk, as well as check for the existence of ZoneManager zones. If you’ve purchased or downloaded profiles into your Profiles folder, reload the mod to have it take effect. novaweather.report (climate) Reports the current weather conditions for all climates if the optional climate argument is not set. If it is, will limit the report to just that climate. novaweather.tickrate (number) If no number is set, will return the current tick rate. If a number is passed, will set the tick rate to that number. The tick rate determines how often the weather system calculates and updates, with a lower number meaning more often. It’s basically saying "Update every <number>th frame”, with 1 being the lowest possible number and 50 being the highest. The lower the number, the smoother the transitions. Climate-related commands novaweather.globalclimate (climate) If the climate argument is set, will set the global weather system’s climate to that climate. If the climate argument is not set, will return the name of the climate currently assigned to global weather. Novaweather.load <climate> <profile> (transition) Used to forcefully load a given profile to the climate immediately. If a numeric transition argument is passed, it will override the profile’s set transition time. "nw.load default default_clear 10” will load the default_clear profile and override the transition to 10 seconds to speed up the appearance of the profile. novaweather.loadnext <climate> <profile> Will forcefully set the next profile for a climate. When the current weather profile reaches its’ end, the next profile is automatically loaded. novaweather.next <climate> (transition) Forcefully ends the currently active profile’s timeline and loads in the next profile in the queue. If a numeric transition argument is passed, it will override the profile’s set transition time. novaweather.pause <climate> Pauses the timeline for the provided climate. Pausing a climate will effectively freeze the current weather in its’ current state indefinitely until unpaused. novaweather.unpause <climate> The ‘counter charm’ to the pause command. Unpauses the provided climate’s timeline (if it is paused). novaweather.skipto <climate> <seconds> Skip the current profile’s timeline to the provided seconds mark. If you enter a seconds mark greater than the timeline’s duration, it will skip it to the last frame effectively ending the profile’s timeline. novaweather.listclimates Presents you with a neat list of all running climates and their status and a list of all assigned profiles. Zone-related commands novaweather.disablezones Disables the ZoneManager support altogether. Will deactivate all non-global climates to save processing power. novaweather.enablezones Basically the ‘counter charm’ to disablezones. Re-enables all disabled zones and boots up all non-global climates if any exist. novaweather.disablezone <zone> Disables a single zone’s overrides. That’s about it. novaweather.enablezone <zone> The brother-command of the above mentioned one. Enables the zone again. novaweather.showzone <zone> More of a debug function, shows the wireframe for the given zone as if you’re editing it with ZoneManager. Good for determining a zone’s transition buffer zone. novaweather.zoneclimate <zone> (climate) This is a big one. This will do a few things based on the provided arguments; - If the climate argument is set and the zone is already registered with Nova Weather, it’ll change that zone’s climate and load it up immediately. - If the climate is set and the zone is not already registered, it will register it and set the zone’s climate and load it up. - If the climate argument is not set but the zone is registered, will return that zone’s set climate. novaweather.removezone <zone> Contrary to what you may think, this does not remove the actual ZoneManager zone. It just removes it from Nova Weather’s configuration and thus removes any zone overrides. This is permanent, if you’re just wanting to temporarily disable it use the ‘disablezones’ command listed above. novaweather.listzones Lists all zones that are configured within Nova Weather with their status and climate. Profile-related commands novaweather.getprofile <climate> Returns the name of the currently active profile for the given climate. novaweather.assignprofile <climate> <profile> (chance) Adds a profile to a climate’s profile list to be included in rotation. If the chance argument is set, will override the default value of "100”. Note that "chance” doesn’t literally mean a chance %, it’s a weight to make a weighted random, just named "chance” to make sure people understand its’ intended use. novaweather.unassignprofile <climate> <profile> The antithesis of the above-mentioned command. Will remove the profile from the climate’s profile rotation permanently. novaweather.setprofilechance <climate> <profile> <chance> Sets the chance (weight) for the given profile in the context of the given climate’s list of profiles. novaweather.listprofiles Lists all profiles loaded into Nova Weather’s memory. If you just created a profile file and don’t see it listed in this list, reload the plugin using the reload command in this list and try again. Nova Weather’s configuration is pretty in-depth but we’re going to try to make it as painless as possible. There’re two distinct types of configuration file for this mod, and those are the singular Configuration.json file and the individual Profile files. We’ll go over both in this section. All of Nova Weather's configuration files can be found in: ROOT / HarmonyMods_Data / NovaWeather (/ Profiles) Before diving into these options, a few key concepts need to be clear for you to fully understand all the ways you can customize your server’s weather. Profiles Profiles are separate files with properties. They contain all actual weather data such as rain level, cloud coverage, etc. It does not do anything in and of itself, it's just basically a timeline that shows the climate what weather to present. Climates Second, there’s Climates. Climates are each individual and isolated weather systems, and are assigned one or more profiles to cycle through. They read the profile data and make all calculations for transitions, timelines, etc. They’re the brain of the operation. Zones Lastly there’s Zones. A zone is a ZoneManager zone that's registered with Nova Weather, and contains information like the zone ID and the climate that should be presented to the clients present within that zone. In and of itself this doesn't to anything, it just tells us to override the global weather climate with another climate. Climates all cycle continuously in the background. Applying a climate to a zone doesn't change the climate at all, it just sort of subscribes to it. The climate is always telling the mod "Hey man, rain should be 1. wind should be 0". It doesn't care if anything's listening. The zone can then sort of connect to that, and hear what the climate is saying, and then show that to the player. This makes it so you can have 10 zones that share 1 climate, saving a ton of processing power. Configuration files: Configuration.json All right, let’s dive into our first bit of configuration. We’ll first take a look at Configuration.json. Note that this config is subject to change, and the image below may not be a fully accurate depiction of the current state of the config file structure. Modification enabled (true/false) A Boolean to turn the mod on or off without having to unload it. Will enable the native weather system if set to false. Enable debug logs (true/false) Will print quite verbose logs, meant to provide the developer more insight into potential problems. If you’re contacting support, make sure you include logs with this set to true. Global Options -> Pause weather if server empty (true/false) Pauses all climates’ timelines to halt processing, since nobody’s there to enjoy it anyway. I can’t think of a real reason to set this to false unless its for testing purposes, but you have the option to. Global Options -> Global weather climate Determines what climate will be applied to the global weather. Speaks for itself. ZoneManager options -> Use ZoneManager zones (true/false) If set to true, this will apply (a) climate(s) to the zone(s) in the zone climates list. If set to false, this will completely disable all zone functionality and will limit the mod to only global weather. ZoneManager options -> ZoneManager zone climates This is where you register and modify zone information. A zone can be disabled individually, have a climate set, and have a modified transition buffer. More on that below. ZoneManager options -> ZoneManager zone climates -> Enabled (true/false) Enables or disables this particular zone from having a climate override. ZoneManager options -> ZoneManager zone climates -> Climate The climate that should be shown to the clients within that zone. ZoneManager options -> ZoneManager zone climates -> Zone transition buffer percentage (1-100) The percentage of the zone’s radius which should be used as a transition buffer. When you enter a zone, you don’t want to instantly have another weather type pop into existence. This is where the zone transition buffer saves the day; the weather types are gradually transitioned between until you’re well and proper into the zone. If you put this at 50%, you’ll see the transition happen for half of the zone. After halfway into the zone, you’ll see no trace of the "outside” climate and will just see the zone climate. ZoneManager options -> ZoneManager zone climates -> Zone transition buffer max. Size (meters) With this you can put an absolute limit on the transition buffer size. This works best if you don’t exactly know the dimensions of the zone(s) you’ll be placing. This makes it so that the transition buffer will not go past the given number of meters past the zone’s border. So, if you set the buffer percentage to 50%, but set the max. meters to 10, the buffer will either go to 50% if it’s shorter than 10m, or it will cap at 10m. Please note: due to there not being a reliable method to calculate the distance travelled within a cuboid shaped zone, there is no transitional buffer for those. The mod will still function, though the weather will not smoothly transition from and to a cuboid shaped zone. See the graphic below for a visual representation of a buffer zone within a radial zone, with "%” meaning the buffer zone percentage. Climate definitions This will contain the definitions for the climates to be used. Climate definitions are very straightforwards, we only need an enabled status and a list of assigned profiles. Climate definitions -> Enabled This enables or disables a climate. A disabled climate will not do any calculations, or propagate any data to players. If you have a special event planned where you’d want to use a specific climate, but don’t want to accidentally use it elsewhere, you can disable it. Climate definitions -> Profiles This is the list of assigned profiles. That’s it. Climate definitions -> Profiles -> Profile The name of the profile to assign to this climate. Note that the name must match exactly, case sensitively. Climate definitions -> Profiles -> Chance This is the chance (weight) for this profile. A climate will cycle through all profiles based on their weight; if one profile has a weigh of 1 and one has a weight of 10, the latter will be 10x more likely to be picked as the next profile to be loaded. The weight is not capped at 100, it is just named "chance” to make sure everyone understands its’ function. From version 1.1.0: Update 1.1.0 introduces permission based overrides. This adds a section to your config: "Permissions options": { "Use Oxide permissions if possible (true/false)": true, "Permission climate overrides (set 'disabled' to disable)": { "novaweather.vip": "default_clear", "novaweather.disabled": "disabled" } } While pretty basic and self explanatory, it adds the following fields: Use Oxide permissions if possible (true/false) This tells the mod to use Oxide permissions if Oxide is installed. If Oxide is not installed, this option is ignored and native permissions are used. If this is set to false, native permissions are always used regardless of Oxide's status. Permission climate overrides (set 'disabled' to disable) These are the actual overrides. Works in a key-value pair, with the key being the permission and the value being the Climate that it should use. Note that the give permission must be fully specified with the 'novaweather.' prefix if its a novaweather-specific permission. Because of this, you can insert another mod's permission in here as well if you like. If the Climate is set to 'disabled', the user will not see changing weather as the mod will skip that user while calculating weather changes. This will allow other mods to influence weather for that user. Configuration files: Profiles/*.json With that out of the way, let’s dive into the profile configuration. { "Transition time (seconds)": 300, "Parent profile": "default_overcast", "Duration": { "Type": "range", "Min. seconds": 900, "Max. seconds": 1800 }, "Base properties": [ { "Property": "wind", "Value": 0.8 }, { "Property": "rain", "Value": 1 } ], "Steps": { "0": [ { "Type": "Property", "Property": "cloud_coverage", "Value": 0.8, "Fade (seconds)": 60 } ], "60": [ { "Type": "Property", "Property": "cloud_attenuation", "Value": 0.7, "Fade (seconds)": 30 } ] } } Transition time (seconds) Determines the duration of the transition between the last profile and this one. When a climate is cycling through the profile’s timeline and the timeline ends, the next profile will be loaded and the transition to it will start from the last frame of the last profile. If you set this to 0, the new profile just pops into existence. Set this to 10 and over 10 seconds the old profile vanishes and the new one appears. Parent profile There’re about 20 weather settings to mess around with, so if you had to enter them all every time it’d be annoying as ****. Thats why we’ve implemented profile inheritance. If you leave this empty you need to enter all 20 properties yourself, but if you already have a profile with properties you like and wish to modify a bit, you can enter that there. Say for example you have a "storm” profile with a regular old storm. But then, in addition to that regular storm, you also want a profile that storms but that also thunders and has a deep red sky. But you don’t want to have to copy-paste the "storm” profile. Instead what you can do is set the parent profile to "storm”, and then just set the thunder property to 1 and the atmosphere rayleigh to whatever you want. The profile will then use the properties of "storm” as a base, and use its’ own base properties to override those. This way you can make infinite variations of similar weather types. Duration Speaks for itself; the profile’s actual duration. There’re two types, "static” and "range”. If the type is set to "range”, it will randomly pick a number between the min and the max values. If the type is set to "static”, it will always pick the min. seconds value as its’ duration. Base properties These are the profile’s properties that are always set and will be transitioned to when the profile loads. You can find all possible properties in the "detailed convars” section of the following URL: https://wiki.facepunch.com/rust/Weather#detailedconvars In the profile’s properties you don’t include the "weather.” prefix for those properties, so "weather.rain” just becomes "rain”. The only property not included in that list that is usable with Nova Weather is the "temperature” property. This property is used to override the locally calculated temperature (think of temperature drops at night and such) and will always be the temperature you enter. This property can also be animated with steps. Steps This is how you animate a weather profile. Using steps, you can populate the profile’s timeline however you see fit. Remember that fun timeline graphic at the top of the page? That roughly translates to: "Steps": { "5": [ { "Type": "Property", "Property": "cloud_coverage", "Value": 0.8, "Fade (seconds)": 120 } ], "30": [ { "Type": "Property", "Property": "rain", "Value": 1.0, "Fade (seconds)": 120 } ], "130": [ { "Type": "Property", "Property": "thunder", "Value": 1.0, "Fade (seconds)": 150 } ] } Steps are put at static positions in the timeline by setting it to a specific second. Want rain to come in at the 30 seconds mark? You add a step at "30”. A step is animated as well; you can have the rain come in at 30 seconds and have it take 60 seconds to go from just a drop to a full on downpour. It’s all in the fade time. Within a step there’s four properties: - Type – this is either "Property” (case sensitive!) or "Command”. - Property – this is the actual weather property name like "wind” or "rain” and such - Value – the value of that property, usually between 0 and 1 - Fade (seconds) – the amount of time it should transition from base value to the new value Nova Weather will release with a few very basic weather profiles that showcase the function of the mod with base properties and timeline steps. You can play with this to your heart’s content. But, for those of you who are not super keen on spending hours configuring the perfect weather, we’re way ahead of you. Our team is working on a set of beautiful weather profiles that’ll be released on this marketplace in the near future. This takes significant amounts of time, so it may not yet be released at the time you’re reading this. But if they are, they will be released either for free or for a small fee. Check the related products for more information. Important to note is that any profile packs that you purchase from us are licensed, and therefore cannot be shared with others who have not bought the pack. Profiles are separate files that are found in the /Profiles folder of the Nova Weather folder. These profiles are in .json format and can be shared basically anywhere. All you have to do to import them is to place the .json file you received into your /Profiles folder with the other profile files, and reload the mod using the appropriate command. The smoothness of the transitions is determined by your Tickrate setting. If you set this to 10, then the mod will calculate new values every 10th frame. To make transitions smoother, you lower the Tickrate setting by either modifying the Configuration.json or use the appropriate command. Note that if you lower this number, the load on your server will slightly increase due to it having to calculate more often. As this is a Harmony mod, you install this by dropping the .dll file into the HarmonyMods folder in the root directory of your Rust server.$17.21 -

Version 1.0.0
16 downloads
It is a copper monument depicting a standing woman dressed in a long tunic. It rises up to 49 meters high, reaching almost 93 meters if we count the pedestal. On her head is a seven-cornered crown, symbolizing the seven continents and the seven seas. 25 windows open on it. In her right hand she carries a torch, redesigned in 1916 to enhance its burning flame appearance. Instead, in her left hand she holds a tablet with the date of the signing of the Declaration of Independence. Readme.txt$3.00 -
Hello. I am looking for an investor to create one specific server. I can say with confidence that at the moment there is no such server in the game. If you are interested, write me a discord (Approximate investment price $ 2000) My discord: AhigaO#4485