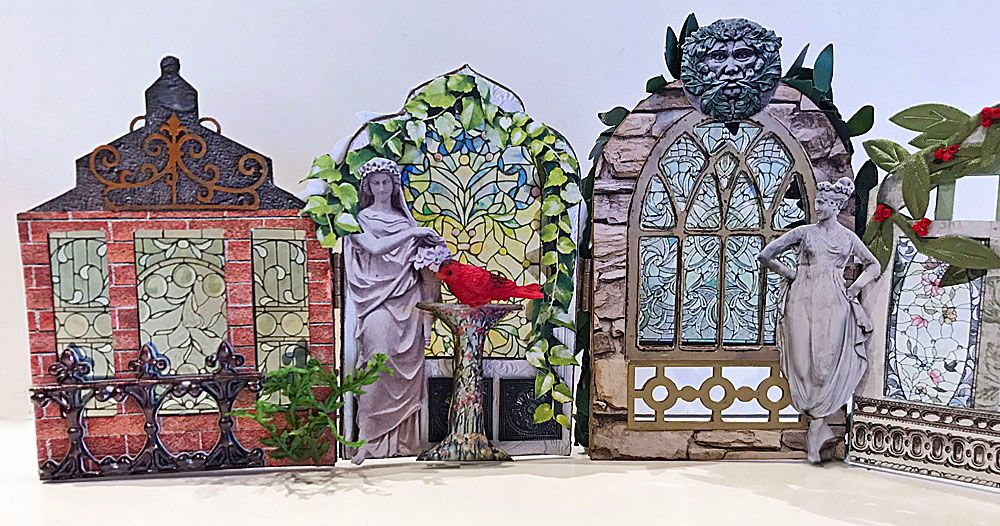
Creating a conservatory has been
something I have wanted to tackle. I
approached Leslie at Alpha Stamps about the idea, and she loved it; the end
result is the Victorian conservatory you see here, filled with lovely plants, a
beautiful fountain, and a nature-inspired chandelier.
You might be looking at this project and
thinking, "there is no way I could do this," but you are wrong. The entire structure comes as an easy-to-assemble kit, yeah, for kits! All that is required
for assembly is that you glue the die-cut pieces together using the tongue and
groves cut into the chipboard. Paint, decorative
paper, and paper images give the piece its architectural details.
Further in the post below, you'll find a tutorial covering
how I assembled and decorated the conservatory and the items
inside.
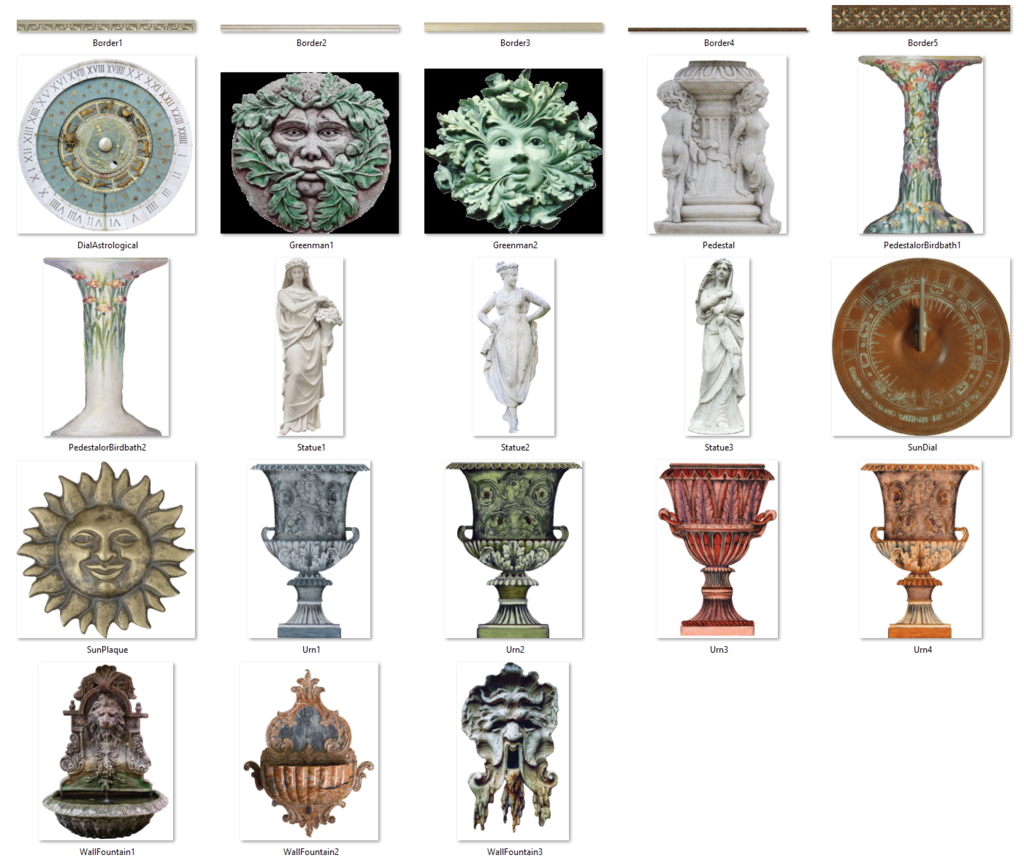
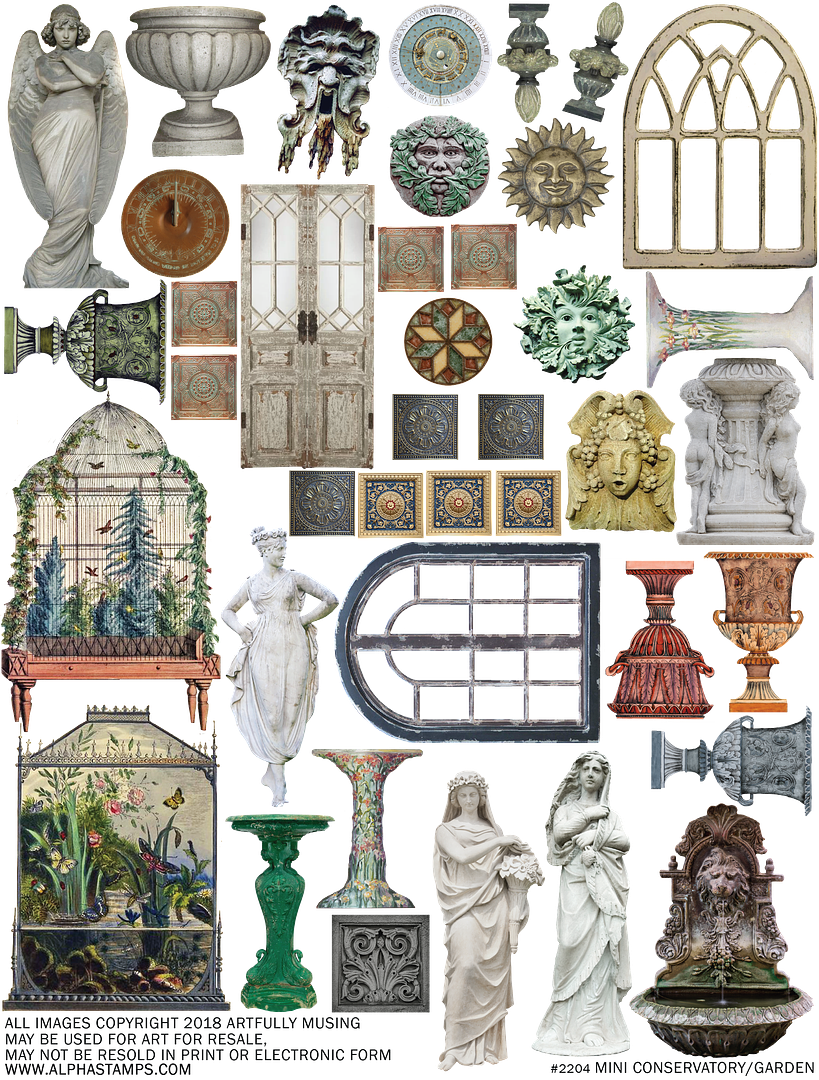
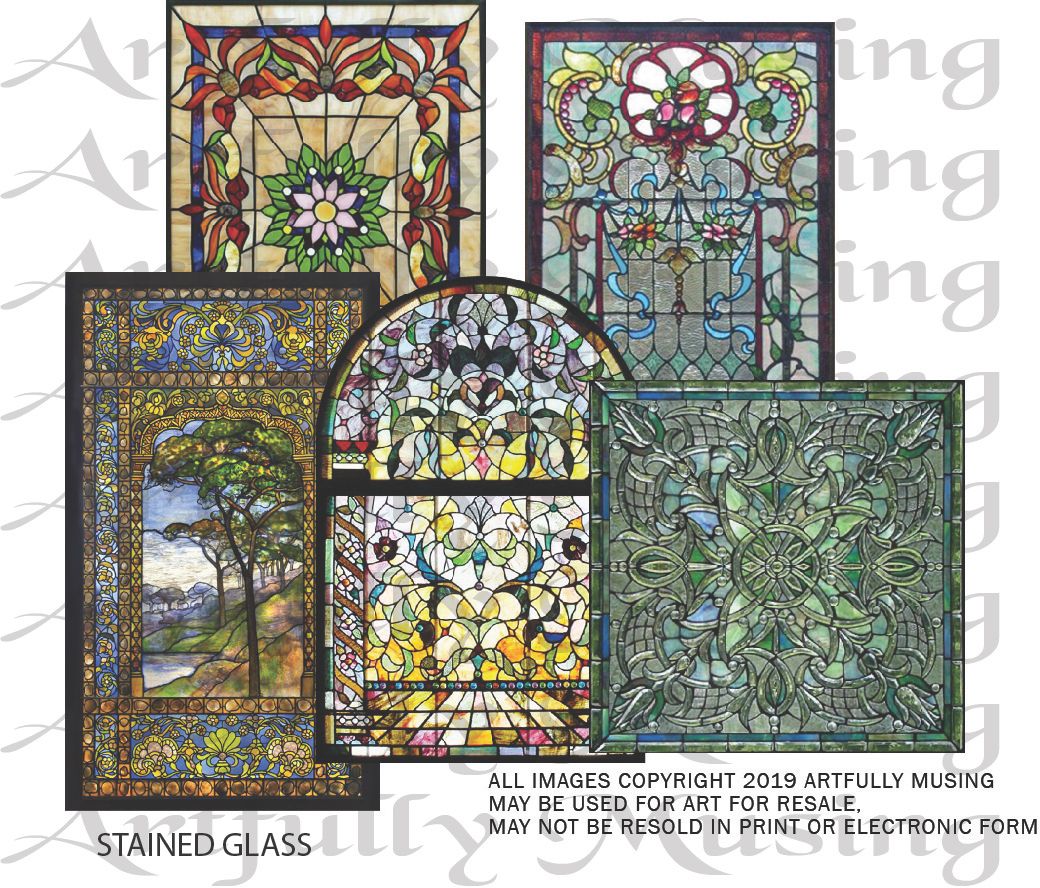
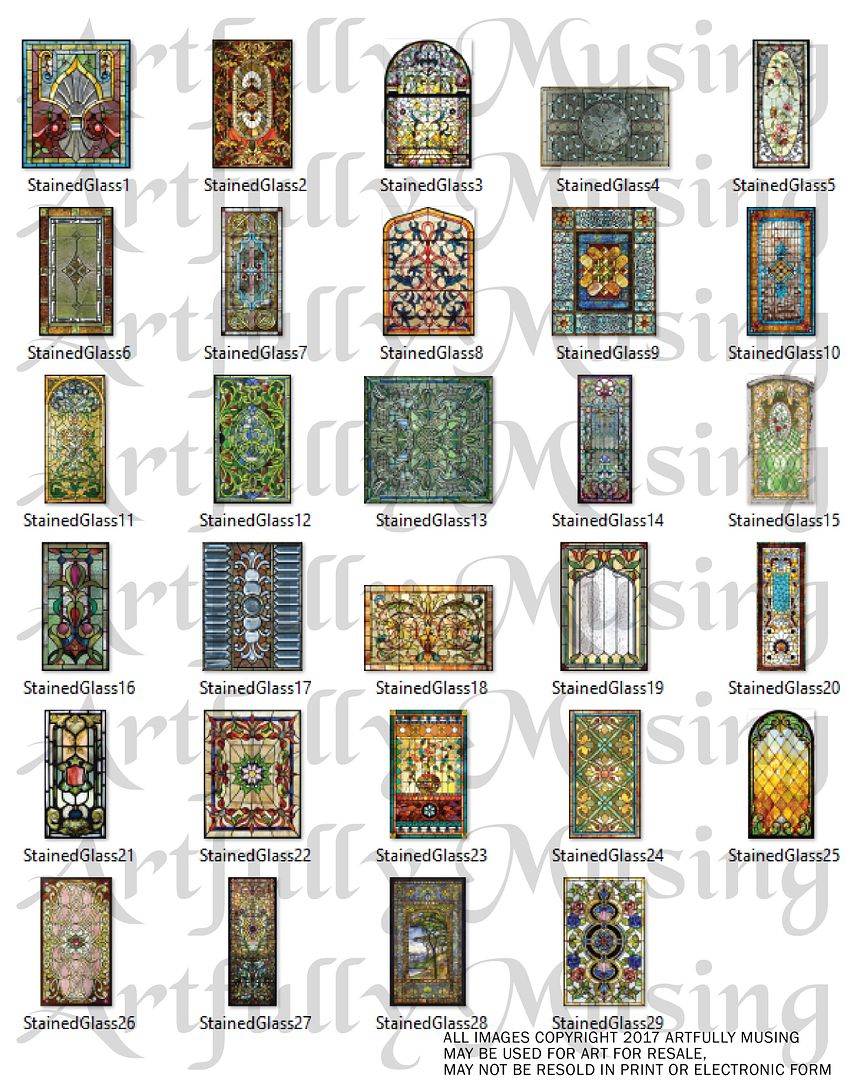
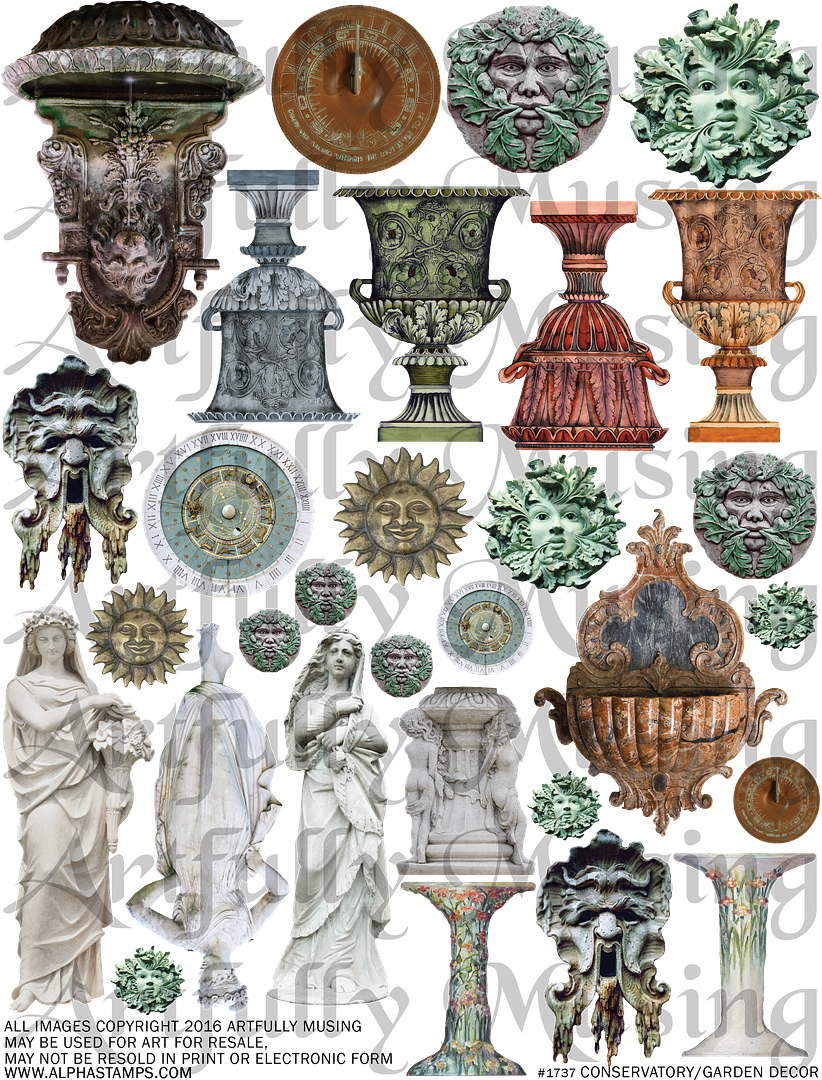
I've assembled a new Conservatory/Garden collage sheet and a companion digital image set for this project.
This collage sheet is filled with lots
of lovely images to decorate a conservatory or garden. These images would also work well for
standalone nature-themed artwork. Included are:
3 Fountains
3 Statues
4 Urns
2 Bases or Bird Baths
1 Pedestal
1 Sun Dial
1 Sun Plaque
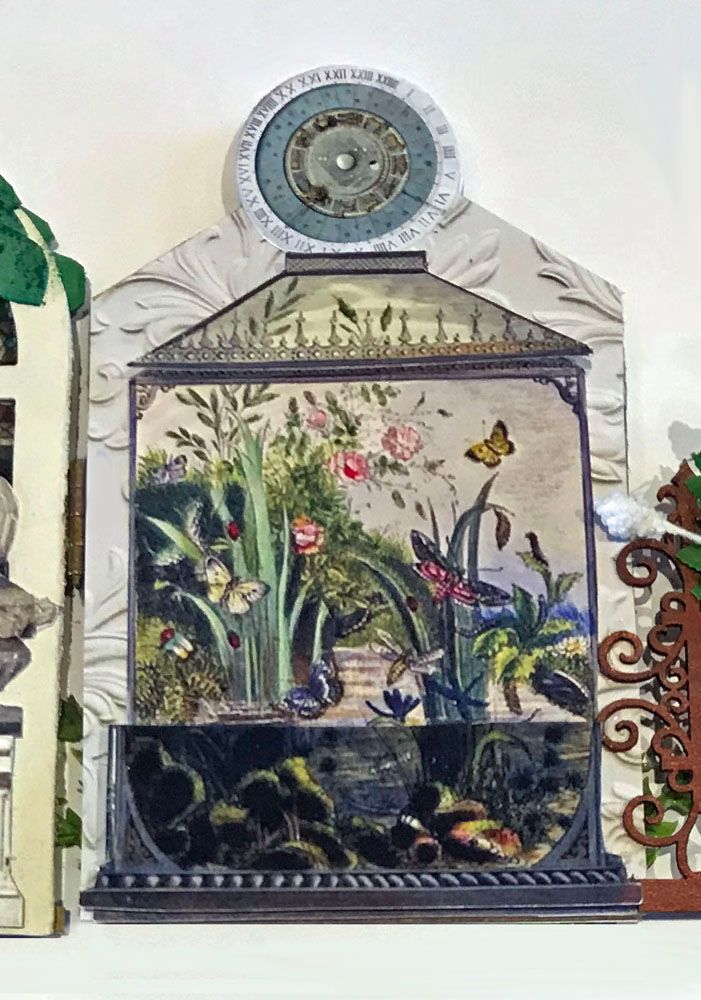
1 Astrological Dial
2 Styles of Green Man Plaques Click on the image below to purchase this collage sheet.
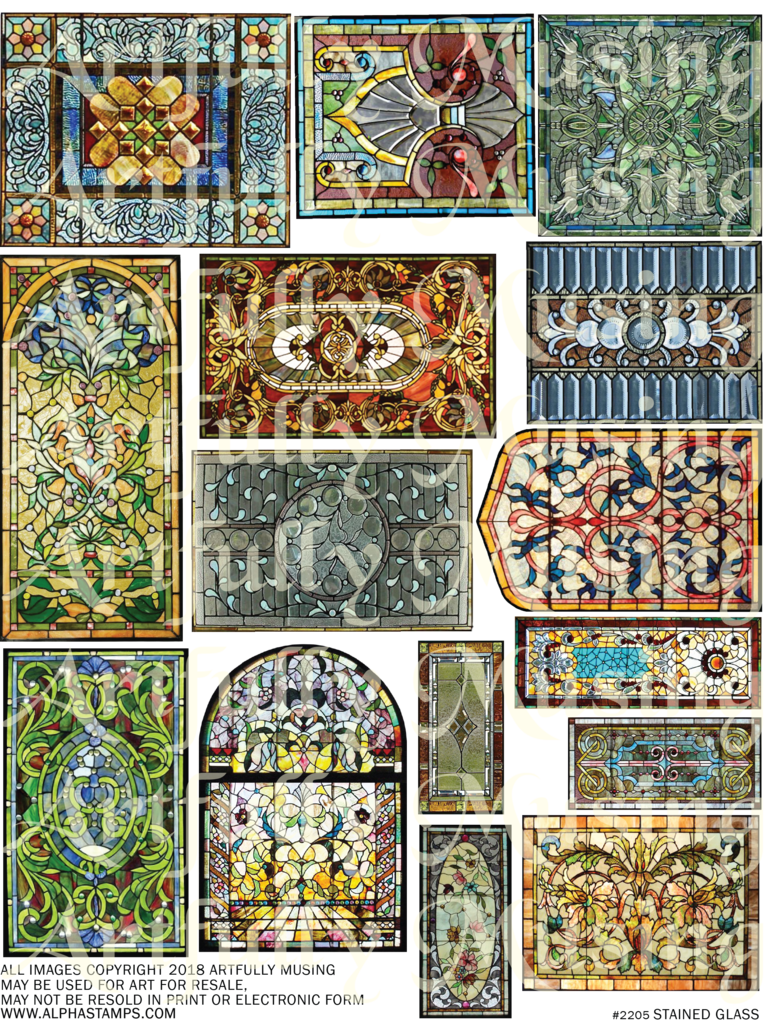
This set contains 23 images, including all the images from the Conservatory/Garden collage sheet, plus 5 borders. The border images are scaled to fit the
Conservatory kit carried by Alpha Stamps. All the images in this set can be easily re-sized for your project as
they are high-resolution (300dpi) PNG formatted images.
Click on the image below to purchase this digital image set.
TUTORIAL
THE BASE
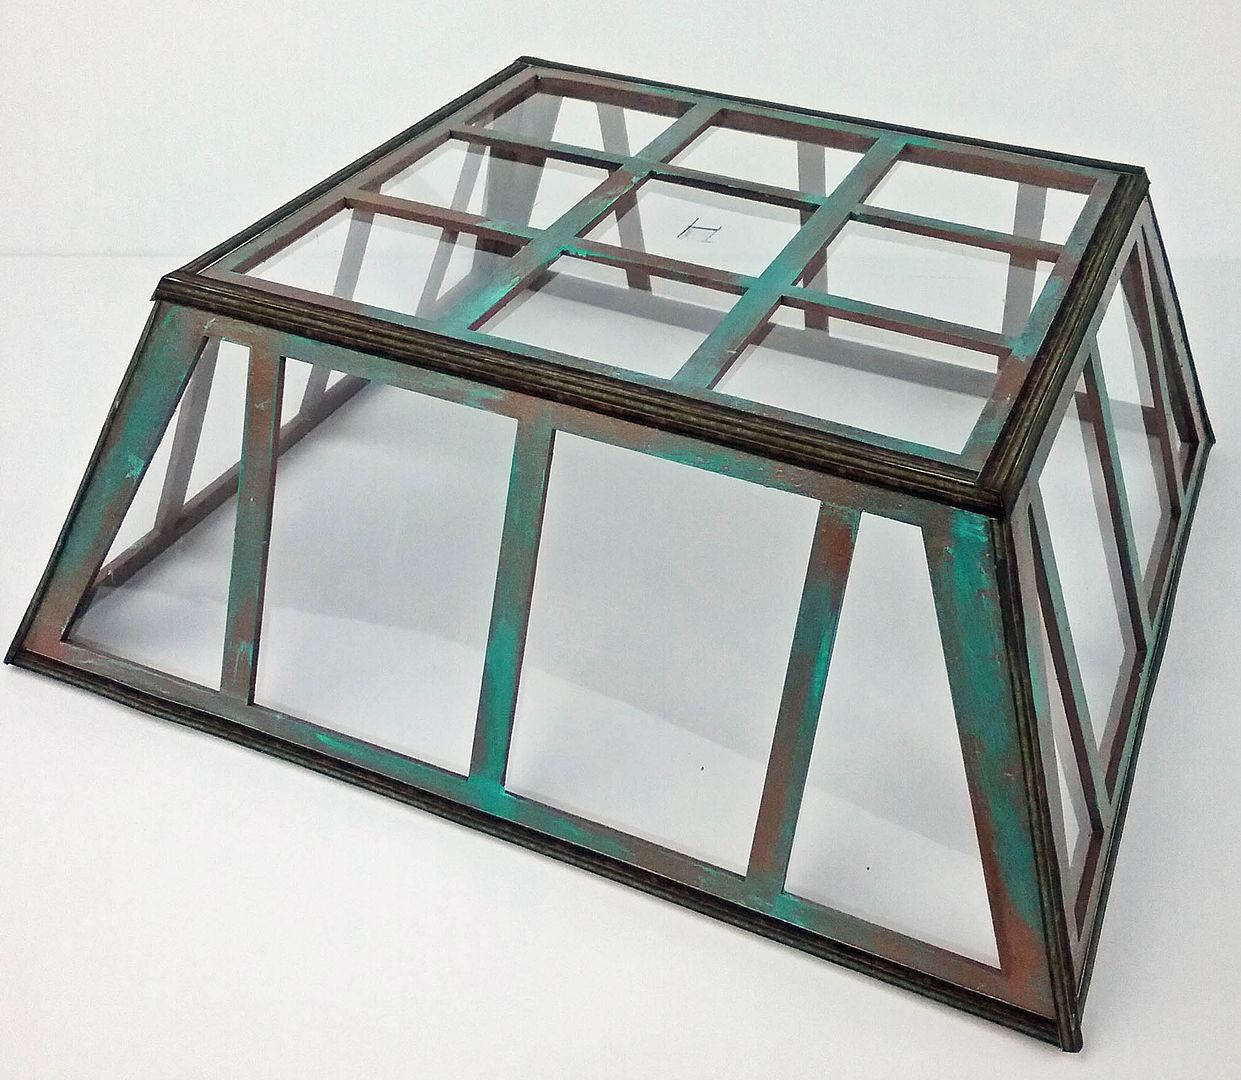
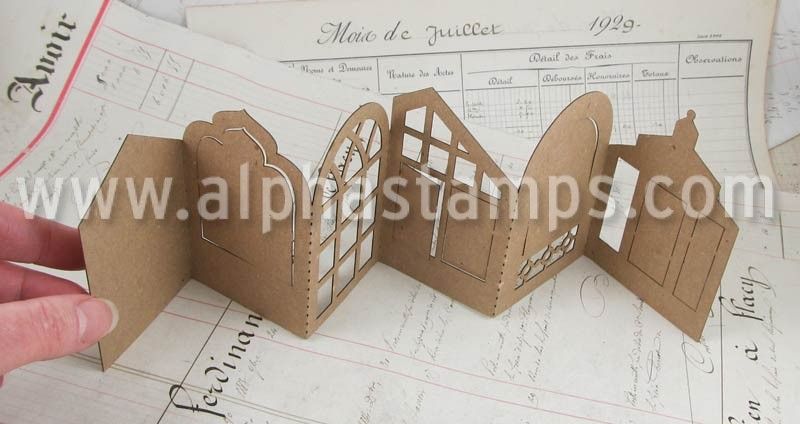
The base is made from a kit containing the top, sides, and a step.
I started by gluing the pieces together.
Next, I covered the base with cobblestone
scrapbook paper.
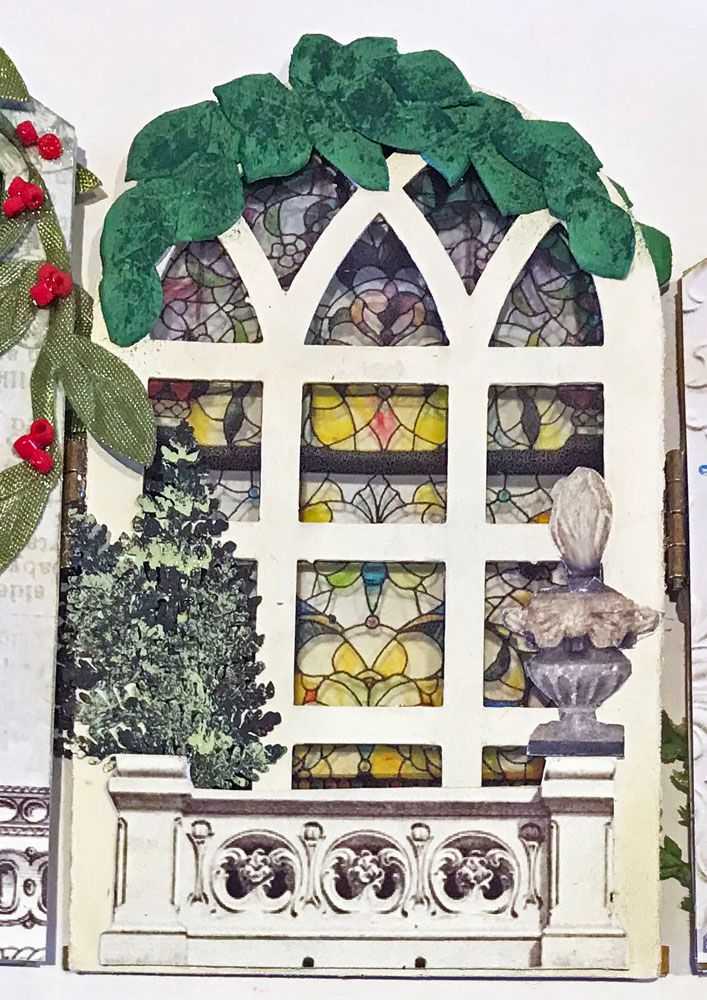
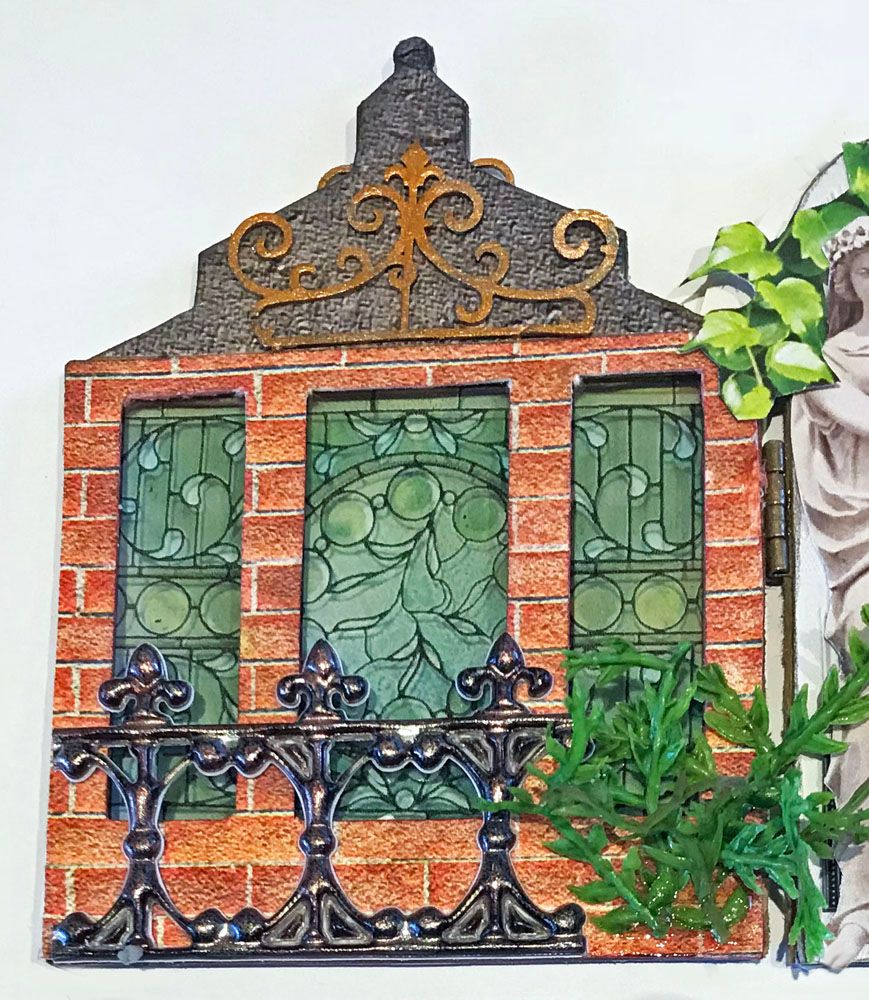
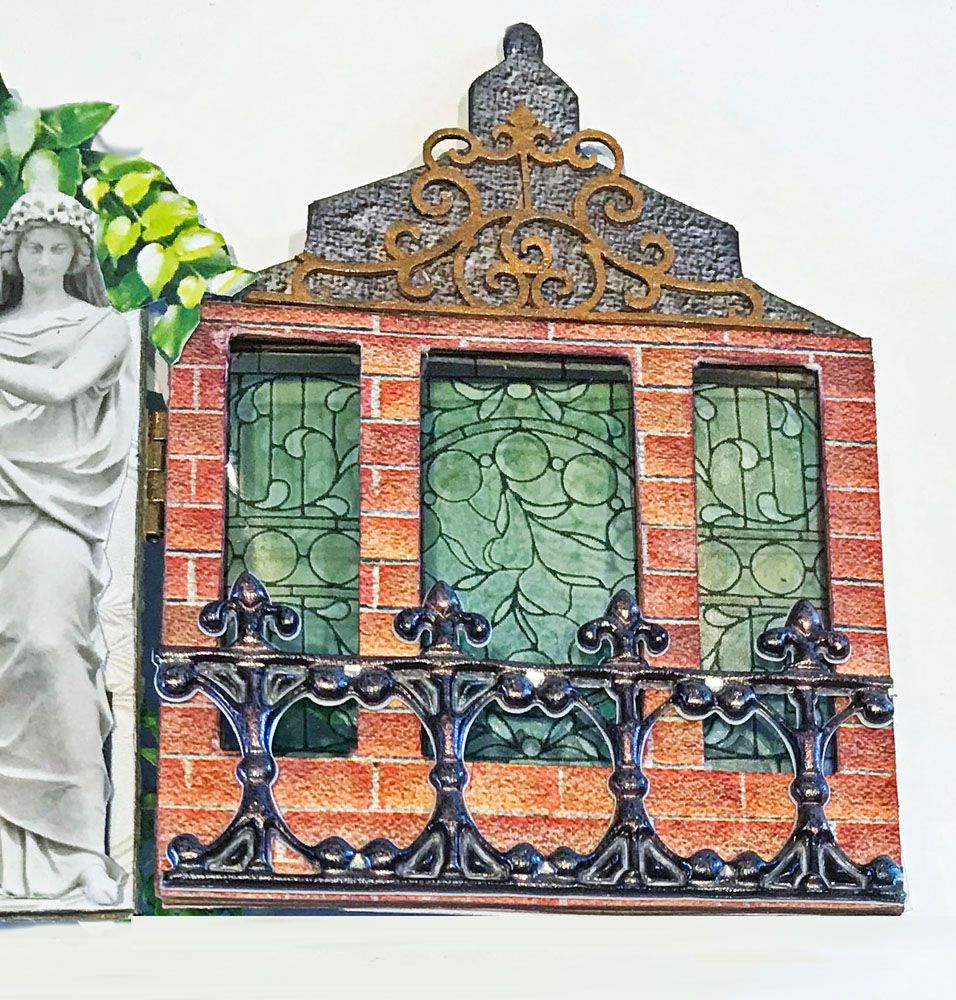
WALLS AND FLOOR
The conservatory kit contains everything
you need (floor, walls, doors, and roof) to build the conservatory. Below is a picture of the floor, sides, and
doors.
I started by painting the walls. The end result consists of three colors, the
original brown of the chipboard and two acrylic paint colors.
First, I applied Apple Barrel acrylic
paint (antique white). I used a
stencil brush and a taping motion to apply the paint. I used a paper towel to remove most of the
paint from my brush so I wouldn't apply too much paint. I also used a paper towel to remove excess paint
from the wall surface. The idea is to add the color without covering up all of the natural
browns of the chipboard.
Next, I applied Apple Barrel acrylic
paint (Khaki) using the same method as the previous paint. Again the idea is to not cover up all of the
original browns of the chipboard and the antique white acrylic paint.
I did this to both sides of the walls. Below is a close-up picture of the end result.
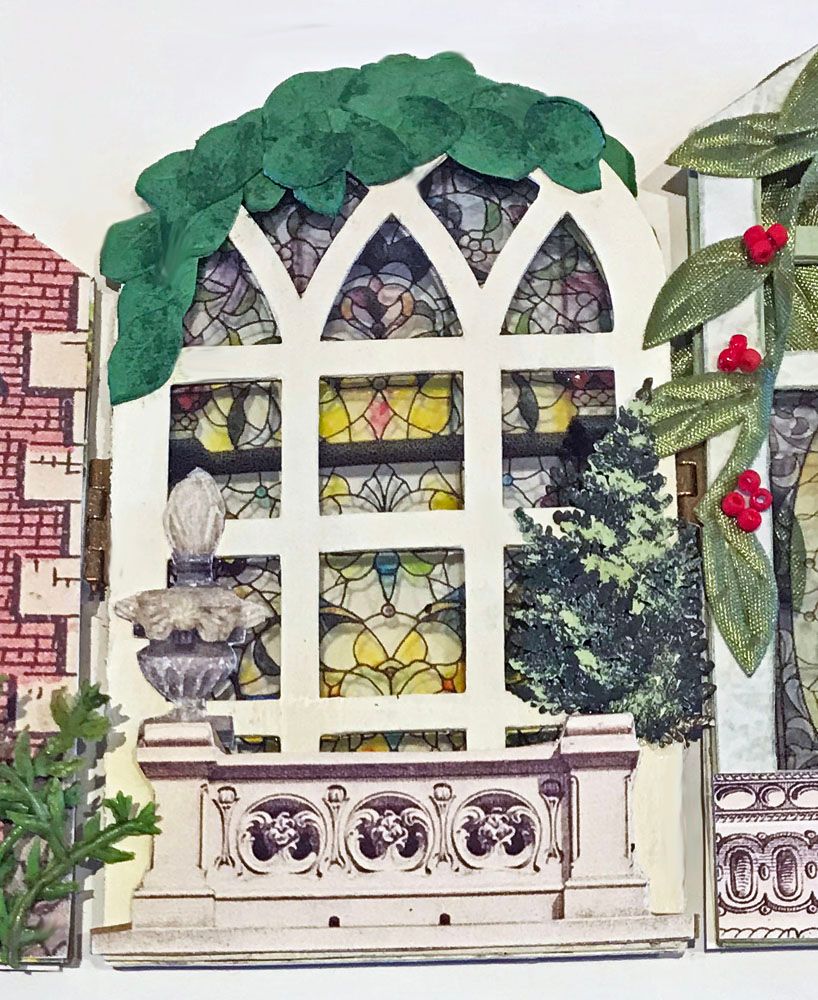
Next, I cut faux glass for the windows
using clear plastic that comes in 12x12 sheets. I cut the plastic slightly
larger than the windows in the walls, then glued the plastic to the walls using Glossy
Accents.
NOTE: Before applying the plastic to the windows, remove the film covering one side of the plastic.
If the Glossy Accents ends up somewhere you don't want (I do this all the time), use a Q-tip wet with Windex to carefully remove the excess glue. You can also use Windex to wipe away fingerprints.
Next, I glued three sides to the
base. Starting with just three sides made it easier to work inside.
I used 2 borders from the
Conservatory/Garden digital image set to decorate the inside.
I placed the large colorful board in the
middle of the bottom section of the walls.
I used the cream border at the bottom and top of the windows. In addition to looking architectural, the borders covered the edge of the windows where the plastic is glued to the wall.
For the floor, I used Double Dot Vintage Chiffon scrapbook paper. In the
center of the floor, I placed a large medallion from the digital image kit.
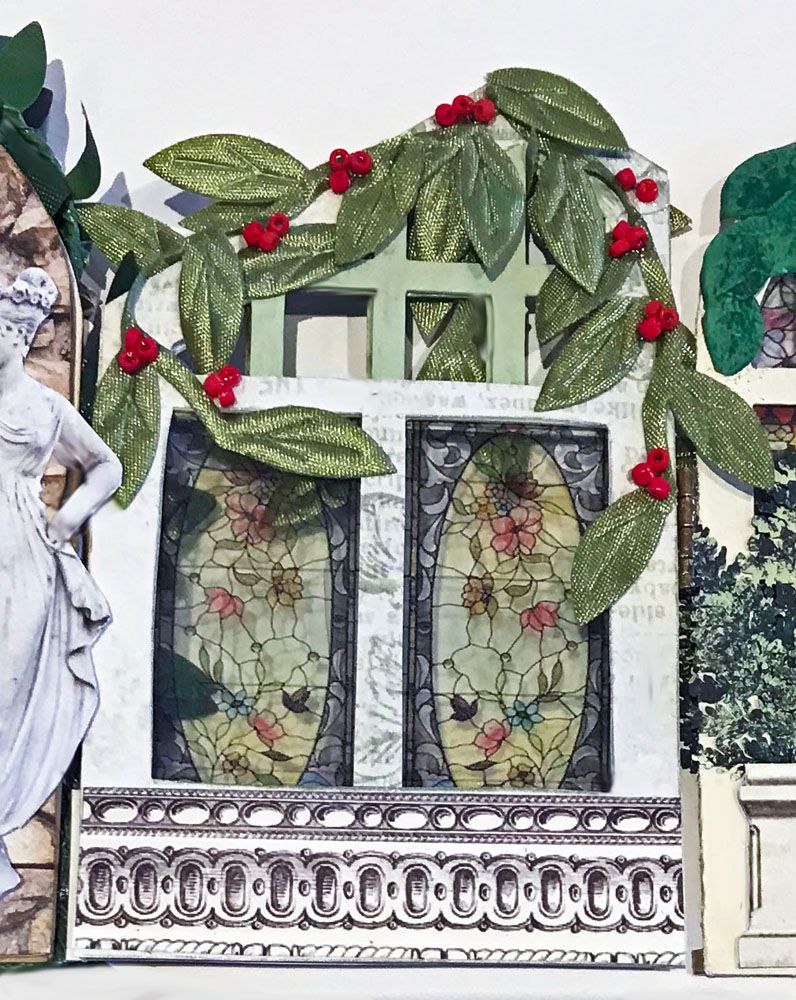
TRIMMING THE OUTSIDE
YOU'LL
FIND ALL OF THE BORDERS USED IN THIS PROJECT IN THE CONSERVATORY DIGITAL IMAGE SET
- First, I attached the roof base to
the top of the windows. I used the dark border to cover the tongue
and grove where the roof and walls meet.

- I then added the dark border to the
bottoms of the outside windows.
- Next, I added a wide cream border to
the edges of the walls where the walls meet. This gives you nice clean corners and hides the tongue and grove used to
hold the wall pieces together.
- To the bottom, I added more of the dark
border. I also added the border to the
open area on the floor where the doors will be attached.
- Finally, I backed the fancy cream border
with chipboard to make it pop out and glued it to the top of the windows under
the roof base.
MAKING MOLDS
I made paper clay panels featuring a Green Man plaque. I needed 10 panels,
three for the closed walls and 2 for each open wall, so I decided to use brass stamping to make a mold. This allowed me
to make as many as I wanted and reduce expenses.
GENERAL
INFORMATION
- You can make a mold from metal or
plastic objects and from rubber stamps. The mold you make can be used with various materials, including
UTTE, wax, soap, and clay. The mold can
withstand the heat of materials such as melted wax. For the purposes of this tutorial, I'm going
to focus on using paper clay.
- You'll want to select objects that you
repeatedly use. The object you choose
shouldn't have lots of holes or too much detail, as it is difficult to get a
good mold and remove the excess clay from the dried clay piece.
- The molding in the product is Ice Resin Silicone Molding Putty.
IMPORTANT:
Combining the materials from the two
containers causes the mold to set, so don't mix the materials until you are
ready.
Remove enough material from one of the
containers (it doesn't matter which one) to cover one-half of the item you wish
to mold. Roll the material into a ball.
Remove the same amount of material from
the other container and roll it into a ball. Rolling the materials into balls makes it easier to see that you have
equal amounts. The balls should be close
in size but don't fret if they aren't perfectly identical; it will still work.
Now you are ready to mix the materials
together. Mix the materials as quickly as possible until they are completely
blended and the color is a light grey, and there are no swirls. The material will start to harden in about 3
to 4 minutes, so it is critical that you work quickly.
Spread the combined material over your
object, making sure all of the object is covered.
I then flip the object over on a flat surface so that the edges around the object are flat.
Allow the mold to set, which takes
approximately 10 minutes. Remove the object from the mold.
Now your mold is ready to use. Fill the mold with paper clay and allow the
clay to dry for a short period to make it easier to remove from the mold. If you have the time, you can allow the clay
to dry in the mold. If you remove the
clay from the mold, keep it flat, as it will warp. After the outside is slightly dry, I put a
lightweight on the piece to keep it from warping as it continues to dry. Placing the piece on a paper towel will help
it to dry faster as the paper will draw the moisture out of the clay
I cut two sizes of chipboard for the panels and used the same painting technique as I did for the walls. The chipboard pieces measure:
2" x 2" and 1 1/2" x 1 1/2" for the side
panels (cut 6 of both sizes)
1 1/2" x 2" and 1 3/8" x 1 1/2" for the
front and back panels (cut 4 of both sizes)
I painted the clay pieces with
copper-colored acrylic paint and rubbed them with Patina Gilders Paste.
ROOF
Below are the pieces that make up the
roof. You'll also see the roof base that
I already discussed in the Wall & Floor section above.
- First, I cut plastic pieces for each of
the sides and the top and put them aside.
- I then glued the four sides to the top
piece and to each other.
- Next, I spray painted the roof with
copper-colored spray paint (this was much faster than hand painting).
- Then using my finger, I rubbed on Patina
Gilders Paste to give the roof a weathered copper look.
- I then glued the plastic pieces on the inside
of the roof.
- Just as I did with the doors, I glued
strips of the dark border to the edges of the plastic to hide where it was glued
to the roof windows.
- I also added the dark border to the
outside of the roof as extra detail. It
also hides the seam between each of the windows and the top and side
windows.
- To accommodate the chandelier, I cut a
small hole in the center of the top window (in plastic).
To support the pineapple final on the center of
the roof and to accommodate the chandelier chain, I painted a stackable die-cut
label and inserted an eye pin, cutting the pin short enough to make a loop for the
chain.
Next, I glued the roof to the roof base.
After attaching the roof, I added knobs
as finals to each corner.
The last architectural detail is the brackets that I added to each corner.
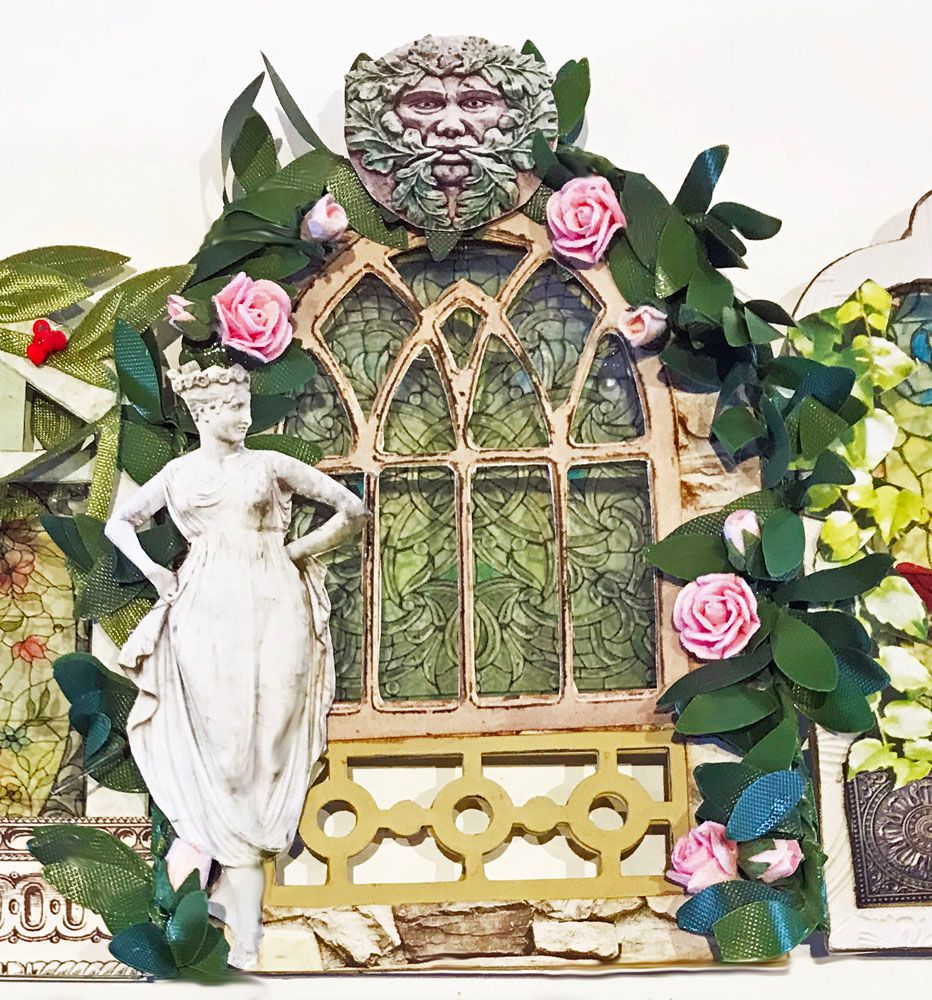
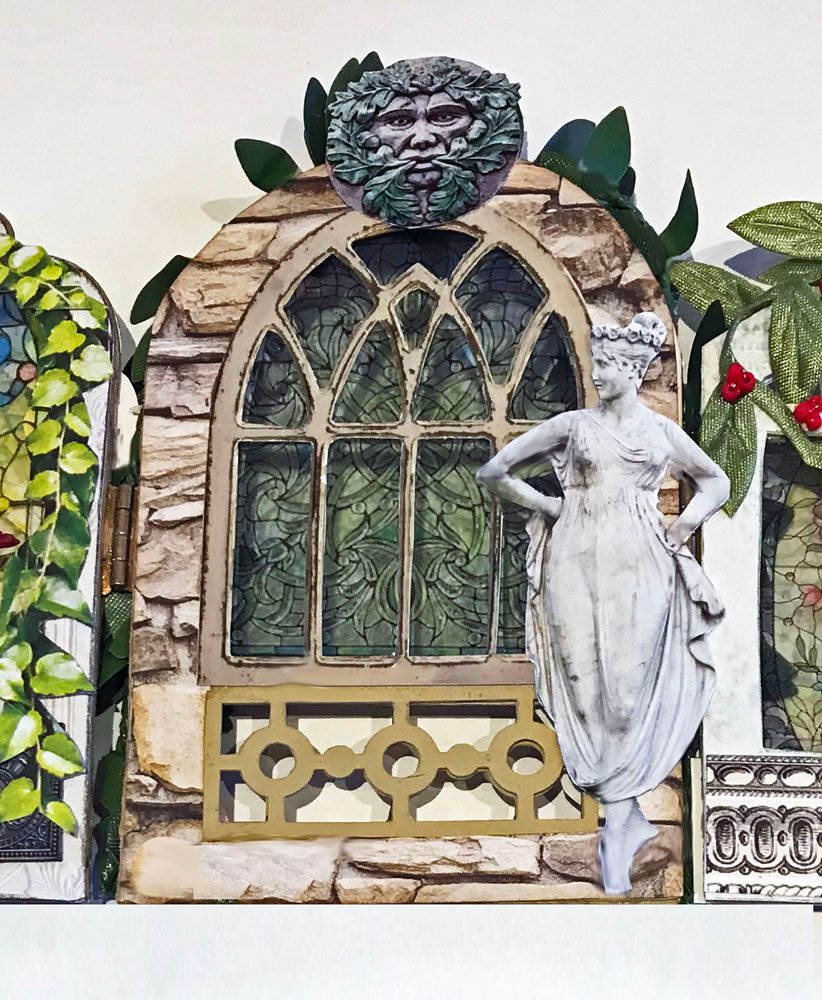
DOORS & OUTDOOR DECOR
- I painted both sets of doors copper.
- I cut plastic pieces (like the windows)
for each door. I glued the plastic to
the door and used the dark border to cover where the plastic is glued to the
door.
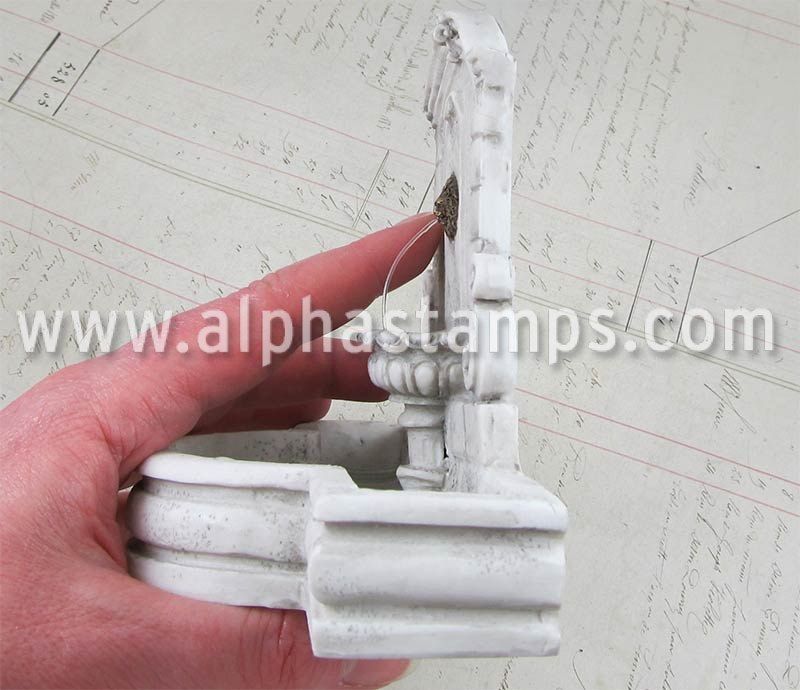
- I glued the door behind the fountain in
place (closed).
- I glued the front doors in place (open).
Flanking the front door are two pillars supporting an astrolabe and a sundial. The astrolabe is made from stuff in my stash. The sundial is a separate piece from the
column. Notice the cute frog sitting on
the dial.
As a final touch, I added Flower Soft to
some of the edges around the cobblestone.
Another option for external décor is a
garden gazing ball with a stand.
CHANDELIER & FOUNTAIN
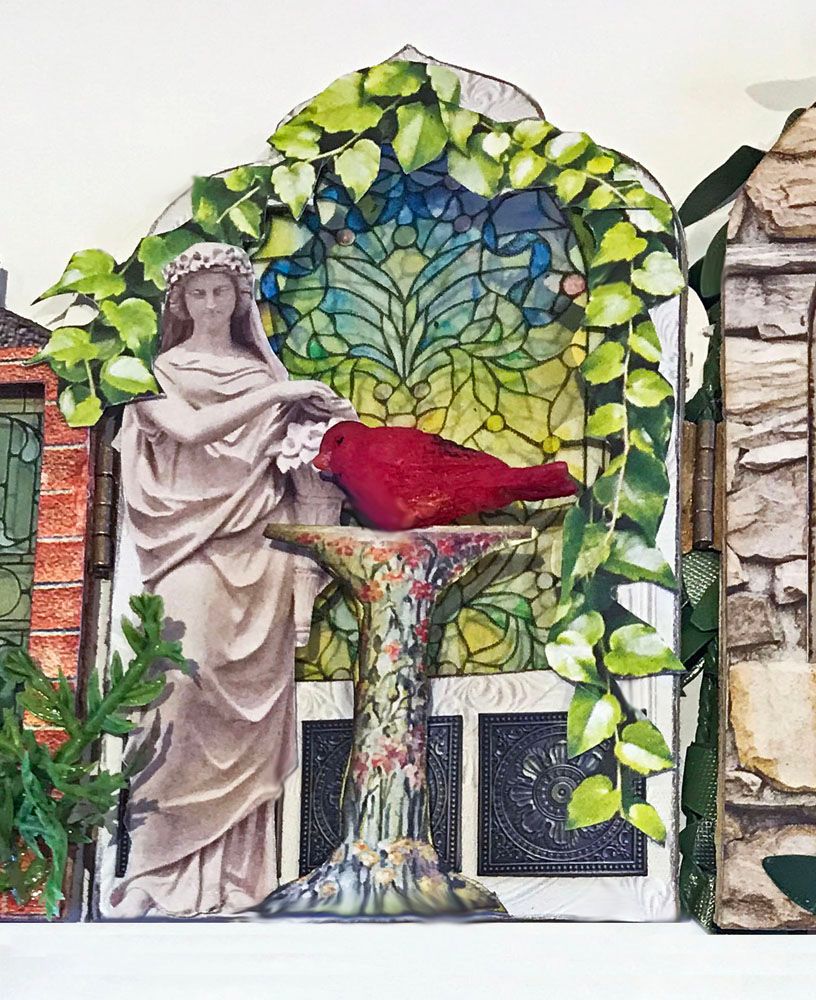
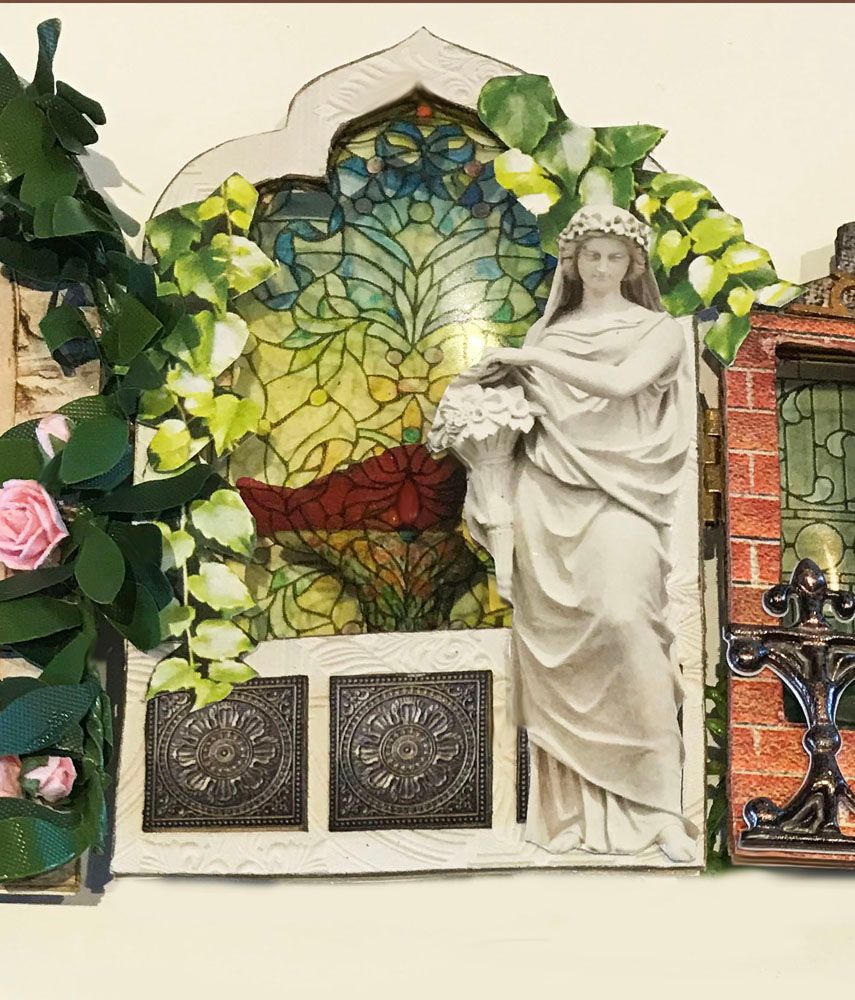
In the back of the conservatory is a beautiful fountain. It's one of those things that when I see it, I think, "I need to build a conservatory to showcase it." Notice the little frogs
sitting on the fountain.
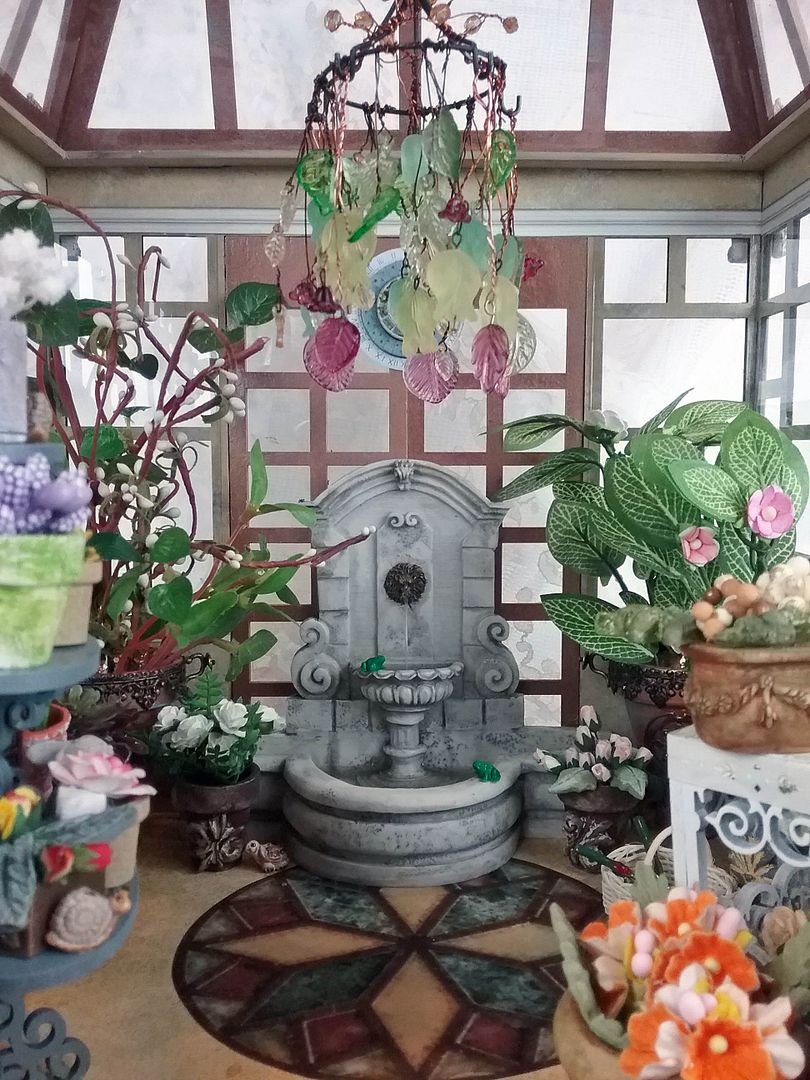
In the fountain base and pedestal contain resin water. Spraying out of the lion's head is a stream of resin water. How cool is that!
CHANDELIER
The inspiration for the chandelier came
from a life-sized real chandelier.
If you want to make a chandelier like
mine, you'll need a mix of leaves (with holes) and flower beads. Acrylic and Lucite look best as often these materials
are semi-translucent.
- I started by inserting the wire in the holes
of the leaves and flowers and wrapping the short end of the wire around the
long end of the wire (easy peasy).
- For the
flowers, I used a headpin inserted through the hole in the flower, sniping away the excess leaving enough to bend the pin to form a loop.
- Next, I inserted a wire through the loop and
wrapped the wire just like I did for the leaves.
- I also inserted a wire into a few beads and
wrapped the wire just like the leaves. Below are all the pieces with wire.
Next, you'll need something to hang the
leaves, flowers, and beads from. The
hangar I used comes from my stash.
If you don't have something like this, you could use a bangle bracelet and wire to create something that functions
like the piece I used.
I wrapped the long end of the wires attached
to the leaves and flowers around the hanger. I wrapped the beads around the top of the hanger. The hook on the top of the hanger hooks into the chain
hanging from the roof. Notice how the beads are wrapped around the top of the hanger.
TABLES
On the inside of the conservatory, I used
two different tables to hold some of the pots. The first is a lovely ornate 3 tier stand.
I first assembled the stand and then
painted it a teal color.
Below you can see how the back side of
the stand looks with the flowers. This
is the side you see through the window.
Below is the front of the stand that you
see from inside the conservatory.
The second plant table is also made of
chipboard which I painted white.
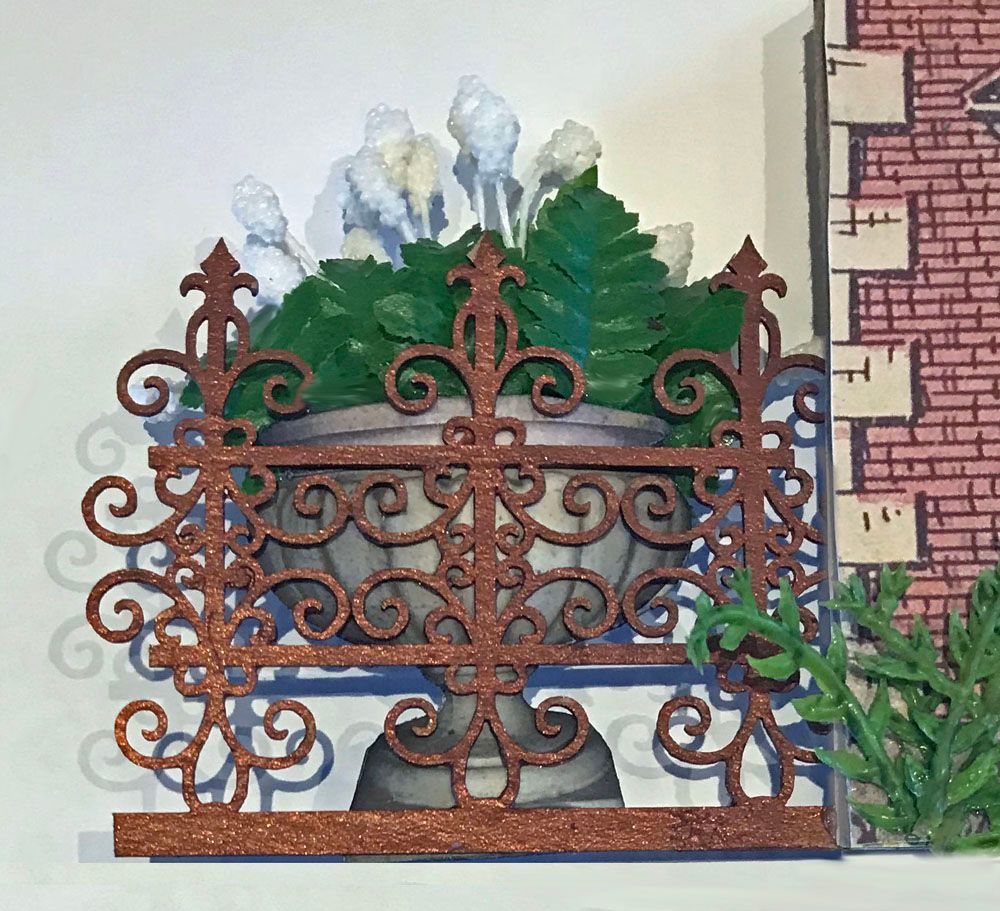
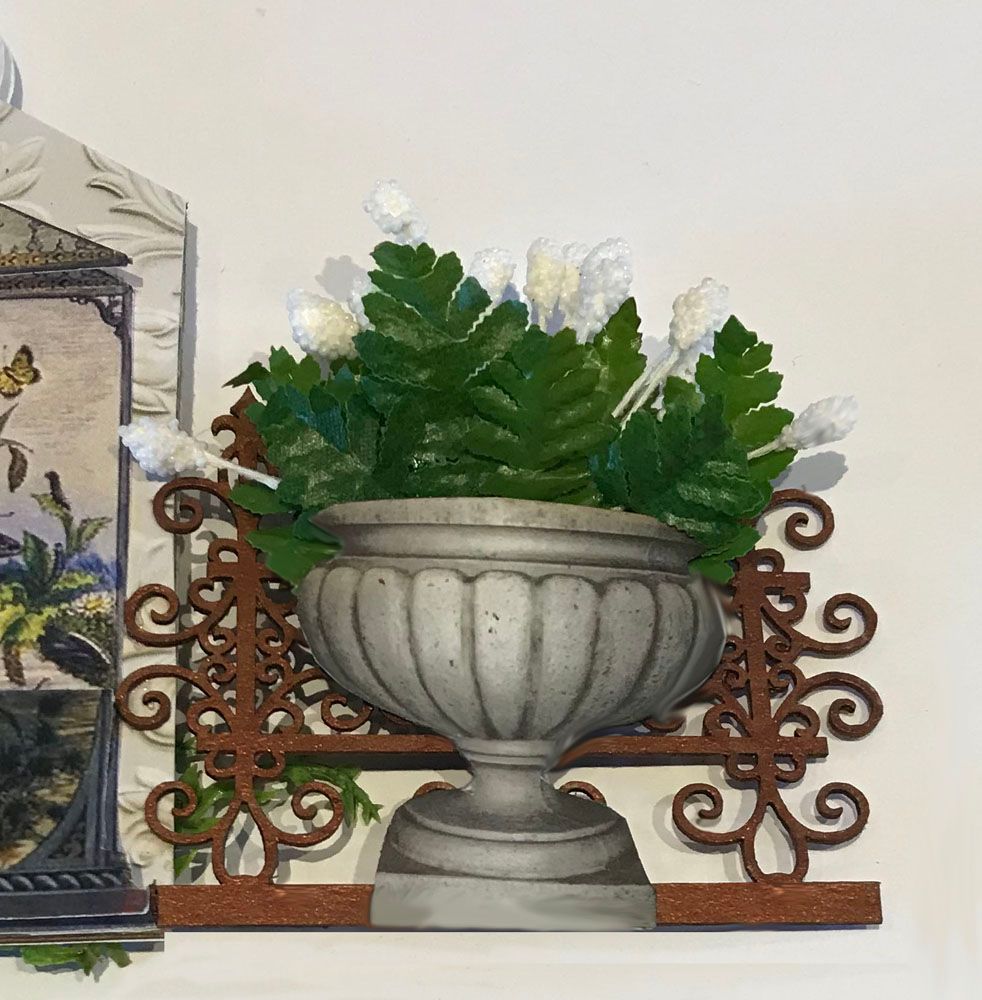
POTS
Alpha Stamps is carrying all kinds of
miniature pots that would work well for a conservatory or garden. Most of the flowers in the pots are also carried by Alpha Stamps (you'll find them in the supply list at the bottom of the post). The rest are from my stash.
For some of the pots, I started by
adding decorative elements. Below are two wooden pots decorated with Dresden and a paper clay shell. If you want the shell to curve around the pot, you need to bend it on the pot while the clay is wet. Make sure it stays curved on the pot as it
dries.
Next, I painted the pot with acrylic
paint. Once dry, I used my finger to
brush on a different color of acrylic paint. This gives you an aged look. Below you can see two different sizes of wooden pots using this technique. Some of the leaves in
the pots are made from paper clay using 2 different silicone leaf molds. Using a mold is great, as you can make as many
as you want.
Another option is to make the pots look
like an urn. I turned a smaller pot upside down in the pots below and glued it to a larger pot. Next, I painted the pots copper and rubbed
them with Patina Gilders Paste. Unlike
the wood pots, I added decorative elements on top of the paint this time. Notice the Dresden and sparrows compass brass piece, which was easy to bend around the pot.
If decorating pots is not your thing, you'll
like this set of pots pictured below that already have dimensional decorations. If you don't like the color, just paint
them.
Below you can see the finished
pots. I painted them with one color and
then rubbed the raised decorative bits with another color. The leaves in the pot in the middle are clay made from a silicone leaf mold.
Below are more wooden pots that paint in various
colors.
The simplest option is the
pre-decorated pots shown below. Once
again, all these pots have clay leaves.
Below are the two leaf molds I
used. Each has several styles of leaves.
You may have noticed that many of the leaves in the pots are
curved. This is accomplished by taking
the wet clay out of the mold and bending it so that it dries curved. Usually, you need to make sure that the clay is flat, as it will warp. In this case, let it
warp and curl.


 The leaves at the top are made by cutting up Green Embossed Dresden Leaves. Each leaf has 5 points, so I used each point to guide where I cut. Using a stencil brush, I lightly applied dark green acrylic paint to give the leaf some contrast. It also helps to bring out the embossing on the leaf.
 The leaves on the side are from the Dollhouse Laser–Cut Fern Leaves. I first painted them brown and then, using a stencil brush, lightly applied dark green and then light green paint.


.jpg)