Image

Bridging Older Tasmota Hardware Into Apple Home

The Tasmota firmware is a popular choice for flashing to a range of Espressif microcontrollers to turn them into smart home devices. If you have such devices in your house, you might wish they were easier to integrate with the Apple Home platform. As it turns out, though, there’s a convenient app for that.

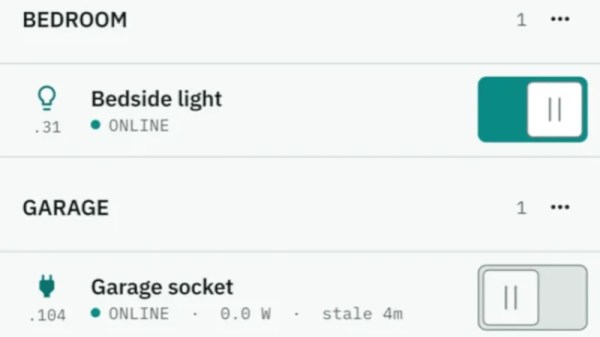
[Christof Müller] built an app called Tasmoshelf for just this purpose. Its primary claim to fame is that it can easily help port a Tasmota-based setup into the Apple Home universe. It can achieve this without requiring a Home Assistant server or MQTT broker or any other workarounds. This is thanks to the fact that Apple Home is compatible with Matter technology, as are ESP32 devices running Tasmota 13 firmware or newer. They can natively jump on an Apple Home setup, and even act as a bridge for older ESP8266 devices that can’t speak Matter themselves. The device is able to run network scans to automatically discover devices and advise whether they can hook up directly to Apple Home, or whether a bridge is needed.

If you’re running Tasmota devices and want to easily integrate them, you might find Tasmoshelf a useful addition to your smart home setup. Just note that it does require a one-off purchase if you intend to use it beyond three devices, a limit which some might find somewhat restrictive.

We’ve looked at Tasmota in detail before; it’s a great way to whip up a smart home to suit your own desires. Meanwhile, if you’re whipping up your own nifty integrations, don’t hesitate to let us know on the tipsline.
Image

Your Laptop Keyboard, On Another Device

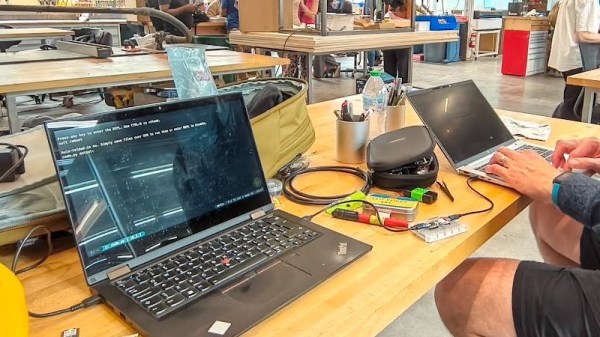
It’s likely many of us have been in the position of first set-up on a machine such as a Raspberry Pi, and had keyboard problems. Either no spare keyboard is to be found, or a cluttered desk has to find extra space for a full-size keyboard. [Þórarinn] and [Arni] have a handy solution: use the existing keyboard on your laptop.

His approach is both ingenious and simple, as it’s only the K part of a KVM. On the laptop end, it’s a serial terminal, without the receiving side. The serial port in question is an RP2040 board which implements a USB-to-serial port. This serial connection goes to another RP2040, which does the ingenious bit. It’s a serial-to-USB HID keyboard. All of this means that keystrokes on the laptop are sent down the serial connection, and appear on the Pi or whatever computer as a USB keyboard as though typed locally. The mildly annoying first set-up can be done, and then it can be run via SSH or whatever other remote access protocol as normal. The code is provided, so anyone with a couple of RP2040 boards can do it.

We like this hack, because we’ve had the annoyance of needing a keyboard to set up what would otherwise be a completely headless machine too many times. It’s one to store away at the back of your mind, for those rare improvisational need-an-extra-keyboard moments.

Thanks [Henk] for the tip.

Image

Read A USB Logitech Racing Wheel On An ESP32‑S3

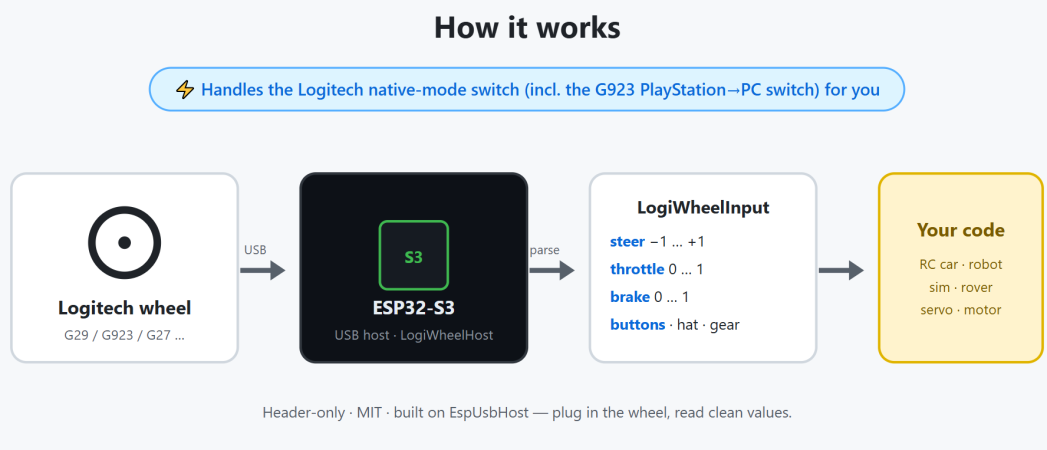
Now that MCUs like the ESP32-S3 are quite capable computer systems including USB host functionality, it only makes sense that you can connect USB peripherals like Logitech racing wheels to them. Of course, these aren’t basic HID USB devices, so they require a bit of setup to make them start spitting out the data updates which we’re interested in. Making this process easy is the goal of the LogiWheelHost project for ESP32-S3 by [Joel Kometz].

This single-header library supports the G29, G923, G920, G27, G25, DFGT, Driving Force Pro wheels, building on top of the EspUsbHost project. As explained in the README, these racing wheels do not start streaming all updates to their controls once powered on, but boot into a restricted mode in which only neutral or combined-axis data is sent.

To change this you need to trigger the so-called native mode switch in which far more detailed information as well as updates on extended features like separate pedals, all buttons and the gear shifter become available. This is done by sending a HID output report to the USB device, which is easy enough.

In addition to handling this detail the library also provides an API using which obtaining and using these controller states in your own code should be quite easy. Presumably the library will work on or can be ported to other ESP32 MCUs that support host USB mode, so this might be good news for anyone who is looking to do more with that old Logitech racing wheel.

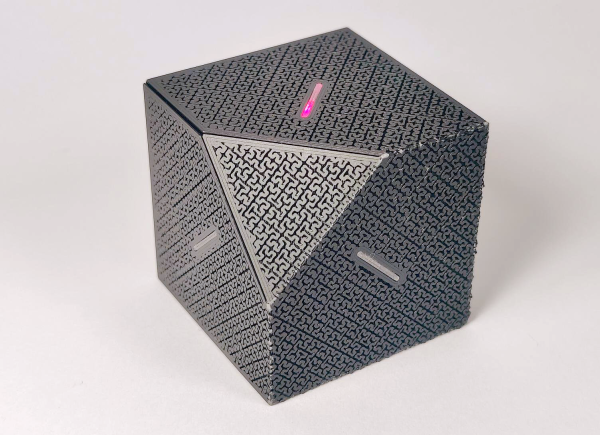
A desktop Borg cube. Just kidding, it's a buttonless, cube-shaped timer with a really neat 3D-printed enclosure.

FlipBuddy Is Borg, You Will Be Assimilated

When you think about it, time is all we’ve really got. Where to go from there is ultimately up to you. Maybe you use an app to track every task, or just go with the onboard timer. But that can be a lot of steps to begin with, and then the phone screen goes dark again. For some people, the whole out of sight, out of mind thing will kick in. At worst, you get distracted, start doing something else, and then feel guilty and frustrated when the timer starts going off.

The guts of FlipBuddy inside the unfurled enclosure.But there’s hope for us visual simpletons, and the purveyor of that hope is [Edris] of Ponderly Robotics. You see, [Edris] created an extremely easy-to-use timer that looks like something you’d find on Captain Picard’s desk as a token of defeating the Borg. But the affably-named FlipBuddy is far more useful than that description implies.

[Edris] uses the open-source FlipBuddy every day, and swears by its simplicity. The point is accessibility, and respect for privacy. That said, there’s a companion app to provide insight.

Basically, you assign a task to each cube face. Choose one, and place the cube with that side facing up. FlipBuddy wakes up, connects to WiFi, and then pushes your session to the cloud, bypassing the need for your phone.

Time to switch tasks? Just put the new side face up. When you’re done for the day, use the stop face, which we’re hoping means to set it on the knocked-off corner.

You don’t need much to make FlipBuddy come to life. [Edris] used an ESP32 (an S3 SuperMini or similar will work), an MPU6050, six WS2812B LEDs, and a 3.7 V Li-Po cell. The beautiful, 3D printed origami mesh enclosure prints as a single, flat piece, and you get to fold it up around the internals and make your new buddy come to life.

Part of the point of FlipBuddy is that it can become as intuitive as punching a chess clock. So if it’s buttons you’re after, check out this simple Pomodoro timer.

Image

Easy Theremin Uses ESP32

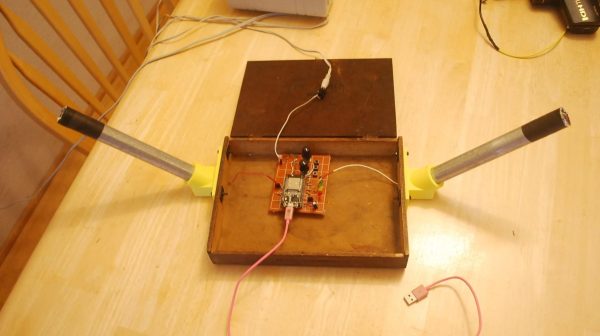
The Theremin is that classic electronic musical instrument that makes those weeee-ohhhhh noises which were so popular in mid-century science fiction movies. Mid-last-century, that is, because this century is just beginning. In any case, you could build one with old-school analog electronics, or you could go a more modern route, as [ericCycles] did.

The build relies almost entirely on an ESP32 microcontroller with minimal supporting circuitry. Like any other Theremin, pitch and volume are controlled by moving hands closer or farther away from two antenna. In this case, the ESP32 uses its capacitive touch circuitry to detect effectively detect hand proximity to the two antenna in question, and uses those values to control the pitch and volume of a synthesized waveform. That waveform is then pumped out over the onboard digital-to-analog converter for playback on external speakers.

If you want to build a simple Theremin-like instrument quickly and easily, it’s hard to beat the simplicity on offer here. We’ve featured some other fun variants over the years, too, like this version that uses time-of-flight sensors for the human interface.

Continue reading “Easy Theremin Uses ESP32”

Image

RC Telemetry Board Lets Virtual Crewmember Help You Race Better

Logging and telemetry in remote controlled racing is a great thing, and not only does [jwachlin]’s Open RC Spotter do a fantastic job of that, it has quite a few clever tricks up its sleeve that make it extra special.

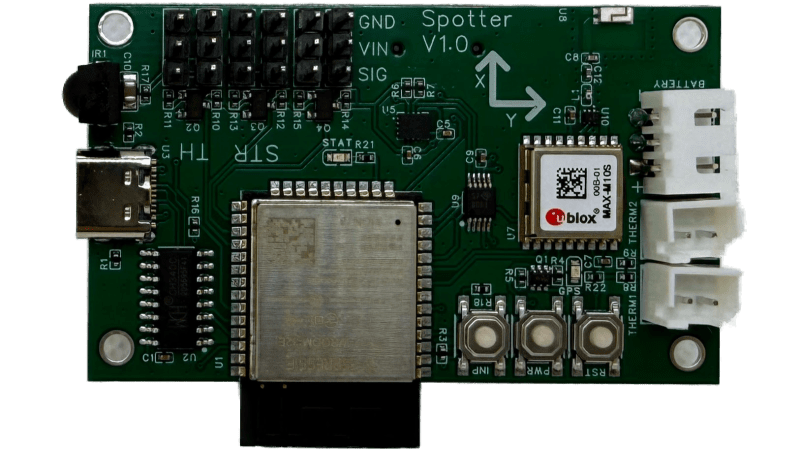
Open RC Spotter is an ESP32-based hardware platform for high performance RC car racing that reads from various sensors (including IMU, GPS, temperature, battery, and IR receiver for IR lap beacons) to create a filtered stream of readings that include position, velocity, lap time, battery voltage, and more.

Image
Got RC car telemetry? Feed it to a virtual race engineer for real-time feedback.

This data gets logged to an SD card, but can also be broadcast wirelessly via ESP-NOW to a receiver that can in turn send it over serial USB, or do whatever else one wishes. There’s also a neat feature that fires up a temporary WiFi access point on demand so log files can be downloaded with a web browser, no need to hook up a cable.

So far, so cool. But there’s still another nifty feature. [Update: originally the project had a link to the sim racing companion application Crew Chief. The developer clarified that at this writing, Open RC Spotter only supports its own Open RC Crew Chief application and not the similarly-named Windows sim racing assistant.] Open RC Spotter supports the Crew Chief telemetry protocol. Crew Chief is a piece of free Windows software that serves as a companion application for sim racing. It acts as a virtual race crew member, providing spoken information based on live telemetry read from supported racing sims.

Since Open RC Spotter supports the same telemetry format, one can use the virtual race engineer with RC car racing by simply feeding Open RC Spotter‘s serial data to the Crew Chief application. The RC telemetry data isn’t as rich as what comes from the racing sim APIs, but it’s more than enough to be useful.

People come up with all kinds of neat ideas when it comes to RC racing, and most of them depend on having access to good data. For example, a load cell in the steering mechanism can provides the data for force-feedback steering. We’ve even seen LiDAR and a depth camera used to automatically compute optimal racing lines.

Image

The ESP32 Gets A Web Browser

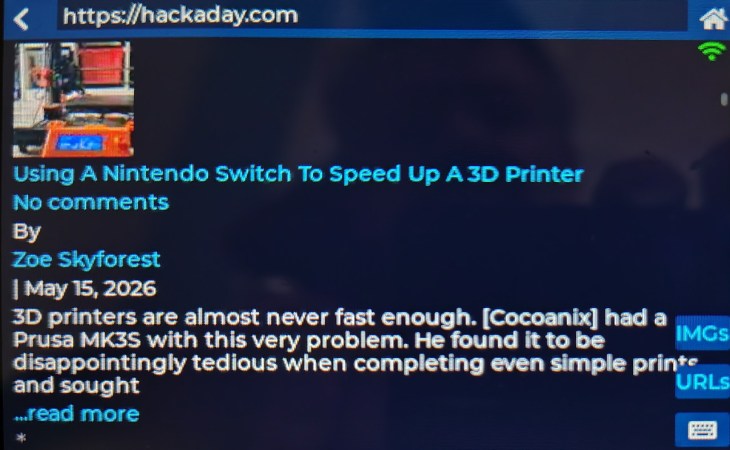
At the Hackaday Europe conference in Italy earlier in the year, we were shown a rather interesting device. The work of [Alun Morris], it was an ESP32-powered Cheap Black Display board, and it was running a web browser. Definitely an achievement.

Lest you imagine that it was sporting the latest and greatest in browser technology, we must disappoint you. The browser in question is a very basic text mode device, but it did happily retrieve Hackaday, which should be the only test a browser should need to pass.

Under the hood it’s running FreeRTOS, with separate HTML retrieval and tokenizing, and UI processes. It can fetch web pages directly, but there’s also a server-side proxy for difficult sites, and for creating image thumbnails.

An ESP32 is a powerful microcontroller, but it’s fair to say it’s not in the league of running a web browser and as far as we can remember this is the first one we’ve seen. We’re sure it’s a field with further progress to be made though, particularly with the more powerful recent chips in the series. This project however is a good start, and more importantly it can be yours for a few dollars on Ali to buy a dev board. What are you waiting for?

Continue reading “The ESP32 Gets A Web Browser”