Image

SolidCraft Is Parametric, Automation-friendly CAD For Desktop And Browser

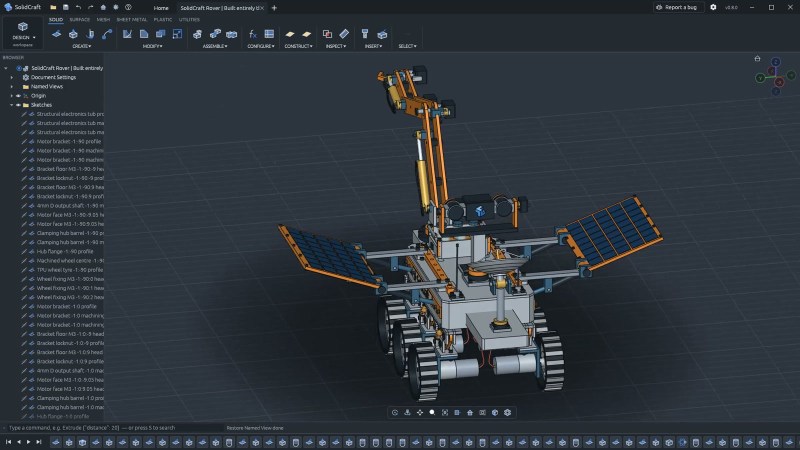
If you’re looking to try a new, open source 3D modeling CAD suite, especially one with automation-friendly interfaces, take a look at SolidCraft. It’s under development but there’s support for all the usual features like sketches, solid modeling, and constraints as well as a full parametric feature timeline.

Image
SolidCraft offers desktop, browser-based, headless CLI, and MCP interfaces.

A parametric timeline essentially means the model exists not as a single discrete object, but as the sum of a sequence of operations. One advantage of this is being able to set things up so that if one changes a value (like wall thickness), all the features that depend on that change automatically get rebuilt as a result. But there’s more!

Written entirely in Rust, SolidCraft can run as a desktop app or as a web app in a browser. Everything the user can do in SolidCraft is a command with JSON parameters, and it offers a built-in headless command line interface and even an MCP (Model Context Protocol) server built specifically to give AI agents a way to use the program, should one be interested in experimenting with that sort of thing.

SolidCraft is still in early development, but so far quite a few features seem to work as they should. Check out the development roadmap for details, and there’s a live online demo if you’re in the mood to click around and get a feel for things.

We have seen quite a few open-source, browser-based CAD efforts over the years and it’s encouraging to see developers continuing to explore fresh ideas and features in the CAD landscape.

Image

Making One Fender From Another

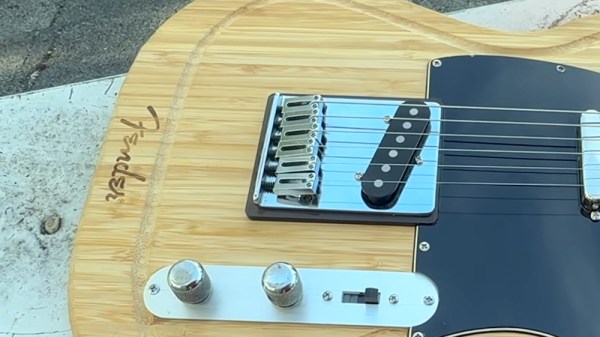
There’s a tendency among cherished brands to licence their name and logo onto all sorts of novelty items in order to make a quick buck. Joining this trend is the guitar maker Fender, who have lent their name to a chopping board in the shape of their famous Telecaster. The existence of such a product seems to have been a direct challenge to [Not A Luthier], who promptly bought one and turned it into a real guitar. It’s a genuine Fender, but is it a genuine Fender guitar? Not really, but it’s an entertaining build.

The chopping board isn’t made of great material, instead it’s a set of strips of wood, we’re guessing probably bamboo or rubberwood, glued together. It’s robust, but noticeably thinner than the guitar whose shape it takes, and with a not-great finish. The build is not too different from any other electric guitar build we’ve seen, with the main challenge being that the bridge and pickups need spacers underneath them to compensate for the reduced thickness of the wood.

The video is below the break and makes for a soothing watch as an in-depth guitar build, complete with a moment of drilling all the way through the board and fabricating a plug to hide the evidence. The final guitar seems to sound alright, but we’re not guitarists so maybe a more practiced ear should judge. The genuine Fender logo is still proudly on it so it’s a Fender of sorts, but just like with the chopping board, it’s best value is in novelty.

Meanwhile if guitar builds are a thing, we’ve had a few in the past.

Continue reading “Making One Fender From Another” →

Image

TAKTO, Open Source Hand-Tracking Built Like LEGO

Hand tracking in VR/AR can add a substantial amount of immersion and added interactivity. Unfortunately, most camera based tracking suffers when fingers get covered, intertwined, or simply out of view of the headset’s camera. What’s even less common are methods of giving feedback to the user’s hands. [Sebastian Molano] saw these issues and decided if anyone was going to make an open-source solution, it was going to be him with his thesis on TAKTO.

Image
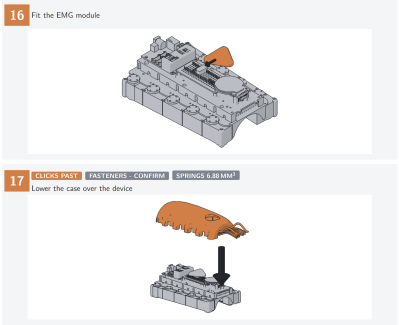
Clear visuals show step-by-step assembly.

TAKTO aims to remove the prior issues mentioned with visual tracking by using magnetic encoders to tell where the device is and the finger’s position inside it. Actuators are able to pull on the fingers themselves to add even further information to the user. Of course, none of this is too crazy, as we have seen similar projects before. Where TAKTO stands out is the extent of the support outside of a one-off hand tracker.

TAKTO.one not only holds general information about the project itself, but also an entire digital twin of the live device. This console can give you a visual of using the glove and general status information. Documentation on how to assemble one for yourself is presented in clean visuals, which should make the build process painless.

Everything else about how to make the hand for yourself can be found on the project’s GitHub. The price tag is steep for the actuated version, though there is a sensing-only version for hand tracking, and most of the cost comes from the quality actuators used. If you want to look into implementing some usability into existing VR hardware, make sure to look at what Valve has released publicly!

Image

The Trials And Tribulations Of Your First Badge

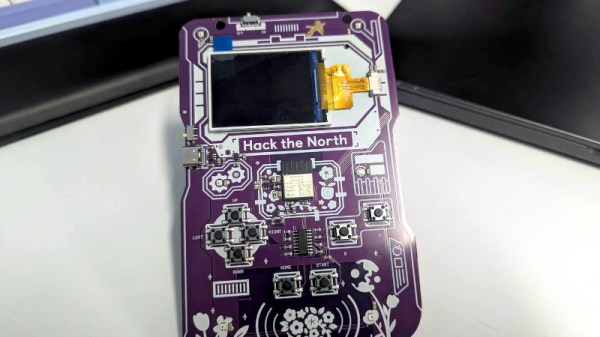
On the face of it, making an event badge should be an easy process. After all, most of us can hand-assemble a microcontroller, some buttons, a battery, and a screen. But anyone who has been involved in producing one will tell you, the difference between producing one or two, and making sure hundreds or even thousands appear on day one of the event fully working is enormous. [Nicholas Ficara] produced 1750 of his first badge for Canada’s Hack The North hackathon, and he’s shared the full story.

We’ve been involved with the gestation of more than one badge here at Hackaday, so we recognise some of his learning moments only too well. He approached it with a well-planned series of prototype and release candidate steps to catch the problems, which came in handy as there certainly were a few. Wrong footprints, misplaced components, power supply issues, and rotated parts were fixed, and eventually they were delivered in time. It’s good to see that they were well received and well used at the event.

If you’re thinking of doing a badge we can certainly recommend that you give this a read. A few years ago we wrote up the story of another badge whose creators put in some hard work to save it from a more serious part error.

Image

Simplifying Slide Rule Calculations With Trig

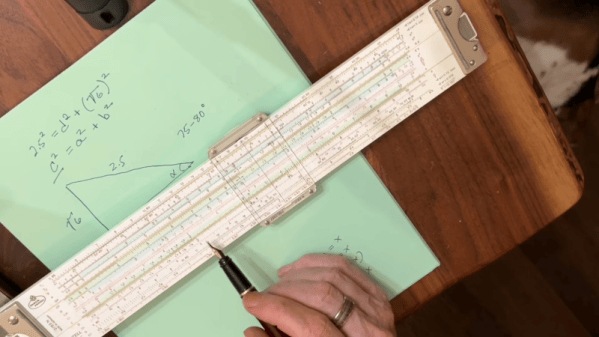
[Bob the Science Guy] remembers how to use a slide rule. Even after all these years, it is pretty easy to remember how to multiply and divide. If you can’t remember, you can usually work it out, as long as you understand how slide rules work. But what about sine, cosine, and quadratics? [Bob’s] been making videos about topics like this, and if you’ve wanted to put your slide rule collection to practical use, you’ll enjoy these videos. You can see one below.

The trick to the slide rule is that it is deceptively simple. You are in effect adding logarithms and then taking an antilog. The issue is that you still have to have some intuition about the scale of the answer since 2×3 works out the same as 2×3000 or 200×300.

Continue reading “Simplifying Slide Rule Calculations With Trig” →

Image

The 10€ Gamepad

We aren’t sure what [Lazy_Duck] is doing with video games, but it must require a lot of controllers. Dismayed at the cost and complexity of commercial gamepads, they started soldering and 3D printing to get a cheaper basic controller.

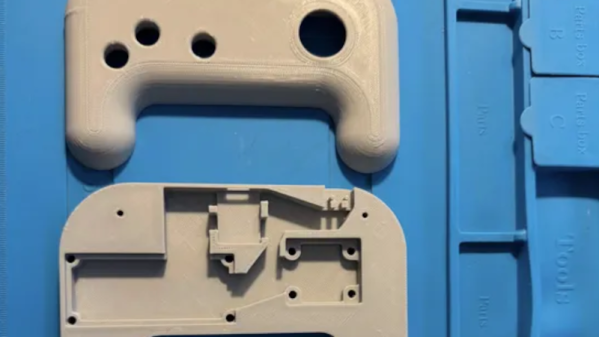
The emphasis is on throwing things together, so there’s no dedicated PCB. Just a protoboard with an RP2040-Zero, a joystick, a few buttons, and a microswitch. A 3D-printed case rounds out the project.

Continue reading “The 10€ Gamepad” →

Image

Fairbuds 2 Teardown Shows Little Glue, Easy Battery Swap

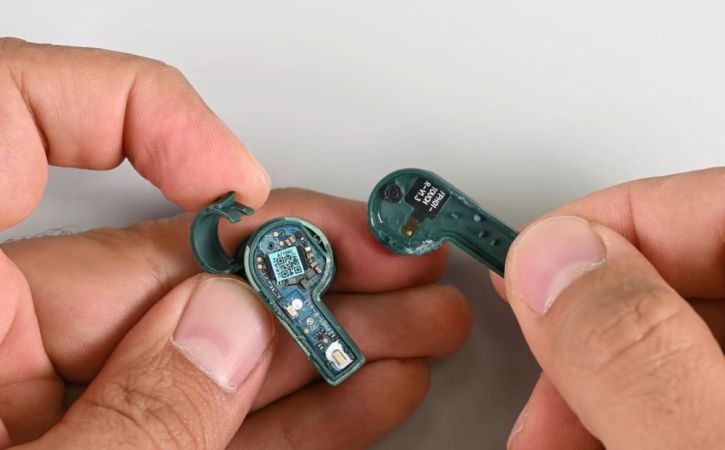
In a world where wireless earbuds are increasingly seen as devices that you toss into the e-waste bin as soon as they stop working, it’s heartening to see companies take the opposite approach with their designs. In a recent teardown of the new Fairbuds 2 by [iFixit] we get a blow-by-blow report of disassembling one of these devices, getting to its rechargeable LIR1054 coin cell, as well as the very accessible PCB should you have to replace a shorted capacitor or similar issue.

Image

Much like with the first version, the 3.6 V lithium-ion coin cell can be extracted simply by pulling on the battery door, which leverages it out of the enclosure. Despite this easy access method and no glue these earbuds are still IP54 rated, so they’re safe to wear when you’re dashing for shelter in a sudden downpour.

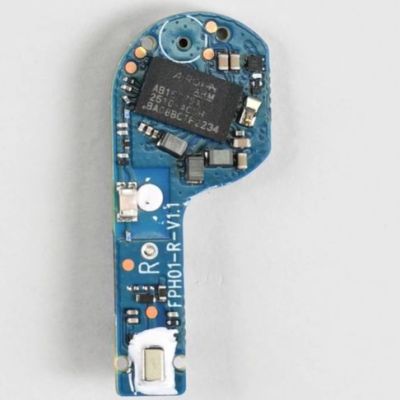
To get further into the device, you have to overcome the plastic clips that hold the enclosure together, along with what appears to be a few dabs of glue. Inside it you find the PCB containing the guts, including the Airoha AB1577S, Cortex-M4F-based IC that provides the Bluetooth Low Energy capabilities as well as enabling the touch control and other features.

Below the PCB is the coin cell holder, followed by the only part that saw real glue usage, namely the driver section. Presumably this is the compromise to keep things like sweat out of the device. Even so, after disassembly [iFixit] managed to reassemble the device and the earbud remained in working condition.

The case for the earbuds is even easier to disassemble, using just some bolts to unfasten. The USB-C port is soldered to the PCB which [iFixit] dinged them on, but still gave it a 10/10 on their repairability score.

Compared to Apple’s AirPods this is obviously a whole different world, although recently [iFixit] was somewhat pleased with the most recent AirPods generation being slightly more repairable, with non-destructive entry for a battery swap at least somewhat feasible.

Continue reading “Fairbuds 2 Teardown Shows Little Glue, Easy Battery Swap” →