Image

C64 Finally Gets The SRAM Corporate Wouldn’t Pay For

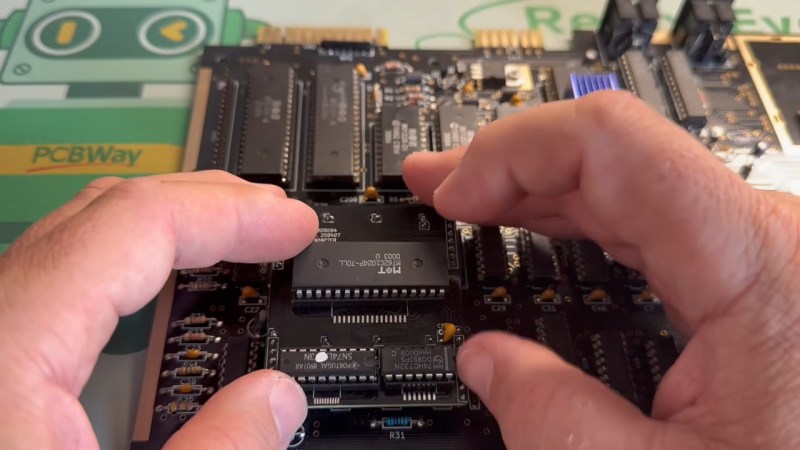
If you think RAM is expensive now, try putting yourselves in the shoes of a Commodore engineer, circa 1981. RAM was eye-wateringly expensive by modern standards, and Jack Tramiel wanted 64K of the stuff for the next computer — hence the name, Commodore 64 — but he didn’t want to pay for it. The solution was to use cheaper dynamic RAM over the more expensive static RAM that later took over the market in the kilobyte range. That’s a small problem for retrocomputer hobbyists, because while we’re complaining about the price of gigabytes of the stuff, you can’t buy new DRAM chips that fit a Commodore at any price. That’s why [Fabio Battaglia] aka [hkzlab] came up with an adapter board to fit easily-available SRAM chips onto aging C64s. 

Nothing lasts forever: not cold September rain, and not DRAM chips. Heat damage? Internal corrosion? There are probably multiple failure modes, but someday the old stock of chips will run out and the retrocomputer community is going to be ready for it. [Keith Olson] sent us a tip on a video by [The Retro Shack] about this very problem that serves as a good demo of what you get when you put SRAM into a C64. (Thanks [Keith]!) That said, the adapter board on offer is only good for C64s with the 250407 motherboard. If yours is different, you may have to modify the board. But hey, it’s open source, so go ye and do that thing. Let us know via the tips line if you do.

Continue reading “C64 Finally Gets The SRAM Corporate Wouldn’t Pay For”
Image

Dynamic RAM From First Principles

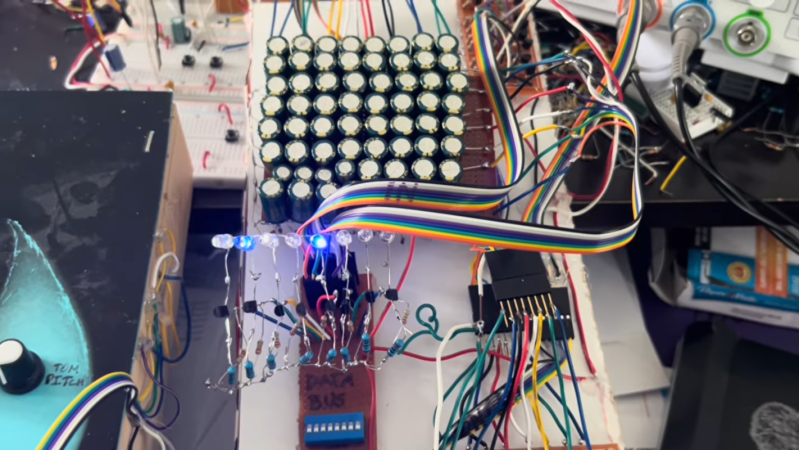
Before the past year, many of us took computer memory for granted. It was one of the lower-cost parts of a PC build and was usually available in whatever quantity one desired. As its cost has skyrocketed, a lot of PC builders and other users of computers in general are taking a deeper look at memory, how much is really needed, and what its functions truly are. [Igor] is working on a drum sequencer project which needs a small amount of memory, and has built this dynamic RAM from discrete components.

The first video goes into the construction of the memory array and how its addressed. It’s only eight bytes total, and using fairly large electrolytic capacitors to store data means that a gigabyte of this memory would take up well over a thousand acres, but it’s still enough memory for [Igor]’s needs. In addition to the capacitor, each bit uses a pair of diodes to determine if a read or write is occuring, and a set of transistors on the read and write busses to perform those actions. Worth noting here is that dynamic RAM like this needs to be refreshed because the capacitors lose charge over time, but these large capacitors can hold charge sometimes overnight, as [Igor] has confirmed experimentally.

There’s a followup video to the construction of these modules as well, where [Igor] demonstrates a number of ways this module can be used, from controlling LED arrays, 7-segment displays, and then installs it into his drum machine. With 64 bits available it’s capable of creating up to eight beats with eight samples available per beat. Although there are complete machines available for all of this, we appreciate his goal of not buying any pre-manufactured hardware and instead constructing it all from the ground up. There are analog drum machine options available in this same style as well.

Continue reading “Dynamic RAM From First Principles”

Image

Making RAM At Home In Your Own Semiconductor Fab

There’s little point in setting up your own shed-based clean room for semiconductor purposes if you don’t try to do something practical with it. Something like responding to the RAMpocalypse by trying to make your own RAM, for example.

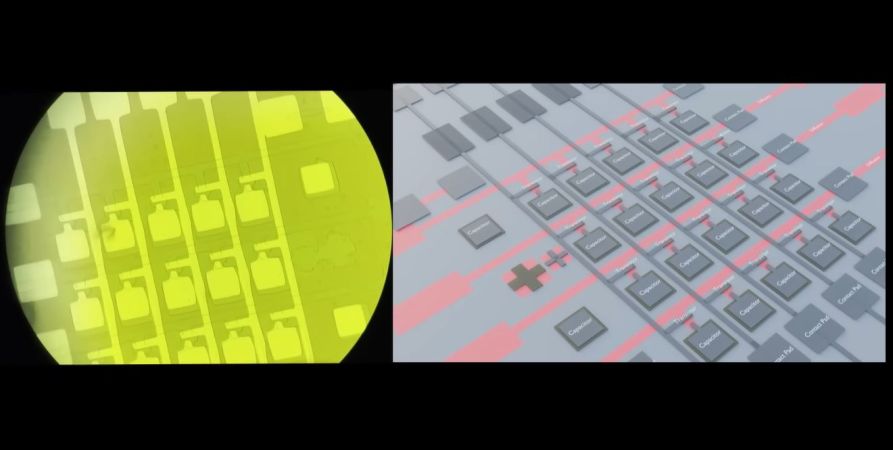
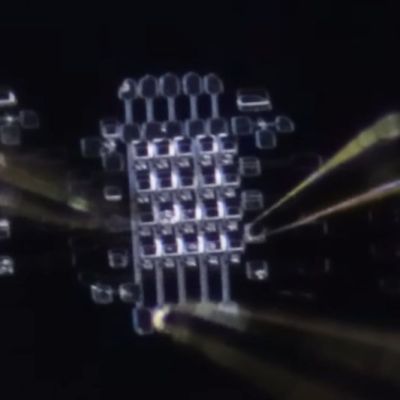
Testing the DRAM cells. (Credit: Dr. Semiconductor, YouTube)

After all, what could be so hard about etching the same repeating structures over and over? In a recent video, [Dr. Semiconductor]’s experience doing exactly this are detailed, with actual DRAM resulting at the end.

We covered the construction of the clean room shed previously, which should provide at least the basic conditions to produce semiconductors without worrying about contaminating dies. From here the process is reminiscent of etching PCBs, with a prepared surface coated with photoresist. Using UV exposure through a mask, the pattern is etched into the photoresist and from there the pattern is subsequently etched into the wafer’s surface.

With the patterns formed, the next step is doping of the silicon in order to create the active structures, i.e. the transistors and capacitors. Doping can be done in a variety of ways, with ion implantation being the industry standard method, but a bit too expensive and bulky for a shed fab. Instead a spin-on-glass method was used. After this the remaining functional structures can be built up.

If anyone was expecting to see a DDR5 DRAM die pop out at the end, they’re bound to be disappointed. The target here was to create a 5×4 array of DRAM cells, for a dizzying 20 bits. Still, the fact that it’s possible to DIY DRAM like this at home is already pretty awesome, with clearly plenty of room to push it towards and past fabrication nodes of the 1990s and beyond.

Although the produced DRAM cells have fairly leaky capacitors, they’re good enough for their purpose, and the plan is to scale up to a large DRAM array from here. Whether the DRAM control logic will also be implemented in hardware like this remains to be seen, but the video’s ending makes it clear that the goal is to attach it to a PC somehow.

Continue reading “Making RAM At Home In Your Own Semiconductor Fab”

Image

Cheap And Aggressive DRAM Chip Tester

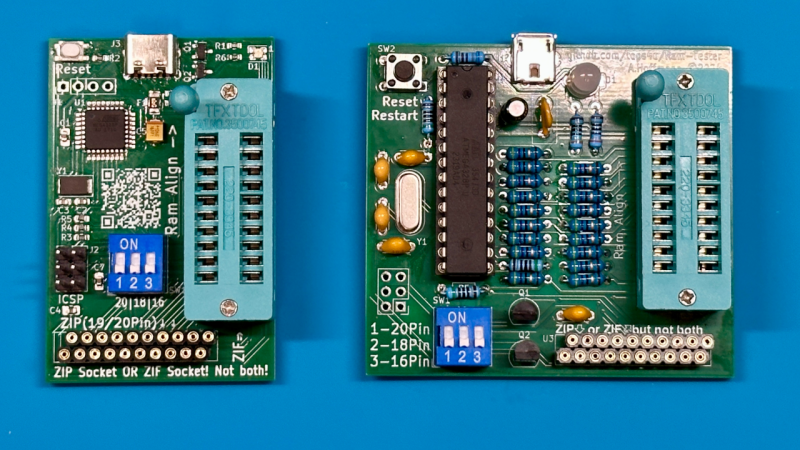
People enjoy retrocomputing for a wide variety of reasons – sometimes it’s about having a computer you could fully learn, or nostalgia for chips that played a part in your childhood. There’s definitely some credit to give for the fuzzy feeling you get booting up a computer you built out of chips. Old technology does deteriorate fast, however, and RAM chip failures are especially frustrating. What if you got a few hundred DRAM chips to go through? Here’s a DRAM chip tester by [Andreas]/[tops4u] – optimized for scanning speed, useful for computers like the ZX Spectrum or Oric, and built around an ATMega328P, which you surely still have in one of your drawers.

Continue reading “Cheap And Aggressive DRAM Chip Tester”

Image

A Free Speed Boost For Your Pi 5

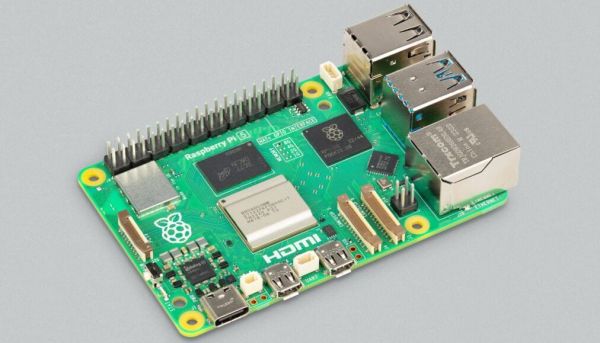
The world of the overclocker contains many arcane tweaks to squeeze the last drops of performance from a computer, many of which require expert knowledge to understand. Happily for Raspberry Pi 5 owners the Pi engineers have come up with a set of tweaks you don’t have to be an overclocker to benefit from, working on the DRAM timings to extract a healthy speed boost. Serial Pi hacker [Jeff Geerling] has tested them and thinks they should be good for as much as 20% boost on a stock board. When overclocked to 3.2 GHz, he found an unbelievable 32% increase in performance.

We’re not DRAM experts here at Hackaday, but as we understand it they have been using timings from the Micron data sheets designed to play it safe. In consultation with Micron engineers they were able to use settings designed to be much faster, we gather by monitoring RAM temperature to ensure the chips stay within their parameters. Best of all, there’s no need to get down and dirty with the settings, and they can be available to all with a firmware update. It’s claimed this will help Pi 4 owners to some extent as well as those with a Pi 5, so even slightly older boards get some love. So if you have a Pi 5, don’t wait for the Pi 6, upgrade today, for free!

565RU1 die manufactured in 1981.

The First Mass Produced DRAM Of The Soviet Union

KE565RU1A (1985) in comparison with the analogue from AMD (1980)

Although the benefits of semiconductor technology were undeniable during the second half the 20th century, there was a clear divide between the two sides of the Iron Curtain. Whilst the First World had access to top-of-the-line semiconductor foundries and engineers, the Second World was having to get by with scraps. Unable to keep up with the frantic pace of the USA’s developments in particular, the USSR saw itself reduced to copying Western designs and smuggling in machinery where possible. A good example of this is the USSR’s first mass-produced dynamic RAM (DRAM), the 565RU1, as detailed by [The CPUShack Museum].

While the West’s first commercially mass-produced DRAM began in 1970 with the Intel 1103 (1024 x 1) with its three-transistor design, the 565RU1 was developed in 1975, with engineering samples produced until the autumn of 1977. This DRAM chip featured a three-transistor design, with a 4096 x 1 layout and characteristics reminiscent of Western DRAM ICs like the Ti TMS4060. It was produced at a range of microelectronics enterprises in the USSR. These included Angstrem, Mezon (Moldova), Alpha (Latvia) and Exciton (Moscow).

Of course, by the second half of the 1970s the West had already moved on to single-transistor, more efficient DRAM designs. Although the 565RU1 was never known for being that great, it was nevertheless used throughout the USSR and Second World. One example of this is a 1985 article (page 2) by [V. Ye. Beloshevskiy], the Electronics Department Chief of the Belorussian Railroad Computer Center in which the unreliability of the 565RU1 ICs are described, and ways to add redundancy to the (YeS1035) computing systems.

Top image: 565RU1 die manufactured in 1981.

Image

16 Kbit DRAM Gives Up Its Secrets

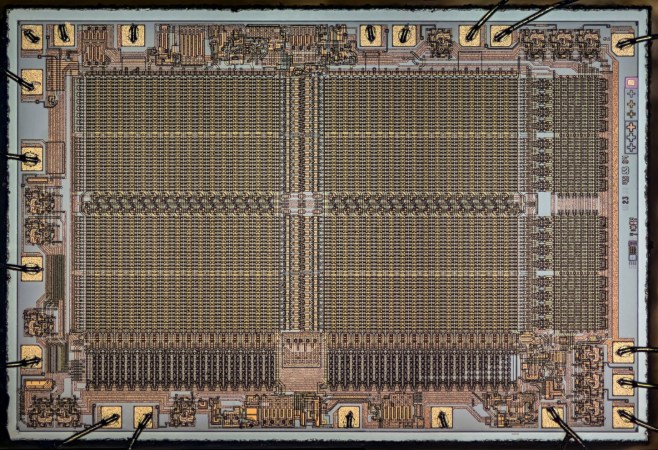
[Ken Shirriff] is looking inside chips again. This time, the subject is the MK4116 — a 16 Kbit DRAM chip. Even without a calculator, you know that’s a whopping 2 Kbytes, and while that doesn’t sound impressive, in the late 1970s, it was a modern miracle.

The chip showed up in computers ranging from the TRS-80 to the Xerox Alto and was even a mainstay of arcade video games. While [Ken] thought it would be a pretty predictable teardown, he found several surprises.

ImageStatic RAM chips use flip flops and retain their state as long as power is on. That’s convenient, but each flip flop takes multiple transistors, so there is a limit to how many bits you can put on a particular size chip. Dynamic RAM increases that limit because it is nothing more than a capacitor and a single transistor. This increases memory density, but the problem is that the capacitor doesn’t hold charge indefinitely. The computer or an associated circuit had to refresh the memory periodically to maintain the contents.

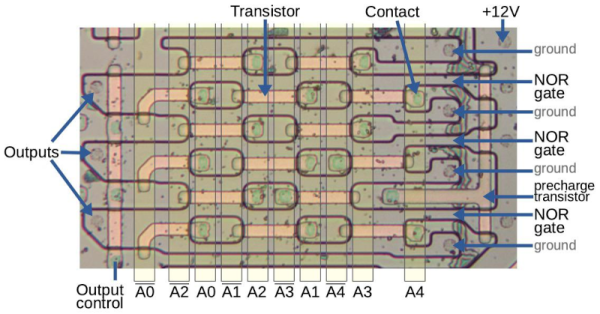
One of the key innovations for this chip was the use of multiplexed address lines so it could use a smaller package. Inside, two banks of capacitors store the bits, and, usually, a computer would use eight chips to store a byte. Of course, each memory bit is made to be as compact as possible. This chip is also made to be very low power when idle. The secret is that it doesn’t use load transistors but instead uses an active pull-up tied to the system clock. Another interesting feature is the sense amplifier, which has to measure the tiny noisy voltage from the capacitors.

You’ll see all this and more in [Ken’s] write-up. Chips from that era were relatively easy to take apart compared to today’s devices. Want to know how it’s done? [Ken] can tell you. He is well-known for doing a lot of cool stuff, with ICs and even old mainframe and space hardware.