Image

A Split Keyboard Designed For Human Hands

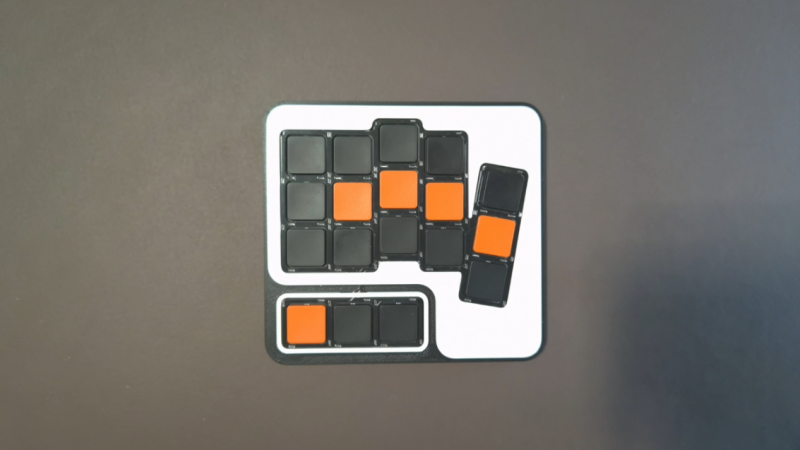
A surprising number of things we use in everyday life retain most of their design cues from their 19th century ancestors. The bicycle retains the same basic design as it had in 1890, as does the sewing machine, the toilet, the car, and of course, the keyboard and the QWERTY layout from old typewriters. But we aren’t doomed to have our technology perpetually living in the past. [Paul] wanted a keyboard designed around human hands, rather than being designed around a machine, so he built this unique split keyboard.

The design of this specific keyboard went through around 50 iterations before he was comfortable with it. Other design goals here were for it to be portable, and the split nature of this certainly makes it more compact as does the use of low-profile switches. Each finger’s column is angled and spaced based on the needs of that finger, with the ring finger keys sitting higher and the index finger columns angled inward. Each thumb has access to three keys, one of which is the spacebar and the other two layer keys, which is what enables this design to get down to only 36 total keys.

When thinking about it for any length of time, the modern keyboard’s design holdovers from the 1800s are fairly wasteful compared to this split, ergonomic version. Especially when looking at the spacebar, which ties up both thumbs and only performs a single task, there’s a lot of opportunity for modern designs to be more efficient, more portable, and easier on one’s body. Feel free to take this to the extreme and use all three dimensions, as long as you aren’t particularly concerned with portability.

Image

When An Engineering Education Doesn’t Teach You How To Really Make Anything

In the sweltering temperatures of an unusually hot European heatwave, I found myself having a chat with  a friend of mine from my university days. After discussing the health of his cat who had solved the problem of a fur coat on a hot day by flattening himself out on the concrete floor in the coolest place in the house, we moved on to tech matters. We’ve known each other for not far short of four decades, so this is familiar territory for us. The problems that come with taking a prototype to manufacturing, a process which even the most seasoned of engineers can slip up on.

The Difference Between Making, And Making For Manufacture

If you’ve ever taken a project and replicated it, you will know the progression. If you’re making five or ten widgets, you can debug and rework as needed, tweak things, and get things going. If you’re making more then this, the process consumes a greater proportion of your time, until a point at which manufacture becomes impractical. Maybe that’s around fifty boards, sometimes more or less. Continue reading “When An Engineering Education Doesn’t Teach You How To Really Make Anything”

Image

Piano Escapement Migrates To Drum Kit

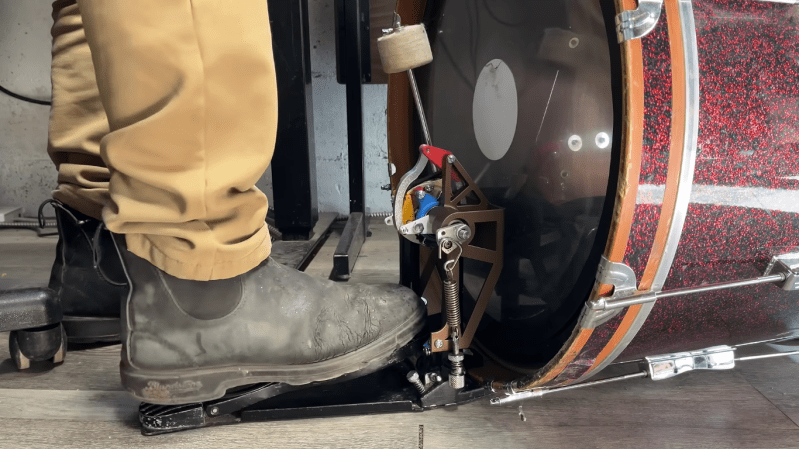
For as popular as the piano is in music studios, homes, and schools, it almost defies logic. Compared to a guitar, harmonica, or drum set, pianos are incredibly complex machines that can have somewhere on the order of 8,000 moving parts in a case that can easily weigh hundreds of pounds and which often responds quite poorly to seasonal changes in temperature and humidity. But for putting up with all of these downsides, musicians are rewarded with an instrument that uniquely responds to touch, style, and emotion. A big reason for that is that mechanical complexity, and [Super Valid Designs] is attempting to bring that design to a drum set.

Compared to the complex machinery that connects the movement of a piano’s key to its hammer striking a string, a kick drum pedal is much simpler. It can only bounce off of the drum or get “buried” where the beater remains pressed up against the drum after hitting it. [Super Valid Designs] wanted something with a bit more finesse and control, so he first 3D printed a mechanism that throws the beater towards the drum head and then disconnects it mechanically from the pedal, so that it rebounds even if the pedal stays depressed. The next steps were more difficult, which involved making sure the mechanism reset itself in a repeatable way, without making too much noise of its own. This involved trying out a few different ideas and printing a massive amount of subtly different linkages, but in the end he’s left with a machine that nearly replicates all of the parts of a piano’s escapement,

The end goal of this project wasn’t simply to reproduce piano mechanisms on a drum set, though. [Super Valid Designs] hopes to make a kick drum that’s much smaller than those found in traditional kits, and since smaller drums respond poorly when the beater remains on or near the drum after striking it, a mechanism like this will dramatically improve the performance of the smaller drum and help reduce the requirement for perfect technique. And, maybe in 50 years or so, these types of escapements will take over the drumming world just like the piano escapement took over keyboards after its invention in the 1700s. Some simpler piano actions have been built before, but the complexity seems to be a requirement for all of the tasks they need to do whether its for a piano or a drum.

Continue reading “Piano Escapement Migrates To Drum Kit”

Image

Photographing Rocket Chute Deployment At 10 Km

For those who haven’t been following along, [BPS.space] aka [Joe] is on a journey to launch a home-built rocket past the Kármán line where it will officially reach outer space. But one does not simply launch a rocket to outer space on the first try. The process is long and involves not only building a series of rockets, but designing and building propellant mixtures, solving aerodynamic problems, gaining several model rocket certifications along the way, and a whole host of other steps. He’s also documenting the entire process on video as well, which involves some custom camera work like this rocket selfie camera which will take an image of his rockets at apogee.

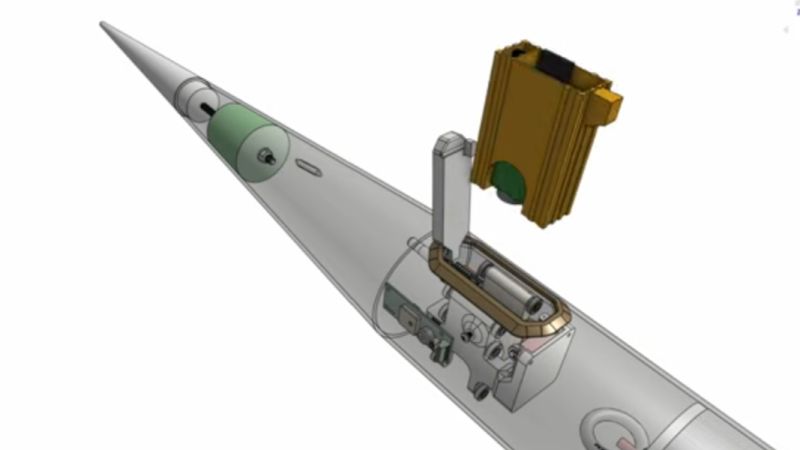
Like most problems in high-power rocketry, extremely tiny problems have a way of causing catastrophic failure, so every detail needs to be considered and planned for in the final design. For a camera that needs to jettison itself from the rocket at a precise moment after experiencing an incredible amount of forces, this is a complicated problem to solve. The initial design involves building a sled for a small deconstructed GoPro which uses springs and a servo to launch itself out of the rocket. The major problem with the design is that even the smallest torque on the sled will cause the camera to point in a random direction by the time it’s far enough from the rocket to take a picture. [Joe] tried a number of design iterations but could not get these torques to vanish.

One of the design limitations with this camera is that it won’t have any sort of parachute or tether itself to the rocket, so it will hit the ground at its terminal velocity. To keep that velocity down and improve survivability chances of the footage, the mass has to stay low. Eventually he settled on a semi-active control system by mounting a brass weight on a small motor, giving the camera module enough stability to stay pointed at the rocket long enough to take the video. Even though it hasn’t flown yet, admitting his first design wasn’t working at compromising on this solution which adds a bit of mass seems to be a good design change. We’ve been following along with his entire process so be sure to check out his actual rocket motor builds and teardowns as well.

Continue reading “Photographing Rocket Chute Deployment At 10 Km”

Image

New Display For Old Multimeter

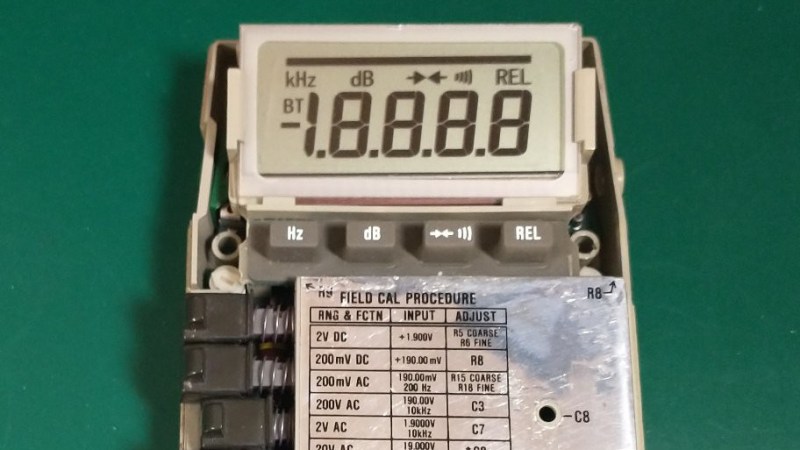
As a company, Fluke has been making electronic test equipment longer than the bipolar junction transistor has been around for. In that time they’ve developed a fairly stellar reputation for quality and consistency, but like any company they don’t support their products indefinitely. [ogdento] owns a Fluke meter that isn’t nearly as old as the BJT but still has an age well outside of the support window, and since the main problem was the broken LCD display they set about building a replacement for this retro multimeter.

Initially, [ogdento] had plans to retrofit this classic multimeter with a modern OLED, but could not find enough space for the display or a way to drive it easily. The next attempt to get something working was to build a custom one-off LCD using a drill press as an end mill, which didn’t work either. But after seeing a Charlieplexed display from [bobricius] as well as this video from EEVblog about designing custom LCDs, [ogdento] was able to not only design a custom PCB and LCD display to match the original meter, but was able to get a manufacturer in China to build them.

The new displays have a few improvements over the old; mostly they are more stylistically inspired by later Fluke models and have a few modern improvements to the LCD itself. There were are few issues during prototyping but nothing that was too hard to sort out, such as ordering the wrong size elastomeric strips initially. For anyone who needs to replace a custom LCD and can’t find replacement parts anymore, this project would be a great starting point for figuring out the process from the ground up.

Art of 3D printer in the middle of printing a Hackaday Jolly Wrencher logo

The Joys Of 3D Printing

Al and I were talking on the podcast today about a sweet 3D printed wide-format camera build, and we got to musing on why we 3D-print.

For Al, it’s an opportunity to experiment with 3D printing itself: tweaking his machines to get the best performance out of them. Other people make small, functional objects that they need in their daily life, like bag clips or spare parts for broken appliances. Some folks go for the ornamental or the aesthetic. The kids in my son’s class all seem obsessed with sci-fi props and fidget toys. The initial RepRap ideal was to replace all commercial fabrication with machines owned by the individual, rather than by companies – it was going to be Marxist revolutionary.

But there’s another group of 3D printer enthusiasts that I think doesn’t get enough coverage, and I’m going to call them the hobbyist industrial designers. These are the people who design a custom dog-poop-bag holder that exactly fits their extra-wide dog leash, not because they couldn’t find one that fit in the pet store, but because it’s simply fun to design and fabricate things. (OK, that’s literally me.)

It’s fun to learn CAD tools, to learn about how things are designed, how they work, and how to manufacture them at least in quantity one. Dreaming, designing, fabricating, failing, and repeating until you get it right is a great joy. And then you get to use the poop-bag holder every day for a few years, until you decide to refine the design and incorporate the lessons learned on the tough streets of practical use.

Of course none of this is exclusive to 3D printing. There were always people who designed-and-built things in the metal machine shop, or made their creations out of wood. In that sense, the 3D printer is just another tool, and the real fun isn’t in using the 3D printer, but rather in the process of bringing things out of your mind and into the world. So maybe there is nothing new here, but the latitude that 3D printing affords the hobby designer is amazing, and that makes it all the more fun, and challenging.

So do you 3D print for necessity, to stick it to the man, to pimp your printer, for the mini-figs, or simply for the joy of the process of making things? It’s all good. 3D printing is a big tent.

Image

An Introduction To Analog Filtering

One of the major difficulties in studying electricity, especially when compared to many other physical phenomena, is that it cannot be observed directly by human senses. We can manipulate it to perform various tasks and see its effects indirectly, like the ionized channels formed during lightning strikes or the resistive heating of objects, but its underlying behavior is largely hidden from view. Even mathematical descriptions can quickly become complex and counter-intuitive, obscured behind layers of math and theory. Still, [lcamtuf] has made some strides in demystifying aspects of electricity in this introduction to analog filters.

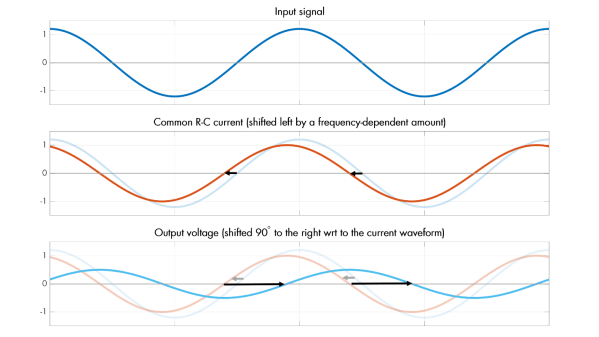
ImageThe discussion on analog filters looks at a few straightforward examples first. Starting with an resistor-capacitor (RC) filter, [lcamtuf] explains it by breaking its behavior down into steps of how the circuit behaves over time. Starting with a DC source and no load, and then removing the resistor to show just the behavior of a capacitor, shows the basics of this circuit from various perspectives. From there it moves into how it behaves when exposed to a sine wave instead of a DC source, which is key to understanding its behavior in arbitrary analog environments such as those involved in audio applications.

There’s some math underlying all of these explanations, of course, but it’s not overwhelming like a third-year electrical engineering course might be. For anyone looking to get into signal processing or even just building a really nice set of speakers for their home theater, this is an excellent primer. We’ve seen some other demonstrations of filtering data as well, like this one which demonstrates basic filtering using a microcontroller.